
Grow baby carrots at home? Absolutely! Imagine plucking sweet, miniature carrots straight from your own backyard, ready to be enjoyed as a healthy snack or a vibrant addition to your salads. Forget those bland, store-bought baby carrots – we’re talking about homegrown goodness bursting with flavor!
For centuries, gardening has been a way for people to connect with nature, provide for themselves, and cultivate beauty. While the idea of growing carrots might conjure images of sprawling farms, the truth is, you can easily enjoy the satisfaction of harvesting your own baby carrots, even with limited space. This DIY guide will unlock the secrets to successfully grow baby carrots at home, regardless of your gardening experience.
Why should you try this DIY project? Well, for starters, it’s incredibly rewarding! Plus, you’ll know exactly what’s going into your food, avoiding any unwanted pesticides or chemicals. More importantly, growing your own baby carrots is a fantastic way to introduce kids to the wonders of gardening and healthy eating habits. So, grab your gardening gloves, and let’s embark on this exciting journey together! I’m excited to share these simple yet effective tricks and hacks that will transform your garden into a baby carrot paradise.
Growing Baby Carrots at Home: A DIY Guide
Hey there, fellow gardening enthusiasts! Ever dreamt of plucking perfectly petite, sweet baby carrots straight from your own backyard? Well, dream no more! Growing baby carrots at home is surprisingly easy and incredibly rewarding. I’m going to walk you through everything you need to know, from prepping the soil to harvesting your tiny treasures. Let’s get our hands dirty!
Choosing the Right Carrot Variety
First things first, not all carrot varieties are created equal when it comes to baby carrots. While you *can* technically harvest any carrot early, some are specifically bred to be small and tender. Here are a few of my favorites:
* ‘Thumbelina’: These are round, almost golf-ball shaped carrots, perfect for small spaces and containers. They mature quickly and have a delightful sweetness.
* ‘Paris Market’: Similar to ‘Thumbelina’, these are also round and mature early. They’re known for their smooth skin and consistent size.
* ‘Little Finger’: As the name suggests, these are slender, finger-sized carrots. They’re crisp, sweet, and ideal for snacking.
* ‘Short n Sweet’: This variety is a classic for baby carrots, offering a good balance of sweetness and texture. They are shorter than regular carrots.
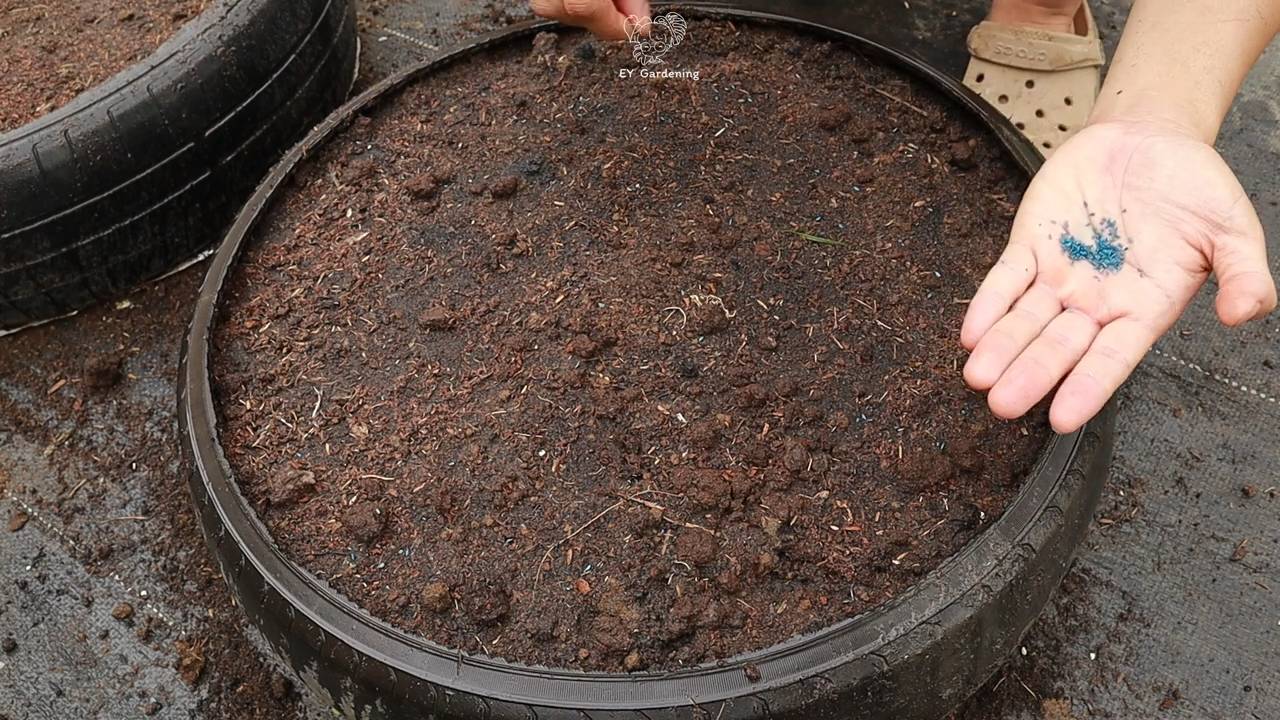
Preparing the Soil: The Key to Success
Carrots are notoriously picky about their soil. They need loose, well-drained soil to develop properly. Rocks, clumps of clay, or compacted soil can cause them to become stunted, forked, or misshapen. Trust me, I’ve been there! Here’s how I prepare my carrot beds:
* Choose the Right Location: Carrots need at least 6 hours of sunlight per day. Pick a spot in your garden that gets plenty of sunshine.
* Test Your Soil: A soil test will tell you the pH level and nutrient content of your soil. Carrots prefer a slightly acidic soil with a pH between 6.0 and 6.8. You can buy a soil test kit at most garden centers.
* Amend the Soil: This is the most important step! Carrots need loose, well-drained soil.
* Remove Rocks and Debris: Carefully remove any rocks, stones, or other debris from the planting area. Even small pebbles can interfere with root development.
* Loosen the Soil: Use a garden fork or tiller to loosen the soil to a depth of at least 12 inches. This will allow the carrot roots to grow freely.
* Add Organic Matter: Incorporate plenty of compost, well-rotted manure, or other organic matter into the soil. This will improve drainage, aeration, and nutrient content. I usually add a 2-3 inch layer of compost.
* Avoid Nitrogen-Rich Fertilizers: Too much nitrogen can cause the carrot tops to grow excessively at the expense of the roots. Use a balanced fertilizer or one that is lower in nitrogen.
* Create Raised Beds (Optional): If your soil is heavy clay or poorly drained, consider creating raised beds. This will improve drainage and make it easier to control the soil quality.
Planting Your Baby Carrots
Now for the fun part! Planting carrot seeds is a bit of a delicate process, as they are tiny and can be easily washed away. Here’s my method for successful carrot planting:
1. Timing is Everything: Carrots are a cool-season crop, meaning they prefer cooler temperatures. Plant your seeds in early spring (2-3 weeks before the last expected frost) or late summer (for a fall harvest). Check your local planting calendar for specific dates.
2. Create Shallow Furrows: Use a hoe or your finger to create shallow furrows in the soil, about 1/4 to 1/2 inch deep. Space the furrows about 2-3 inches apart.
3. Sow the Seeds Sparingly: Carrot seeds are tiny, so it’s easy to sow them too thickly. Try to space the seeds about 1/2 inch apart. I find it helpful to mix the seeds with sand to make them easier to handle.
4. Cover the Seeds Lightly: Gently cover the seeds with a thin layer of soil or vermiculite.
5. Water Gently: Use a watering can with a gentle rose or a hose with a spray nozzle to water the seeds thoroughly. Be careful not to wash the seeds away.
6. Keep the Soil Moist: Carrot seeds need consistent moisture to germinate. Keep the soil moist but not soggy until the seedlings emerge. I often cover the planting area with burlap or a piece of cardboard to help retain moisture. Remove the covering once the seedlings start to sprout.
Thinning the Seedlings: A Crucial Step
This is where many gardeners go wrong! Thinning is essential for giving your carrots enough space to grow. If you don’t thin them, they’ll be overcrowded and won’t develop properly.
1. Wait Until Seedlings Have Two Sets of True Leaves: Once the seedlings have emerged and have two sets of true leaves (not just the initial seed leaves), it’s time to thin them.
2. Thin to 1-2 Inches Apart: Carefully pull out the weaker seedlings, leaving the strongest ones spaced about 1-2 inches apart. Be gentle to avoid disturbing the roots of the remaining seedlings.
3. Thin Again if Necessary: As the carrots grow, you may need to thin them again to give them even more space. Aim for a final spacing of about 2-3 inches apart.
4. Water After Thinning: Water the remaining seedlings after thinning to help them settle in.
Caring for Your Baby Carrots
Once your carrots are thinned, it’s time to focus on providing them with the care they need to thrive.
* Watering: Carrots need consistent moisture, especially during dry periods. Water deeply once or twice a week, depending on the weather. Avoid overhead watering, as this can promote fungal diseases.
* Weeding: Keep the carrot bed free of weeds. Weeds compete with carrots for nutrients and water. Hand-pull weeds carefully to avoid disturbing the carrot roots.
* Fertilizing: Carrots are not heavy feeders, but they will benefit from a light feeding of fertilizer. Use a balanced fertilizer or one that is lower in nitrogen. Apply the fertilizer according to the package directions. I like to use a liquid seaweed fertilizer diluted in water.
* Pest Control: Carrots can be susceptible to certain pests, such as carrot rust flies and aphids. Inspect your plants regularly for signs of pests. Use organic pest control methods, such as insecticidal soap or neem oil, to control infestations.
* Mulching: Apply a layer of mulch around the carrots to help retain moisture, suppress weeds, and regulate soil temperature. Straw, hay, or shredded leaves are good choices for mulch.
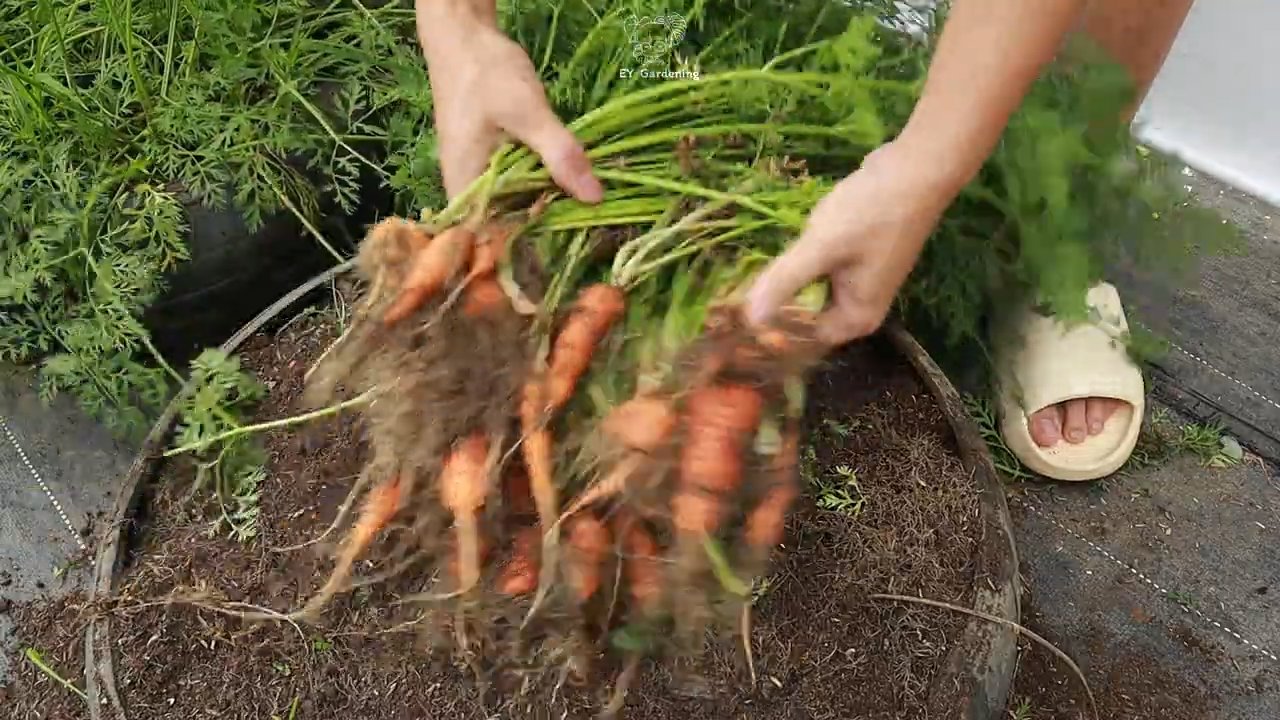
Harvesting Your Baby Carrots
The moment you’ve been waiting for! Harvesting baby carrots is a joy. They’re so cute and delicious!
1. Check Maturity Dates: Baby carrots typically mature in 50-70 days, depending on the variety. Check the seed packet for specific maturity dates.
2. Look for Size: Baby carrots are ready to harvest when they reach the desired size. This will vary depending on the variety, but generally, they should be about 2-4 inches long.
3. Loosen the Soil: Before pulling the carrots, loosen the soil around them with a garden fork or trowel. This will make it easier to pull them out without breaking them.
4. Pull Gently: Grasp the carrot tops near the base and gently pull upwards. If the carrots are difficult to pull, loosen the soil further.
5. Wash and Enjoy: Wash the harvested carrots thoroughly and enjoy them fresh from the garden! They’re delicious raw, steamed, roasted, or added to salads and other dishes.
Troubleshooting Common Problems
Even with the best care, you may encounter some problems when growing baby carrots. Here are a few common issues and how to address them:
* Forked or Stunted Roots: This is usually caused by compacted soil or rocks in the soil. Make sure to prepare the soil thoroughly before planting.
* Poor Germination: Carrot seeds can be slow to germinate. Keep the soil consistently moist and consider using a heat mat to speed up germination.
* Pest Infestations: Inspect your plants regularly for signs of pests and take action promptly.
* Diseases: Carrots can be susceptible to certain fungal diseases, such as leaf blight. Avoid overhead watering and provide good air circulation to prevent diseases.
Growing Carrots in Containers
If you don’t have a garden, you can still grow baby carrots in containers! Choose a container that is at least 8-10 inches deep and fill it with a well-draining potting mix. Follow the same planting and care instructions as for growing carrots in the ground. Container-grown carrots may need more frequent watering and
Conclusion
So, there you have it! Growing baby carrots at home is not only achievable, but it’s also a rewarding and surprisingly simple process. Forget those pre-packaged, often bland, store-bought baby carrots. Imagine biting into a sweet, crisp, and perfectly sized carrot that you nurtured from seed to table. The difference in flavor and texture is truly remarkable. This DIY trick transforms the humble carrot into a gourmet experience.
But why is this a must-try? Beyond the superior taste, growing your own baby carrots offers a multitude of benefits. You have complete control over the growing process, ensuring that your carrots are free from harmful pesticides and herbicides. You can choose organic seeds and fertilizers, creating a truly healthy and sustainable snack. Plus, it’s a fantastic way to get kids involved in gardening and teach them about where their food comes from. There’s something incredibly satisfying about harvesting your own vegetables, and baby carrots are the perfect gateway to a lifelong love of gardening.
This method is also incredibly versatile. While we’ve focused on growing baby carrots in containers, you can easily adapt this technique to raised beds or even directly in your garden, provided you have well-drained, loose soil. Experiment with different carrot varieties to find your favorite flavor profile. Nantes carrots are known for their sweetness, while Chantenay carrots are more robust and hold their shape well. Consider adding companion plants like radishes or onions to deter pests and improve soil health.
Want to add a little extra flair? Try growing rainbow carrots! These colorful varieties come in shades of purple, yellow, and white, adding a vibrant touch to your salads and snacks. You can even pickle your homegrown baby carrots for a tangy and delicious treat. The possibilities are endless!
Don’t be intimidated by the thought of growing your own vegetables. This DIY trick is perfect for beginners and experienced gardeners alike. With a little patience and attention, you’ll be harvesting a bounty of delicious baby carrots in no time.
We wholeheartedly encourage you to give this a try. It’s a fun, educational, and ultimately delicious experience. Once you’ve tasted the difference between homegrown and store-bought baby carrots, you’ll never go back.
So, grab your seeds, soil, and containers, and get ready to embark on your baby carrot growing adventure! And most importantly, we want to hear about your experience. Share your photos, tips, and tricks in the comments below. Let’s create a community of baby carrot enthusiasts and inspire others to grow their own food. Happy gardening!
Frequently Asked Questions (FAQ)
What is the best time of year to grow baby carrots?
The best time to grow baby carrots is during the cooler months of the year, typically in spring or fall. Carrots prefer temperatures between 60°F and 70°F (15°C and 21°C). In warmer climates, you can grow them during the winter months. Avoid planting during the hottest part of summer, as high temperatures can cause the carrots to become bitter and stunted. If you live in an area with harsh winters, start your seeds indoors a few weeks before the last expected frost.
What kind of soil is best for growing baby carrots?
Baby carrots need loose, well-drained soil that is free of rocks and clumps. Rocky or compacted soil can cause the carrots to become misshapen or stunted. Amend your soil with compost or other organic matter to improve drainage and fertility. A slightly acidic soil pH of 6.0 to 6.8 is ideal. If your soil is heavy clay, consider growing your baby carrots in raised beds or containers filled with a potting mix specifically designed for vegetables.
How often should I water my baby carrots?
Baby carrots need consistent moisture to thrive. Water deeply and regularly, especially during dry periods. Aim to keep the soil consistently moist but not waterlogged. Overwatering can lead to root rot, while underwatering can cause the carrots to become tough and bitter. A good rule of thumb is to water when the top inch of soil feels dry to the touch. Consider using a soaker hose or drip irrigation to deliver water directly to the roots and minimize water loss through evaporation.
How much sunlight do baby carrots need?
Baby carrots need at least six hours of sunlight per day to grow properly. Choose a location that receives full sun for the majority of the day. If you live in a hot climate, some afternoon shade can be beneficial to prevent the carrots from overheating. If you are growing your baby carrots indoors, use grow lights to supplement natural sunlight.
How long does it take for baby carrots to grow?
Baby carrots typically take 50 to 70 days to mature, depending on the variety and growing conditions. You can start harvesting them when they reach the desired size, usually around 3 to 4 inches long. To check if your carrots are ready, gently loosen the soil around the top of the carrot and pull one out to inspect it.
Do I need to thin my baby carrots?
Yes, thinning is essential for growing healthy baby carrots. Overcrowding can lead to stunted growth and misshapen carrots. When the seedlings are about 2 inches tall, thin them to about 1 to 2 inches apart. Use small scissors to snip off the unwanted seedlings at the soil line, being careful not to disturb the roots of the remaining plants.
What are some common pests and diseases that affect baby carrots?
Some common pests that can affect baby carrots include carrot rust flies, aphids, and nematodes. Carrot rust flies lay their eggs near the base of the plants, and the larvae burrow into the roots, causing damage. Aphids suck the sap from the leaves, weakening the plants. Nematodes are microscopic worms that live in the soil and feed on the roots. To prevent pest problems, practice good garden hygiene, such as removing weeds and debris that can harbor pests. You can also use organic pest control methods, such as insecticidal soap or neem oil.
Common diseases that can affect baby carrots include leaf blight and root rot. Leaf blight causes brown spots on the leaves, while root rot causes the roots to become soft and mushy. To prevent disease problems, ensure good air circulation around the plants and avoid overwatering. You can also use organic fungicides to control fungal diseases.
Can I grow baby carrots in containers?
Yes, growing baby carrots in containers is a great option, especially if you have limited space or poor soil. Choose a container that is at least 8 inches deep and has drainage holes. Fill the container with a potting mix specifically designed for vegetables. Sow the seeds directly into the container and thin them as needed. Water regularly and fertilize with a balanced fertilizer every few weeks.
How do I store my homegrown baby carrots?
To store your homegrown baby carrots, first remove the tops and wash the carrots thoroughly. Pat them dry and store them in a plastic bag or container in the refrigerator. They should last for several weeks. You can also freeze your baby carrots for longer storage. Blanch them in boiling water for a few minutes, then transfer them to an ice bath to stop the cooking process. Drain them well and store them in freezer bags.
What are some creative ways to use my homegrown baby carrots?
Besides eating them raw as a snack, there are many creative ways to use your homegrown baby carrots. You can roast them with herbs and spices, add them to soups and stews, or pickle them for a tangy treat. They also make a great addition to salads and stir-fries. Get creative and experiment with different recipes to find your favorite ways to enjoy your homegrown baby carrots!

Leave a Comment