
Grow Basil Kitchen Hack: Unlock the secrets to a thriving herb garden right on your kitchen counter! Have you ever dreamed of snipping fresh, fragrant basil leaves whenever you need them for your favorite pasta sauce or Caprese salad? I know I have! Imagine the convenience and the incredible flavor boost it adds to your meals.
Basil, with its rich history dating back to ancient civilizations, has been cherished for centuries not only for its culinary uses but also for its medicinal properties and symbolic meaning. From being a sacred herb in India to a symbol of love in Italy, basil has woven its way into the cultural tapestry of many societies.
But let’s face it, sometimes growing basil can feel like a challenge. Whether you’re dealing with limited space, unpredictable weather, or simply a lack of gardening experience, keeping those delicate leaves happy can be tricky. That’s where this Grow Basil Kitchen Hack comes in! I’m going to share simple, effective, and budget-friendly DIY tricks that will transform your kitchen into a basil-growing haven. Say goodbye to store-bought basil that wilts within days and hello to a constant supply of fresh, vibrant leaves. Get ready to unleash your inner gardener and enjoy the delicious rewards!

Grow Endless Basil Indoors: A DIY Kitchen Hack
Hey there, fellow herb enthusiasts! Are you tired of buying those sad, little bunches of basil at the grocery store, only to watch them wilt away in a few days? I know I was! That’s why I’m so excited to share this super simple DIY hack that will let you grow endless basil right in your kitchen. Seriously, endless! It’s all about propagating basil cuttings, and trust me, it’s easier than you think.
What You’ll Need
Before we dive in, let’s gather our supplies. Don’t worry, you probably already have most of this stuff lying around:
* Fresh basil sprigs (from the grocery store or your garden – the healthier, the better!)
* A clean glass or jar
* Water (tap water is fine, but filtered is even better)
* Scissors or pruning shears
* Rooting hormone (optional, but it speeds things up!)
* Small pots (2-3 inch diameter is perfect)
* Potting mix (a well-draining mix is key)
* A sunny windowsill or grow light
Choosing Your Basil Sprigs
Okay, this is important. You can’t just grab any old basil sprig and expect it to magically grow roots. Here’s what to look for:
* Healthy Leaves: Choose sprigs with vibrant green leaves that aren’t wilted, spotted, or damaged.
* Strong Stems: The stems should be firm and sturdy, not flimsy or broken.
* Nodes, Nodes, Nodes: This is the most crucial part! Look for sprigs with multiple nodes along the stem. Nodes are the little bumps where leaves grow out. These are where the roots will emerge.
Preparing Your Cuttings
Alright, let’s get our hands dirty! This is where the magic begins.
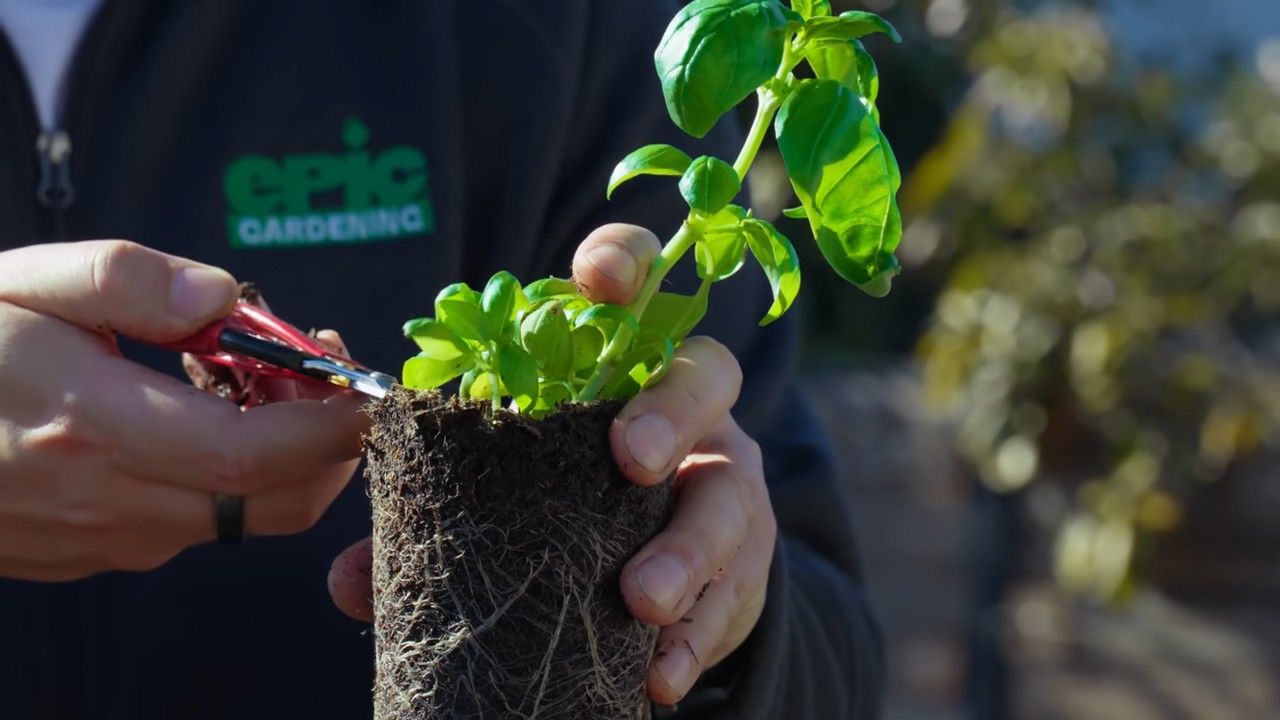
1. Trim the Bottom Leaves: Using your scissors or pruning shears, carefully remove the leaves from the bottom 1-2 inches of the basil sprig. This is important because those submerged leaves will rot and contaminate the water. You want a clean stem ready to sprout roots.
2. Cut Below a Node: Make a clean cut just below a node. This encourages root growth from that point.
3. Optional: Dip in Rooting Hormone: If you’re using rooting hormone, now’s the time. Dip the cut end of the stem into the hormone powder or liquid, following the instructions on the product label. This step isn’t essential, but it can significantly speed up the rooting process and increase your success rate. I personally find it worth the small investment.
4. Place in Water: Fill your clean glass or jar with water and place the prepared basil sprigs inside. Make sure the nodes are submerged in water, but the leaves are above the waterline.
Rooting Your Basil Cuttings
Now comes the waiting game! But don’t worry, it’s not a long wait.
1. Find a Sunny Spot: Place your glass or jar in a bright, sunny windowsill. Basil loves light! If you don’t have a sunny windowsill, you can use a grow light.
2. Change the Water Regularly: This is crucial! Change the water every 1-2 days to keep it fresh and prevent bacteria from growing. This will also provide the cuttings with fresh oxygen.
3. Be Patient: You should start to see roots emerging from the nodes within a week or two. The roots will look like tiny white threads.
4. Wait for Strong Roots: Let the roots grow to be at least an inch or two long before transplanting. The stronger the roots, the better the chances of your basil plant thriving.
Planting Your Rooted Cuttings
Once your basil cuttings have developed a good root system, it’s time to give them a new home in some soil!
1. Prepare Your Pots: Fill your small pots with a well-draining potting mix. Gently make a small hole in the center of each pot.
2. Carefully Remove the Cuttings: Gently remove the rooted basil cuttings from the water. Be careful not to damage the delicate roots.
3. Plant the Cuttings: Place each cutting into the hole in the potting mix, making sure the roots are covered. Gently press the soil around the base of the stem to secure the plant.
4. Water Thoroughly: Water the newly planted basil cuttings thoroughly until the water drains out of the bottom of the pot.
5. Provide Humidity: Basil loves humidity, especially when it’s first transplanted. You can increase humidity by placing a clear plastic bag over the pot for a few days, creating a mini-greenhouse effect. Just make sure to poke a few holes in the bag for ventilation.
6. Place in a Sunny Location: Put your newly planted basil plants back in a sunny windowsill or under a grow light.
Caring for Your Basil Plants
Congratulations! You’ve successfully propagated basil cuttings. Now, let’s keep those plants happy and healthy.
1. Water Regularly: Water your basil plants when the top inch of soil feels dry to the touch. Avoid overwatering, as this can lead to root rot.
2. Fertilize Occasionally: Feed your basil plants with a diluted liquid fertilizer every few weeks during the growing season.
3. Pinch Off Flower Buds: This is important! When you see flower buds forming, pinch them off. This will encourage the plant to produce more leaves, which is what we want! If you let the plant flower, it will stop producing leaves and eventually go to seed.
4. Harvest Regularly: Don’t be afraid to harvest your basil! Regular harvesting encourages the plant to grow bushier. Simply pinch off the top leaves or cut entire stems.
5. Watch for Pests: Keep an eye out for common pests like aphids and spider mites. If you spot any pests, treat them with an insecticidal soap or neem oil.
Troubleshooting
Sometimes, things don’t go exactly as planned. Here are a few common problems you might encounter and how to fix them:
* Cuttings Not Rooting: If your cuttings aren’t rooting, make sure they’re getting enough light and that you’re changing the water regularly. You can also try using rooting hormone.
* Leaves Turning Yellow: Yellowing leaves can be a sign of overwatering or underwatering. Adjust your watering schedule accordingly. It could also be a sign of nutrient deficiency, so try fertilizing.
* Plant Wilting: Wilting can be caused by underwatering or transplant shock. Make sure you’re watering your plants regularly and providing them with enough humidity.
* Root Rot: Root rot is caused by overwatering. If you suspect root rot, let the soil dry out completely before watering again. You may also need to repot the plant in fresh potting mix.
Enjoy Your Endless Basil!
And that’s it! With a little bit of care and attention, you can enjoy fresh, homegrown basil all year round. This DIY hack has saved me so much money and has made my cooking so much more flavorful. I hope you enjoy it as much as I do! Happy growing!
Conclusion
So, there you have it! This simple yet incredibly effective DIY trick to grow basil from cuttings is a game-changer for any home cook or gardening enthusiast. Forget constantly buying those expensive, often wilted, bunches from the grocery store. With just a few simple steps and minimal effort, you can have a thriving basil plant right in your kitchen, ready to provide you with fresh, fragrant leaves whenever you need them.
This isn’t just about saving money; it’s about experiencing the joy of nurturing your own food source. There’s something deeply satisfying about watching those tiny roots emerge and knowing that you played a part in bringing that plant to life. Plus, the flavor of homegrown basil is simply unmatched – richer, more vibrant, and bursting with aromatic oils that will elevate your culinary creations to a whole new level.
But the benefits don’t stop there. This method is also a fantastic way to propagate your favorite basil varieties. Did you find a particularly flavorful basil at a farmer’s market? Take a cutting and clone it! You can even experiment with different types of basil – Genovese, Thai, lemon, purple – and create your own miniature basil garden. Imagine the possibilities!
Variations and Suggestions:
* Rooting Hormone: While not strictly necessary, dipping the cut ends of your basil stems in rooting hormone can significantly speed up the rooting process and increase your success rate. You can find rooting hormone at most garden centers or online.
* Water Quality: Use filtered or dechlorinated water for best results. Tap water can sometimes contain chemicals that inhibit root growth.
* Light: While basil thrives in sunlight, avoid placing your cuttings in direct, intense sunlight, especially during the hottest part of the day. Indirect light is ideal. Once the roots have developed, you can gradually acclimate the plant to more sunlight.
* Potting Mix: When transplanting your rooted cuttings into pots, use a well-draining potting mix. A mix specifically formulated for herbs is a great choice.
* Fertilizing: Once your basil plant is established, fertilize it regularly with a balanced liquid fertilizer to encourage healthy growth and abundant leaf production.
* Hydroponics: For a fun twist, consider using a small hydroponic system to grow your basil. This eliminates the need for soil and can be a very efficient way to grow herbs indoors.
* Different Containers: While a glass of water works perfectly, you can also use other containers like mason jars or even repurposed plastic bottles. Just make sure the container is clean and allows enough light to reach the stems.
This DIY trick to grow basil is more than just a recipe; it’s an invitation to connect with nature, to cultivate your own food, and to experience the simple pleasures of gardening. It’s a sustainable and rewarding way to enjoy fresh basil year-round.
So, what are you waiting for? Grab some basil stems, a glass of water, and get started! We’re confident that you’ll be amazed at how easy and rewarding this process is. And once you’ve successfully grown your own basil, we encourage you to share your experience with us. Post photos of your thriving basil plants on social media using #HomegrownBasil and tell us about your favorite ways to use your fresh basil. We can’t wait to see what you create! Let’s spread the joy of homegrown basil together!
Frequently Asked Questions (FAQ)
How long does it take for basil cuttings to root?
Generally, you should start seeing roots emerge from your basil cuttings within 7-14 days. However, this can vary depending on factors such as the variety of basil, the temperature, and the amount of light the cuttings receive. Be patient, and don’t give up if you don’t see roots immediately. Keep the water fresh and the cuttings in a bright, indirect light, and they should eventually root.
What’s the best type of basil to propagate from cuttings?
Most varieties of basil can be successfully propagated from cuttings. Genovese basil, which is the most common type, is particularly easy to root. However, you can also try propagating other varieties such as Thai basil, lemon basil, or purple basil. Experiment and see which varieties you enjoy growing the most.
Can I use basil cuttings from the grocery store?
Yes, you can absolutely use basil cuttings from the grocery store. However, it’s important to choose healthy-looking stems with plenty of leaves. Avoid stems that are wilted, discolored, or have any signs of disease. Also, keep in mind that some commercially grown basil may have been treated with chemicals that can inhibit rooting. If possible, choose organic basil.
What if my basil cuttings don’t root?
If your basil cuttings don’t root after a few weeks, there could be several reasons why. The most common reasons are:
* Poor quality cuttings: The stems may have been damaged or diseased.
* Contaminated water: The water may have contained bacteria or fungi that inhibited root growth.
* Insufficient light: The cuttings may not have received enough light.
* Temperature: The temperature may have been too cold or too hot.
Try again with fresh cuttings, clean water, and a brighter location. You can also try using rooting hormone to increase your chances of success.
How do I know when the basil cuttings are ready to be planted?
Your basil cuttings are ready to be planted when the roots are at least 1-2 inches long. The roots should be white and healthy-looking. Avoid waiting too long to plant the cuttings, as the roots can become weak and brittle if they stay in water for too long.
What kind of soil should I use for my basil plants?
Basil plants thrive in well-draining soil that is rich in organic matter. A good potting mix for basil should contain a combination of peat moss, perlite, and vermiculite. You can also add compost or other organic amendments to improve the soil’s fertility.
How much sunlight do basil plants need?
Basil plants need at least 6-8 hours of sunlight per day. If you are growing your basil indoors, place it near a sunny window or use a grow light.
How often should I water my basil plants?
Water your basil plants when the top inch of soil feels dry to the touch. Avoid overwatering, as this can lead to root rot. Basil plants prefer to be kept slightly moist, but not soggy.
How do I harvest basil leaves?
To harvest basil leaves, simply pinch or cut them off the stem just above a leaf node (the point where leaves grow out of the stem). This will encourage the plant to branch out and produce more leaves. Avoid removing more than one-third of the plant’s leaves at a time.
Can I grow basil indoors year-round?
Yes, you can grow basil indoors year-round, provided you give it enough light and water. A sunny window or a grow light is essential for indoor basil cultivation.
How can I prevent pests and diseases from affecting my basil plants?
To prevent pests and diseases from affecting your basil plants, keep them clean and well-ventilated. Inspect your plants regularly for signs of pests or diseases. If you find any, treat them promptly with an appropriate insecticide or fungicide. You can also use organic pest control methods such as neem oil or insecticidal soap.
What are some common uses for fresh basil?
Fresh basil is a versatile herb that can be used in a wide variety of dishes. It’s a key ingredient in pesto, pasta sauces, salads, and soups. You can also use it to flavor meats, vegetables, and even desserts. Fresh basil is best added at the end of cooking to preserve its flavor and aroma.
Can I dry basil leaves for later use?
Yes, you can dry basil leaves for later use. To dry basil leaves, simply hang them upside down in a cool, dry place until they are completely dry. You can also use a dehydrator or an oven set to a low temperature. Once the leaves are dry, store them in an airtight container in a cool, dark place.
Is it better to grow basil from seed or cuttings?
Both growing basil from seed and cuttings have their advantages. Growing from seed is a more economical option, especially if you want to grow a large number of plants. However, growing from cuttings is faster and easier, and it allows you to propagate your favorite varieties. Ultimately, the best method depends on your individual needs and preferences. This DIY trick focuses on the ease and speed of using cuttings.

Leave a Comment