
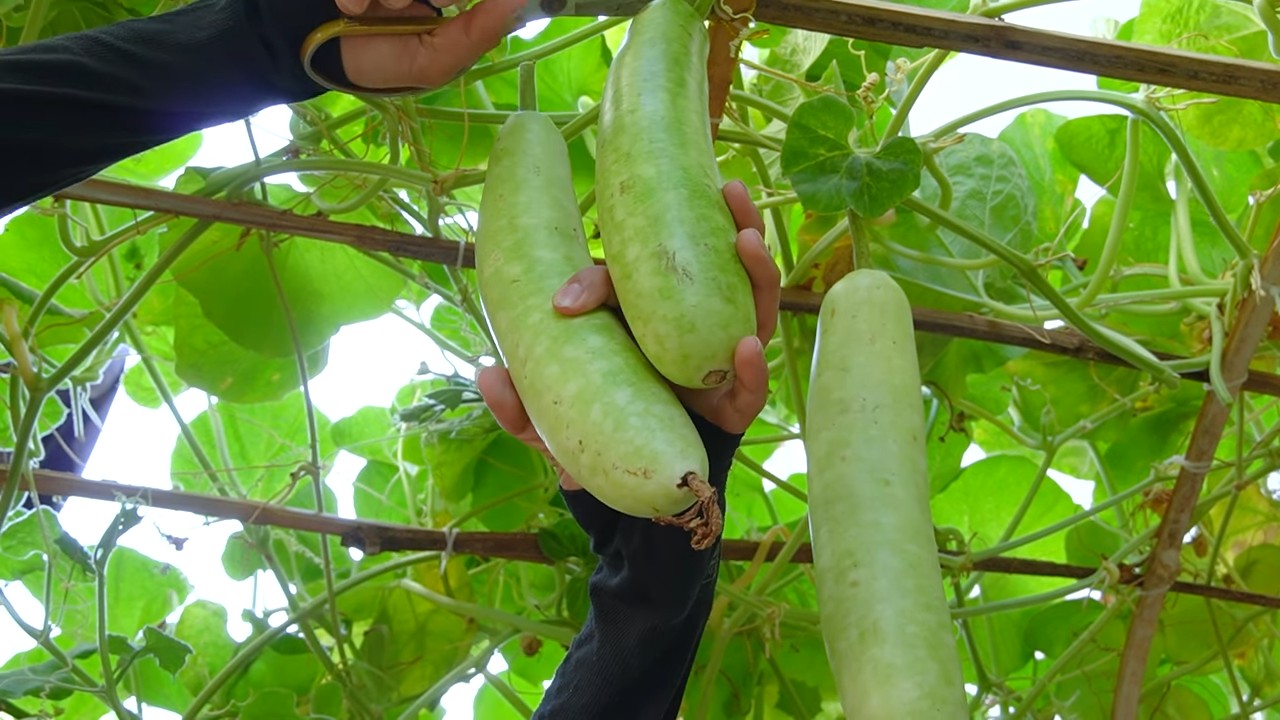
Grow bigger gourds than you ever thought possible! Have you ever dreamed of having prize-winning gourds that are the envy of all your neighbors? I know I have! There’s something incredibly satisfying about nurturing a tiny seed into a massive, impressive gourd. This isn’t just about bragging rights, though. For centuries, gourds have held a special place in cultures around the world, used for everything from practical containers and musical instruments to intricate works of art. Think of the beautiful gourd bowls crafted by indigenous artisans or the whimsical birdhouses that add charm to any garden.
But let’s be honest, sometimes getting those gourds to reach their full potential can feel like a real challenge. That’s where these DIY tricks and hacks come in! I’m going to share some simple, yet effective, techniques that will help you grow bigger gourds and achieve those impressive results you’ve been hoping for. Whether you’re a seasoned gardener or just starting out, these tips will give you the edge you need to cultivate truly remarkable gourds. Get ready to roll up your sleeves and transform your garden into a gourd-growing paradise!
So züchtest du riesige Kürbisse: Mein ultimativer DIY-Leitfaden
Hey Kürbisfreunde! Träumst du auch davon, den größten, beeindruckendsten Kürbis in der Nachbarschaft zu züchten? Ich auch! Und nach jahrelangem Experimentieren und Lernen habe ich endlich ein paar Tricks auf Lager, die ich gerne mit dir teilen möchte. Dieser Leitfaden ist vollgepackt mit meinen besten Tipps und Tricks, um dir zu helfen, deinen eigenen Riesenkürbis zu züchten. Los geht’s!
Die Grundlagen: Vorbereitung ist alles!
Bevor wir überhaupt anfangen, Samen zu säen, müssen wir sicherstellen, dass wir die Grundlagen richtig machen. Ein riesiger Kürbis braucht viel Liebe, Aufmerksamkeit und vor allem die richtige Umgebung.
* Die richtige Sorte wählen: Nicht alle Kürbisse sind gleich! Für Riesenkürbisse solltest du dich für Sorten wie ‘Atlantic Giant’ entscheiden. Diese sind speziell dafür gezüchtet, riesig zu werden. Ich habe mit ‘Atlantic Giant’ die besten Erfahrungen gemacht.
* Der perfekte Standort: Kürbisse lieben die Sonne! Wähle einen Standort, der mindestens 6-8 Stunden direkte Sonneneinstrahlung pro Tag erhält. Außerdem brauchen sie viel Platz, also plane genügend Raum ein. Ich empfehle mindestens 10 Quadratmeter pro Pflanze.
* Boden vorbereiten: Der Boden ist das A und O! Kürbisse sind Starkzehrer und brauchen einen nährstoffreichen, gut durchlässigen Boden. Ich bereite meinen Boden im Herbst vor, indem ich viel Kompost und gut verrotteten Mist einarbeite. Im Frühjahr gebe ich dann noch etwas organischen Dünger hinzu.
Schritt-für-Schritt-Anleitung: Vom Samen zum Riesen
Jetzt geht’s ans Eingemachte! Hier ist eine detaillierte Anleitung, wie du deinen eigenen Riesenkürbis züchten kannst:
1. Samen keimen lassen:
* Wann? Beginne etwa 3-4 Wochen vor dem letzten erwarteten Frost in deiner Region.
* Wie? Lege die Samen zwischen feuchte Papiertücher in einem Plastikbeutel. Bewahre den Beutel an einem warmen Ort auf (ca. 25-30°C). Ich benutze dafür gerne mein Heizkissen auf niedrigster Stufe.
* Was passiert? Nach ein paar Tagen sollten die Samen keimen. Sobald die Wurzeln etwa 1-2 cm lang sind, kannst du sie in Töpfe pflanzen.
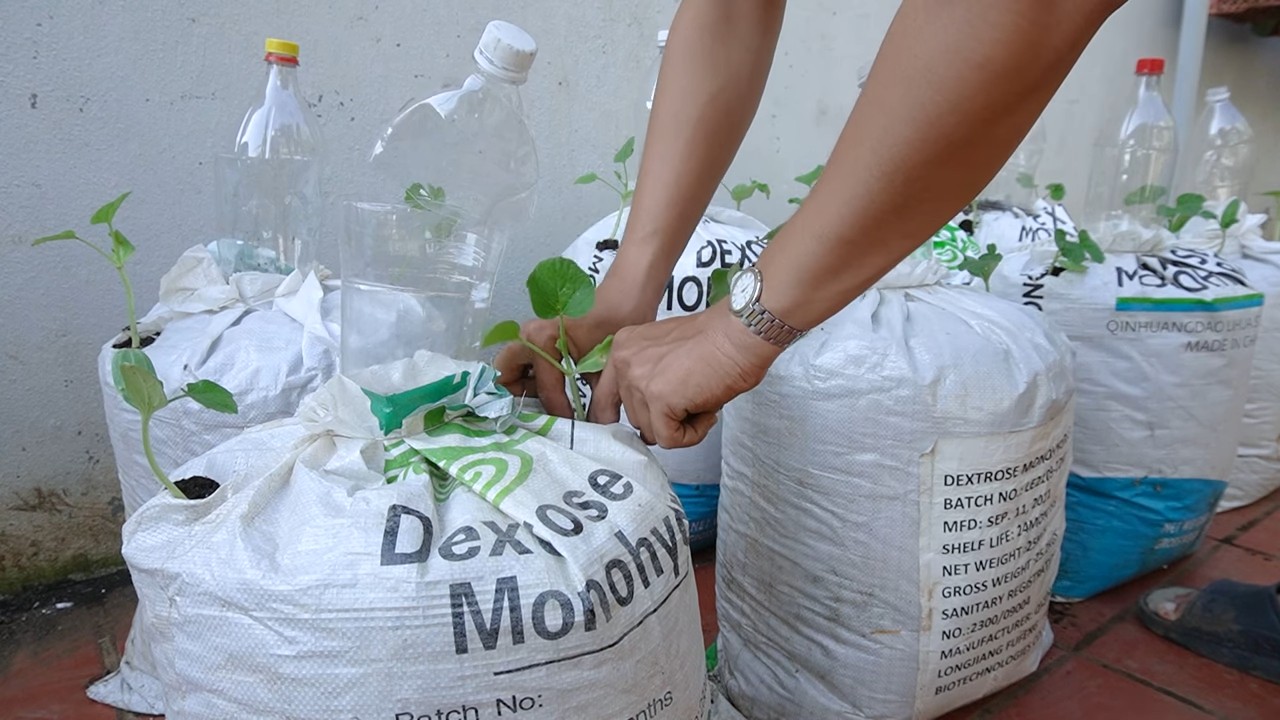
2. Pflanzen in Töpfe setzen:
* Welche Töpfe? Verwende große Töpfe (mindestens 15 cm Durchmesser), damit die Wurzeln genügend Platz haben.
* Welche Erde? Fülle die Töpfe mit einer hochwertigen Anzuchterde.
* Wie pflanzen? Setze die gekeimten Samen vorsichtig in die Töpfe, wobei die Wurzel nach unten zeigt. Bedecke sie mit etwa 1 cm Erde und gieße sie vorsichtig an.
* Wo aufbewahren? Stelle die Töpfe an einen hellen, warmen Ort. Ich benutze dafür gerne mein Gewächshaus, aber ein sonniges Fensterbrett tut es auch.
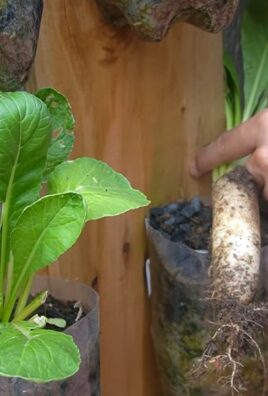
3. Pflanzen abhärten:
* Was bedeutet das? Bevor du die Pflanzen ins Freie setzt, musst du sie langsam an die Bedingungen draußen gewöhnen.
* Wie geht das? Stelle die Töpfe tagsüber für ein paar Stunden ins Freie, beginnend mit einer Stunde und steigere die Zeit jeden Tag. Schütze sie vor starkem Wind und direkter Sonneneinstrahlung.
4. Auspflanzen:
* Wann? Sobald keine Frostgefahr mehr besteht und die Pflanzen etwa 15-20 cm groß sind.
* Wie? Grabe ein großes Loch, das doppelt so breit und tief ist wie der Topf. Mische Kompost und organischen Dünger in das Loch. Setze die Pflanze vorsichtig in das Loch und fülle es mit Erde auf. Gieße sie gründlich an.
* Abstand? Achte darauf, dass die Pflanzen genügend Platz haben. Ich empfehle mindestens 3 Meter Abstand zwischen den Pflanzen.
5. Bewässerung:
* Wie oft? Kürbisse brauchen viel Wasser, besonders während der Wachstumsphase. Gieße sie regelmäßig, besonders bei trockenem Wetter.
* Wie viel? Achte darauf, dass der Boden immer feucht, aber nicht nass ist. Ich gieße meine Kürbisse am liebsten am frühen Morgen, damit die Blätter Zeit haben, abzutrocknen, bevor die Sonne aufgeht. Das hilft, Pilzkrankheiten vorzubeugen.
* Wo gießen? Gieße direkt an die Wurzeln, nicht über die Blätter.
6. Düngung:
* Welcher Dünger? Verwende einen organischen Dünger, der reich an Stickstoff, Phosphor und Kalium ist. Ich benutze gerne Komposttee oder verdünnten Fischdünger.
* Wie oft? Dünge die Pflanzen alle 2-3 Wochen.
* Wann aufhören? Sobald die Kürbisse anfangen, sich zu entwickeln, reduziere die Düngung.
7. Bestäubung:
* Warum ist das wichtig? Kürbisse sind auf Bestäubung angewiesen, um Früchte zu bilden.
* Wie funktioniert das? Bienen und andere Insekten bestäuben die Blüten. Wenn du sicherstellen willst, dass deine Kürbisse bestäubt werden, kannst du sie auch von Hand bestäuben.
* Wie bestäubt man von Hand? Suche nach männlichen und weiblichen Blüten. Männliche Blüten haben einen langen Stiel, während weibliche Blüten einen kleinen Kürbisansatz direkt unter der Blüte haben. Pflücke eine männliche Blüte ab und entferne die Blütenblätter. Tupfe den Stempel der männlichen Blüte auf den Stempel der weiblichen Blüte. Mache das am besten am frühen Morgen.
8. Ausdünnen:
* Warum ausdünnen? Kürbispflanzen produzieren viele Blüten und Früchte. Um sicherzustellen, dass dein Kürbis riesig wird, musst du die Anzahl der Früchte reduzieren.
* Wie ausdünnen? Wähle den vielversprechendsten Kürbis aus und entferne alle anderen Früchte und Blüten. Ich wähle immer den Kürbis aus, der am besten geformt ist und am gesündesten aussieht.
* Wann ausdünnen? Sobald die Kürbisse etwa faustgroß sind.
9. Schutz vor Schädlingen und Krankheiten:
* Welche Schädlinge? Kürbisse können von verschiedenen Schädlingen befallen werden, wie z.B. Schnecken, Blattläuse und Kürbiswanzen.
* Welche Krankheiten? Mehltau ist eine häufige Krankheit bei Kürbissen.
* Wie schützen? Kontrolliere die Pflanzen regelmäßig auf Schädlinge und Krankheiten. Entferne befallene Blätter und verwende bei Bedarf organische Schädlingsbekämpfungsmittel. Um Mehltau vorzubeugen, sorge für eine gute Belüftung und gieße die Pflanzen am frühen Morgen.
10. Sonnenschutz:
* Warum Sonnenschutz? Gerade in den heißen Sommermonaten kann die Sonne die Kürbisse verbrennen.
* Wie schützen? Decke den Kürbis mit einem Tuch oder einer Plane ab, wenn die Sonne am stärksten scheint. Ich benutze dafür gerne ein altes Bettlaken.
11. Drehen:
* Warum drehen? Durch das Drehen des Kürbisses verhinderst du, dass er eine flache Stelle bekommt.
* Wie drehen? Drehe den Kürbis vorsichtig alle paar Tage um ein paar Grad.
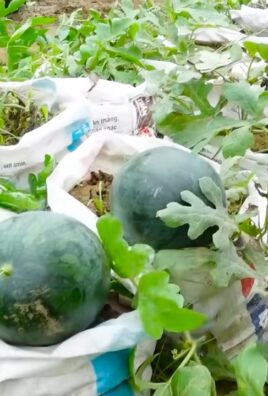
12. Unterlage:
* Warum eine Unterlage? Eine Unterlage schützt den Kürbis vor Feuchtigkeit und Schädlingen.
* Welche Unterlage? Ich benutze gerne eine dicke Schicht Stroh oder eine Holzpalette.
Spezielle Tipps für Riesenkürbisse
Hier sind noch ein paar zusätzliche Tipps, die dir helfen können, deinen Kürbis noch größer zu machen:
* Beschneiden: Beschneide die Seitentriebe der Pflanze, um die Energie
Conclusion
So, there you have it! Mastering the art of growing bigger gourds isn’t just about luck; it’s about understanding the plant’s needs and employing a few strategic techniques. This DIY approach, focusing on careful pruning, strategic fertilization, and consistent watering, is a game-changer for anyone serious about achieving gourd-growing success. It’s a method that empowers you to take control of your garden’s output and witness the impressive results firsthand.
Why is this DIY trick a must-try? Because it’s effective, economical, and deeply satisfying. You’re not relying on expensive, pre-packaged solutions or hoping for the best. Instead, you’re actively participating in the growth process, nurturing your gourds with targeted care. The reward is not only larger, more impressive gourds but also a deeper connection to your garden and a sense of accomplishment.
Consider these variations to personalize your gourd-growing journey. Experiment with different types of organic fertilizers to see which yields the best results in your specific soil conditions. Try different pruning techniques, focusing on removing specific types of unproductive vines. You could even explore companion planting, introducing beneficial plants that naturally deter pests and improve soil health. Remember, gardening is an ongoing experiment, and the more you explore, the more you’ll learn.
We’ve armed you with the knowledge and the tools; now it’s time to put them into action. Don’t be intimidated by the process. Start small, be patient, and observe your gourds closely. The beauty of this DIY method is that it’s adaptable. You can adjust your approach based on your observations and the specific needs of your plants.
We are confident that by implementing these techniques, you’ll be well on your way to harvesting the biggest, most beautiful gourds you’ve ever grown. But don’t just take our word for it. Try it yourself and see the difference.
We encourage you to embark on this gourd-growing adventure and share your experiences with us. Post photos of your progress, share your tips and tricks, and let us know what worked best for you. Together, we can create a community of passionate gourd growers, sharing knowledge and inspiring each other to achieve even greater success. Happy growing!
Frequently Asked Questions (FAQ)
What kind of gourds will this DIY method work for?
This method is generally effective for a wide variety of gourd types, including ornamental gourds, bottle gourds, and even some larger squash varieties. However, keep in mind that different gourd varieties have different growth habits and may respond differently to specific techniques. For example, some gourds may be more sensitive to pruning than others. It’s always a good idea to research the specific needs of the gourd variety you’re growing and adjust your approach accordingly. The principles of proper watering, fertilization, and pruning remain crucial for all types of gourds.
How often should I water my gourds?
Watering frequency depends on several factors, including the weather, soil type, and the size of your gourds. As a general rule, gourds need consistent moisture, especially during the flowering and fruiting stages. Aim to water deeply whenever the top inch of soil feels dry to the touch. Avoid overwatering, as this can lead to root rot. Mulching around the base of the plants can help retain moisture and reduce the need for frequent watering. During hot, dry periods, you may need to water daily. In cooler, wetter weather, you can reduce the frequency.
What type of fertilizer is best for growing bigger gourds?
A balanced fertilizer with a slightly higher phosphorus content is generally recommended for gourds. Phosphorus promotes strong root development and abundant flowering, which are essential for producing large fruits. Look for a fertilizer with an NPK ratio (nitrogen, phosphorus, potassium) of around 5-10-5 or 10-10-10. Organic options like compost tea, bone meal, and fish emulsion are also excellent choices. Avoid over-fertilizing with nitrogen, as this can promote excessive foliage growth at the expense of fruit production. Apply fertilizer according to the package instructions, and be sure to water thoroughly after application.
When should I start pruning my gourd plants?
Start pruning your gourd plants once they have developed several true leaves and are actively growing. The goal of pruning is to remove unproductive vines and encourage the plant to focus its energy on developing a few strong, healthy fruits. Remove any suckers (small shoots that grow from the base of the plant) and any vines that are not producing flowers or fruits. You can also prune back the tips of the main vines to encourage branching and more fruit production. Be careful not to remove too much foliage at once, as this can stress the plant.
How do I know when my gourds are ready to harvest?
The timing of harvest depends on the type of gourd you’re growing and your intended use. Ornamental gourds are typically harvested when they are fully mature and their stems have dried out. Bottle gourds are harvested when they are hard and their skin has turned a dull color. To test for ripeness, try pressing your fingernail into the skin of the gourd. If it’s difficult to puncture, the gourd is likely ready to harvest. Use a sharp knife or pruning shears to cut the gourd from the vine, leaving a few inches of stem attached.
What are some common pests and diseases that affect gourds, and how can I prevent them?
Common pests that affect gourds include squash bugs, squash vine borers, and aphids. Diseases include powdery mildew, downy mildew, and fungal rot. To prevent these problems, practice good garden hygiene, such as removing plant debris and weeds. Rotate your crops each year to prevent soilborne diseases from building up. Use organic pest control methods, such as insecticidal soap or neem oil, to control pests. Ensure good air circulation around your plants to prevent fungal diseases. Water at the base of the plants to avoid wetting the foliage, which can promote fungal growth.
Can I grow gourds in containers?
Yes, you can grow gourds in containers, but you’ll need to choose a large container (at least 20 gallons) to accommodate their extensive root systems. Use a well-draining potting mix and provide regular watering and fertilization. Container-grown gourds may require more frequent watering and fertilization than those grown in the ground. Choose a sunny location for your containers, and provide support for the vines to climb.
How can I store my harvested gourds?
Proper storage is essential for preserving your harvested gourds. Clean the gourds with a mild soap and water solution, and dry them thoroughly. Place the gourds in a well-ventilated area with good air circulation. Avoid storing gourds in damp or humid conditions, as this can promote mold growth. Check the gourds regularly for signs of rot or decay, and discard any that are affected. With proper storage, gourds can last for several months.
What if I don’t have a lot of space for a traditional garden?
Even if you lack a large garden, you can still enjoy growing gourds. Consider vertical gardening techniques, such as growing gourds on trellises or fences. This can maximize your space and provide support for the vines. You can also grow gourds in containers on patios or balconies. Choose smaller gourd varieties that are well-suited for container growing.
How important is sunlight for growing bigger gourds?
Sunlight is absolutely critical for growing bigger gourds. Gourds are sun-loving plants and require at least 6-8 hours of direct sunlight per day to thrive. Insufficient sunlight can result in stunted growth, reduced fruit production, and smaller gourds. Choose a sunny location for your gourd plants, and avoid planting them in areas that are shaded by trees or buildings. If you live in an area with limited sunlight, consider using grow lights to supplement the natural light.
Leave a Comment