
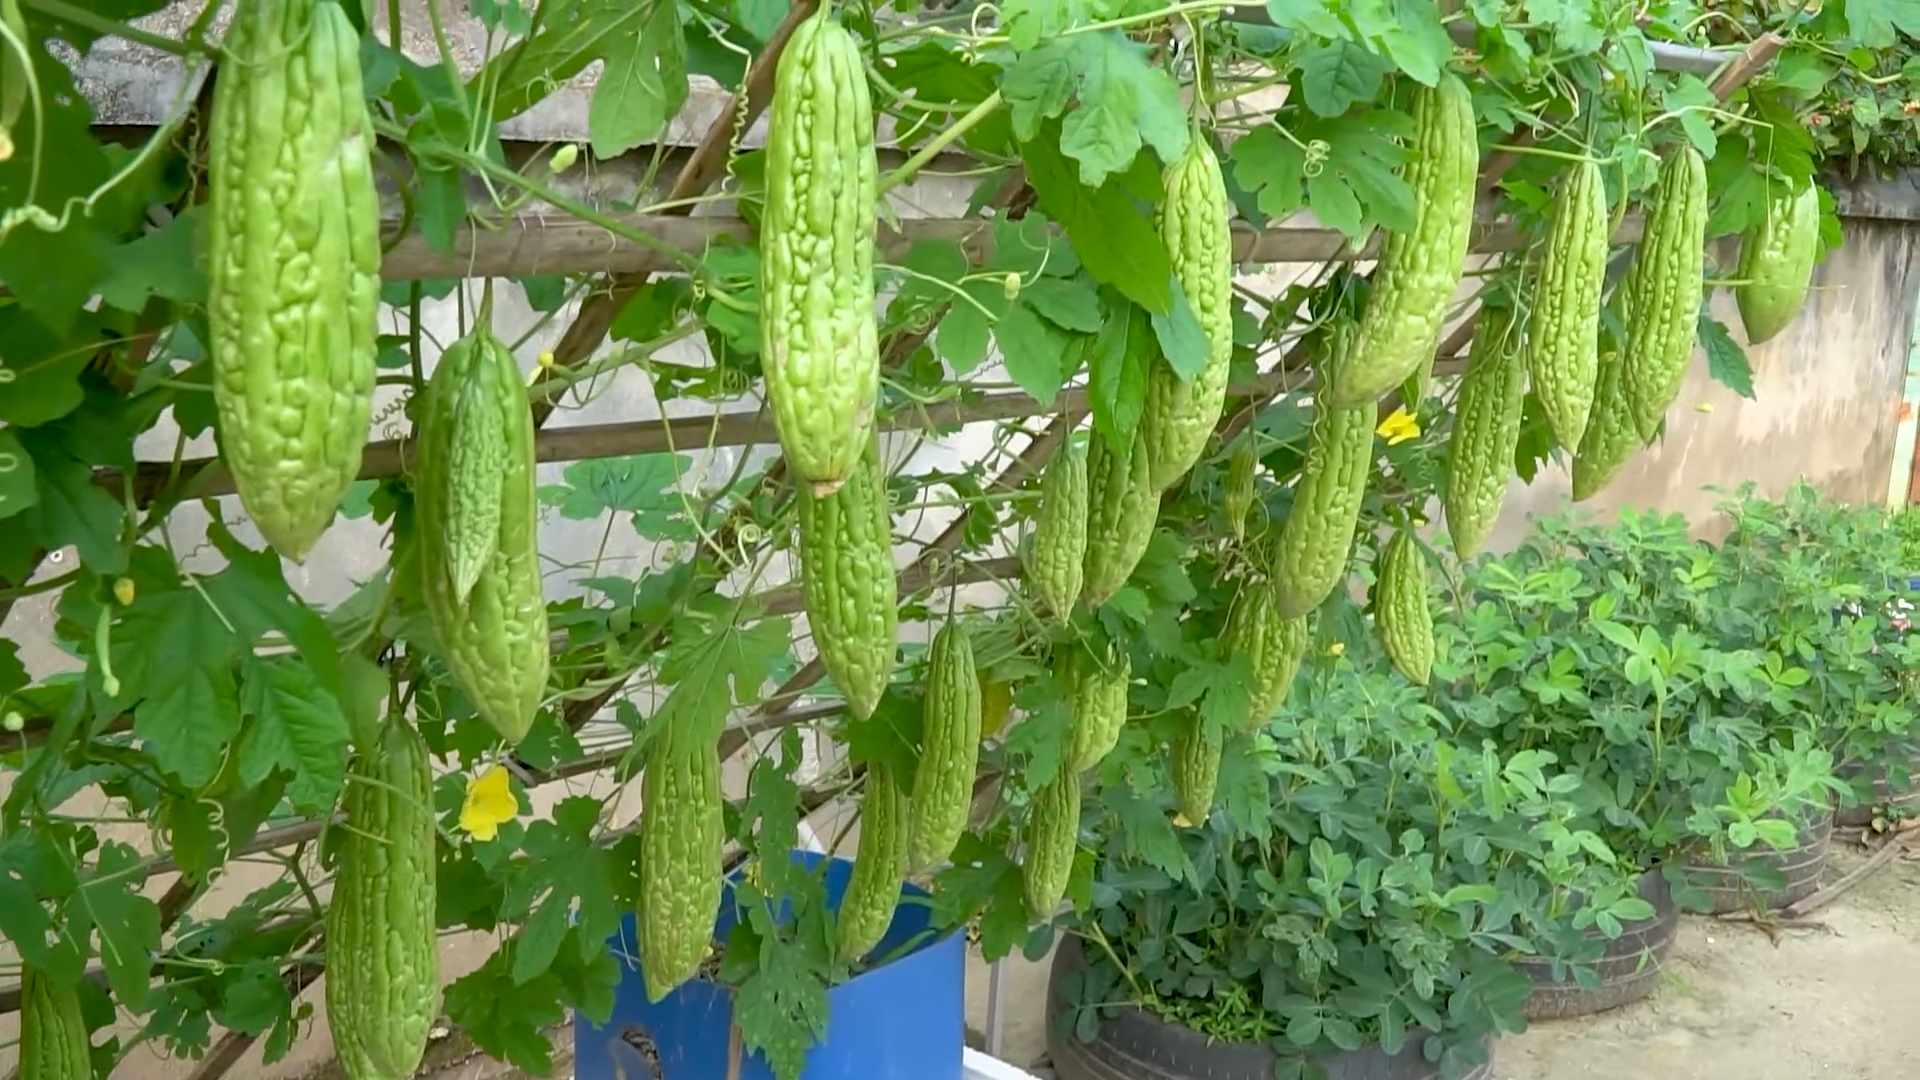
Grow Bitter Gourd Indoors? Absolutely! Imagine harvesting fresh, vibrant bitter gourds right from your own home, regardless of the season or your outdoor space. It’s not just a dream; it’s an achievable reality with the right know-how. For centuries, bitter gourd, also known as karela, has been a staple in Asian cuisine and traditional medicine, revered for its unique flavor and numerous health benefits. But what if you don’t have a sprawling garden? That’s where the magic of indoor gardening comes in!
I know what you’re thinking: “Bitter gourd indoors? Is that even possible?” Well, I’m here to tell you it is, and it’s easier than you might think. In this article, I’m going to share some simple yet effective DIY tricks and hacks that will empower you to grow bitter gourd indoors successfully. Whether you’re a seasoned gardener or a complete beginner, these tips will help you create the perfect environment for your bitter gourd to thrive.
Why bother growing bitter gourd indoors? Well, besides the sheer satisfaction of nurturing your own food, it offers several advantages. You have complete control over the growing conditions, protecting your plants from pests, diseases, and unpredictable weather. Plus, fresh, homegrown bitter gourd tastes infinitely better than anything you can buy at the store. So, let’s dive in and unlock the secrets to a bountiful indoor harvest!
Growing Bitter Gourd Indoors: A Comprehensive DIY Guide
Hey there, fellow gardening enthusiasts! Ever thought about growing bitter gourd, that knobbly, slightly intimidating vegetable, right inside your home? It might sound a bit ambitious, but trust me, it’s totally doable! I’ve successfully cultivated bitter gourd indoors, and I’m here to share all my secrets with you. Get ready to transform your living space into a mini-vineyard of healthy goodness!
Why Grow Bitter Gourd Indoors?
Before we dive in, let’s talk about why you might want to consider this project.
* Extended Growing Season: Living in a region with short summers? Growing indoors lets you bypass the limitations of the outdoor climate and enjoy a longer harvest.
* Pest Control: Indoor gardening significantly reduces the risk of pests and diseases that often plague outdoor crops.
* Fresh, Organic Produce: You’ll have access to fresh, organic bitter gourd right at your fingertips, knowing exactly what went into growing it.
* Space Saving: If you have limited outdoor space, indoor gardening is a fantastic alternative.
* A Fun and Rewarding Project: Watching your bitter gourd vine flourish indoors is incredibly satisfying!
What You’ll Need: Gathering Your Supplies
Okay, let’s get down to brass tacks. Here’s a list of everything you’ll need to embark on this indoor bitter gourd adventure:
* Bitter Gourd Seeds: Choose a variety that’s known to be relatively compact and suitable for container gardening. You can find these at most garden centers or online.
* Large Container: Bitter gourd vines need plenty of room for their roots to spread. I recommend a container that’s at least 15-20 gallons in size. Make sure it has drainage holes!
* Well-Draining Potting Mix: A good quality potting mix is crucial for healthy growth. Avoid using garden soil, as it can become compacted and doesn’t drain well.
* Trellis or Support Structure: Bitter gourd is a climbing vine, so you’ll need a trellis, bamboo stakes, or some other structure for it to climb on. I’ve used everything from store-bought trellises to DIY structures made from PVC pipes.
* Grow Lights (Optional but Recommended): If you don’t have a spot that receives at least 6-8 hours of direct sunlight, you’ll need grow lights to supplement the natural light.
* Watering Can or Hose: For watering your plants.
* Fertilizer: A balanced liquid fertilizer will help your bitter gourd vine thrive.
* Spray Bottle: For misting the leaves.
* Pruning Shears or Scissors: For trimming and shaping the vine.
* Gloves: To protect your hands.
Step-by-Step Guide: From Seed to Harvest
Alright, let’s get our hands dirty! Here’s a detailed, step-by-step guide to growing bitter gourd indoors:
Section 1: Germinating the Seeds
1. Soak the Seeds: Before planting, soak the bitter gourd seeds in warm water for 24 hours. This helps to soften the seed coat and improve germination rates.
2. Prepare Seedling Trays or Small Pots: Fill small seedling trays or individual pots with a seed-starting mix. This mix is lighter and more sterile than regular potting mix, which is ideal for delicate seedlings.
3. Plant the Seeds: Make a small hole (about 1/2 inch deep) in the center of each pot or cell. Place one seed in each hole and cover it gently with the seed-starting mix.
4. Water Gently: Water the soil gently using a spray bottle or a watering can with a fine rose. Avoid overwatering, as this can lead to rot.
5. Create a Humid Environment: Cover the seedling trays or pots with a clear plastic lid or plastic wrap to create a humid environment. This helps to keep the soil moist and promotes germination.
6. Provide Warmth: Place the seedling trays or pots in a warm location, ideally around 75-85°F (24-29°C). A heat mat can be helpful if your home is cooler.
7. Wait for Germination: Germination typically takes 7-14 days. Once the seedlings emerge, remove the plastic cover and provide them with plenty of light.
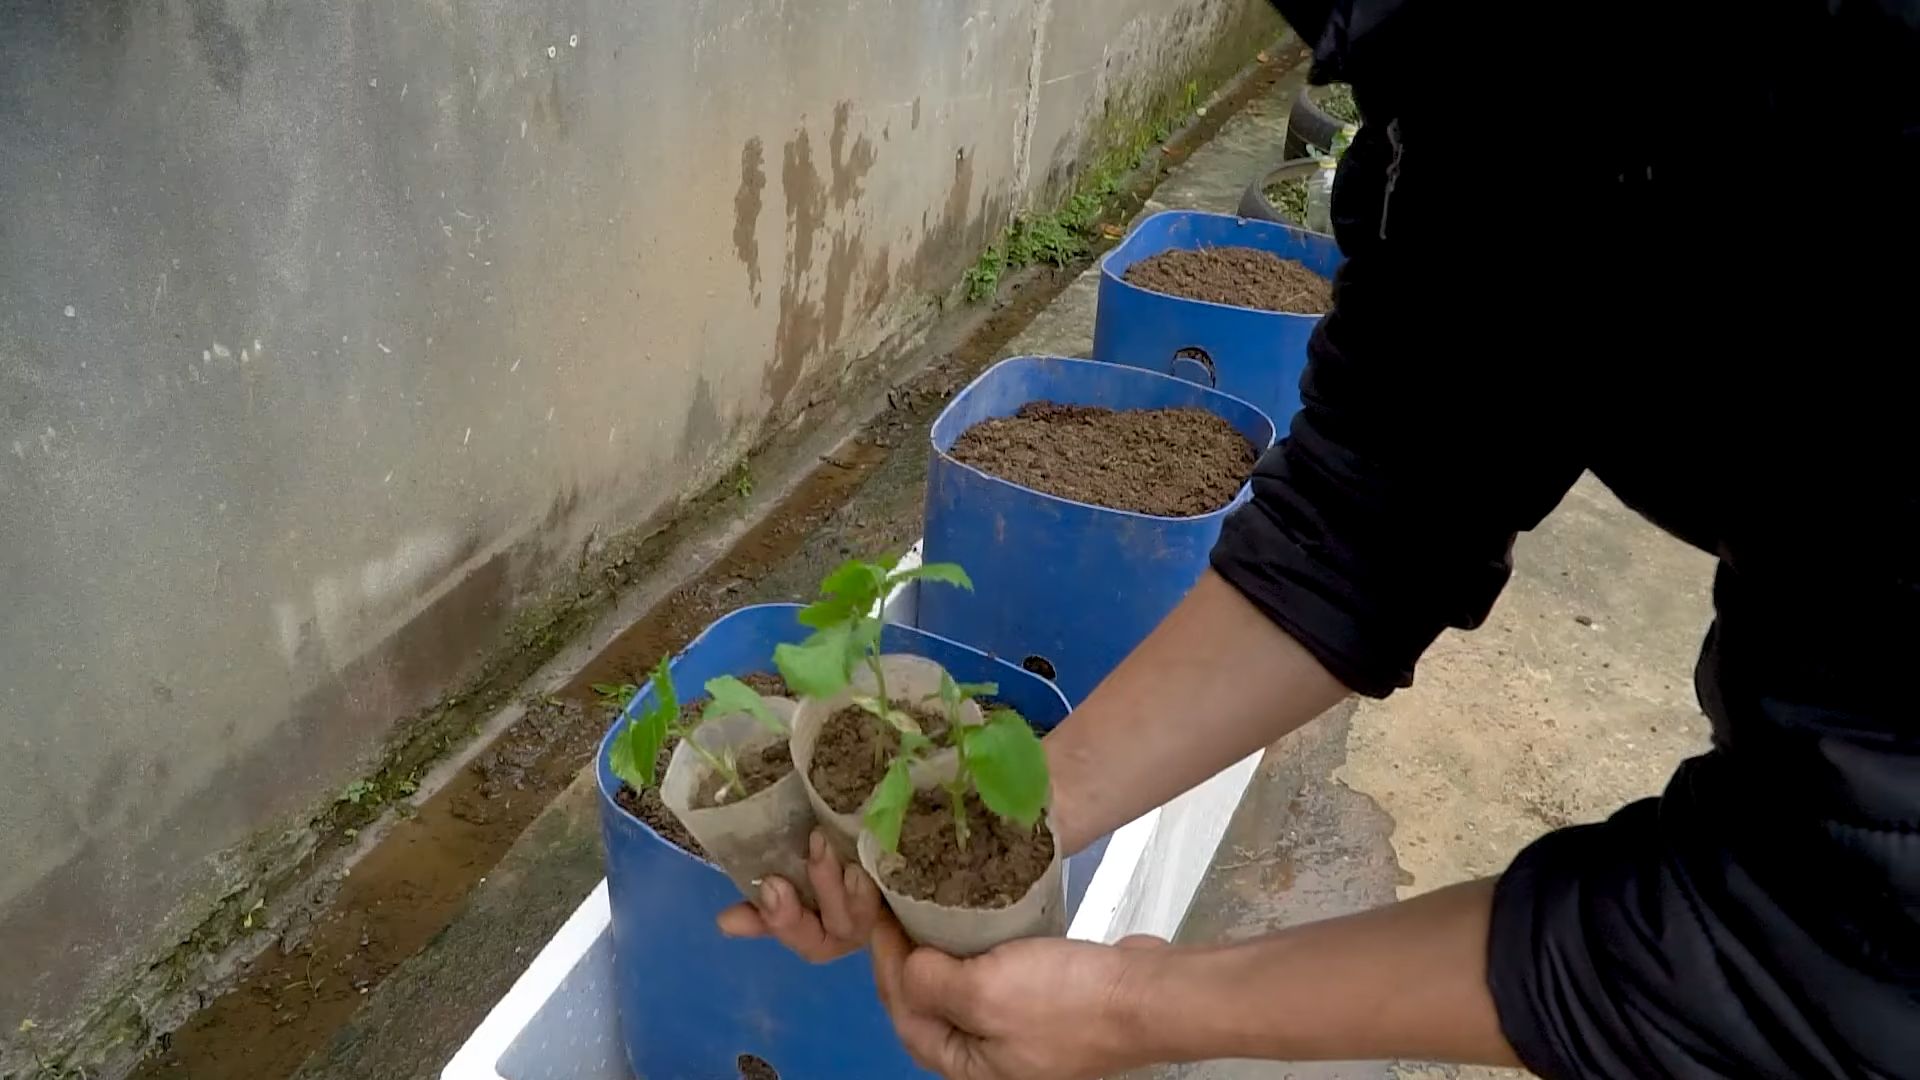
Section 2: Transplanting the Seedlings
1. Harden Off the Seedlings: Before transplanting the seedlings into their final container, you’ll need to “harden them off.” This means gradually exposing them to outdoor conditions to help them adjust to the change in environment. Start by placing the seedlings outdoors for an hour or two each day, gradually increasing the amount of time they spend outside over the course of a week.
2. Prepare the Large Container: Fill the large container with well-draining potting mix, leaving a few inches of space at the top.
3. Transplant the Seedlings: Gently remove the seedlings from their trays or pots, being careful not to damage the roots. Make a hole in the center of the potting mix and place the seedling in the hole. Cover the roots with soil and gently firm the soil around the base of the plant.
4. Water Thoroughly: Water the transplanted seedlings thoroughly to help them settle in.
Section 3: Providing Support and Training the Vine
1. Install the Trellis or Support Structure: Place the trellis or support structure in the container, making sure it’s sturdy and can support the weight of the growing vine.
2. Train the Vine: As the bitter gourd vine grows, gently guide it to climb the trellis or support structure. You can use plant ties or clips to secure the vine to the structure.
3. Prune Regularly: Prune the vine regularly to encourage branching and fruit production. Remove any dead or yellowing leaves. You can also pinch off the tips of the vines to encourage them to produce more side shoots.
Section 4: Providing Light, Water, and Nutrients
1. Provide Adequate Light: Bitter gourd needs at least 6-8 hours of direct sunlight per day. If you don’t have a spot that receives enough natural light, use grow lights to supplement the light. Position the grow lights about 6-12 inches above the plants.
2. Water Regularly: Water the bitter gourd vine regularly, keeping the soil consistently moist but not waterlogged. Check the soil moisture by sticking your finger into the soil. If the top inch of soil feels dry, it’s time to water.
3. Fertilize Regularly: Feed the bitter gourd vine with a balanced liquid fertilizer every 2-3 weeks. Follow the instructions on the fertilizer label.
Section 5: Pollination
1. Hand-Pollination (If Necessary): Bitter gourd plants produce both male and female flowers. The female flowers have a small fruit behind the flower, while the male flowers do not. If you’re growing bitter gourd indoors, you may need to hand-pollinate the flowers to ensure fruit production.
2. How to Hand-Pollinate: Use a small paintbrush or cotton swab to collect pollen from the male flowers. Gently transfer the pollen to the stigma of the female flowers. It’s best to do this in the morning, when the flowers are open.
Section 6: Harvesting
1. Harvest When Ready: Bitter gourd is typically ready to harvest about 2-3 months after planting. The fruits should be firm and green, and they should be about 6-8 inches long.
2. Harvesting Technique: Use a sharp knife or scissors to cut the bitter gourd from the vine. Be careful not to damage the vine.
3. Enjoy Your Harvest: Enjoy your homegrown bitter gourd in your favorite recipes!
Troubleshooting: Common Issues and Solutions
Even with the best care, you might encounter some challenges along the way. Here are some common issues and how to address them:
* Yellowing Leaves: This could be a sign of overwatering, underwatering, nutrient deficiency, or pest infestation. Check the soil moisture, fertilize the plant, and inspect it for pests.
* Lack of Fruit Production: This could be due to insufficient light, poor pollination, or nutrient deficiency. Make sure the plant is getting enough light, hand-pollinate the flowers if necessary, and fertilize the plant.
* Pest Infestation: Common pests that can affect bitter gourd include aphids, spider mites, and whiteflies. Inspect the plant regularly and treat any infestations with insecticidal soap or neem oil.
* Powdery Mildew: This fungal disease can cause a white, powdery coating on the leaves. Improve air circulation around the plant and treat with a fungicide.
Tips for Success: My Personal Recommendations
Here are a few extra tips that I’ve learned from my own experience growing bitter gourd indoors:
* Choose the Right Variety:
Conclusion
So, there you have it! Growing bitter gourd indoors might seem daunting at first, but with a little patience, the right setup, and these simple DIY tricks, you can enjoy fresh, homegrown bitter gourd even without a sprawling garden. The satisfaction of harvesting your own vegetables, especially one as unique and nutritious as bitter gourd, is truly unparalleled.
This isn’t just about saving money on groceries; it’s about connecting with nature, understanding the growing process, and enjoying the freshest possible ingredients in your meals. Plus, think of the bragging rights! Imagine serving a dish featuring bitter gourd you cultivated yourself.
Why is this DIY approach a must-try? Because it empowers you to control the entire growing environment, maximizing your chances of success, especially in climates where outdoor bitter gourd cultivation is challenging. You can tailor the lighting, temperature, and humidity to create the ideal conditions for your plants to thrive. Furthermore, it’s a fantastic way to reduce your carbon footprint by minimizing transportation and supporting sustainable practices.
Looking for variations? Consider experimenting with different varieties of bitter gourd. Some are smaller and more compact, making them perfect for indoor containers. You can also try different trellising methods to optimize space and encourage vertical growth. Instead of traditional soil, explore hydroponics or aquaponics for an even more controlled and efficient growing system. You can also try companion planting with herbs like basil or marigolds to deter pests naturally.
Don’t be afraid to get creative with your setup. Repurpose old containers, build your own DIY grow lights, and find innovative ways to support your plants. The possibilities are endless!
We wholeheartedly encourage you to give this DIY bitter gourd growing method a try. It’s a rewarding experience that will not only provide you with fresh produce but also deepen your appreciation for the natural world.
And most importantly, we want to hear about your journey! Share your experiences, successes, and challenges in the comments below. Post pictures of your plants, ask questions, and connect with other indoor gardeners. Let’s build a community of passionate bitter gourd enthusiasts! Your insights could inspire others to embark on their own indoor growing adventures. Let us know if this DIY trick helped you to grow bitter gourd indoors successfully.
Frequently Asked Questions (FAQs)
Q: What is the best time of year to start growing bitter gourd indoors?
A: Ideally, you should start your bitter gourd seeds indoors about 6-8 weeks before the last expected frost. This allows the seedlings to develop a strong root system before being transplanted into larger containers. If you live in a climate with mild winters, you can start them indoors at any time of the year, ensuring you provide adequate light and warmth. The key is to provide consistent warmth and light, mimicking the conditions of the warm growing season.
Q: What kind of soil is best for growing bitter gourd indoors?
A: Bitter gourd thrives in well-draining, nutrient-rich soil. A good mix would be equal parts of potting soil, compost, and perlite or vermiculite. The potting soil provides a base, the compost adds essential nutrients, and the perlite or vermiculite improves drainage and aeration. Avoid using garden soil, as it can be too heavy and may contain pests or diseases. You can also amend your soil with slow-release fertilizer to provide a steady supply of nutrients throughout the growing season.
Q: How much sunlight does bitter gourd need when grown indoors?
A: Bitter gourd requires at least 6-8 hours of direct sunlight per day to thrive. If you don’t have a sunny window, you’ll need to supplement with grow lights. LED grow lights are a great option as they are energy-efficient and provide the full spectrum of light that plants need. Position the grow lights a few inches above the plants and adjust as they grow taller. Rotate the plants regularly to ensure even light exposure on all sides.
Q: How often should I water my indoor bitter gourd plants?
A: Water your bitter gourd plants regularly, keeping the soil consistently moist but not waterlogged. Check the soil moisture by sticking your finger about an inch deep. If it feels dry, it’s time to water. Water deeply, allowing the excess water to drain out of the bottom of the pot. Avoid overwatering, as this can lead to root rot. Reduce watering frequency during cooler periods or when the plants are not actively growing.
Q: How do I pollinate bitter gourd flowers indoors?
A: Bitter gourd plants have separate male and female flowers. Indoors, you’ll need to hand-pollinate the flowers to ensure fruit production. Use a small paintbrush or cotton swab to collect pollen from the male flowers (which have a long, thin stem) and transfer it to the female flowers (which have a small, immature fruit behind the flower). Do this in the morning when the flowers are open. You may need to repeat this process several times to ensure successful pollination.
Q: What are some common pests and diseases that affect indoor bitter gourd plants?
A: Common pests that can affect indoor bitter gourd plants include aphids, spider mites, and whiteflies. Regularly inspect your plants for signs of infestation and take action promptly. You can use insecticidal soap, neem oil, or introduce beneficial insects like ladybugs to control these pests. Diseases like powdery mildew and fungal infections can also occur. Ensure good air circulation, avoid overwatering, and use a fungicide if necessary.
Q: How long does it take for bitter gourd to mature after flowering?
A: Bitter gourd typically takes about 8-12 weeks to mature after flowering, depending on the variety and growing conditions. The fruits are ready to harvest when they are still green and tender. Overripe bitter gourd will turn yellow or orange and become bitter. Harvest the fruits regularly to encourage continued production.
Q: Can I grow bitter gourd in a small container indoors?
A: While bitter gourd plants can grow quite large, you can successfully grow them in containers indoors with proper care. Choose a container that is at least 12-18 inches in diameter and depth to provide enough space for the roots to grow. Use a sturdy trellis or support system to accommodate the vining growth habit of the plant. Regular pruning can also help to control the size of the plant.
Q: How do I fertilize my indoor bitter gourd plants?
A: Fertilize your indoor bitter gourd plants every 2-3 weeks with a balanced liquid fertilizer. Look for a fertilizer with an NPK ratio (nitrogen, phosphorus, potassium) of 10-10-10 or similar. Follow the instructions on the fertilizer label for proper dilution. You can also supplement with compost tea or other organic fertilizers to provide additional nutrients. Avoid over-fertilizing, as this can burn the roots.
Q: What are some tips for maximizing fruit production when growing bitter gourd indoors?
A: To maximize fruit production, ensure your plants receive adequate sunlight or grow light exposure, proper watering, and regular fertilization. Hand-pollinate the flowers diligently. Prune the plants to encourage branching and fruit development. Provide a sturdy trellis or support system for the vines to climb. Monitor for pests and diseases and take action promptly. And most importantly, be patient and enjoy the process!

Leave a Comment