
Balcony Chili Gardening Tips: Unleash Your Inner Gardener!
Ever dreamt of adding a fiery kick to your meals with chilies you’ve grown yourself? Imagine stepping onto your balcony and plucking a vibrant red chili, bursting with flavor, ready to spice up your dinner. Well, dream no more! This article is your ultimate guide to mastering balcony chili gardening tips, even if you’re a complete beginner with limited space.
Chili peppers have a rich history, dating back thousands of years to South America, where they were revered not only for their culinary uses but also for their medicinal properties. From ancient civilizations to modern kitchens, chilies have captivated palates and cultures worldwide. Now, you can bring that history and flavor right to your own home!
Why should you embark on this chili-growing adventure? Because fresh, homegrown chilies are simply superior! They offer a depth of flavor and a level of freshness you just can’t find in store-bought varieties. Plus, gardening is incredibly therapeutic! It’s a fantastic way to de-stress, connect with nature, and enjoy the satisfaction of nurturing something from seed to harvest. And let’s be honest, who wouldn’t want to impress their friends and family with their green thumb and spicy creations?
I’m here to guide you through every step, from choosing the right chili varieties for your balcony to providing essential care tips for a bountiful harvest. Get ready to transform your balcony into a vibrant, chili-filled oasis!
Balcony Chili Gardening: From Seed to Spice Rack!
Hey there, fellow spice enthusiasts! Dreaming of fresh, fiery chilies right outside your door? Well, you’ve come to the right place! I’m going to walk you through everything you need to know to create a thriving chili garden right on your balcony. Trust me, it’s easier than you think, and the rewards are oh-so-delicious!
Choosing the Right Chili Varieties
First things first, let’s talk chilies! Not all chilies are created equal, and some are definitely better suited for balcony life than others. Here’s what I consider when choosing my varieties:
* Size Matters: Opt for compact or dwarf varieties. These won’t outgrow your pots and will be much easier to manage on a balcony. Think Thai chilies, Jalapeños, Serrano peppers, or even some ornamental varieties.
* Sunlight Needs: Most chilies crave sunshine, but some are more tolerant of partial shade than others. Check the seed packet or plant label to make sure your chosen varieties will thrive in the amount of sunlight your balcony receives.
* Heat Level: This is totally up to your personal preference! Do you want a mild kick or a scorching inferno? Research the Scoville Heat Units (SHU) of different chilies to find your perfect match.
* Disease Resistance: Look for varieties that are known to be resistant to common chili plant diseases. This will save you a lot of headaches (and potential crop failures) down the line.
Gathering Your Supplies
Alright, now that we’ve got our chili varieties picked out, let’s gather our supplies. Here’s what you’ll need:
* Chili Seeds or Seedlings: Obviously! You can start from seed or buy established seedlings from a nursery.
* Pots: Choose pots that are at least 12 inches in diameter. Make sure they have drainage holes! Terra cotta pots are great because they allow the soil to breathe.
* Potting Mix: Use a high-quality potting mix that’s well-draining. Avoid using garden soil, as it can become compacted in pots.
* Fertilizer: A balanced fertilizer (like 10-10-10) or a fertilizer specifically formulated for tomatoes and peppers will work wonders.
* Watering Can or Hose: For, well, watering!
* Gardening Gloves: To keep your hands clean and protected.
* Small Shovel or Trowel: For planting and transplanting.
* Plant Labels: To keep track of your different chili varieties. Trust me, you’ll thank yourself later!
* Optional:
* Seed Starting Tray and Dome: If you’re starting from seed.
* Heat Mat: To speed up germination.
* Grow Lights: If you don’t have enough natural sunlight.
* Stakes or Cages: To support taller chili plants.
* Insecticidal Soap or Neem Oil: For pest control (hopefully you won’t need it!).
Starting from Seed (Optional)
If you’re feeling ambitious, starting your chilies from seed is a rewarding experience. Here’s how I do it:
1. Sow the Seeds: Fill your seed starting tray with potting mix and moisten it. Sow the chili seeds about ¼ inch deep and cover them lightly with soil.
2. Provide Warmth and Moisture: Place the seed starting tray in a warm location (around 75-85°F). A heat mat can help speed up germination. Cover the tray with a dome to create a humid environment.
3. Keep the Soil Moist: Water the soil gently whenever it starts to dry out. Avoid overwatering, as this can lead to damping off (a fungal disease that kills seedlings).
4. Provide Light: Once the seedlings emerge (usually within 1-3 weeks), remove the dome and place them under grow lights or in a sunny window.
5. Thin the Seedlings: If you sowed multiple seeds in each cell, thin them out to one seedling per cell once they have a few sets of true leaves.
6. Harden Off the Seedlings: Before transplanting the seedlings to your balcony, you’ll need to harden them off. This means gradually exposing them to outdoor conditions over a period of 1-2 weeks. Start by placing them outside for an hour or two each day, gradually increasing the amount of time they spend outdoors.
Transplanting Your Chilies
Whether you started from seed or bought seedlings, it’s time to get those chilies into their permanent pots!
1. Prepare the Pots: Fill your pots with potting mix, leaving a few inches of space at the top.
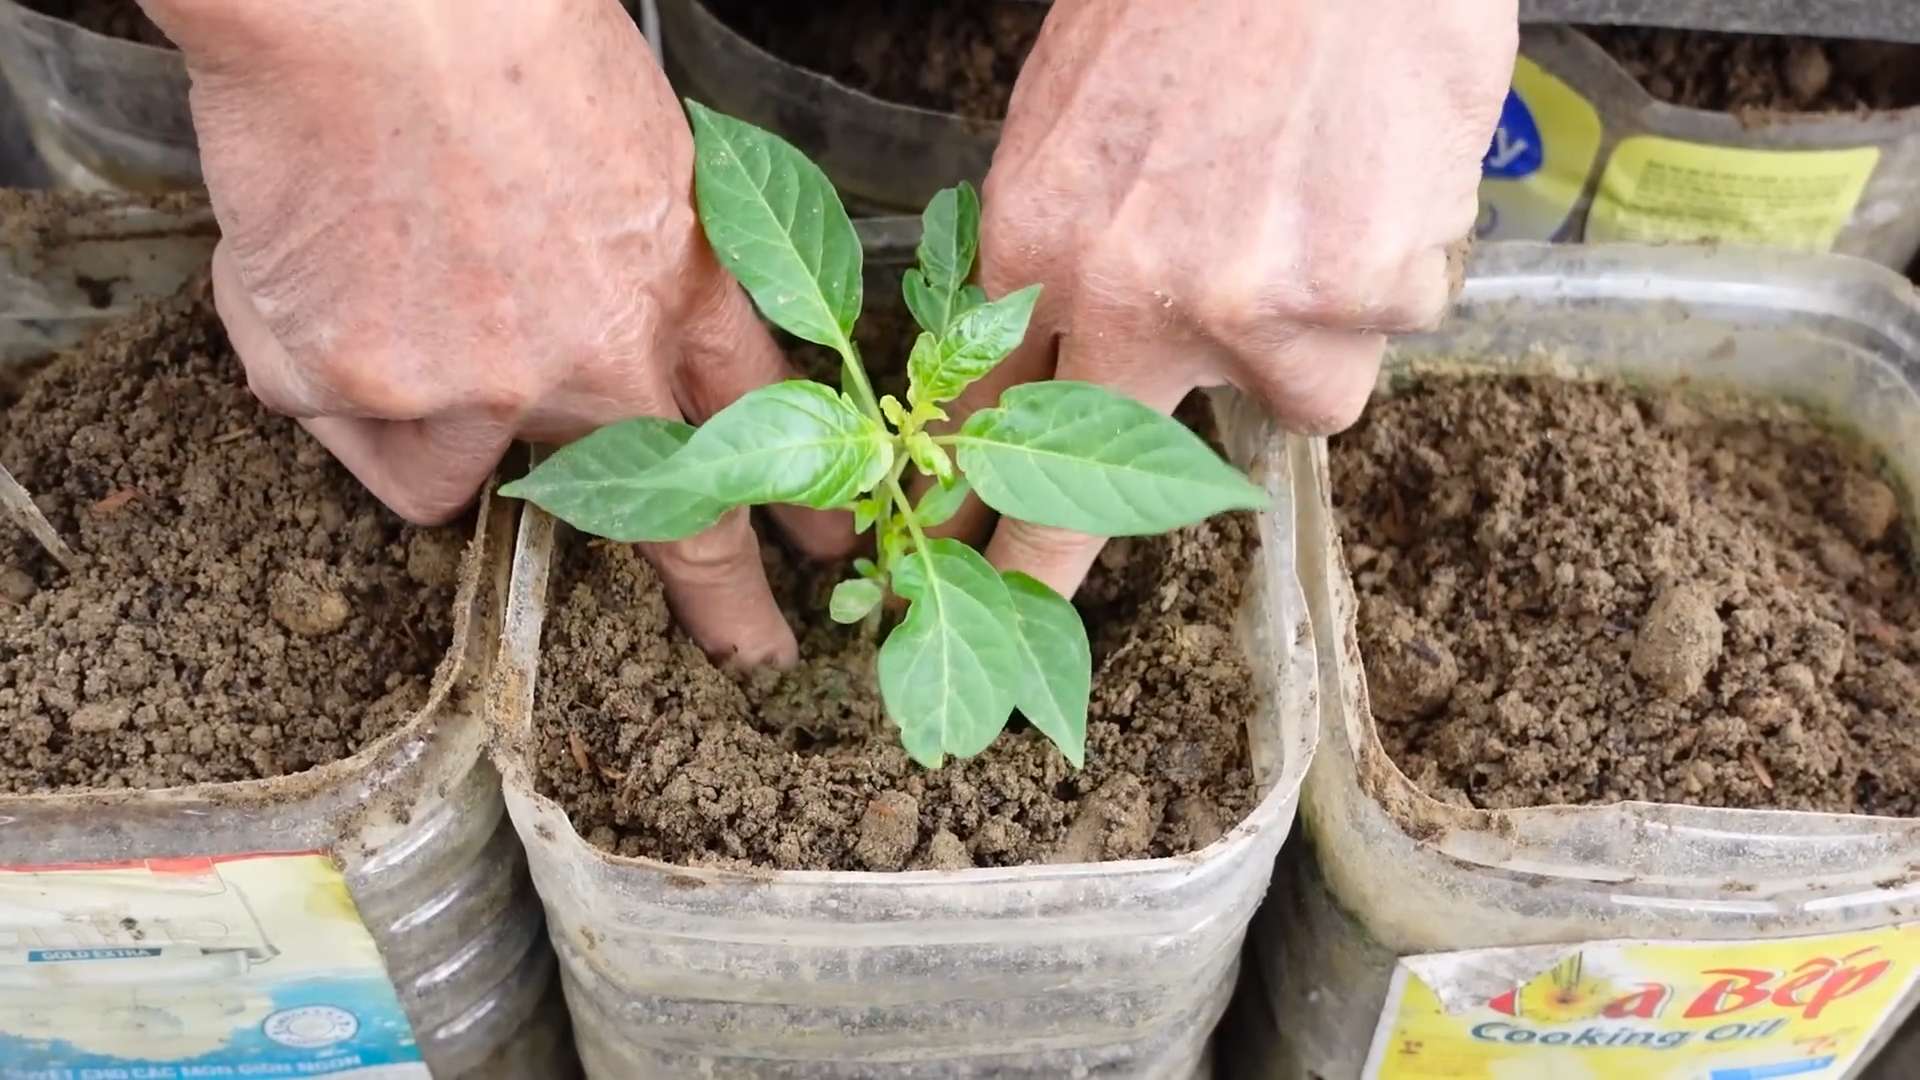
2. Remove the Seedlings from Their Containers: Gently remove the seedlings from their seed starting tray or nursery pots. If the roots are pot-bound (tightly circling the bottom of the pot), gently loosen them before planting.
3. Plant the Seedlings: Dig a hole in the potting mix that’s large enough to accommodate the root ball. Place the seedling in the hole and backfill with potting mix. Gently firm the soil around the base of the plant.
4. Water Thoroughly: Water the newly transplanted chilies thoroughly.
5. Add Support (Optional): If you’re growing taller chili varieties, insert stakes or cages into the pots to provide support.
Caring for Your Balcony Chili Garden
Now comes the fun part – watching your chilies grow and thrive! Here’s what you need to do to keep them happy:
* Watering: Water your chilies regularly, especially during hot, dry weather. The soil should be consistently moist, but not soggy. Check the soil moisture by sticking your finger into the soil. If the top inch or two feels dry, it’s time to water.
* Fertilizing: Fertilize your chilies every 2-3 weeks with a balanced fertilizer or a fertilizer specifically formulated for tomatoes and peppers. Follow the instructions on the fertilizer label.
* Sunlight: Chilies need at least 6-8 hours of sunlight per day. If your balcony doesn’t get enough sunlight, consider using grow lights.
* Pruning: Prune your chili plants to encourage bushier growth and more fruit production. Pinch off the tips of the branches to promote branching. Remove any yellowing or dead leaves.
* Pest Control: Keep an eye out for pests like aphids, spider mites, and whiteflies. If you spot any pests, treat them with insecticidal soap or neem oil. Follow the instructions on the product label.
* Pollination: Chilies are self-pollinating, but you can help them along by gently shaking the plants or using a small paintbrush to transfer pollen from one flower to another. This is especially important if you’re growing your chilies indoors or in a sheltered location where there aren’t many pollinators.
Harvesting Your Chilies
The moment you’ve been waiting for! Harvesting your chilies is the most rewarding part of the process.
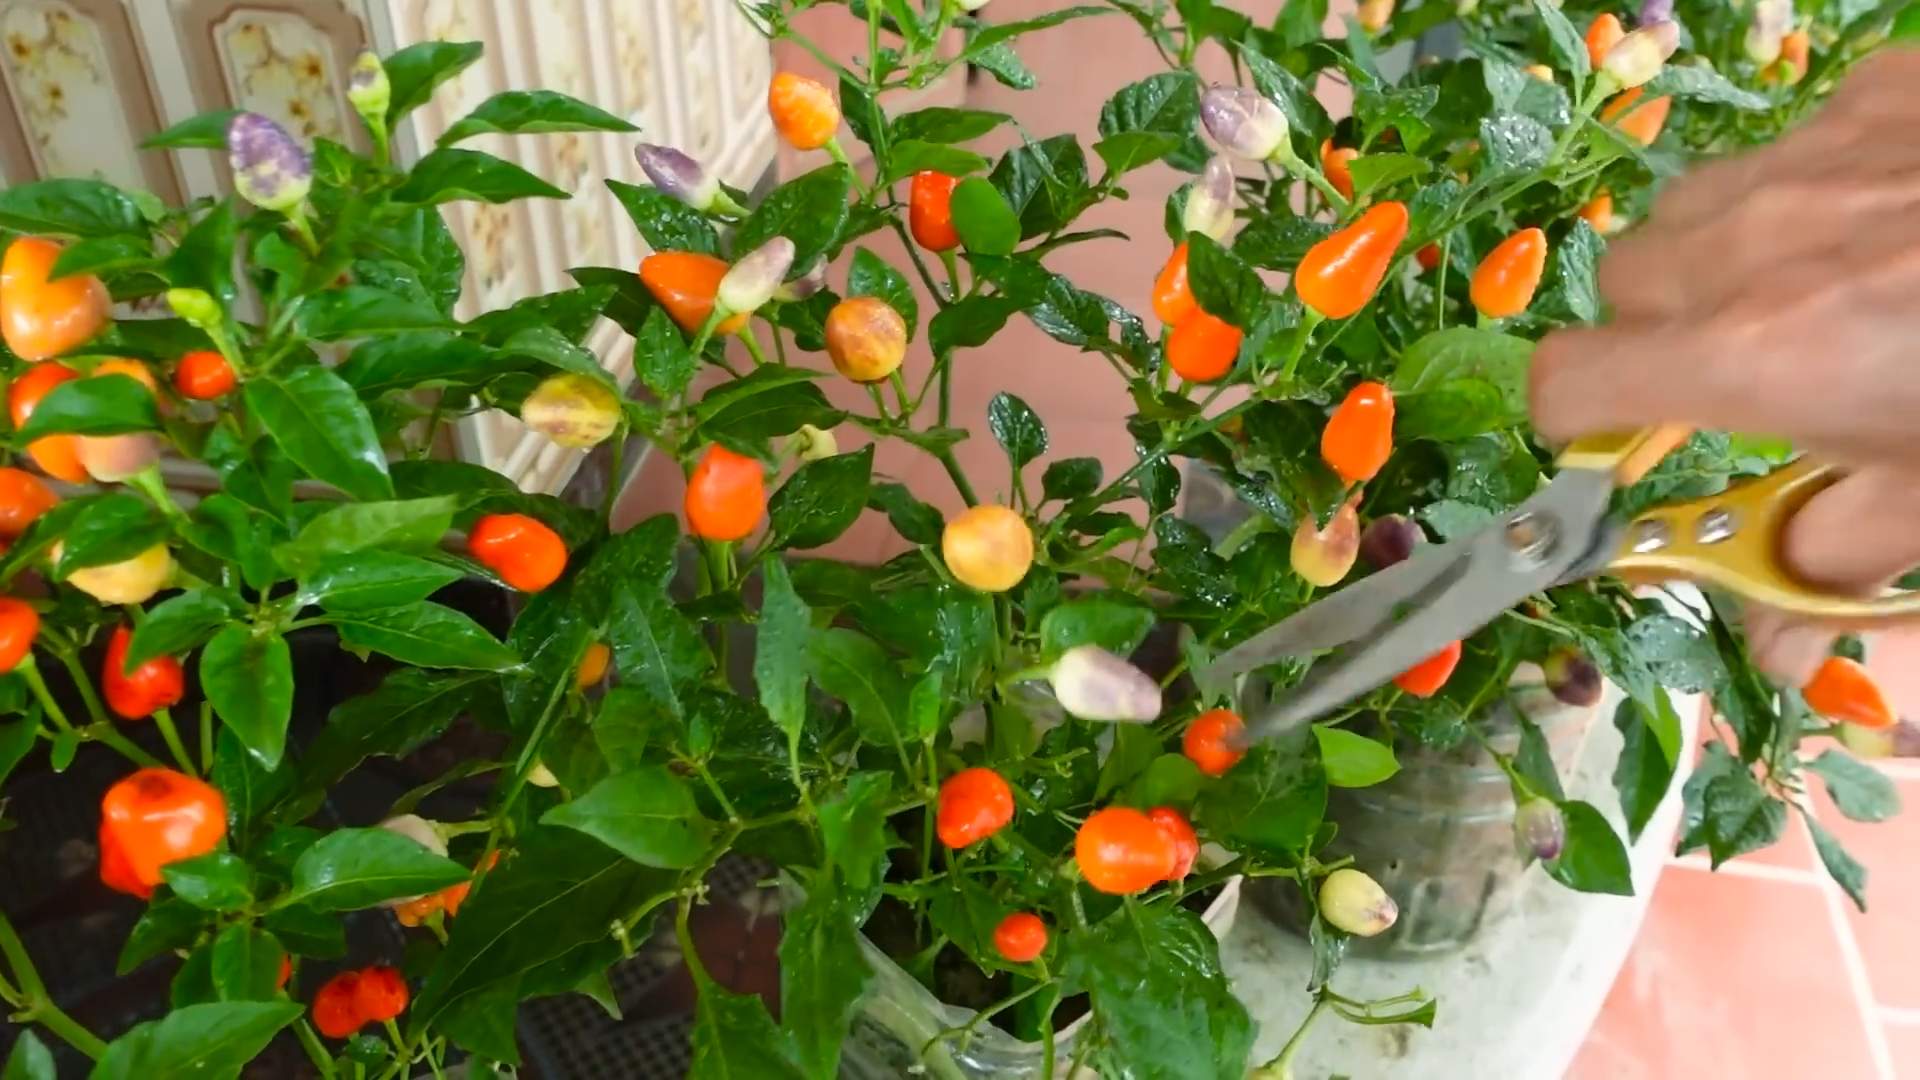
1. Know When to Harvest: The best time to harvest your chilies depends on the variety and your personal preference. Some chilies are best harvested when they’re green, while others are best harvested when they’re red or another color. Check the seed packet or plant label for specific harvesting instructions.
2. Use Pruning Shears or Scissors: Use pruning shears or scissors to cut the chilies from the plant. This will prevent you from damaging the plant.
3. Handle with Care: Be careful when handling chilies, especially hot varieties. Wear gloves to protect your hands from the oils that can cause skin irritation.
4. Enjoy Your Harvest! Use your fresh chilies in your favorite recipes, dry them for later use, or make your own chili powder or hot sauce.
Troubleshooting Common Problems
Even with the best care, you might encounter some problems along the way. Here are some common issues and how to fix them:
* Yellowing Leaves: This can be caused by overwatering, underwatering, nutrient deficiencies, or pests. Check the soil moisture and adjust your watering accordingly. Fertilize your plants regularly. Inspect the leaves for pests.
* Blossom End Rot: This is a calcium deficiency that causes the bottom of the chilies to rot. Add calcium to the soil by using a fertilizer that contains calcium or by adding crushed eggshells to the soil.
* Lack of Fruit Production: This can be caused by insufficient sunlight, poor pollination, or nutrient deficiencies. Make sure your plants are getting enough sunlight. Hand-pollinate the flowers. Fertilize your plants regularly.
* Pests: Aphids, spider mites, and whiteflies are common pests that can attack chili plants. Treat them with insecticidal soap or neem oil.
Enjoying Your Spicy Bounty!
And there you have it! With a
Conclusion
So, there you have it! Transforming your balcony into a vibrant chili garden is not only achievable, but incredibly rewarding. We’ve walked through the essential steps, from selecting the right chili varieties to providing the optimal growing conditions, and hopefully, you’re feeling inspired to embark on this spicy adventure.
Why is this DIY balcony chili gardening trick a must-try? Because it offers a unique blend of benefits that store-bought chilies simply can’t match. Imagine the satisfaction of harvesting your own fresh, organic chilies, knowing exactly where they came from and how they were grown. Think of the burst of flavor they’ll add to your dishes, far surpassing the often-bland taste of commercially produced peppers. And consider the sheer joy of nurturing a living thing, watching it grow and thrive under your care. Beyond the practical advantages, balcony chili gardening is a fantastic way to connect with nature, even in the heart of the city. It’s a therapeutic activity that can reduce stress, boost your mood, and add a touch of beauty to your living space.
But the best part? It’s completely customizable! Feel free to experiment with different chili varieties to find your perfect heat level. Try growing your chilies in decorative pots to add a splash of color to your balcony. Consider companion planting with herbs like basil or oregano to enhance the flavor of your chilies and deter pests naturally. You could even explore hydroponic or vertical gardening techniques for a more space-efficient approach. The possibilities are endless!
Don’t be afraid to get creative and tailor your balcony chili garden to your own preferences and needs. Perhaps you want to focus on growing only mild chilies for everyday cooking, or maybe you’re a heat seeker who wants to cultivate the hottest peppers in the world. Whatever your goal, balcony chili gardening offers a fun and fulfilling way to achieve it.
We truly believe that anyone can successfully grow chilies on their balcony, regardless of their gardening experience. With a little bit of planning, patience, and care, you can transform your outdoor space into a thriving chili haven.
So, what are you waiting for? Grab your pots, soil, and chili seeds, and get started today! We’re confident that you’ll be amazed by the results. And most importantly, we want to hear about your experience! Share your photos, tips, and stories with us in the comments below. Let’s create a community of balcony chili gardeners and inspire others to join the fun. We can’t wait to see what you grow!
Frequently Asked Questions (FAQ)
What are the best chili varieties to grow on a balcony?
Choosing the right chili varieties is crucial for successful balcony gardening. Compact varieties that don’t grow too tall are ideal. Some excellent choices include:
* **Thai Chilies:** These are small, prolific, and pack a good amount of heat. They’re perfect for adding a spicy kick to Asian dishes.
* **Jalapeños:** A classic choice for a reason. Jalapeños are relatively easy to grow and offer a moderate level of heat.
* **Serrano Peppers:** Similar to jalapeños but slightly hotter, serranos are a great option for those who like a bit more spice.
* **Habaneros:** If you’re a heat seeker, habaneros are a must-try. Be warned, though, they’re very spicy!
* **Poblano Peppers:** These mild peppers are perfect for stuffing or roasting.
* **Bell Peppers:** While technically not chilies, bell peppers are a great addition to any balcony garden and offer a sweet, mild flavor.
Consider your climate and personal preferences when selecting your chili varieties. Research the specific needs of each variety to ensure they thrive in your balcony environment.
How much sunlight do chili plants need?
Chili plants are sun-loving creatures and require at least 6-8 hours of direct sunlight per day to thrive. If your balcony doesn’t receive enough sunlight, you may need to supplement with grow lights. Position your chili plants in the sunniest spot on your balcony and rotate them regularly to ensure even exposure to sunlight.
What type of soil is best for growing chilies in pots?
Well-draining soil is essential for healthy chili plants. Avoid heavy clay soils that retain too much water, as this can lead to root rot. A good potting mix for chilies should be light, airy, and rich in organic matter. You can purchase a pre-made potting mix specifically designed for vegetables or create your own by mixing equal parts of compost, perlite, and peat moss.
How often should I water my chili plants?
Water your chili plants regularly, especially during hot, dry weather. The frequency of watering will depend on the size of your pots, the type of soil, and the weather conditions. Check the soil moisture regularly by sticking your finger into the soil. If the top inch of soil feels dry, it’s time to water. Avoid overwatering, as this can lead to root rot. Water deeply, allowing the water to drain out of the bottom of the pot.
Do I need to fertilize my chili plants?
Yes, chili plants benefit from regular fertilization. Use a balanced fertilizer specifically formulated for vegetables. Follow the instructions on the fertilizer package carefully. Fertilize your chili plants every 2-3 weeks during the growing season. You can also use organic fertilizers like compost tea or fish emulsion.
How do I protect my chili plants from pests and diseases?
Balcony chili gardens are generally less susceptible to pests and diseases than in-ground gardens. However, it’s still important to be vigilant and take preventative measures. Regularly inspect your plants for signs of pests or diseases. Common pests that may affect chili plants include aphids, spider mites, and whiteflies. You can control these pests with insecticidal soap or neem oil. Diseases like powdery mildew and fungal leaf spots can be prevented by ensuring good air circulation and avoiding overwatering.
When can I harvest my chilies?
The time it takes for chilies to mature will vary depending on the variety. Generally, chilies are ready to harvest when they reach their mature color and size. The color will depend on the variety, but common colors include green, red, yellow, and orange. Gently twist the chili from the plant, being careful not to damage the stem.
Can I grow chilies indoors?
Yes, you can grow chilies indoors, but you’ll need to provide them with adequate light. Place your chili plants near a sunny window or use grow lights to supplement natural light. Indoor chili plants may also require more frequent watering and fertilization.
How do I overwinter my chili plants?
If you live in a climate with cold winters, you can overwinter your chili plants indoors. Before the first frost, prune your plants back to about 6 inches tall and repot them into smaller pots. Bring them indoors and place them in a sunny location. Water sparingly during the winter months. In the spring, gradually acclimate your plants to outdoor conditions before transplanting them back into larger pots.
What if my chili plant is not producing any chilies?
There could be several reasons why your chili plant is not producing chilies. Common causes include insufficient sunlight, lack of pollination, and nutrient deficiencies. Ensure your plant is receiving at least 6-8 hours of direct sunlight per day. You can hand-pollinate your chili flowers by gently shaking the plant or using a small brush to transfer pollen from one flower to another. Fertilize your plant with a balanced fertilizer to provide it with the nutrients it needs to produce chilies.
We hope these FAQs have answered your questions about balcony chili gardening. Remember, gardening is a learning process, so don’t be afraid to experiment and have fun! Happy growing!
Leave a Comment