
Grow Cauliflower Successfully, even if you think you have a “brown thumb”! Let’s face it, the grocery store cauliflower can be bland and expensive. But imagine harvesting your own crisp, delicious, and perfectly white cauliflower head right from your backyard. Sounds amazing, right?
For centuries, cauliflower has been a staple in gardens and kitchens worldwide. Originating in the Mediterranean, this cruciferous vegetable has been cultivated and enjoyed for its unique flavor and nutritional benefits. From ancient Roman feasts to modern-day culinary creations, cauliflower has proven its versatility and staying power.
But growing cauliflower can sometimes feel like a daunting task. Pests, diseases, and unpredictable weather can all threaten your precious plants. That’s where these DIY tricks and hacks come in! I’m going to share my tried-and-true methods for ensuring a bountiful cauliflower harvest, regardless of your gardening experience. You’ll learn how to select the right varieties, prepare your soil, protect your plants from common problems, and ultimately, grow cauliflower successfully. Get ready to ditch the store-bought stuff and enjoy the satisfaction of homegrown goodness!
Growing Cauliflower: A DIY Guide to a Bountiful Harvest
Hey there, fellow gardening enthusiasts! I’m so excited to share my tried-and-true method for growing cauliflower. It might seem intimidating at first, but trust me, with a little patience and these tips, you’ll be harvesting beautiful, creamy heads of cauliflower in no time. Let’s dive in!
Choosing the Right Cauliflower Variety
Before we even think about planting, let’s talk varieties. Not all cauliflowers are created equal! Choosing the right one for your climate and growing season is crucial.
* Consider your climate: Are you in a warm or cool climate? Some varieties are more heat-tolerant than others.
* Think about your growing season: How long is your growing season? Early-maturing varieties are best for shorter seasons.
* Explore different colors: Did you know cauliflower comes in purple, orange, and even green? These add a fun twist to your garden and plate!
Some popular and reliable varieties include:
* Snowball Y Improved: A classic, early-maturing variety that produces medium-sized, pure white heads. Great for beginners!
* Cheddar: An orange variety that’s packed with beta-carotene. It’s also known for its mild flavor.
* Graffiti: A stunning purple variety that adds a pop of color to any dish. It’s also relatively easy to grow.
* Romanesco: This isn’t technically cauliflower, but it’s closely related and has a unique, fractal-like appearance. It’s a bit more challenging to grow, but the reward is worth it!
Preparing the Soil: The Foundation for Success
Cauliflower is a heavy feeder, meaning it needs nutrient-rich soil to thrive. Proper soil preparation is absolutely essential for a healthy and productive crop.
* Soil Testing: Before you do anything, test your soil! This will tell you its pH level and nutrient content. Cauliflower prefers a slightly acidic to neutral pH of 6.0 to 7.0.
* Amending the Soil: Based on your soil test results, amend the soil accordingly.
* Compost: Add plenty of compost to improve drainage, aeration, and nutrient content. I usually add a 2-3 inch layer and work it into the top 6-8 inches of soil.
* Manure: Well-rotted manure is another excellent soil amendment. It’s rich in nitrogen, which cauliflower loves.
* Fertilizer: If your soil is lacking in essential nutrients, consider adding a balanced fertilizer (e.g., 10-10-10). Follow the instructions on the fertilizer package carefully.
* Good Drainage: Cauliflower hates soggy soil. Make sure your soil drains well to prevent root rot. If you have heavy clay soil, consider adding sand or perlite to improve drainage.
Starting Cauliflower Seeds: Indoors vs. Outdoors
You can start cauliflower seeds either indoors or outdoors, depending on your climate and growing season.
* Starting Indoors: This is my preferred method, especially if you have a short growing season.
1. Sow seeds 6-8 weeks before the last expected frost. Use seed-starting trays or small pots filled with seed-starting mix.
2. Plant seeds about 1/4 inch deep. Gently water the soil and keep it moist but not soggy.
3. Provide warmth and light. Place the trays in a warm location (around 70-75°F) and provide plenty of light. A grow light is ideal, but a sunny windowsill can also work.
4. Harden off seedlings. Before transplanting seedlings outdoors, gradually acclimate them to outdoor conditions over a period of 7-10 days. Start by placing them in a sheltered location for a few hours each day, gradually increasing the amount of time they spend outdoors.
* Direct Sowing Outdoors: This is an option if you have a long growing season and mild climate.
1. Sow seeds directly into the garden after the last expected frost.
2. Plant seeds about 1/2 inch deep and 18-24 inches apart.
3. Keep the soil moist until the seeds germinate.
4. Thin seedlings to 18-24 inches apart once they have a few true leaves.
Transplanting Cauliflower Seedlings: Giving Them Room to Grow
Once your seedlings are ready, it’s time to transplant them into the garden.
1. Choose a sunny location. Cauliflower needs at least 6 hours of sunlight per day.
2. Prepare the planting holes. Dig holes that are slightly larger than the root balls of your seedlings. Space the holes 18-24 inches apart.
3. Gently remove the seedlings from their containers. Be careful not to damage the roots.
4. Place the seedlings in the holes and backfill with soil. Gently firm the soil around the base of the plants.
5. Water thoroughly. This will help settle the soil and encourage root growth.
6. Mulch around the plants. Mulch helps retain moisture, suppress weeds, and regulate soil temperature. I like to use straw or wood chips.
Caring for Your Cauliflower Plants: Watering, Fertilizing, and Pest Control
Proper care is essential for healthy cauliflower plants and a bountiful harvest.
* Watering: Cauliflower needs consistent moisture, especially during head formation. Water deeply and regularly, especially during dry spells. Aim for about 1-1.5 inches of water per week.
* Fertilizing: Side-dress your cauliflower plants with a nitrogen-rich fertilizer every 2-3 weeks. This will help promote healthy growth and head development. I like to use fish emulsion or compost tea.
* Weed Control: Keep the area around your cauliflower plants free of weeds. Weeds compete with cauliflower for water and nutrients. Mulching helps suppress weeds, but you may still need to hand-pull them occasionally.
* Pest Control: Cauliflower is susceptible to several pests, including cabbage worms, aphids, and flea beetles.
* Cabbage Worms: These green caterpillars can quickly devour cauliflower leaves. Hand-picking them off the plants is an effective method of control. You can also use Bacillus thuringiensis (Bt), a natural insecticide that’s safe for humans and pets.
* Aphids: These tiny insects suck the sap from cauliflower leaves, causing them to curl and yellow. Spraying the plants with a strong stream of water can dislodge aphids. You can also use insecticidal soap or neem oil.
* Flea Beetles: These tiny beetles chew small holes in cauliflower leaves. Covering the plants with row covers can prevent flea beetles from reaching them. You can also use insecticidal soap or neem oil.
Blanching Cauliflower: Achieving That Perfect White Head
Blanching is the process of covering the developing cauliflower head to prevent it from turning yellow or brown. This is especially important for white varieties.
1. When the head is about 2-3 inches in diameter, gather the outer leaves and tie them together over the head with twine or rubber bands. This will block sunlight and keep the head white.
2. Check the head regularly. It should be ready to harvest in about 7-12 days after blanching.
Some newer varieties are self-blanching, meaning their leaves naturally curl inward to protect the head. If you’re growing one of these varieties, you don’t need to manually blanch them.
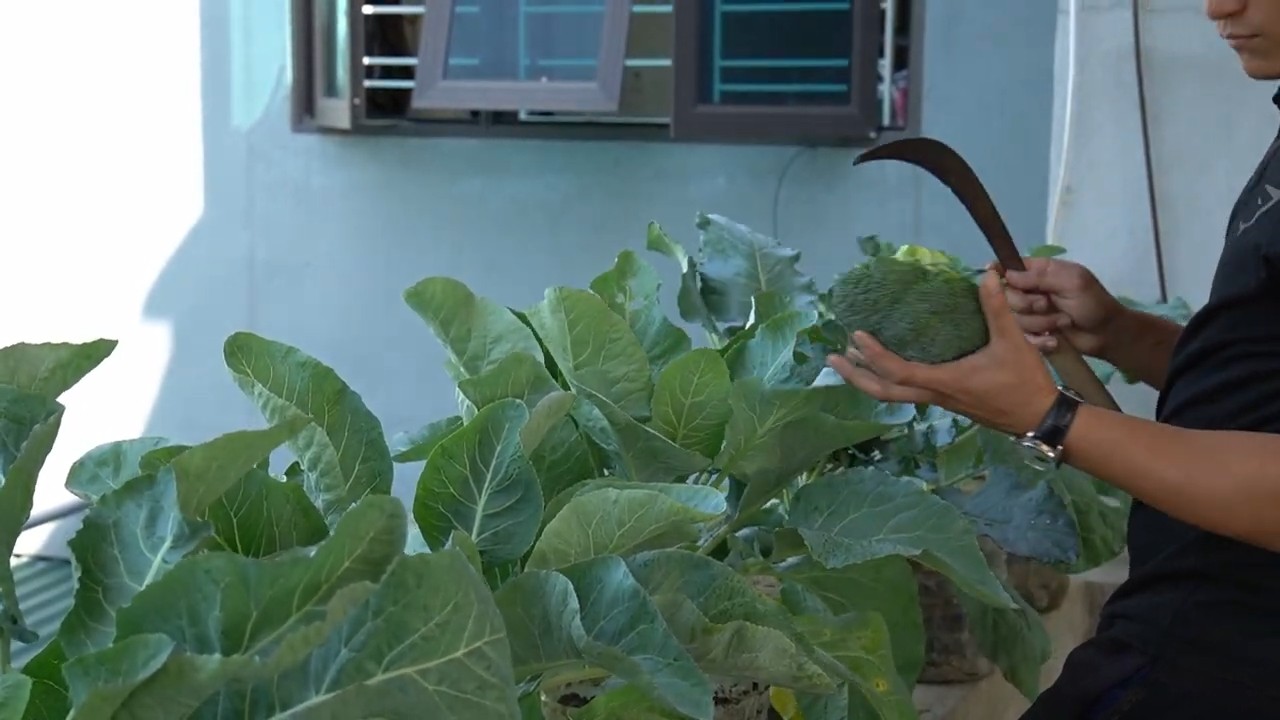
Harvesting Cauliflower: Knowing When It’s Ready
Knowing when to harvest cauliflower is key to getting the best flavor and texture.
* Harvest when the head is firm, compact, and about 6-8 inches in diameter. The exact size will depend on the variety.
* Check the head regularly. Cauliflower can quickly become overripe, so it’s important to harvest it at the right time.
* Cut the head from the plant with a sharp knife. Leave a few leaves attached to protect the head.
* Store cauliflower in the refrigerator for up to a week.
Troubleshooting Common Cauliflower Problems
Even with the best care, you may encounter some problems while growing cauliflower. Here are a few common issues and how to address them:
* Buttoning: This is when the cauliflower head forms prematurely and remains small. It’s often caused by stress, such as lack of water or nutrients. Make sure your plants are getting enough water and fertilizer.
* Ricey Heads: This is when the cauliflower head has a loose, grainy texture. It’s often caused by hot weather or inconsistent watering. Try to provide shade for your plants during hot weather and water them regularly.
* Clubroot: This is a soilborne disease that causes swollen, distorted roots.
Conclusion
So, there you have it! Mastering the art of growing cauliflower successfully doesn’t have to be an intimidating endeavor. By implementing these simple yet effective DIY tricks, you can transform your garden into a cauliflower haven, yielding crisp, delicious heads that rival anything you’d find at the grocery store. We’ve covered everything from soil preparation and seedling selection to pest control and proper harvesting techniques. Remember, patience and observation are your best allies in this gardening journey.
This isn’t just about saving money; it’s about connecting with your food source, understanding the nuances of nature, and experiencing the immense satisfaction of nurturing something from seed to table. Imagine the pride you’ll feel serving a dish featuring cauliflower you grew yourself!
But the journey doesn’t end here. Feel free to experiment with different cauliflower varieties. Try growing purple, orange, or Romanesco cauliflower for a vibrant and visually stunning addition to your garden. Consider companion planting to deter pests naturally. Marigolds, for example, are known to repel many common cauliflower predators. You could also explore different methods of pest control, such as using row covers or introducing beneficial insects.
Don’t be afraid to adapt these techniques to your specific climate and growing conditions. What works in one region might need tweaking in another. The key is to observe your plants closely, learn from your mistakes, and celebrate your successes.
We’ve provided you with a solid foundation, but the real magic happens when you put these principles into practice. So, grab your gardening gloves, prepare your soil, and embark on your cauliflower-growing adventure! We are confident that with a little effort and these DIY tricks, you’ll be harvesting beautiful, healthy cauliflower in no time.
We are eager to hear about your experiences! Share your successes, your challenges, and any variations you’ve tried in the comments below. Let’s create a community of cauliflower enthusiasts, sharing knowledge and inspiring each other to grow the best cauliflower possible. Your insights could be invaluable to other gardeners just starting out. Let us know what worked best for you, what challenges you faced, and any unique tips you discovered along the way. Together, we can unlock the secrets to growing cauliflower successfully and enjoy the fruits (or rather, vegetables) of our labor!
Frequently Asked Questions (FAQ)
1. What is the best time of year to start growing cauliflower?
The best time to start growing cauliflower depends on your climate. Cauliflower thrives in cool weather, so it’s generally best to plant it in the spring or fall. For a spring crop, start seeds indoors 6-8 weeks before the last expected frost. For a fall crop, start seeds indoors in mid-summer. In warmer climates, you can grow cauliflower throughout the winter. The key is to avoid planting during the hottest months of the year, as high temperatures can cause the heads to bolt (go to seed) prematurely. Check your local planting calendar for specific dates tailored to your region.
2. What kind of soil does cauliflower need?
Cauliflower requires rich, well-drained soil with a pH between 6.0 and 7.0. Amend your soil with plenty of organic matter, such as compost or well-rotted manure, before planting. This will improve drainage, water retention, and nutrient availability. Cauliflower is a heavy feeder, so it’s also a good idea to incorporate a slow-release fertilizer into the soil at planting time. A soil test can help you determine the specific nutrient needs of your soil.
3. How much sunlight does cauliflower need?
Cauliflower needs at least 6 hours of direct sunlight per day to thrive. Choose a planting location that receives full sun for most of the day. If you live in a particularly hot climate, some afternoon shade may be beneficial to prevent the heads from overheating.
4. How often should I water cauliflower?
Cauliflower needs consistent moisture to produce large, healthy heads. Water deeply and regularly, especially during dry periods. Aim to keep the soil consistently moist but not waterlogged. Mulching around the plants can help retain moisture and suppress weeds. A good rule of thumb is to water when the top inch of soil feels dry to the touch.
5. What are some common pests and diseases that affect cauliflower?
Cauliflower is susceptible to a variety of pests and diseases, including cabbage worms, aphids, flea beetles, clubroot, and black rot. Regularly inspect your plants for signs of infestation or disease. Use organic pest control methods, such as insecticidal soap or neem oil, to control pests. Practice crop rotation to prevent soilborne diseases. Ensure good air circulation around the plants to reduce the risk of fungal diseases. Row covers can also be used to protect plants from pests.
6. How do I prevent cauliflower from bolting?
Bolting, or premature flowering, is a common problem with cauliflower. It’s usually caused by stress, such as high temperatures, drought, or nutrient deficiencies. To prevent bolting, choose heat-tolerant varieties, water regularly, fertilize properly, and provide shade during the hottest part of the day.
7. How do I blanch cauliflower?
Blanching is the process of covering the developing cauliflower head to protect it from sunlight. This helps to keep the head white and tender. To blanch cauliflower, simply tie the outer leaves together over the head when it reaches about 2-3 inches in diameter. Use twine or rubber bands to secure the leaves. Check the head regularly and harvest when it reaches the desired size. Some varieties are self-blanching, meaning their leaves naturally curl inward to protect the head.
8. How do I know when cauliflower is ready to harvest?
Cauliflower is ready to harvest when the head is firm, compact, and reaches the desired size. The size will vary depending on the variety, but most heads are ready to harvest when they are 6-8 inches in diameter. The head should be white or the color of the variety you are growing (purple, orange, etc.). Use a sharp knife to cut the head from the plant, leaving a few leaves attached.
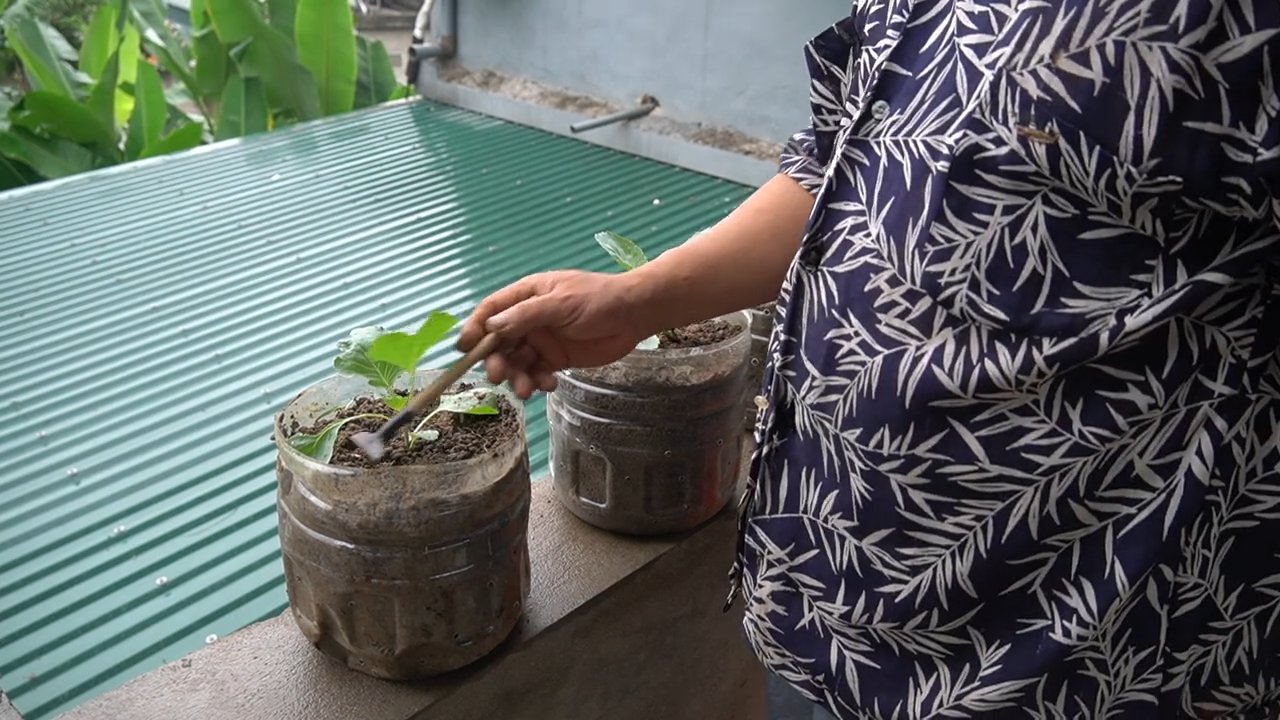
9. Can I grow cauliflower in containers?
Yes, you can grow cauliflower in containers, but you’ll need to choose a large container (at least 5 gallons) and use a high-quality potting mix. Container-grown cauliflower will need more frequent watering and fertilizing than plants grown in the ground. Choose a compact variety that is well-suited for container gardening.
10. What are some good companion plants for cauliflower?
Companion planting can help to deter pests, attract beneficial insects, and improve the overall health of your cauliflower plants. Some good companion plants for cauliflower include marigolds, nasturtiums, rosemary, thyme, and garlic. These plants can help to repel common cauliflower pests, such as cabbage worms and aphids.

Leave a Comment