
Grow Coconut Tree at Home? Absolutely! Imagine sipping fresh coconut water straight from a tree you nurtured yourself, right in your backyard. Sounds like a tropical dream, doesn’t it? Well, it’s more achievable than you might think! For centuries, the coconut palm has been a symbol of tropical paradise, providing sustenance, shelter, and even spiritual significance to cultures across the globe. From the shores of Southeast Asia to the Caribbean islands, the coconut tree has been revered and utilized in countless ways.
But you don’t need to live on a tropical island to enjoy the benefits of this amazing plant. In this DIY guide, I’m going to share some simple yet effective tricks and hacks to help you grow coconut tree at home, even if you’re a beginner gardener. Many people believe that growing a coconut tree is difficult, but with the right knowledge and a little bit of patience, you can successfully cultivate your own little piece of paradise.
Why should you bother? Because beyond the delicious fruit and refreshing water, growing your own coconut tree is incredibly rewarding. It’s a connection to nature, a sustainable source of food, and a beautiful addition to your landscape. Plus, who wouldn’t want to impress their friends with a homegrown coconut? So, let’s dive in and discover the secrets to successfully growing your own coconut tree at home!
Growing Your Own Coconut Tree: A DIY Guide
Okay, so you want to grow a coconut tree at home? Awesome! It’s a rewarding project, though it does require patience and the right conditions. I’m going to walk you through everything you need to know, from selecting the right coconut to nurturing your little palm into a thriving tree. Let’s get started!
Choosing the Right Coconut
This is the most crucial step! You can’t just grab any coconut from the grocery store. We need one that’s viable, meaning it’s capable of germination.
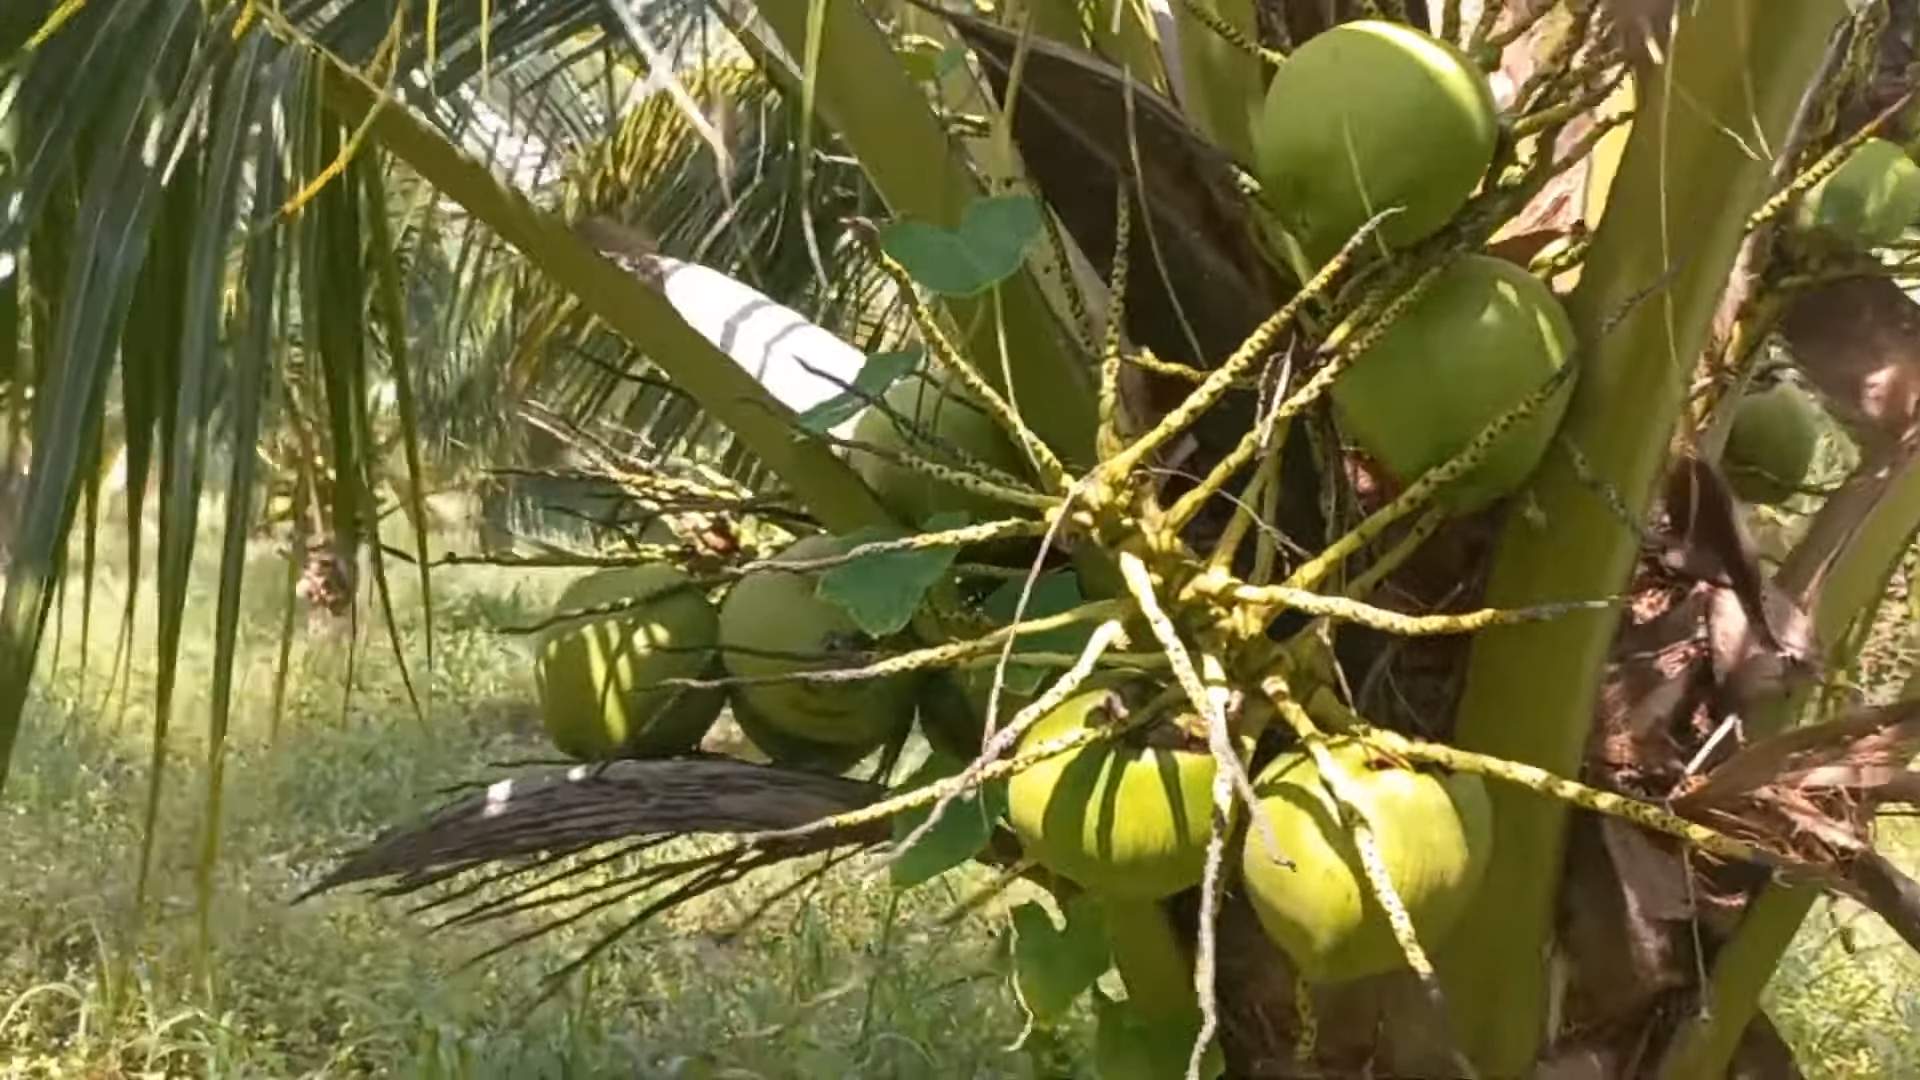
* Look for a mature, brown coconut: Avoid the young, green coconuts. We want a mature one that’s ready to sprout.
* Check for water sloshing inside: Give the coconut a shake. You should hear water moving around. This indicates that the coconut still has its endosperm, which is essential for the seedling’s growth.
* Inspect for damage: Avoid coconuts with cracks, bruises, or signs of mold. A healthy coconut is key.
* Consider buying a sprouting coconut: Some nurseries or online retailers sell coconuts that have already started to sprout. This can significantly increase your chances of success. If you can find one, grab it! It’ll save you some time and effort.
Preparing the Coconut for Germination
Alright, you’ve got your coconut. Now, let’s get it ready to sprout. This process involves creating the ideal environment for germination.
1. Soaking the Coconut: Submerge the coconut in a bucket of lukewarm water for 2-3 days. This helps to rehydrate the husk and soften it, making it easier for the sprout to emerge. Change the water daily to prevent bacterial growth. I usually use tap water, but if your tap water is heavily chlorinated, consider using filtered water.
2. Choosing a Germination Method: You have a couple of options here. I’ll explain both, and you can choose the one that works best for you.
* The Bag Method: This is my preferred method because it’s simple and effective.
1. Place the soaked coconut in a large, clear plastic bag.
2. Add a handful of moist (not soaking wet!) coco coir or peat moss to the bag. This will help retain moisture around the coconut.
3. Seal the bag loosely, leaving a small opening for air circulation.
4. Place the bag in a warm, dark location, like a closet or under the sink.
* The Potting Mix Method: This method involves planting the coconut directly in a pot.
1. Fill a large pot (at least 12 inches in diameter) with well-draining potting mix. A mix of coco coir, perlite, and vermiculite works well.
2. Bury the coconut halfway in the potting mix, with the “eyes” (the three soft spots on the coconut) facing upwards.
3. Water the potting mix thoroughly, making sure it’s evenly moist.
3. Maintaining the Germination Environment: Regardless of the method you choose, maintaining the right environment is crucial.
* Temperature: Coconuts need warmth to germinate. Aim for a temperature between 85-95°F (29-35°C). If you live in a cooler climate, you may need to use a heat mat to provide supplemental warmth.
* Moisture: Keep the coconut and its surrounding medium consistently moist, but not waterlogged. Check the moisture level regularly and water as needed.
* Patience: Germination can take anywhere from 2-6 months, so be patient! Don’t give up if you don’t see results immediately.
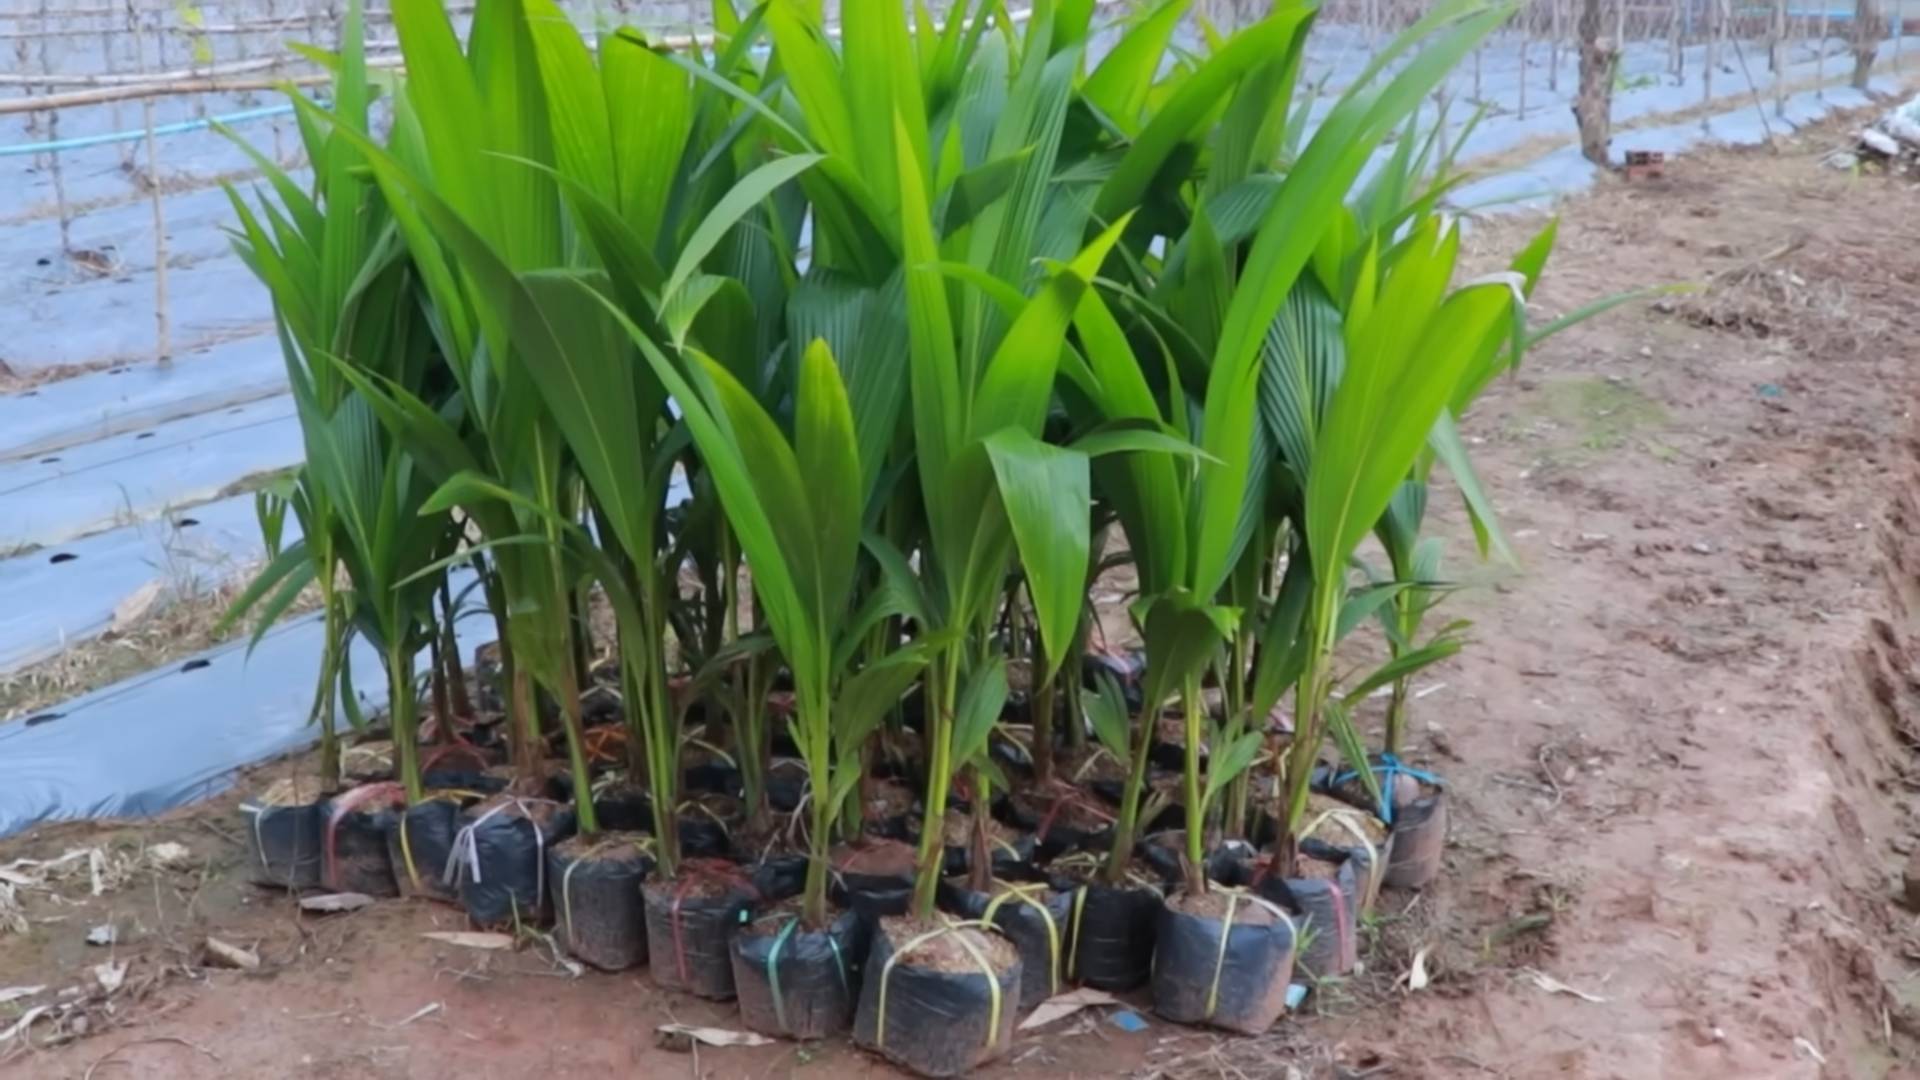
Transplanting the Sprouted Coconut
Hooray! You’ve got a sprout! Now it’s time to transplant your little coconut palm into a larger pot.
1. Choosing the Right Pot: Select a pot that’s at least 18 inches in diameter and 18 inches deep. Coconuts have extensive root systems, so they need plenty of room to grow. Make sure the pot has drainage holes to prevent waterlogging.
2. Preparing the Potting Mix: Use a well-draining potting mix that’s rich in nutrients. A mix of coco coir, perlite, vermiculite, and compost is ideal. You can also add some slow-release fertilizer to provide a steady supply of nutrients.
3. Transplanting the Seedling: Gently remove the sprouted coconut from the bag or pot. Be careful not to damage the roots. Place the coconut in the center of the new pot and fill in around it with potting mix. The top of the coconut should be slightly exposed.
4. Watering and Fertilizing: Water the newly transplanted coconut thoroughly, making sure the potting mix is evenly moist. Fertilize every 2-3 months with a balanced fertilizer. Follow the instructions on the fertilizer package.
Caring for Your Coconut Palm
Now that your coconut palm is in its new home, it’s time to provide it with the care it needs to thrive.
1. Sunlight: Coconut palms need plenty of sunlight, at least 6-8 hours per day. Place your palm in a sunny location, such as a south-facing window or a patio. If you live in a very hot climate, you may need to provide some afternoon shade to prevent the leaves from scorching.
2. Watering: Water your coconut palm regularly, especially during the growing season (spring and summer). Allow the top inch of soil to dry out between waterings. Overwatering can lead to root rot, so be careful not to overdo it.
3. Humidity: Coconut palms thrive in humid environments. If you live in a dry climate, you may need to increase the humidity around your palm. You can do this by misting the leaves regularly, placing a humidifier nearby, or setting the pot on a tray filled with pebbles and water.
4. Fertilizing: Fertilize your coconut palm every 2-3 months with a balanced fertilizer. Look for a fertilizer that’s specifically formulated for palms. Follow the instructions on the fertilizer package.
5. Pruning: Prune away any dead or yellowing leaves to keep your coconut palm looking its best. Use sharp, clean pruning shears to avoid spreading disease.
6. Pest and Disease Control: Keep an eye out for pests and diseases. Common pests that can affect coconut palms include spider mites, scale, and mealybugs. Treat infestations promptly with insecticidal soap or neem oil. Root rot is a common disease that can affect coconut palms, especially if they’re overwatered. Prevent root rot by ensuring that your potting mix is well-draining and by avoiding overwatering.
Overwintering Your Coconut Palm (If Necessary)
If you live in a climate with cold winters, you’ll need to bring your coconut palm indoors during the winter months.
1. Acclimatizing Your Palm: Before bringing your palm indoors, gradually acclimatize it to the lower light levels and drier air. Start by bringing it indoors for a few hours each day, gradually increasing the amount of time it spends indoors.
2. Providing Adequate Light: Place your coconut palm in a sunny location indoors, such as a south-facing window. If you don’t have enough natural light, you may need to supplement with grow lights.
3. Maintaining Humidity: Indoor air tends to be drier than outdoor air, so you’ll need to increase the humidity around your coconut palm. You can do this by misting the leaves regularly, placing a humidifier nearby, or setting the pot on a tray filled with pebbles and water.
4. Watering: Water your coconut palm less frequently during the winter months, as it will be growing more slowly. Allow the top inch of soil to dry out between waterings.
5. Fertilizing: Don’t fertilize your coconut palm during the winter months, as it won’t need as many nutrients.
6. Returning Your Palm Outdoors: Once the weather warms up in the spring, gradually acclimatize your coconut palm back to outdoor conditions. Start by placing it outdoors for a few hours each day, gradually increasing the amount of time it spends outdoors.
Potential Challenges and Troubleshooting
Growing a coconut tree isn’t always a walk in the park. Here are some common challenges you might encounter and how to address them:
* Coconut Doesn’t Sprout: Patience is key! If it’s been several months and your coconut hasn’t sprouted, double-check the temperature and moisture levels. The coconut might also be non-viable. Try starting with a new coconut.
* Yellowing Leaves: This could be a sign of overwatering, underwatering, nutrient deficiency, or pest infestation. Check the soil moisture, fertilize if needed, and inspect for pests.
* Brown Leaf Tips: This is often caused by dry air. Increase the humidity around your palm.
* Slow Growth: Coconut palms need plenty of
Conclusion
So, there you have it! Growing your own coconut tree at home might seem like a tropical dream reserved for those living in balmy climates, but with this simple DIY trick, it’s more attainable than you think. We’ve demystified the process, breaking it down into manageable steps that anyone, regardless of their gardening experience, can follow.
Why is this DIY trick a must-try? Because it offers a unique and rewarding experience. Imagine the satisfaction of nurturing a tiny coconut sprout into a thriving tree, right in your own backyard or even indoors! Beyond the personal fulfillment, you’re also contributing to a greener environment and potentially enjoying fresh coconuts in the future. Plus, a coconut tree adds a touch of exotic beauty to any space.
But the benefits don’t stop there. This method is cost-effective, utilizing readily available materials and minimizing the need for expensive gardening equipment. It’s also a fantastic learning opportunity, allowing you to connect with nature and understand the fascinating life cycle of a coconut tree.
Now, let’s talk about variations and suggestions. While we’ve outlined a specific method, feel free to experiment and adapt it to your own environment and resources. For instance, if you live in a colder climate, consider using a grow light to provide supplemental warmth and light, especially during the initial stages of germination. You can also explore different types of potting mixes to find what works best for your coconut. Some gardeners prefer a mix of coco coir, perlite, and vermicast for optimal drainage and aeration.
Another variation involves the type of coconut you choose. While a mature, brown coconut is generally recommended, you can also try using a sprouted coconut, which will significantly reduce the germination time. Just make sure the sprout is healthy and vigorous.
Remember to be patient and persistent. Growing a coconut tree takes time and effort, but the rewards are well worth it. Don’t be discouraged if you encounter setbacks along the way. Just keep learning, adapting, and providing your coconut with the care it needs.
We wholeheartedly encourage you to try this DIY trick and embark on your own coconut-growing adventure. It’s a fun, educational, and ultimately rewarding experience that will bring a touch of the tropics to your home.
And most importantly, we want to hear about your journey! Share your experiences, successes, and challenges in the comments section below. Let’s create a community of coconut enthusiasts who can learn from each other and inspire others to grow their own coconut trees at home. Don’t forget to share pictures of your coconut sprouts and saplings! Let’s see those beautiful, green leaves reaching for the sky. This **DIY coconut tree** project is more than just a gardening endeavor; it’s a chance to connect with nature, learn new skills, and create something truly special. So, grab a coconut, follow our guide, and get ready to watch your own tropical paradise take root!
Frequently Asked Questions (FAQ)
1. What kind of coconut should I use?
The best type of coconut to use for growing a coconut tree is a mature, brown coconut that still has its husk intact. Look for coconuts that feel heavy for their size and don’t have any cracks or soft spots. You can find these at most grocery stores or Asian markets. Avoid using processed or treated coconuts, as they may not germinate. A sprouted coconut is also a great option and will germinate faster.
2. How long does it take for a coconut to sprout?
Germination time can vary depending on several factors, including the coconut’s freshness, the temperature, and the humidity. Generally, it can take anywhere from 2 to 6 months for a coconut to sprout. Be patient and consistent with your watering and care, and you’ll eventually see a sprout emerge. Maintaining a warm and humid environment will help speed up the process.
3. What kind of soil should I use?
Coconut trees prefer well-draining soil that is rich in organic matter. A good potting mix would be a combination of coco coir, perlite, and vermicast. This mixture provides excellent drainage, aeration, and nutrient retention. Avoid using heavy clay soils, as they can become waterlogged and inhibit root growth. You can also add some compost or aged manure to the soil to provide additional nutrients.
4. How often should I water my coconut?
Water your coconut regularly, especially during the warmer months. The soil should be kept consistently moist but not waterlogged. Allow the top inch of soil to dry out before watering again. In the winter, you can reduce the watering frequency. Overwatering can lead to root rot, so it’s important to ensure proper drainage.
5. How much sunlight does a coconut tree need?
Coconut trees thrive in full sunlight, requiring at least 6-8 hours of direct sunlight per day. If you’re growing your coconut tree indoors, place it near a sunny window or use a grow light to provide supplemental lighting. Insufficient sunlight can lead to stunted growth and yellowing leaves.
6. What temperature is ideal for growing a coconut tree?
Coconut trees prefer warm temperatures, ideally between 70°F and 90°F (21°C and 32°C). They are sensitive to frost and cold temperatures, so it’s important to protect them from freezing conditions. If you live in a colder climate, consider growing your coconut tree in a container so you can bring it indoors during the winter months.
7. How do I fertilize my coconut tree?
Fertilize your coconut tree regularly with a balanced fertilizer that is specifically formulated for palm trees. Follow the instructions on the fertilizer packaging for application rates and frequency. You can also use organic fertilizers, such as compost tea or fish emulsion, to provide essential nutrients. Avoid over-fertilizing, as this can damage the roots.
8. Can I grow a coconut tree indoors?
Yes, you can grow a coconut tree indoors, but it will require some extra care. Choose a large pot with good drainage and use a well-draining potting mix. Provide plenty of sunlight or use a grow light to supplement natural light. Maintain a warm and humid environment by misting the leaves regularly or using a humidifier. Be aware that indoor coconut trees may not grow as large or produce coconuts as readily as those grown outdoors.
9. What are some common problems with growing coconut trees?
Some common problems with growing coconut trees include root rot, nutrient deficiencies, and pest infestations. Root rot can be prevented by ensuring proper drainage and avoiding overwatering. Nutrient deficiencies can be addressed by fertilizing regularly with a balanced fertilizer. Pests, such as spider mites and scale, can be controlled with insecticidal soap or neem oil.
10. How do I transplant my coconut tree?
When your coconut tree outgrows its current pot, it’s time to transplant it to a larger container. Choose a pot that is at least twice the size of the current pot and fill it with a well-draining potting mix. Gently remove the coconut tree from its old pot and place it in the new pot. Backfill with soil and water thoroughly. Avoid damaging the roots during the transplanting process.
11. Will my coconut tree produce coconuts?
Whether your coconut tree will produce coconuts depends on several factors, including the climate, the variety of coconut, and the overall health of the tree. Coconut trees typically take 5-7 years to begin producing coconuts. In colder climates, it may be difficult to get a coconut tree to produce coconuts, even with proper care.
12. How do I know if my coconut is ready to harvest?
Coconuts are typically ready to harvest when they are about 6-8 months old. The husk will turn from green to brown, and the coconut will feel heavy and full of liquid. You can also shake the coconut to listen for the sound of the liquid inside. If the liquid sounds sloshy, the coconut is likely ready to harvest.
Leave a Comment