
Grow Collard Greens Easily, even if you think you don’t have a green thumb! Have you ever dreamed of stepping outside your back door and harvesting fresh, vibrant greens for a delicious and healthy meal? It’s more attainable than you think, and I’m here to show you how. For generations, collard greens have been a staple in Southern cuisine, symbolizing prosperity and good fortune. Their rich history is intertwined with resilience and resourcefulness, as they provided essential nutrients during challenging times.
But you don’t have to be a Southerner to appreciate the incredible benefits of growing your own collard greens. In today’s world, where we’re all looking for ways to eat healthier, save money, and connect with nature, learning to grow collard greens easily at home is a game-changer. Imagine the satisfaction of knowing exactly where your food comes from, free from harmful pesticides and bursting with flavor. Plus, these leafy greens are packed with vitamins and minerals, making them a nutritional powerhouse.
This DIY guide will provide you with simple, step-by-step instructions and insider tips to ensure a bountiful harvest, even if you’re a complete beginner. I’ll share my favorite hacks for pest control, soil preparation, and harvesting techniques, so you can enjoy fresh, homegrown collard greens all season long. Get ready to transform your backyard into a thriving garden and experience the joy of growing your own food!
Kräftige Collard Greens: Dein DIY-Guide für eine reiche Ernte
Collard Greens, oder Grünkohl, sind nicht nur super gesund, sondern auch überraschend einfach anzubauen! Ich zeige dir, wie du mit ein paar einfachen Schritten und Tricks eine üppige Ernte erzielen kannst, egal ob du einen großen Garten oder nur einen kleinen Balkon hast. Los geht’s!
Die Vorbereitung: Der Schlüssel zum Erfolg
Bevor wir mit dem Pflanzen loslegen, ist eine gute Vorbereitung das A und O. Das betrifft die Auswahl des richtigen Standorts, die Vorbereitung des Bodens und die Auswahl der passenden Collard Greens-Sorte.
Der perfekte Standort
* Sonnenschein ist Trumpf: Collard Greens lieben die Sonne! Wähle einen Standort, der mindestens 6 Stunden direktes Sonnenlicht pro Tag bekommt. Je mehr Sonne, desto besser!
* Schutz vor Wind: Ein windgeschützter Platz ist ideal, da starker Wind die Blätter beschädigen kann. Eine Mauer, ein Zaun oder andere Pflanzen können hier Abhilfe schaffen.
* Gute Drainage: Staunässe ist der Feind! Achte darauf, dass der Boden gut drainiert ist, damit die Wurzeln nicht faulen.
Die Bodenbearbeitung
* Lockere den Boden auf: Collard Greens bevorzugen lockeren, gut durchlässigen Boden. Grabe den Boden um und entferne Steine und Wurzeln.
* Verbessere die Bodenqualität: Mische Kompost oder gut verrotteten Mist unter den Boden. Das verbessert die Nährstoffversorgung und die Wasserspeicherung.
* Der richtige pH-Wert: Collard Greens gedeihen am besten in einem leicht sauren bis neutralen Boden mit einem pH-Wert zwischen 6,0 und 7,0. Ein Bodentest kann dir hier Klarheit verschaffen.
Die Wahl der richtigen Sorte
Es gibt viele verschiedene Collard Greens-Sorten, jede mit ihren eigenen Vor- und Nachteilen. Hier sind ein paar beliebte Optionen:
* ‘Georgia’: Eine klassische Sorte mit großen, dunkelgrünen Blättern. Sie ist robust und ertragreich.
* ‘Vates’: Eine kompakte Sorte, die sich gut für kleinere Gärten oder Container eignet. Sie ist frühreif und hat einen milden Geschmack.
* ‘Champion’: Eine schnell wachsende Sorte mit zarten Blättern. Sie ist besonders gut für den Anbau im Frühjahr und Herbst geeignet.
* ‘Top Bunch’: Eine sehr ertragreiche Sorte, die sich gut für die Lagerung eignet.
Aussaat und Anzucht: Der Start ins Grüne
Du hast zwei Möglichkeiten, Collard Greens anzubauen: entweder direkt ins Freiland säen oder die Pflanzen vorziehen. Ich persönlich bevorzuge die Voranzucht, da sie mir mehr Kontrolle über den Wachstumsprozess gibt.
Direktsaat ins Freiland
* Der richtige Zeitpunkt: Säe die Samen im Frühjahr (April/Mai) oder im Spätsommer (August/September) direkt ins Freiland.
* Die Aussaat: Säe die Samen etwa 1 cm tief und mit einem Abstand von 30-45 cm zwischen den Pflanzen.
* Gießen: Halte den Boden feucht, bis die Samen keimen.
* Vereinzeln: Wenn die Sämlinge groß genug sind, vereinzele sie auf den gewünschten Abstand.
Voranzucht im Haus
* Der richtige Zeitpunkt: Beginne mit der Voranzucht etwa 4-6 Wochen vor dem letzten erwarteten Frost.
* Die Aussaat: Säe die Samen in Anzuchtschalen oder Töpfe mit Anzuchterde.
* Gießen: Halte die Erde feucht, aber nicht nass.
* Der richtige Standort: Stelle die Anzuchtschalen an einen hellen, warmen Ort.
* Pikieren: Wenn die Sämlinge groß genug sind, pikiere sie in größere Töpfe.
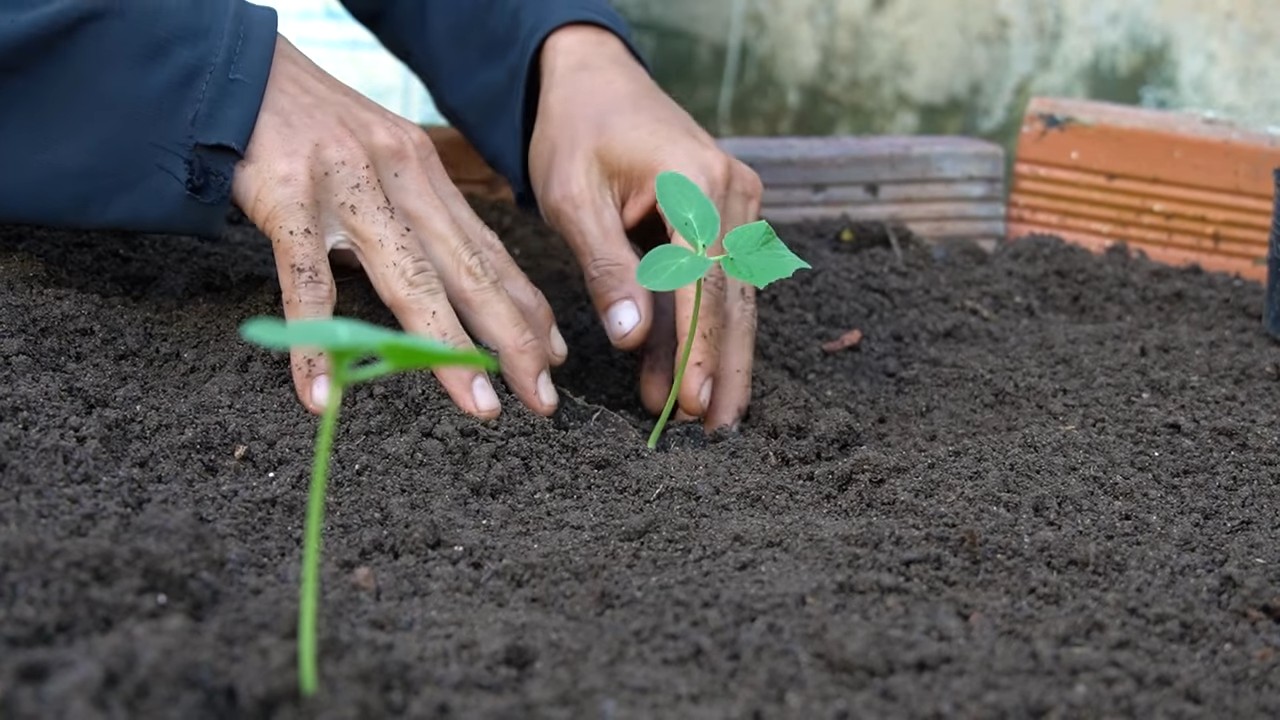
Das Auspflanzen: Ab ins Beet!
Sobald die Jungpflanzen kräftig genug sind (etwa 10-15 cm hoch), können sie ins Freiland ausgepflanzt werden.
1. Vorbereitung des Beetes: Lockere den Boden erneut auf und entferne Unkraut.
2. Pflanzlöcher graben: Grabe Pflanzlöcher im Abstand von 30-45 cm.
3. Pflanzen einsetzen: Setze die Jungpflanzen vorsichtig in die Pflanzlöcher und fülle sie mit Erde auf.
4. Angießen: Gieße die Pflanzen gründlich an.
5. Schutz vor Schädlingen: Schütze die jungen Pflanzen vor Schnecken und anderen Schädlingen.
Die Pflege: Damit deine Collard Greens prächtig gedeihen
Collard Greens sind relativ pflegeleicht, aber ein paar Dinge solltest du beachten, damit sie optimal wachsen.
* Regelmäßiges Gießen: Halte den Boden feucht, besonders während trockener Perioden.
* Düngen: Dünge die Pflanzen regelmäßig mit einem organischen Dünger oder Kompost.
* Unkraut jäten: Entferne regelmäßig Unkraut, damit die Collard Greens nicht um Nährstoffe konkurrieren müssen.
* Schädlingsbekämpfung: Kontrolliere die Pflanzen regelmäßig auf Schädlinge und bekämpfe sie bei Bedarf mit natürlichen Mitteln.
Schädlinge und Krankheiten: Was du beachten musst
Wie jede Pflanze können auch Collard Greens von Schädlingen und Krankheiten befallen werden. Hier sind ein paar häufige Probleme und wie du sie bekämpfen kannst:
* Kohlweißling: Die Raupen des Kohlweißlings fressen die Blätter der Collard Greens. Du kannst sie absammeln oder mit einem biologischen Insektizid bekämpfen.
* Erdflöhe: Erdflöhe sind kleine Käfer, die Löcher in die Blätter fressen. Du kannst sie mit einem Netz abdecken oder mit einem natürlichen Insektizid bekämpfen.
* Kohlhernie: Kohlhernie ist eine Pilzkrankheit, die die Wurzeln der Pflanzen befällt. Du kannst sie vermeiden, indem du den Boden gut drainierst und die Pflanzen nicht zu dicht pflanzt.
* Falscher Mehltau: Falscher Mehltau ist eine Pilzkrankheit, die sich durch weiße Flecken auf den Blättern äußert. Du kannst sie bekämpfen, indem du die befallenen Blätter entfernst und die Pflanzen mit einem Fungizid behandelst.
Die Ernte: Der Lohn deiner Mühe
Du kannst die Collard Greens ernten, sobald die Blätter groß genug sind. In der Regel dauert es etwa 60-80 Tage von der Aussaat bis zur Ernte.
1. Die richtige Technik: Schneide die äußeren Blätter ab, während die inneren Blätter weiterwachsen. So kannst du über einen längeren Zeitraum ernten.
2. Der beste Zeitpunkt: Ernte die Blätter am besten am Morgen, wenn sie noch frisch und knackig sind.
3. Die Lagerung: Collard Greens können im Kühlschrank für einige Tage gelagert werden. Wickle sie in ein feuchtes Tuch, um sie frisch zu halten.
Collard Greens im Topf: Auch auf dem Balkon möglich!
Kein Garten? Kein Problem! Collard Greens lassen sich auch wunderbar in Töpfen oder Kübeln auf dem Balkon oder der Terrasse anbauen.
* Der richtige Topf: Wähle einen Topf mit einem Durchmesser von mindestens 30 cm.
* Die richtige Erde: Verwende eine hochwertige Blumenerde mit guter Drainage.
* Der richtige Standort: Stelle den Topf an einen sonnigen Standort.
* Die Pflege: Gieße und dünge die Pflanzen regelmäßig.
Rezepte und Verwendung: Was du mit deiner Ernte anfangen kannst
Collard Greens sind unglaublich vielseitig und können in vielen verschiedenen Gerichten verwendet werden. Hier sind ein paar Ideen:
* Gedünstet: Gedünstete Collard Greens sind ein klassisches Gericht der Südstaatenküche.
* In Suppen und Eintöpfen: Collard Greens verleihen Suppen und Eintöpfen eine herzhafte Note.
* Als Beilage: Collard Greens passen hervorragend zu Fleisch, Fisch oder Geflügel.
* In Smoothies: Collard Greens sind eine gesunde Zutat für grüne Smoothies.
* Chips: Collard Greens-Chips sind eine kn
Conclusion
So, there you have it! Growing collard greens easily doesn’t have to be a daunting task reserved for seasoned gardeners. With a little preparation, the right techniques, and a dash of patience, you can cultivate your own vibrant, nutrient-rich collard greens right in your backyard or even in containers on your balcony. We’ve walked you through the essential steps, from selecting the perfect seeds or seedlings to nurturing them with the proper sunlight, water, and soil.
But why should you bother with this DIY project? Beyond the satisfaction of harvesting your own food, growing collard greens offers a multitude of benefits. You’ll have access to fresher, more flavorful greens than you can typically find in the store, and you’ll know exactly what went into their cultivation – no harmful pesticides or herbicides necessary! Plus, you’ll save money in the long run, especially if you’re a regular collard green consumer.
This method is a game-changer for anyone looking to enjoy fresh, homegrown collard greens without the hassle of traditional gardening.
Don’t be afraid to experiment with different varieties of collard greens. Some popular choices include ‘Georgia Southern,’ known for its heat tolerance, ‘Vates,’ a compact and cold-hardy variety, and ‘Champion,’ which boasts excellent flavor and disease resistance. You can also try growing different colored collard greens, such as ‘Red Russian,’ for a visually appealing addition to your garden and your plate.
Consider companion planting to further enhance your collard green growing experience. Planting herbs like rosemary, thyme, and sage near your collard greens can help deter pests naturally. Marigolds are also excellent companion plants, as they repel nematodes and other harmful insects.
If you’re short on space, container gardening is a fantastic option. Choose a large container with good drainage and fill it with a high-quality potting mix. Be sure to provide adequate support for your collard greens as they grow, especially if you’re growing taller varieties.
We encourage you to take the plunge and try growing collard greens easily using the methods we’ve outlined. It’s a rewarding experience that will connect you with nature and provide you with a healthy and delicious food source. Once you’ve harvested your first batch of homegrown collard greens, we’d love to hear about your experience! Share your tips, tricks, and photos in the comments below. Let’s build a community of collard green enthusiasts and inspire others to embrace the joys of gardening. Happy growing!
Frequently Asked Questions (FAQ)
What is the best time of year to plant collard greens?
The best time to plant collard greens depends on your climate. In warmer climates with mild winters, you can plant collard greens in the fall for a winter harvest. In colder climates, you can start seeds indoors 6-8 weeks before the last expected frost and transplant them outdoors in the spring. You can also plant collard greens in the late summer for a fall harvest. The key is to avoid planting during the hottest part of the summer, as high temperatures can cause the plants to bolt (go to seed).
How much sunlight do collard greens need?
Collard greens need at least 6 hours of sunlight per day to thrive. If you’re growing them in a shady area, they may not produce as many leaves or grow as quickly. Choose a location in your garden that receives full sun for optimal growth. If you’re growing them in containers, you can move them around to ensure they get enough sunlight throughout the day.
What kind of soil is best for collard greens?
Collard greens prefer well-drained soil that is rich in organic matter. Amend your soil with compost or other organic materials before planting to improve its fertility and drainage. The ideal soil pH for collard greens is between 6.0 and 7.5. You can test your soil pH with a soil testing kit and adjust it accordingly.
How often should I water collard greens?
Collard greens need consistent moisture to grow well. Water them deeply whenever the top inch of soil feels dry to the touch. Avoid overwatering, as this can lead to root rot. During hot, dry weather, you may need to water them more frequently. Mulching around your collard greens can help retain moisture in the soil and reduce the need for frequent watering.
What are some common pests and diseases that affect collard greens?
Some common pests that affect collard greens include aphids, cabbage worms, flea beetles, and slugs. You can control these pests with organic methods such as handpicking, insecticidal soap, or Bacillus thuringiensis (Bt). Common diseases that affect collard greens include black rot, downy mildew, and clubroot. Prevent these diseases by practicing crop rotation, providing good air circulation, and avoiding overhead watering.
How do I harvest collard greens?
You can begin harvesting collard greens when the leaves are about 10-12 inches long. Harvest the outer leaves first, leaving the inner leaves to continue growing. This will allow you to harvest collard greens continuously throughout the growing season. To harvest, simply cut the leaves off at the base of the plant with a sharp knife or scissors.
Can I grow collard greens in containers?
Yes, collard greens can be grown successfully in containers. Choose a large container that is at least 12 inches deep and 12 inches wide. Fill the container with a high-quality potting mix and provide adequate drainage. Be sure to water your container-grown collard greens regularly, as they will dry out more quickly than those grown in the ground.
How do I store collard greens after harvesting?
After harvesting, wash your collard greens thoroughly and remove any damaged or yellowing leaves. Store them in a plastic bag in the refrigerator for up to a week. For longer storage, you can blanch and freeze them. To blanch, boil the collard greens for 2-3 minutes, then plunge them into ice water to stop the cooking process. Drain them well and freeze them in freezer bags or containers.
Can I eat collard green stems?
Yes, you can eat collard green stems, but they can be tough and fibrous. To make them more palatable, remove the tough outer layer with a vegetable peeler and chop them into smaller pieces. You can then cook them along with the leaves or use them in soups and stews.
Are collard greens nutritious?
Yes, collard greens are a nutritional powerhouse! They are an excellent source of vitamins A, C, and K, as well as calcium, iron, and fiber. They are also low in calories and carbohydrates. Eating collard greens can help boost your immune system, improve bone health, and promote healthy digestion.
Leave a Comment