
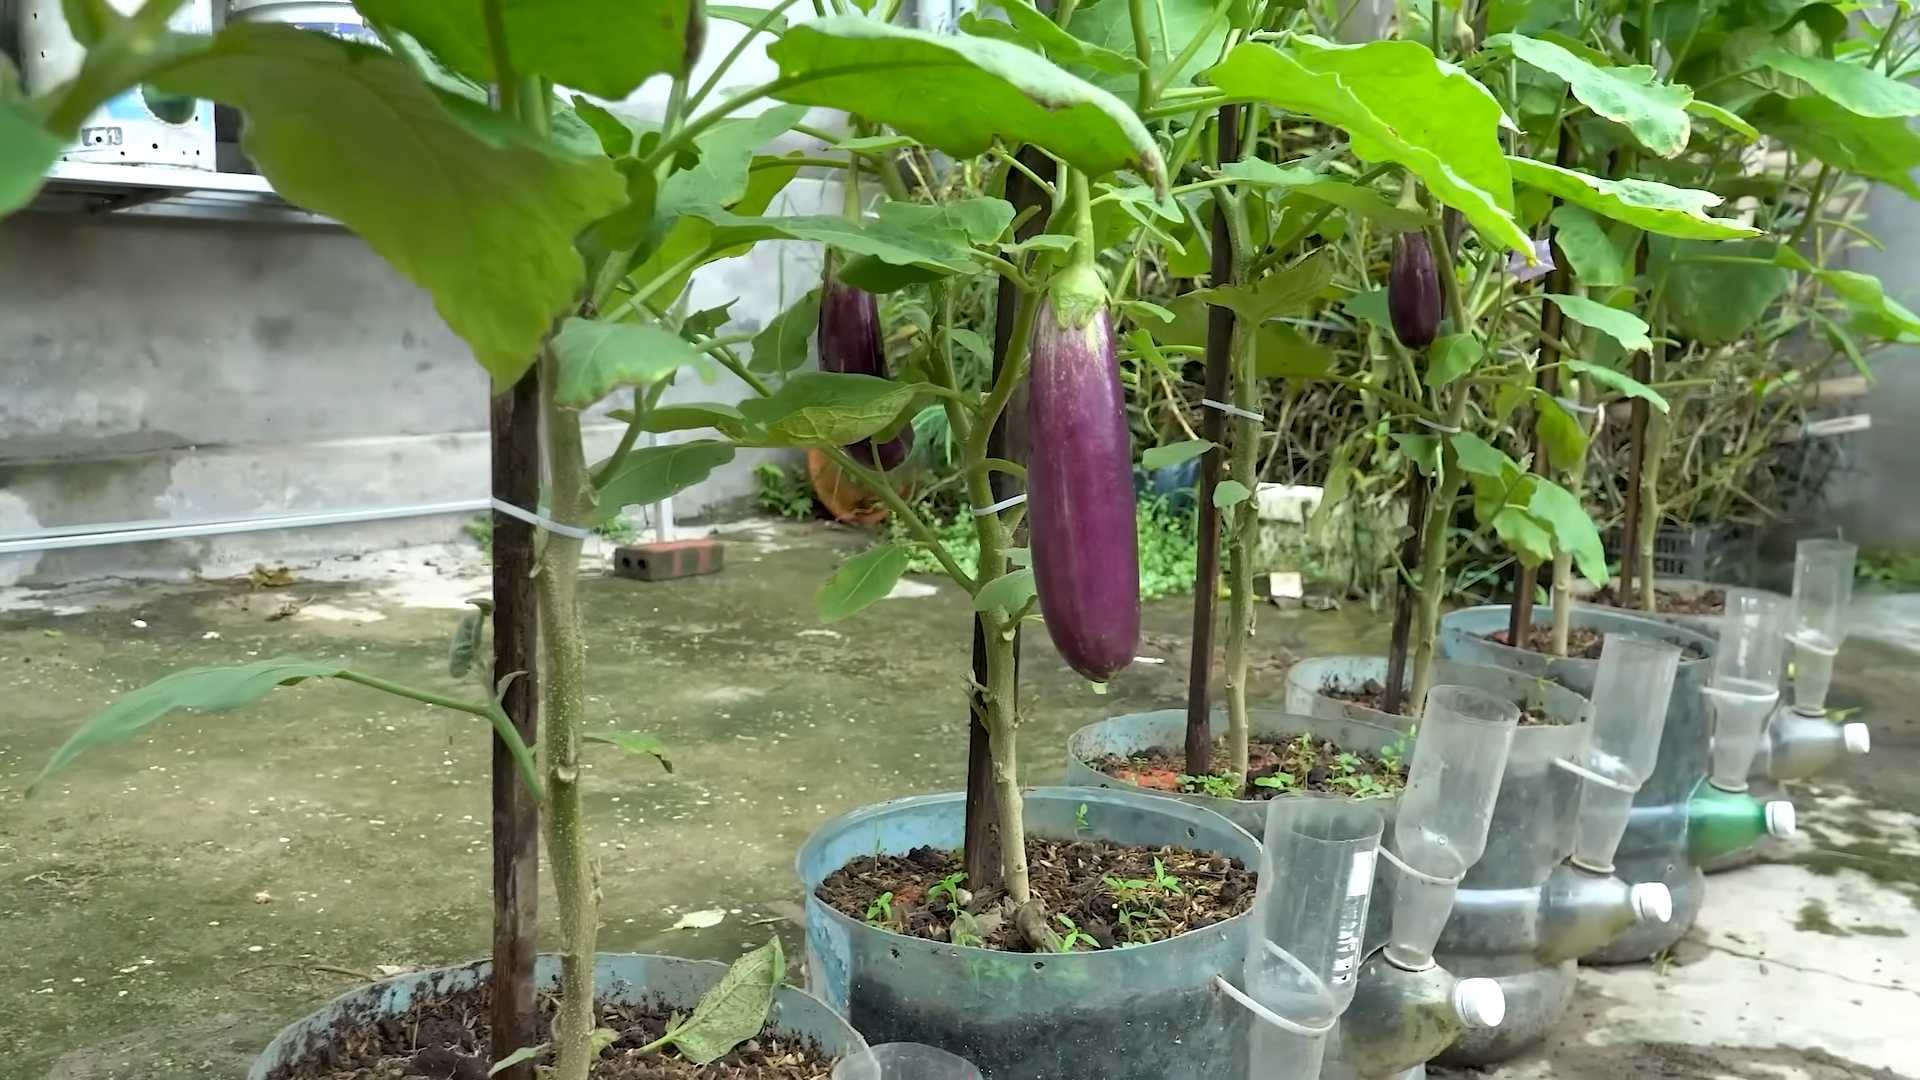
Grow Eggplants Fast? Absolutely! Imagine harvesting plump, glossy eggplants from your own backyard, ready to be transformed into delicious baba ghanoush, hearty moussaka, or a simple, satisfying eggplant parmesan. It’s a dream for many home gardeners, and I’m here to tell you it’s entirely achievable, even if you’re short on space or time.
Eggplants, with their rich history tracing back to ancient Asia, have been cultivated for centuries, gracing tables and gardens across the globe. But let’s be honest, sometimes they can be a bit… temperamental. That’s where these DIY tricks and hacks come in.
Let’s face it, waiting for your eggplant seedlings to mature can feel like an eternity. You’ve carefully nurtured them, provided ample sunlight, and diligently watered them, yet the fruits seem to take forever to appear. This article is your secret weapon to accelerate the process and grow eggplants fast. I’m going to share simple, effective techniques that will give your plants the boost they need, ensuring a bountiful harvest in record time. From soil preparation secrets to strategic pruning tips, get ready to unlock the full potential of your eggplant patch and enjoy the satisfaction of homegrown goodness sooner than you ever thought possible!
DIY: Supercharge Your Eggplant Growth!
Hey there, fellow gardeners! Ever feel like your eggplants are taking their sweet time to mature? I know I have! That’s why I’ve put together this guide to share all the tips and tricks I’ve learned to get those beautiful, glossy eggplants growing faster and more abundantly. Let’s dive in!
Choosing the Right Variety and Starting Strong
Before we even get our hands dirty, it’s crucial to set ourselves up for success. This means picking the right eggplant variety and giving them a head start.
* Select Early-Maturing Varieties: Not all eggplants are created equal! Some varieties are bred to mature much faster than others. Look for terms like “early,” “quick,” or specific names known for their speed. Some of my favorites include ‘Black Beauty’ (a classic!), ‘Little Fingers,’ and ‘Hansel.’ These tend to produce fruit sooner than larger, more exotic varieties.
* Start Seeds Indoors: Eggplants need a long growing season, especially in cooler climates. Starting your seeds indoors 6-8 weeks before the last expected frost gives them a significant advantage.
1. Prepare Your Seed Starting Mix: Use a sterile seed starting mix to avoid diseases. I like to moisten it slightly before filling my seed trays or small pots.
2. Sow the Seeds: Plant the seeds about ¼ inch deep in the mix. I usually plant 2-3 seeds per cell or pot to increase my chances of germination.
3. Provide Warmth and Light: Eggplants need warmth to germinate. A heat mat is ideal, keeping the soil temperature around 80-85°F (27-29°C). Once the seedlings emerge, they need plenty of light. A grow light is best, but a sunny windowsill can work if it gets at least 6 hours of direct sunlight.
4. Water Carefully: Keep the soil consistently moist, but not soggy. Overwatering can lead to damping off, a fungal disease that can kill young seedlings. I use a spray bottle to gently water them.
5. Thin Seedlings: Once the seedlings have their first true leaves (the second set of leaves), thin them to one strong seedling per cell or pot.
Transplanting and Soil Preparation
Transplanting your seedlings into the garden is a critical step. Proper soil preparation ensures they have the nutrients they need to thrive.
* Harden Off Seedlings: Before transplanting, gradually acclimate your seedlings to outdoor conditions. This process, called “hardening off,” helps them adjust to the sun, wind, and temperature changes. Start by placing them outside for an hour or two each day, gradually increasing the time over a week or two.
* Choose a Sunny Location: Eggplants need at least 6-8 hours of direct sunlight per day. Choose a spot in your garden that gets plenty of sun.
* Prepare the Soil: Eggplants are heavy feeders, meaning they need a lot of nutrients. Amend your soil with plenty of compost or well-rotted manure. This will improve drainage, aeration, and fertility. I also like to add a slow-release organic fertilizer at planting time.
1. Dig a Hole: Dig a hole that’s slightly larger than the root ball of your seedling.
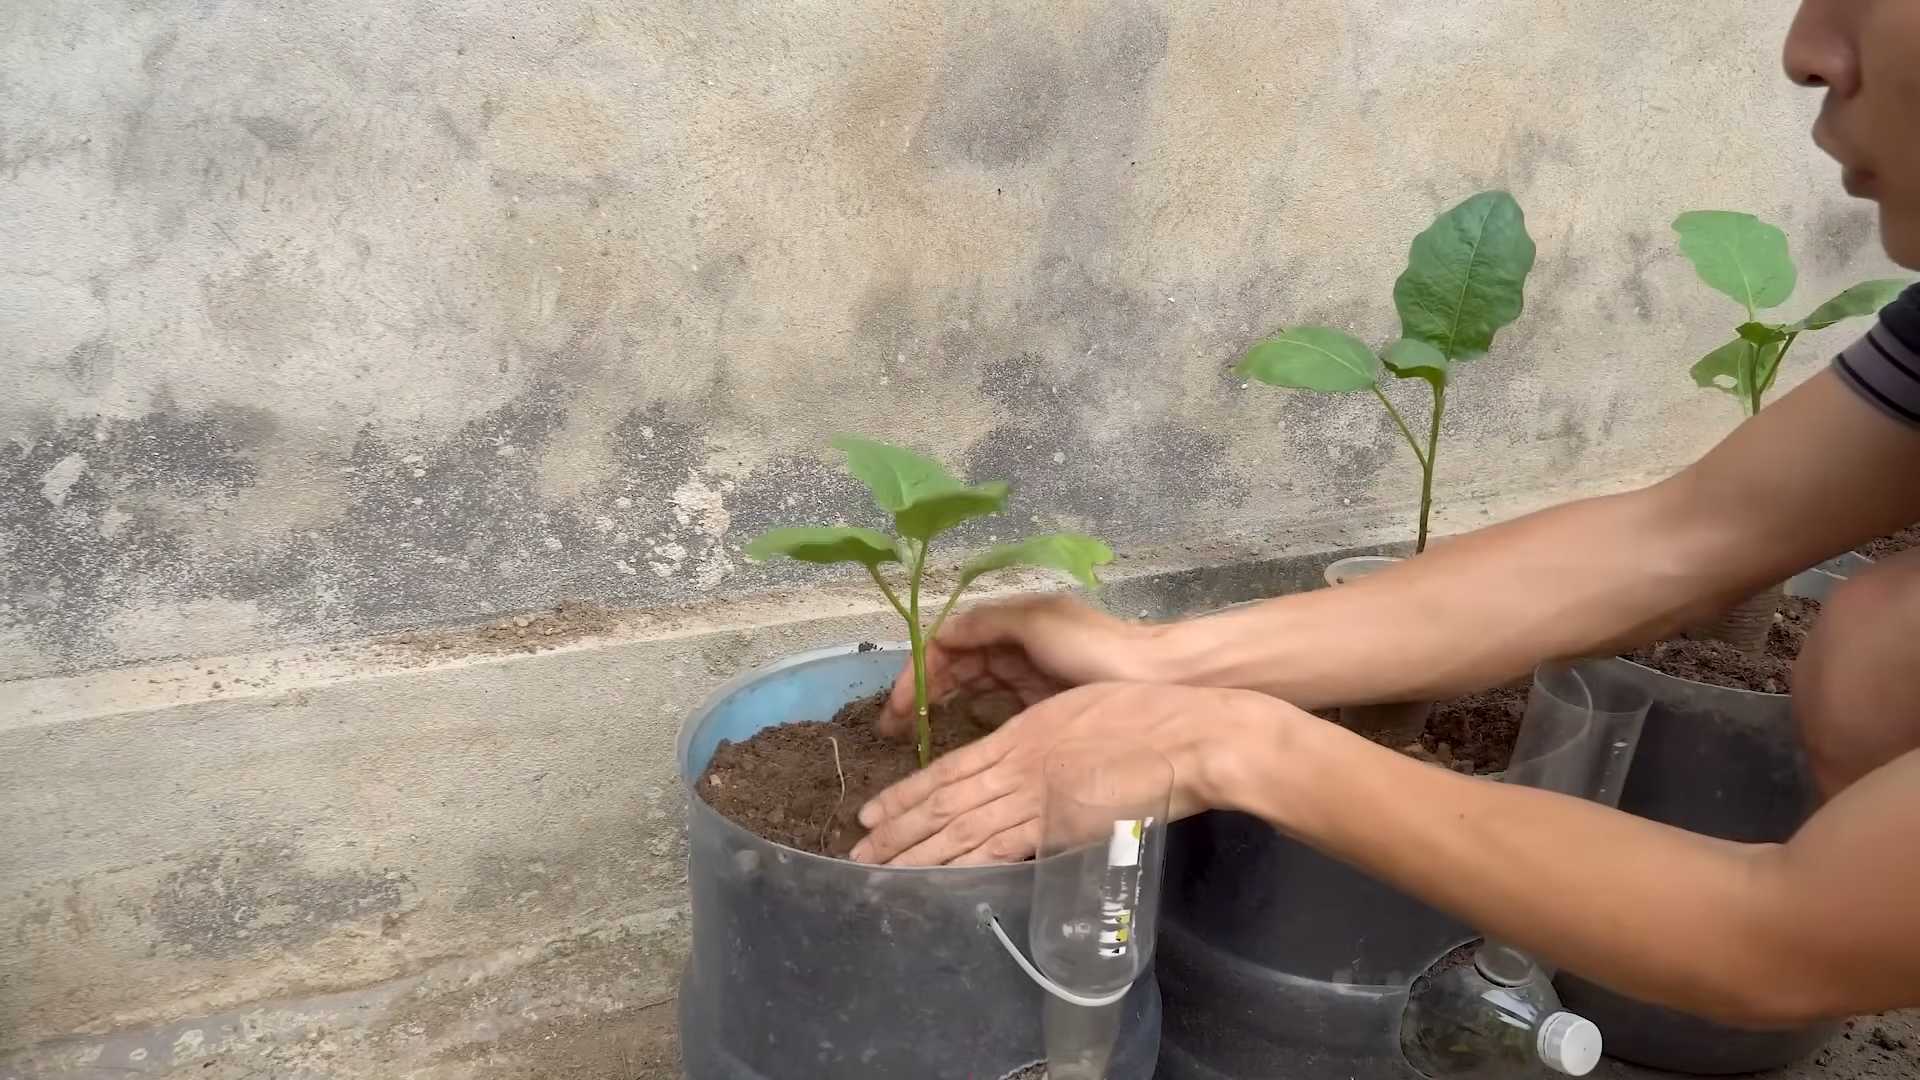
2. Gently Remove the Seedling: Carefully remove the seedling from its container, being careful not to damage the roots.
3. Place the Seedling in the Hole: Place the seedling in the hole, making sure the top of the root ball is level with the surrounding soil.
4. Backfill with Soil: Backfill the hole with soil, gently firming it around the base of the plant.
5. Water Thoroughly: Water the newly transplanted seedling thoroughly.
Watering, Fertilizing, and Pruning for Speed
Consistent watering, strategic fertilizing, and careful pruning can significantly boost your eggplant’s growth rate and fruit production.
* Water Deeply and Regularly: Eggplants need consistent moisture, especially during hot weather. Water deeply and regularly, aiming for about 1-2 inches of water per week. Avoid overhead watering, which can promote fungal diseases. Drip irrigation or soaker hoses are ideal.
* Fertilize Regularly: As heavy feeders, eggplants benefit from regular fertilization. I like to use a balanced organic fertilizer every 2-3 weeks. You can also use a liquid fertilizer, such as fish emulsion or seaweed extract, for a quick boost.
* Prune for Airflow and Fruit Production: Pruning can improve airflow, reduce disease risk, and encourage more fruit production.
1. Remove Suckers: Suckers are small shoots that grow from the base of the plant. Remove them to direct the plant’s energy towards fruit production.
2. Remove Yellowing or Damaged Leaves: Remove any yellowing or damaged leaves to prevent the spread of disease.
3. Pinch Off Flowers (Optional): In the early stages, you can pinch off some of the early flowers to encourage the plant to focus on vegetative growth. This will result in a stronger plant that can support more fruit later on. However, don’t overdo it, or you’ll delay your harvest.
4. Top the Plant (Optional): Once the plant reaches a desired height (usually around 2-3 feet), you can top it by pinching off the growing tip. This will encourage the plant to branch out and produce more fruit.
Supporting Your Plants and Protecting from Pests
Eggplants can get quite heavy with fruit, so providing support is essential. Also, protecting them from pests will keep them healthy and productive.
* Provide Support: As the eggplants grow, they can become quite heavy and the branches can break. Provide support using stakes, cages, or trellises. I prefer using tomato cages, as they provide good support and allow for easy access to the fruit.
* Control Pests and Diseases: Eggplants are susceptible to various pests and diseases, including flea beetles, aphids, and blossom-end rot.
* Flea Beetles: These tiny beetles can chew holes in the leaves. Cover your plants with row covers to prevent them from reaching the plants. You can also use insecticidal soap or neem oil.
* Aphids: These small, sap-sucking insects can weaken the plant. Spray them off with a strong stream of water or use insecticidal soap.
* Blossom-End Rot: This is caused by a calcium deficiency and results in a dark, sunken spot on the bottom of the fruit. Ensure consistent watering and amend your soil with calcium-rich amendments, such as bone meal or crushed eggshells. You can also use a calcium foliar spray.
* Use Companion Planting: Planting basil near your eggplants can help repel pests. Marigolds are also a good choice.
Extra Tips for Supercharged Growth
Here are a few extra tips I’ve found helpful over the years:
* Mulch Around the Plants: Mulching helps retain moisture, suppress weeds, and regulate soil temperature. I like to use straw, wood chips, or compost as mulch.
* Hand-Pollinate if Necessary: In some cases, eggplants may need help with pollination, especially in hot or humid weather. You can hand-pollinate by gently shaking the flowers or using a small paintbrush to transfer pollen from one flower to another.
* Harvest Regularly: Harvest your eggplants when they are glossy and firm. Regular harvesting encourages the plant to produce more fruit. Don’t wait until they get too large, as they can become bitter.
* Consider Grafting: For the truly dedicated gardener, grafting eggplant onto a more vigorous rootstock (like a tomato rootstock) can significantly increase yield and disease resistance. This is a more advanced technique, but the results can be impressive.
* Reflective Mulch: Using reflective mulch, like silver or aluminum foil, can increase sunlight exposure to the plant, promoting faster growth and higher yields.
* Epsom Salts: A foliar spray of Epsom salts (magnesium sulfate) can help with nutrient uptake and overall plant health. Mix 1 tablespoon of Epsom salts per gallon of water and spray on the leaves every 2-3 weeks.
By following these tips, you’ll be well on your way to harvesting a bumper crop of delicious eggplants in no time! Happy gardening!
Conclusion
So, there you have it! This simple yet effective DIY trick for growing eggplants fast is a game-changer for any gardener, whether you’re a seasoned pro or just starting out. We’ve walked you through the process, highlighting the science behind why it works and offering practical tips to ensure your success. But why is this method a must-try?
Firstly, it significantly accelerates the growth cycle of your eggplants. Imagine harvesting plump, juicy eggplants weeks earlier than you normally would. This means more harvests within a single growing season, maximizing your yield and providing you with a bountiful supply of this versatile vegetable. Secondly, this DIY approach is incredibly cost-effective. You’re likely to have most of the materials already lying around your home or garden, making it a budget-friendly alternative to expensive fertilizers or growth boosters.
Furthermore, this method promotes healthier, more robust plants. By providing the eggplants with the specific nutrients they need at critical stages of development, you’re strengthening their natural defenses against pests and diseases. This translates to healthier plants that are less susceptible to common problems, ultimately leading to a more successful and rewarding gardening experience.
But the benefits don’t stop there. This DIY trick is also environmentally friendly. By using natural and readily available materials, you’re reducing your reliance on synthetic chemicals and contributing to a more sustainable gardening practice. You can feel good about nourishing your plants while also protecting the environment.
Now, let’s talk about variations. While the core method remains the same, you can certainly experiment with different ingredients to tailor it to your specific needs and preferences. For example, if you’re looking to boost the phosphorus content, consider adding bone meal or rock phosphate to your mixture. If you want to enhance the nitrogen levels, try incorporating coffee grounds or composted manure. Remember to always research the specific nutrient requirements of your eggplants and adjust your recipe accordingly.
Another variation involves the application method. While we recommend watering the plants with the solution, you can also try foliar feeding. This involves spraying the solution directly onto the leaves of the plants, allowing them to absorb the nutrients more quickly. However, be sure to dilute the solution further when using this method to avoid burning the leaves.
We also encourage you to experiment with different types of eggplants. This DIY trick works well with a wide variety of eggplant cultivars, from the classic Black Beauty to the more exotic Japanese varieties. Try it out on your favorite type of eggplant and see the amazing results for yourself.
Ultimately, the key to success with this DIY trick is consistency and observation. Monitor your plants closely, paying attention to their growth rate, leaf color, and overall health. Adjust your approach as needed, and don’t be afraid to experiment. Gardening is a journey of learning and discovery, and this DIY trick is just one step along the way.
So, what are you waiting for? Give this DIY trick for growing eggplants fast a try and experience the joy of harvesting your own delicious, homegrown eggplants. We’re confident that you’ll be amazed by the results. And don’t forget to share your experiences with us! We’d love to hear about your successes, challenges, and any variations you’ve tried. Share your photos and stories on social media using the hashtag #GrowEggplantsFast, and let’s inspire others to embrace the power of DIY gardening. Happy gardening!
Frequently Asked Questions (FAQ)
What exactly does this DIY trick do to help eggplants grow faster?
This DIY trick focuses on providing eggplants with a readily available source of essential nutrients, particularly nitrogen, phosphorus, and potassium, which are crucial for rapid growth and development. The specific ingredients used in the mixture break down quickly, releasing these nutrients into the soil where they can be easily absorbed by the plant’s roots. This boost of nutrients stimulates root growth, leaf production, and ultimately, fruit development, leading to a faster and more abundant harvest. It’s like giving your eggplants a supercharged fertilizer that’s tailored to their specific needs.
How often should I apply this DIY solution to my eggplants?
The frequency of application depends on several factors, including the age of your plants, the type of soil you have, and the weather conditions. As a general guideline, we recommend applying the solution every two to three weeks during the active growing season. For younger plants, you may want to dilute the solution further and apply it more frequently, perhaps once a week. For more mature plants, you can increase the concentration and apply it less often. Always monitor your plants closely and adjust the frequency of application based on their response. If you notice any signs of nutrient burn, such as yellowing or browning leaves, reduce the frequency or dilute the solution further.
Can I use this DIY trick on other plants besides eggplants?
While this DIY trick is specifically formulated for eggplants, it can also be beneficial for other fruiting vegetables, such as tomatoes, peppers, and cucumbers. These plants have similar nutrient requirements to eggplants, so they can benefit from the same boost of nitrogen, phosphorus, and potassium. However, it’s important to note that different plants have different nutrient needs, so you may need to adjust the recipe accordingly. For example, tomatoes may require more potassium than eggplants, so you may want to add a potassium-rich ingredient, such as banana peels, to the mixture. Always research the specific nutrient requirements of the plants you’re growing and adjust your recipe accordingly.
What if I don’t have all the ingredients listed in the recipe? Can I substitute them?
Yes, you can definitely substitute ingredients based on what you have available. The key is to understand the role of each ingredient and find a suitable alternative that provides the same nutrients. For example, if you don’t have Epsom salts, you can substitute them with another source of magnesium, such as dolomite lime. If you don’t have bone meal, you can substitute it with another source of phosphorus, such as rock phosphate. The most important thing is to ensure that your mixture contains a balanced blend of nitrogen, phosphorus, and potassium. Don’t be afraid to experiment and see what works best for you.
Is this DIY trick safe for organic gardening?
Yes, this DIY trick can be used in organic gardening, as long as you use organic ingredients. Make sure that the ingredients you use are certified organic and free from synthetic chemicals. This will ensure that your plants are grown in a healthy and sustainable way. Using organic methods to grow eggplants fast is a great way to ensure you are eating healthy.
My eggplants are already flowering. Is it too late to use this DIY trick?
No, it’s not too late! In fact, applying this DIY solution during the flowering and fruiting stages can be particularly beneficial. The extra nutrients will help support the development of healthy flowers and fruits, leading to a larger and more abundant harvest. Just be sure to dilute the solution further during these stages to avoid burning the delicate flowers and fruits.
I’ve noticed some pests on my eggplants. Will this DIY trick help with that?
While this DIY trick primarily focuses on providing nutrients to promote growth, it can also indirectly help with pest control. Healthy, well-nourished plants are generally more resistant to pests and diseases. By strengthening your plants’ natural defenses, you can reduce their susceptibility to common problems. However, this DIY trick is not a substitute for proper pest management practices. If you’re dealing with a serious pest infestation, you may need to use additional methods, such as insecticidal soap or neem oil.
How do I know if I’m over-fertilizing my eggplants with this DIY trick?
Signs of over-fertilization include yellowing or browning leaves, stunted growth, and the accumulation of salts on the soil surface. If you notice any of these symptoms, reduce the frequency of application or dilute the solution further. It’s always better to err on the side of caution and under-fertilize rather than over-fertilize. Remember to monitor your plants closely and adjust your approach based on their response.
Can I store the leftover DIY solution for later use?
Yes, you can store the leftover solution in a sealed container in a cool, dark place. However, it’s best to use it within a few days, as the nutrients may start to degrade over time. Before using the stored solution, give it a good shake to ensure that the ingredients are evenly distributed.


Leave a Comment