
Grow Microgreens at Home – sounds intimidating, right? But trust me, it’s easier than you think! Imagine adding a burst of fresh, vibrant flavor to your meals, all while knowing exactly where your food came from. That’s the magic of microgreens, and you can cultivate this magic right on your kitchen counter.
Humans have been sprouting seeds for centuries, with evidence suggesting ancient civilizations like the Egyptians and Romans enjoyed the nutritional benefits of young shoots. While not exactly the same as modern microgreens, the practice highlights our long-standing connection to nurturing food from the earliest stages. Today, with concerns about food miles and the desire for healthier eating, growing your own microgreens is experiencing a major resurgence.
Why should you jump on the microgreen bandwagon? Well, for starters, they’re packed with nutrients – often more so than their mature counterparts! Plus, they’re incredibly versatile, adding a pop of color and flavor to salads, sandwiches, soups, and even smoothies. But the real reason you need this DIY trick in your life is the sheer satisfaction of watching something grow from seed to harvest in just a matter of days. It’s a little bit of nature’s magic, right in your home. I’m going to show you how easy it is to grow microgreens at home, even if you have a black thumb!
Grow Your Own Delicious Microgreens: A Beginner’s Guide
Hey there, fellow foodies and green thumbs! I’m so excited to share my experience with growing microgreens at home. It’s seriously one of the easiest and most rewarding DIY projects I’ve ever tackled. Not only do you get a constant supply of fresh, nutrient-packed greens, but it’s also incredibly satisfying to watch them sprout and flourish. Trust me, once you start, you’ll be hooked!
Microgreens are basically baby vegetable greens, harvested just after the cotyledon leaves (the first leaves to emerge) have developed. They’re packed with flavor and nutrients, often containing higher concentrations of vitamins and minerals than their mature counterparts. Plus, they add a beautiful pop of color and texture to salads, sandwiches, soups, and just about anything else you can imagine.
Here’s everything you need to know to get started growing your own microgreens at home:
What You’ll Need
Before we dive into the nitty-gritty, let’s gather our supplies. The beauty of this project is that you probably already have many of these items lying around!
* **Seeds:** This is the most important part! Choose high-quality seeds specifically intended for microgreens. Some popular and easy-to-grow options include:
* Radish
* Broccoli
* Sunflower
* Pea shoots
* Mustard
* Arugula
* Kale
* Cress
* Avoid using seeds that are treated with fungicides or other chemicals. Organic seeds are always a great choice.
* **Growing Trays:** You’ll need two trays: one with drainage holes (the growing tray) and one without (the drip tray). You can find these at most garden centers or online. Alternatively, you can repurpose plastic containers, just make sure they’re clean and food-safe.
* **Growing Medium:** I prefer using coconut coir (also known as coco coir) because it’s sustainable, holds moisture well, and is relatively inexpensive. You can also use seed starting mix or potting soil, but avoid using garden soil, as it can contain pests and diseases.
* **Spray Bottle:** For misting the seeds and seedlings.
* **Weight (Optional):** A small weight, like a book or brick, to help the seeds germinate evenly.
* **Light Source:** Microgreens need light to grow. A sunny windowsill can work, but a grow light will provide more consistent and reliable results, especially during the darker months.
* **Water:** Filtered water is best.
Step-by-Step Instructions: From Seed to Sprout
Okay, let’s get our hands dirty! Here’s a detailed guide to growing your own microgreens:
1. **Soaking the Seeds (Optional but Recommended):** Some seeds benefit from soaking before planting, as it helps to soften the seed coat and speed up germination. Seeds like pea shoots and sunflower seeds especially benefit from this. To soak, place the seeds in a bowl of water and let them soak for 4-12 hours, depending on the type of seed. Check your seed packet for specific recommendations. I usually soak my pea shoots overnight.
2. **Preparing the Growing Tray:** Moisten your growing medium. If you’re using coconut coir, you’ll need to rehydrate it by adding water until it’s damp but not soggy. It should feel like a wrung-out sponge. Fill the growing tray with the moistened growing medium, leaving about an inch of space at the top. Gently press down on the medium to create a smooth, even surface.
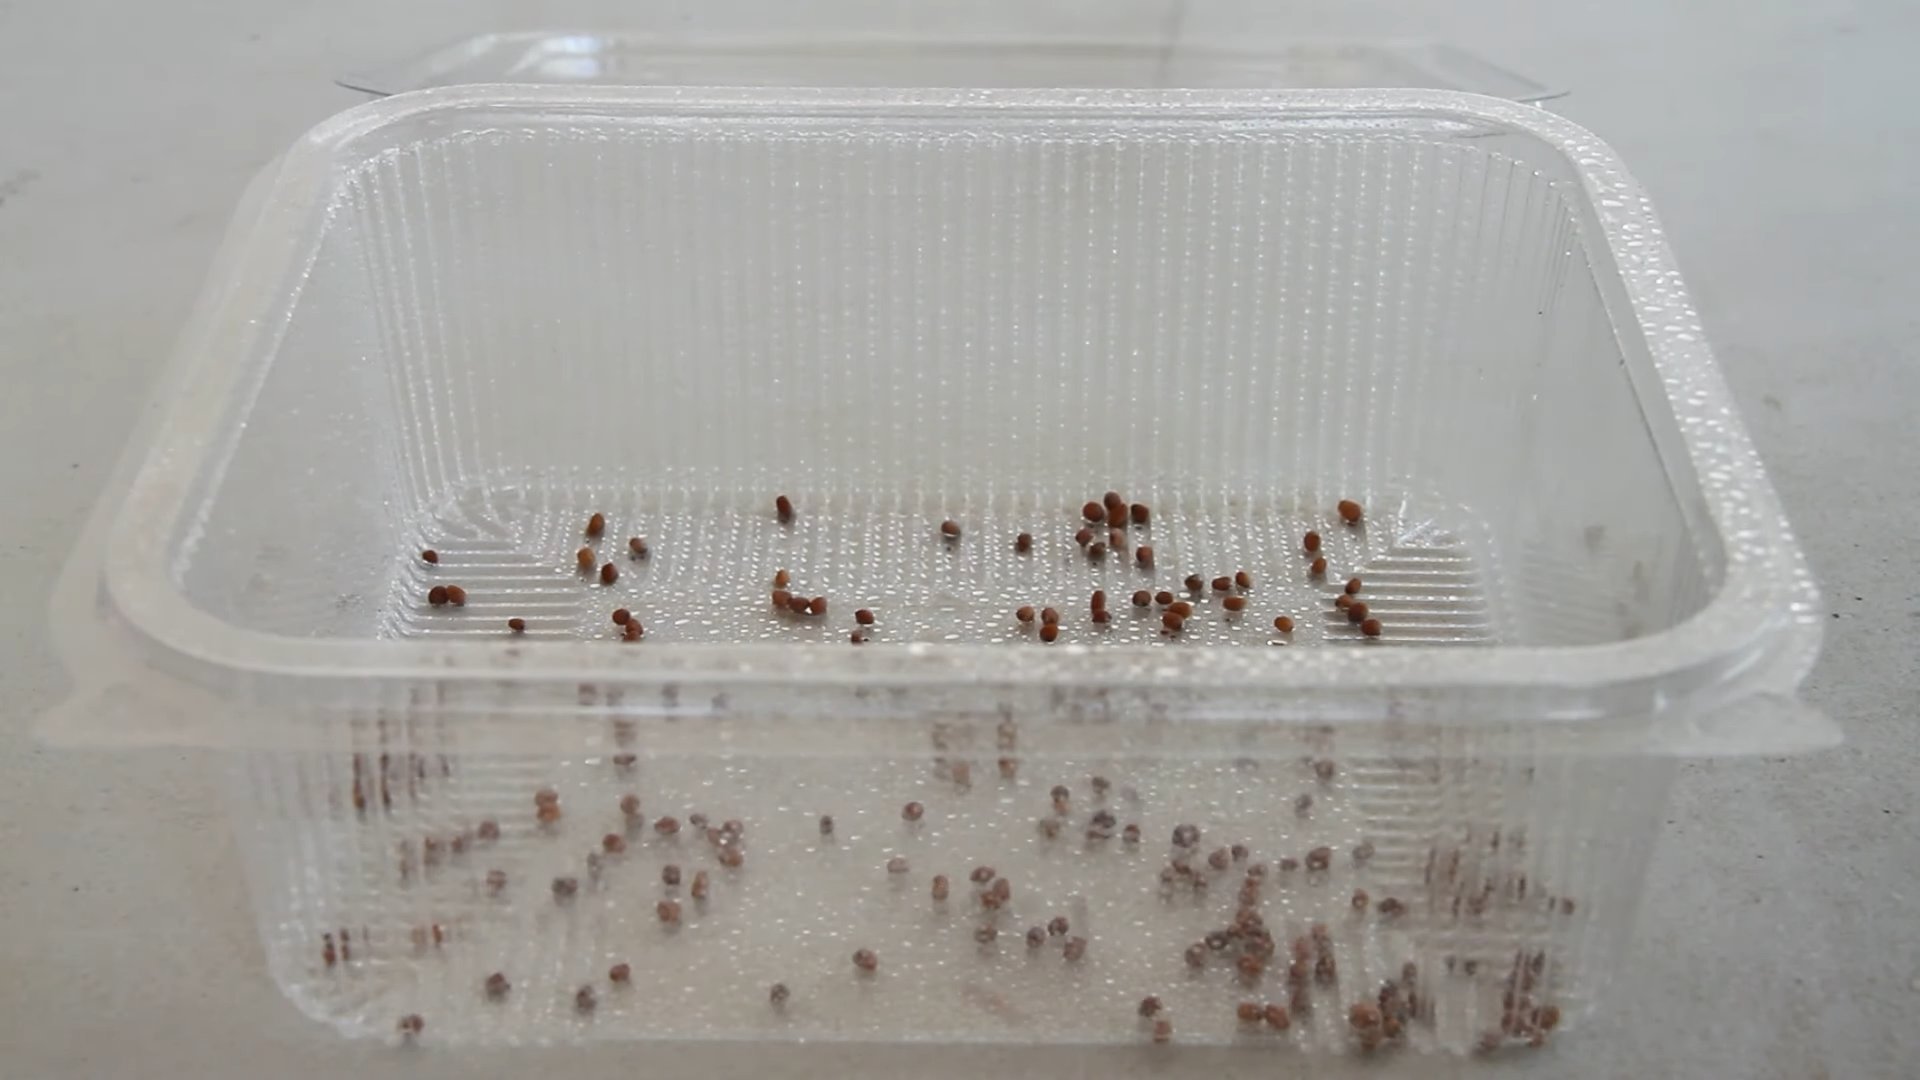
3. **Sowing the Seeds:** This is where the magic happens! Sprinkle the seeds evenly over the surface of the growing medium. The goal is to create a dense layer of seeds, but avoid overcrowding them. Refer to your seed packet for recommended seeding density. For smaller seeds like radish or broccoli, you can use a shaker or your fingers to distribute them evenly. For larger seeds like sunflower or pea shoots, you can place them individually.
4. **Misting the Seeds:** Gently mist the seeds with water using your spray bottle. The goal is to moisten the seeds without dislodging them.
5. **Covering the Seeds (Blackout Period):** This is a crucial step for many microgreens. Covering the seeds creates a dark, humid environment that encourages germination. You can cover the tray with a lid, a damp towel, or another tray turned upside down. The blackout period typically lasts for 2-4 days, or until the seeds have germinated and started to sprout.
6. **Weighting the Seeds (Optional):** After covering the seeds, you can place a light weight on top of the cover. This helps to ensure good seed-to-soil contact and promotes even germination. I often use a small book or a brick wrapped in plastic wrap.
7. **Checking for Germination:** Check the seeds daily for germination. Once you see sprouts emerging, it’s time to remove the cover and introduce light.
8. **Introducing Light:** Remove the cover and place the tray under a grow light or on a sunny windowsill. If using a grow light, position it a few inches above the seedlings. Rotate the tray regularly to ensure even light exposure.
9. **Watering:** Keep the growing medium consistently moist, but not soggy. Water from the bottom by pouring water into the drip tray. The growing medium will absorb the water through the drainage holes. Avoid watering from the top, as this can damage the delicate seedlings and increase the risk of mold. I usually water every 1-2 days, depending on the humidity and temperature.
10. **Monitoring and Maintenance:** Keep an eye on your microgreens for any signs of mold or disease. Good air circulation is important to prevent these problems. If you notice any mold, remove the affected area immediately.
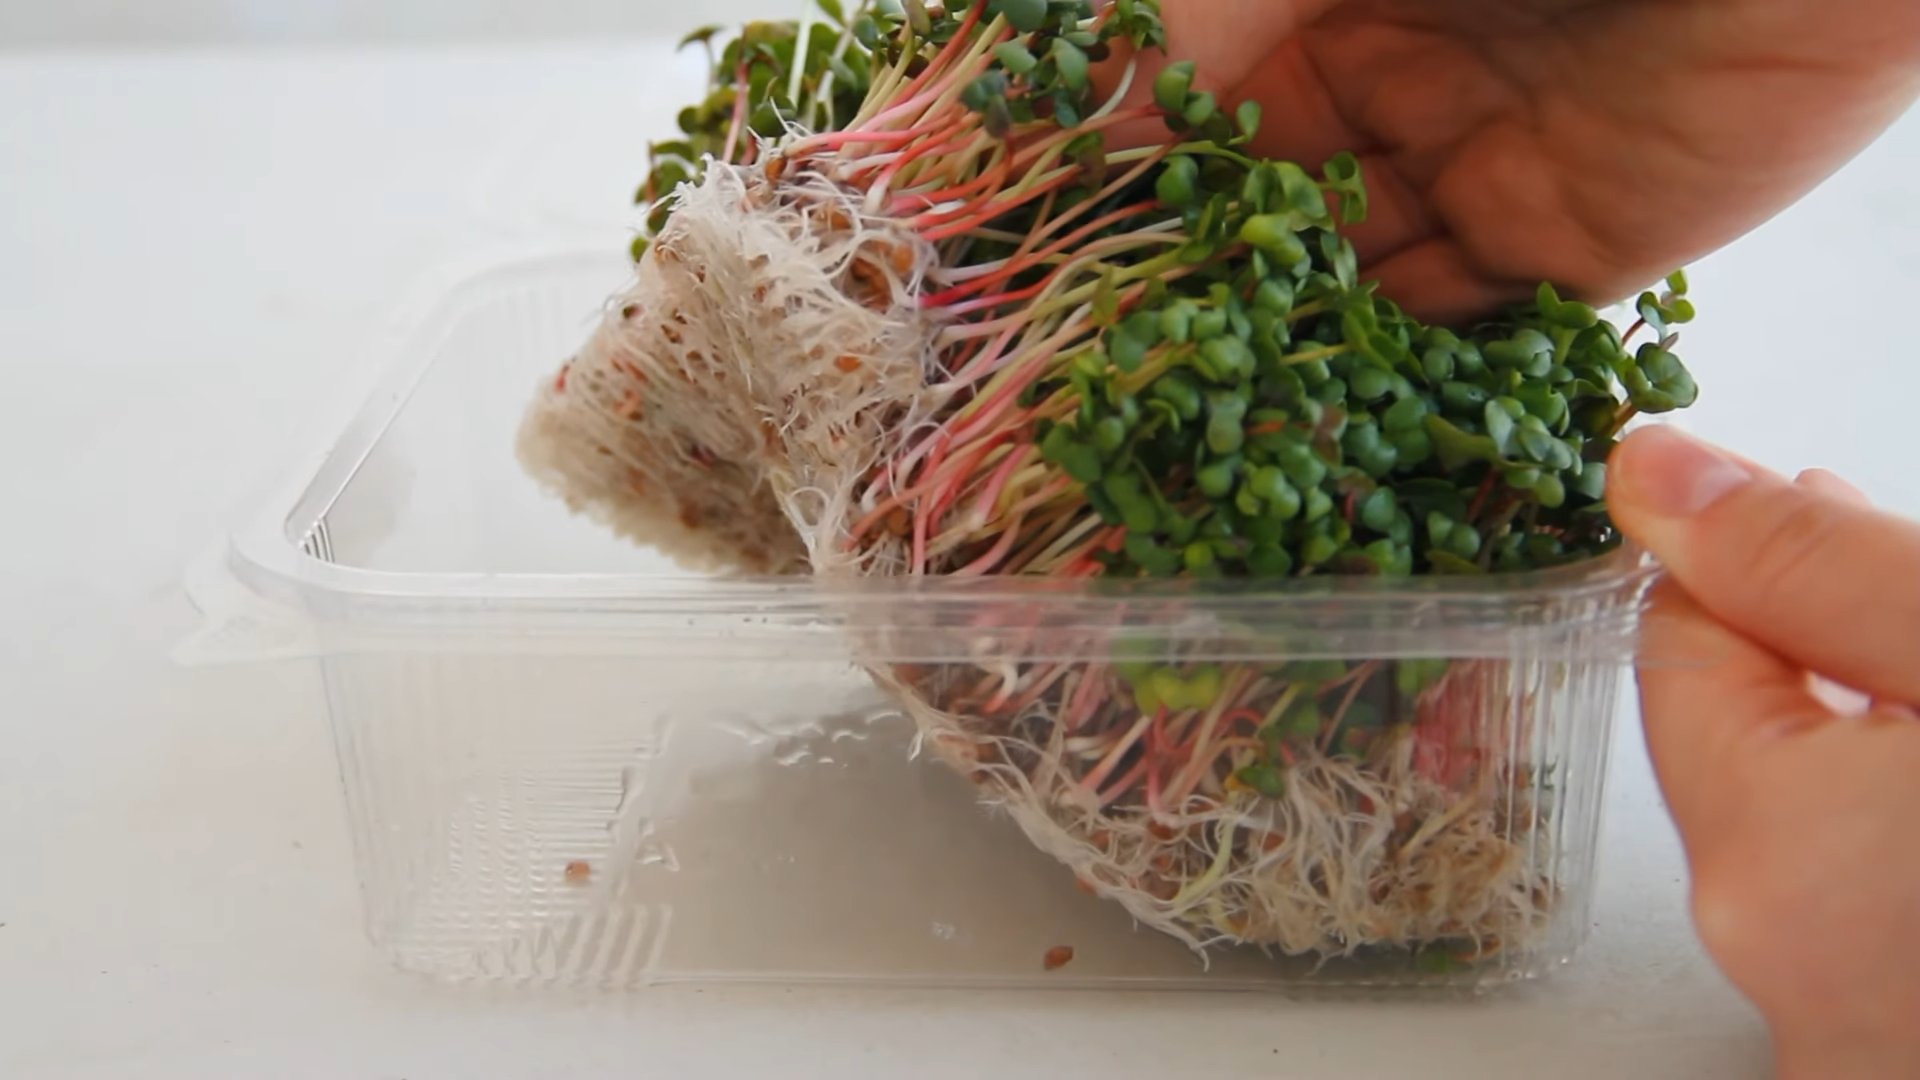
11. **Harvesting:** The moment you’ve been waiting for! Microgreens are typically ready to harvest in 7-14 days, depending on the variety. They’re ready when the cotyledon leaves are fully developed and the first true leaves (the second set of leaves) are starting to emerge. To harvest, use scissors or a sharp knife to cut the microgreens just above the growing medium.
12. **Enjoying Your Harvest:** Rinse the harvested microgreens with water and enjoy them immediately! They’re delicious in salads, sandwiches, soups, smoothies, or as a garnish. You can also store them in the refrigerator for a few days, but they’re best when fresh.
Troubleshooting Tips
Even with the best intentions, things don’t always go according to plan. Here are a few common problems and how to fix them:
* **Poor Germination:** This could be due to several factors, including old seeds, improper watering, or incorrect temperature. Make sure your seeds are fresh, your growing medium is moist but not soggy, and the temperature is within the optimal range for germination (usually between 65-75°F).
* **Mold:** Mold can be a problem in humid environments. Ensure good air circulation by placing a fan near the growing tray. Avoid overwatering and remove any affected areas immediately. You can also try spraying the seedlings with a diluted solution of hydrogen peroxide.
* **Leggy Seedlings:** Leggy seedlings are tall and spindly, with long stems and small leaves. This is usually caused by insufficient light. Move the tray closer to the light source or use a stronger grow light.
* **Uneven Growth:** Uneven growth can be caused by uneven light exposure or inconsistent watering. Rotate the tray regularly and make sure the growing medium is evenly moist.
Choosing the Right Seeds
As I mentioned earlier, the type of seeds you choose will greatly impact your microgreen growing experience. Here’s a little more detail on some popular options:
* **Radish:** Radish microgreens are known for their spicy, peppery flavor and vibrant colors. They’re also one of the fastest-growing microgreens, often ready to harvest in just 5-7 days.
* **Broccoli:** Broccoli microgreens have a mild, slightly sweet flavor and are packed with nutrients, including sulforaphane, a powerful antioxidant.
* **Sunflower:** Sunflower microgreens have a nutty, slightly sweet flavor and a crunchy texture. They’re also a good source of protein and fiber.
* **Pea Shoots:** Pea shoots have a sweet, pea-like flavor and are a great addition to salads and stir-fries. They’re also relatively easy to grow.
* **Mustard:** Mustard microgreens have a strong, pungent flavor and are often used in Asian cuisine.
* **Arugula:** Arugula microgreens have a peppery, slightly bitter flavor and are a good source of vitamins A and C.
* **Kale:** Kale microgreens have a mild, slightly earthy flavor and are packed with nutrients, including vitamins K and C.
* **Cress:** Cress microgreens have a peppery, slightly spicy flavor and are often used as a garnish.
* **Avoid Nightshades:** It’s generally recommended to avoid growing microgreens from the nightshade family (tomatoes, peppers, eggplants) as their leaves can contain solanine, which can be
Conclusion
So, there you have it! Growing microgreens at home is not only surprisingly simple, but it’s also an incredibly rewarding experience. Forget those expensive, pre-packaged containers from the grocery store. With just a few readily available supplies and a little bit of patience, you can cultivate a vibrant, nutrient-packed garden right on your windowsill.
Why is this DIY trick a must-try? Because it puts you in control of your food source. You know exactly what you’re eating – no hidden pesticides, no mysterious additives, just pure, fresh goodness. Plus, the flavor of homegrown microgreens is unparalleled. They burst with intense, concentrated flavors that will elevate your salads, sandwiches, soups, and just about any dish you can imagine.
Beyond the health benefits and superior taste, growing microgreens at home is also incredibly cost-effective. The initial investment in seeds and a growing tray is minimal, and you’ll quickly recoup that cost by avoiding those pricey store-bought options. Think of all the money you’ll save!
But the advantages don’t stop there. This DIY project is also a fantastic way to connect with nature, even if you live in an urban environment. Watching those tiny sprouts emerge and flourish is a truly satisfying experience, and it’s a great way to relieve stress and boost your mood. It’s a miniature garden that brings joy and nourishment to your life.
Looking for variations? Absolutely! Experiment with different types of seeds to discover your favorite flavors. Radish microgreens offer a peppery kick, while broccoli microgreens are mild and slightly sweet. Sunflower microgreens have a nutty flavor, and pea shoots are tender and slightly grassy. The possibilities are endless! You can also try using different growing mediums, such as coconut coir or hemp mats, to see which works best for you. Consider adding a small amount of organic fertilizer to the water to boost growth, but be careful not to overdo it.
Another fun variation is to create your own microgreen blends. Combine different types of seeds to create a unique flavor profile that perfectly complements your favorite dishes. Imagine a spicy mix of radish, mustard, and arugula microgreens, or a mild and refreshing blend of broccoli, kale, and clover.
We wholeheartedly encourage you to give this DIY trick a try. It’s easy, affordable, and incredibly rewarding. Once you experience the joy of harvesting your own fresh microgreens, you’ll never go back to store-bought again.
And most importantly, we want to hear about your experience! Share your photos, tips, and favorite microgreen recipes in the comments below. Let’s create a community of microgreen enthusiasts and inspire others to discover the joys of homegrown goodness. What are you waiting for? Start growing microgreens at home today!
Frequently Asked Questions (FAQ)
What exactly are microgreens?
Microgreens are young vegetable greens that are harvested just after the cotyledon leaves (the first leaves that emerge from the seed) have developed, and sometimes after the first true leaves have appeared. They are typically about 1-3 inches tall and are packed with nutrients and flavor. They are different from sprouts, which are germinated seeds eaten whole, including the root, seed, and stem. Microgreens are cut above the soil line.
What types of seeds can I use to grow microgreens?
The possibilities are vast! Some popular choices include:
* **Brassicas:** Broccoli, cauliflower, kale, cabbage, arugula, mustard
* **Legumes:** Peas, lentils, chickpeas
* **Asteraceae:** Sunflower, lettuce, endive, radicchio
* **Apiaceae:** Carrot, celery, fennel, dill
* **Amaranthaceae:** Amaranth, quinoa, beet, chard, spinach
However, it’s crucial to use seeds specifically intended for sprouting or growing microgreens. Avoid using seeds that have been treated with fungicides or other chemicals, as these are not safe for consumption.
What kind of container should I use?
You can use a variety of containers, as long as they have drainage holes. Shallow trays or plastic containers work well. You can even repurpose takeout containers or yogurt tubs, just make sure to clean them thoroughly first. A good size is about 10×20 inches, but you can adjust based on your needs. You’ll also want a tray without holes to act as a drip tray.
What kind of soil should I use?
A good quality potting mix is ideal. You can also use coconut coir or a soilless mix specifically designed for seed starting. Avoid using garden soil, as it may contain pests or diseases. Ensure the soil is well-draining to prevent waterlogging.
How much light do microgreens need?
Microgreens need plenty of light to thrive. A sunny windowsill that receives at least 4-6 hours of direct sunlight per day is ideal. If you don’t have enough natural light, you can supplement with a grow light. Position the light a few inches above the microgreens and keep it on for 12-16 hours per day.
How often should I water my microgreens?
Keep the soil consistently moist, but not soggy. Water gently from the bottom by adding water to the drip tray, allowing the soil to absorb the moisture. You can also mist the microgreens with a spray bottle. Avoid overwatering, as this can lead to mold growth.
How long does it take to grow microgreens?
The growing time varies depending on the type of seed, but most microgreens are ready to harvest in 7-14 days. Keep an eye on them and harvest when they have developed their cotyledon leaves and sometimes their first true leaves.
How do I harvest microgreens?
Use sharp scissors or a knife to cut the microgreens just above the soil line. Wash them gently before using.
How do I store microgreens?
Store harvested microgreens in an airtight container in the refrigerator. They will typically last for up to a week.
Can I reuse the soil?
It’s generally not recommended to reuse the soil, as it may contain pathogens or depleted nutrients. It’s best to start with fresh soil each time you grow microgreens. You can compost the used soil.
What if I see mold growing?
Mold can sometimes be a problem, especially in humid environments. To prevent mold, ensure good air circulation and avoid overwatering. If you see mold, remove the affected areas immediately. You can also try spraying the microgreens with a diluted solution of hydrogen peroxide.
Are there any seeds I shouldn’t use for microgreens?
Yes! Avoid using seeds from the nightshade family (tomatoes, peppers, eggplants), as their leaves can be toxic. Also, avoid using seeds that have been treated with chemicals. Always use seeds specifically intended for sprouting or growing microgreens.
Can I grow microgreens outdoors?
Yes, you can grow microgreens outdoors, but you’ll need to protect them from extreme weather conditions, such as frost or excessive heat. Choose a location that receives partial shade and ensure the soil stays consistently moist.
How can I prevent damping off?
Damping off is a fungal disease that can kill seedlings. To prevent damping off, use sterile soil, ensure good air circulation, and avoid overwatering. You can also treat the seeds with an organic fungicide before planting.
What are the nutritional benefits of microgreens?
Microgreens are packed with vitamins, minerals, and antioxidants. Studies have shown that they can contain significantly higher levels of nutrients than their mature counterparts. They are a great way to boost your nutrient intake and add flavor to your meals.


Leave a Comment