
Grow Napa Cabbage Backyard: Imagine stepping into your backyard and harvesting crisp, delicious Napa cabbage, ready to be transformed into kimchi, stir-fries, or fresh salads. Sounds dreamy, right? Well, it doesn’t have to be just a dream! This DIY guide is packed with simple, effective tricks to help you cultivate thriving Napa cabbage right in your own backyard, even if you’re a beginner gardener.
Napa cabbage, also known as Chinese cabbage, has a rich history deeply intertwined with Asian cuisine. For centuries, it’s been a staple ingredient, particularly in Korean kimchi, a fermented dish that’s not only delicious but also packed with probiotics. But you don’t have to travel to Asia to enjoy this versatile vegetable.
Many people shy away from growing their own vegetables, thinking it’s too complicated or time-consuming. But with the right knowledge and a few clever hacks, you can easily grow Napa Cabbage Backyard and enjoy fresh, organic produce without breaking the bank. This article will provide you with easy-to-follow steps and insider tips to ensure a bountiful harvest. From choosing the right seeds to protecting your plants from pests, we’ll cover everything you need to know to succeed. So, grab your gardening gloves, and let’s get started!
Napa-Kohl im eigenen Garten anbauen: Eine Schritt-für-Schritt-Anleitung
Hey Gartenfreunde! Habt ihr schon mal darüber nachgedacht, Napa-Kohl (auch Chinakohl genannt) selbst anzubauen? Ich kann euch sagen, es ist einfacher als man denkt und das Ergebnis ist einfach köstlich! Frischer, knackiger Napa-Kohl direkt aus dem eigenen Garten – was will man mehr? In diesem Artikel zeige ich euch, wie ihr das ganz einfach hinbekommt. Los geht’s!
Was du brauchst: Die Vorbereitung
Bevor wir loslegen, brauchen wir natürlich die richtigen Materialien und Werkzeuge. Hier ist eine Liste, damit ihr nichts vergesst:
* Napa-Kohl-Samen: Wählt eine Sorte, die für euer Klima geeignet ist. Es gibt frühreife und spätreife Sorten.
* Anzuchterde: Für die Voranzucht im Haus oder Gewächshaus.
* Gartenerde: Gut durchlässig und nährstoffreich.
* Kompost oder organischer Dünger: Um den Boden anzureichern.
* Pflanzgefäße oder Anzuchtschalen: Für die Voranzucht.
* Gießkanne oder Gartenschlauch: Zum Bewässern.
* Gartenwerkzeug: Spaten, Harke, Pflanzkelle.
* Schneckenkorn (optional): Napa-Kohl ist leider sehr beliebt bei Schnecken.
* Insektenschutznetz (optional): Um Kohlweißlinge fernzuhalten.
Die Aussaat: Der Start ins Kohl-Glück
Es gibt zwei Möglichkeiten, Napa-Kohl anzubauen: Direktsaat im Freien oder Voranzucht im Haus. Ich empfehle die Voranzucht, da sie die Erfolgschancen erhöht und die Pflanzen einen Vorsprung haben.
Voranzucht im Haus (empfohlen)
1. Aussaatzeitpunkt bestimmen: Beginnt mit der Voranzucht etwa 4-6 Wochen vor dem letzten erwarteten Frost. In Deutschland ist das meistens im März oder April.
2. Anzuchtschalen vorbereiten: Füllt die Anzuchtschalen oder Pflanzgefäße mit Anzuchterde.
3. Samen aussäen: Legt 2-3 Samen pro Zelle oder Topf etwa 1 cm tief in die Erde.
4. Angießen: Gießt die Erde vorsichtig an, sodass sie feucht, aber nicht nass ist.
5. Warm stellen: Stellt die Anzuchtschalen an einen warmen, hellen Ort. Eine Temperatur von 18-22°C ist ideal.
6. Feucht halten: Haltet die Erde gleichmäßig feucht, aber vermeidet Staunässe.
7. Pikieren: Sobald die Sämlinge 2-3 echte Blätter haben (nicht nur die Keimblätter), könnt ihr sie pikieren. Das bedeutet, dass ihr die stärksten Sämlinge in größere Töpfe umpflanzt, damit sie mehr Platz zum Wachsen haben.
Direktsaat im Freien (Alternative)
1. Boden vorbereiten: Lockert den Boden gründlich auf und entfernt Unkraut. Mischt Kompost oder organischen Dünger unter, um den Boden anzureichern.
2. Aussaatzeitpunkt bestimmen: Die Direktsaat erfolgt, sobald keine Frostgefahr mehr besteht. Das ist meistens ab Mitte Mai der Fall.
3. Saatrillen ziehen: Zieht Saatrillen im Abstand von etwa 40-50 cm.
4. Samen aussäen: Legt die Samen in die Saatrillen und bedeckt sie mit einer dünnen Schicht Erde.
5. Angießen: Gießt die Erde vorsichtig an.
6. Vereinzeln: Sobald die Sämlinge groß genug sind, müsst ihr sie vereinzeln, sodass die Pflanzen genügend Platz zum Wachsen haben. Lasst etwa 40-50 cm Abstand zwischen den Pflanzen.
Das Umpflanzen: Ab ins Beet!
Sobald die Jungpflanzen kräftig genug sind (etwa 10-15 cm hoch), können sie ins Beet umgepflanzt werden.
1. Beet vorbereiten: Lockert den Boden im Beet gründlich auf und entfernt Unkraut. Mischt Kompost oder organischen Dünger unter.
2. Pflanzlöcher graben: Grabt Pflanzlöcher im Abstand von etwa 40-50 cm.
3. Pflanzen einsetzen: Setzt die Jungpflanzen vorsichtig in die Pflanzlöcher. Achtet darauf, dass der Wurzelballen vollständig mit Erde bedeckt ist.
4. Angießen: Gießt die Pflanzen gründlich an.
5. Schutzmaßnahmen treffen: Bringt bei Bedarf Schneckenkorn aus oder deckt die Pflanzen mit einem Insektenschutznetz ab.
Die Pflege: Damit der Kohl prächtig gedeiht
Napa-Kohl ist relativ pflegeleicht, aber ein paar Dinge solltet ihr beachten, damit er gut wächst.
1. Bewässerung: Haltet den Boden gleichmäßig feucht, besonders während trockener Perioden. Gießt am besten morgens oder abends, um Verdunstung zu vermeiden.
2. Düngung: Düngt die Pflanzen regelmäßig mit einem organischen Dünger oder Kompost. Eine Düngung alle 2-3 Wochen ist ausreichend.
3. Unkrautbekämpfung: Entfernt regelmäßig Unkraut, da es dem Kohl Nährstoffe und Wasser entzieht.
4. Schädlingsbekämpfung: Achtet auf Schädlinge wie Schnecken, Kohlweißlinge und Blattläuse. Bekämpft sie bei Bedarf mit geeigneten Mitteln. Schneckenkorn ist oft notwendig, besonders bei feuchtem Wetter. Ein Insektenschutznetz kann Kohlweißlinge effektiv fernhalten.
5. Bodenpflege: Lockert den Boden regelmäßig auf, um die Belüftung zu verbessern.
Die Ernte: Endlich Napa-Kohl aus dem eigenen Garten!
Die Erntezeit hängt von der Sorte und dem Aussaatzeitpunkt ab. In der Regel könnt ihr Napa-Kohl etwa 80-100 Tage nach der Aussaat ernten.
1. Erntezeitpunkt bestimmen: Der Kohl ist erntereif, wenn er fest und geschlossen ist.
2. Kopf abschneiden: Schneidet den Kohlkopf mit einem scharfen Messer knapp über dem Boden ab.
3. Lagerung: Napa-Kohl lässt sich im Kühlschrank etwa 1-2 Wochen lagern.
Zusätzliche Tipps für den erfolgreichen Anbau
* Fruchtfolge beachten: Baut Napa-Kohl nicht jedes Jahr am selben Standort an, um Krankheiten und Schädlingen vorzubeugen.
* Sonniger Standort: Napa-Kohl benötigt einen sonnigen Standort, um optimal zu wachsen.
* Gute Nachbarn: Gute Nachbarn für Napa-Kohl sind beispielsweise Salat, Spinat, Radieschen und Dill.
* Schlechte Nachbarn: Schlechte Nachbarn sind beispielsweise andere Kohlsorten, Tomaten und Erdbeeren.
* Bodenverbesserung: Schwere Böden können durch die Zugabe von Sand und Kompost verbessert werden.
* Sortenwahl: Wählt eine Sorte, die für euer Klima und eure Bedürfnisse geeignet ist. Es gibt frühreife Sorten für kurze Sommer und spätreife Sorten für längere Sommer.
Häufige Probleme und Lösungen
* Schneckenbefall: Schneckenkorn ausbringen oder Schneckenzäune aufstellen.
* Kohlweißlinge: Insektenschutznetz verwenden oder Raupen absammeln.
* Blattläuse: Mit einem Wasserstrahl abspritzen oder mit einem biologischen Insektizid behandeln.
* Kohlhernie: Fruchtfolge beachten und den Boden kalken.
* Falscher Mehltau: Für gute Belüftung sorgen und befallene Blätter entfernen.
Napa-Kohl in der Küche: Vielseitig und lecker!
Napa-Kohl ist unglaublich vielseitig und kann roh, gekocht, gebraten oder eingelegt werden. Hier sind ein paar Ideen:
* Salat: Fein geschnitten als Salat mit einem leckeren Dressing.
* Kimchi: Der Klassiker aus Korea!
* Suppen

Conclusion
So, there you have it! Growing Napa cabbage in your backyard isn’t just a gardening project; it’s an investment in fresh, flavorful meals and a deeper connection to the food you eat. We’ve walked through the essential steps, from selecting the right seeds to harvesting your own crisp, delicious heads. But why should you take the plunge and dedicate a portion of your garden to this versatile vegetable?
First and foremost, the taste of homegrown Napa cabbage is simply unparalleled. Forget the bland, often bruised heads you find at the grocery store. When you grow your own, you’re rewarded with a sweetness and tenderness that’s truly exceptional. Imagine the satisfying crunch in your homemade kimchi, the delicate flavor in your stir-fries, or the refreshing crispness in your salads – all elevated by the superior quality of your backyard Napa cabbage.
Beyond the taste, growing your own Napa cabbage offers a level of control and assurance that you just can’t get from store-bought produce. You know exactly what’s gone into your cabbage – no harsh pesticides, no questionable fertilizers, just good old-fashioned care and attention. This is especially important for those who are conscious about their health and the environment.
But the benefits don’t stop there. Gardening is a therapeutic activity, a chance to connect with nature and de-stress from the demands of daily life. Tending to your Napa cabbage patch can be a meditative experience, a way to slow down, appreciate the beauty of the natural world, and reap the rewards of your hard work.
And let’s not forget the cost savings! While the initial investment in seeds and supplies might seem daunting, the long-term savings are significant. A single head of Napa cabbage can cost several dollars at the grocery store, but with a little effort, you can grow multiple heads for a fraction of the price.
Ready to take your Napa cabbage growing to the next level? Consider these variations:
* **Succession Planting:** Plant seeds every few weeks to ensure a continuous harvest throughout the growing season.
* **Companion Planting:** Plant Napa cabbage alongside beneficial companions like dill, chamomile, and rosemary to deter pests and attract pollinators.
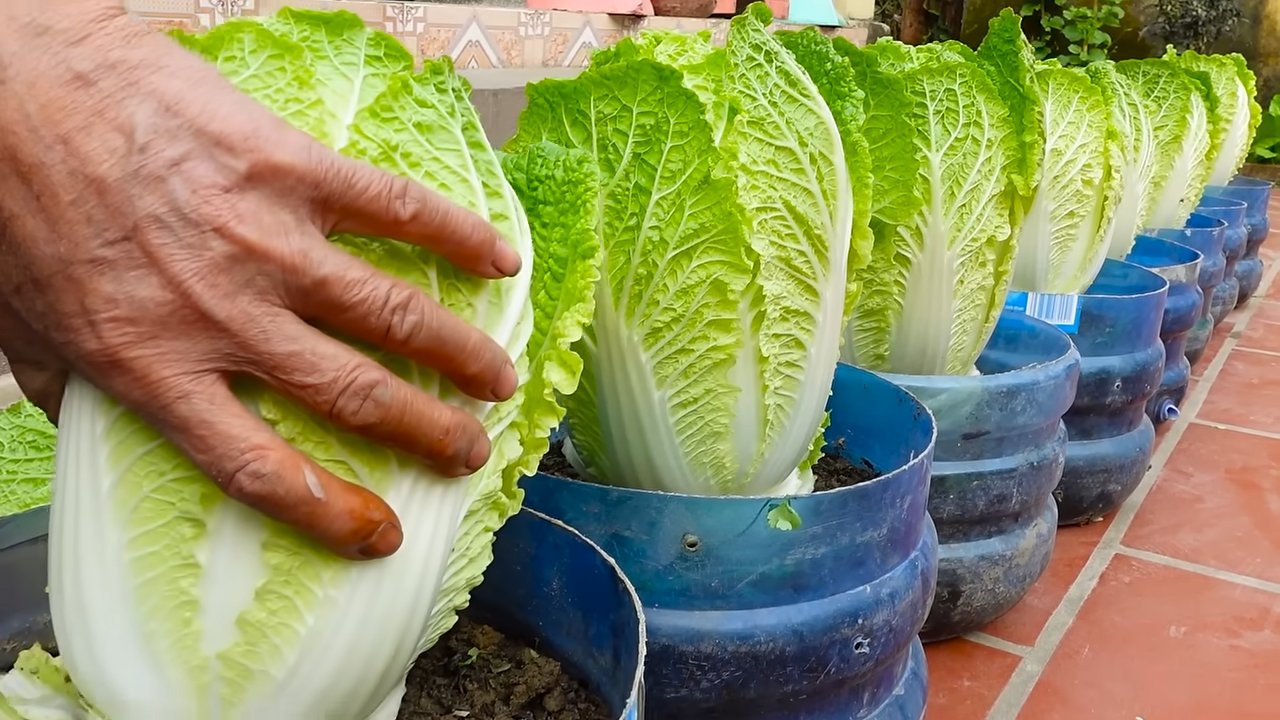
* **Container Gardening:** If you’re short on space, you can successfully grow Napa cabbage in large containers. Just make sure to provide adequate drainage and sunlight.
* **Different Varieties:** Explore different varieties of Napa cabbage, such as ‘Blues’ or ‘Optiko’, to find the one that best suits your taste and growing conditions.
Growing Napa cabbage in your backyard is a rewarding experience that offers a multitude of benefits, from superior taste and quality to cost savings and therapeutic value. So, what are you waiting for? Grab some seeds, prepare your garden bed, and get ready to enjoy the fruits (or rather, vegetables) of your labor.
We’re confident that you’ll be amazed by the results. And we want to hear all about it! Share your experiences, tips, and photos with us in the comments below. Let’s build a community of Napa cabbage enthusiasts and inspire others to embrace the joys of homegrown produce. Happy gardening!
Frequently Asked Questions (FAQ)
What is the best time of year to plant Napa cabbage?
The best time to plant Napa cabbage depends on your climate. Napa cabbage is a cool-season crop, meaning it thrives in cooler temperatures and shorter days. In most regions, the ideal planting times are either in the early spring (6-8 weeks before the last expected frost) or in the late summer (6-8 weeks before the first expected frost). Planting in the heat of summer can cause the cabbage to bolt (go to seed) prematurely, resulting in bitter-tasting leaves. Check your local frost dates and adjust your planting schedule accordingly. For a fall harvest, start seeds indoors in mid-summer and transplant them outdoors when the weather cools down.
How much sunlight does Napa cabbage need?
Napa cabbage requires at least 6 hours of direct sunlight per day to thrive. Choose a planting location that receives ample sunlight throughout the day. If you live in a particularly hot climate, some afternoon shade can be beneficial to prevent the leaves from scorching. If you’re growing Napa cabbage in containers, make sure to place them in a sunny spot. Insufficient sunlight can lead to stunted growth and smaller heads.
What kind of soil is best for growing Napa cabbage?
Napa cabbage prefers well-drained, fertile soil that is rich in organic matter. The ideal soil pH is between 6.0 and 7.5. Before planting, amend your soil with compost, aged manure, or other organic materials to improve its fertility and drainage. Avoid planting in heavy clay soil, as this can lead to root rot. If your soil is compacted, consider adding sand or perlite to improve drainage. A soil test can help you determine the pH and nutrient levels of your soil and guide you in making necessary amendments.
How often should I water my Napa cabbage plants?
Napa cabbage needs consistent moisture to grow properly. Water your plants deeply and regularly, especially during dry periods. Aim to keep the soil consistently moist but not waterlogged. Overwatering can lead to root rot, while underwatering can cause the leaves to wilt and the heads to be smaller. A good rule of thumb is to water when the top inch of soil feels dry to the touch. Mulching around your plants can help retain moisture and suppress weeds.
What are some common pests and diseases that affect Napa cabbage?
Napa cabbage is susceptible to a variety of pests and diseases, including cabbage worms, aphids, flea beetles, clubroot, and black rot. To prevent pest and disease problems, practice good garden hygiene, such as removing plant debris and weeds. Use row covers to protect your plants from pests. Inspect your plants regularly for signs of infestation or disease and take action promptly. Organic pest control methods, such as insecticidal soap and Bacillus thuringiensis (Bt), can be effective against many common pests. Choose disease-resistant varieties of Napa cabbage to minimize the risk of disease.
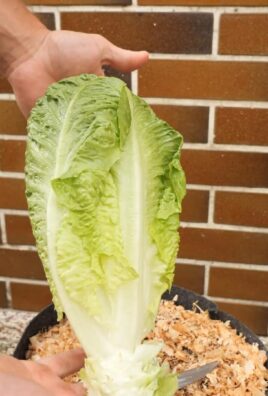
How do I know when my Napa cabbage is ready to harvest?
Napa cabbage is typically ready to harvest 70-80 days after planting. The heads should be firm and compact, and the leaves should be tightly wrapped. The size of the head will vary depending on the variety, but most heads will be about 12-18 inches long. To harvest, use a sharp knife to cut the head at the base of the plant. Remove any yellow or damaged outer leaves.
Can I store Napa cabbage after harvesting?
Yes, Napa cabbage can be stored for several weeks in the refrigerator. Wrap the head in plastic wrap or place it in a plastic bag to prevent it from drying out. Store it in the crisper drawer of your refrigerator. Avoid storing Napa cabbage near ethylene-producing fruits, such as apples and bananas, as this can cause it to spoil more quickly.
Can I grow Napa cabbage in containers?
Yes, Napa cabbage can be successfully grown in containers. Choose a large container that is at least 12 inches deep and 12 inches wide. Make sure the container has drainage holes to prevent waterlogging. Use a high-quality potting mix that is well-draining and rich in organic matter. Water regularly and fertilize every few weeks with a balanced fertilizer. Place the container in a sunny location that receives at least 6 hours of direct sunlight per day.
Is Napa cabbage a good source of nutrients?
Yes, Napa cabbage is a nutritious vegetable that is low in calories and high in vitamins and minerals. It is a good source of vitamin C, vitamin K, folate, and potassium. It also contains antioxidants and fiber. Adding Napa cabbage to your diet can help boost your immune system, improve digestion, and protect against chronic diseases.
What are some ways to use Napa cabbage in cooking?
Napa cabbage is a versatile vegetable that can be used in a variety of dishes. It can be eaten raw in salads, stir-fried, steamed, or added to soups and stews. It is also a key ingredient in kimchi, a traditional Korean fermented dish. Napa cabbage has a mild, slightly sweet flavor that pairs well with a variety of ingredients. Experiment with different recipes and find your favorite ways to enjoy this delicious and nutritious vegetable.
Leave a Comment