
Grow Pineapple at Home? Absolutely! Imagine plucking a juicy, sun-ripened pineapple straight from your own backyard. Sounds like a tropical dream, right? Well, it’s more attainable than you think, and this DIY guide will show you exactly how to make it a reality. Forget those expensive grocery store pineapples – we’re about to embark on a fun and rewarding gardening adventure!
The pineapple, a symbol of hospitality and welcome, has a rich history. Originating in South America, it spread throughout the Caribbean and eventually captivated Europeans. Pineapples were so prized that they became status symbols, often rented out for display at lavish parties! Now, you can bring a touch of that exotic luxury to your own home.
Why should you learn this DIY trick? Because growing your own pineapple is not only incredibly satisfying, but it’s also a sustainable way to enjoy this delicious fruit. Plus, it’s a fantastic conversation starter! In this article, I’ll share my tried-and-true methods for successfully cultivating pineapples, even if you don’t have a sprawling garden. We’ll cover everything from selecting the perfect pineapple top to nurturing your plant for optimal growth. Get ready to grow pineapple at home and impress your friends and family with your green thumb!

DIY Hanging Mint Container Garden: A Refreshing Project
Hey there, fellow plant enthusiasts! I’m so excited to share this super easy and rewarding DIY project with you: creating your very own hanging mint container garden. Not only will you have a readily available supply of fresh mint for mojitos, teas, and culinary creations, but it’ll also add a touch of green beauty to your porch, balcony, or even kitchen window. Plus, containing mint in a pot is crucial because it’s a notorious spreader! Let’s get started!
What You’ll Need:
Before we dive in, let’s gather our supplies. This is a pretty straightforward project, so you probably have a lot of these items already.
* Hanging Basket: Choose a basket that’s at least 10 inches in diameter. I prefer the ones with coco coir liners, as they provide good drainage and a natural look. You can find these at most garden centers or online.
* Potting Soil: Use a high-quality potting mix specifically formulated for containers. This will ensure good drainage and aeration for your mint. Avoid using garden soil, as it can become compacted in containers.
* Mint Seedlings or Cuttings: You can either start with established mint seedlings from a nursery or propagate your own from cuttings. I’ll explain both methods below.
* Water-Absorbing Polymer Crystals (Optional): These crystals help retain moisture in the soil, which is especially helpful for hanging baskets that tend to dry out quickly.
* Slow-Release Fertilizer (Optional): A slow-release fertilizer will provide your mint with a steady supply of nutrients over several months.
* Gardening Gloves: To keep your hands clean and protected.
* Trowel or Small Shovel: For scooping and transferring soil.
* Watering Can or Hose: For watering your newly planted mint.
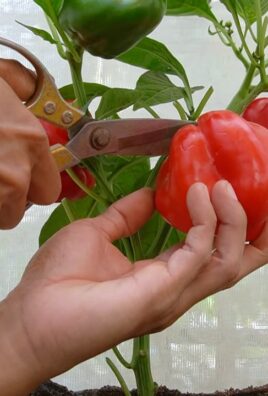
* Scissors or Pruning Shears: For taking cuttings (if propagating).
* Rooting Hormone (Optional, for cuttings): This can help speed up the rooting process.
* Spray Bottle (Optional, for cuttings): To keep the cuttings humid.
Propagating Mint from Cuttings (If You’re Feeling Adventurous!)
If you already have a mint plant, propagating from cuttings is a fantastic way to expand your mint collection without spending extra money. It’s also surprisingly easy!
1. Select Healthy Stems: Choose healthy, non-flowering stems from your existing mint plant. Look for stems that are about 4-6 inches long and have several leaves.
2. Prepare the Cuttings: Using clean scissors or pruning shears, cut the stems just below a leaf node (the point where a leaf grows from the stem). Remove the leaves from the bottom 1-2 inches of the stem. This is where the roots will emerge.
3. Apply Rooting Hormone (Optional): Dip the cut end of each stem into rooting hormone powder or liquid. This will encourage root development.
4. Plant the Cuttings: Fill a small pot or container with moist potting mix. Make small holes in the soil and gently insert the cuttings, spacing them about an inch apart.
5. Create a Humid Environment: Cover the pot with a clear plastic bag or place it inside a humidity dome. This will help keep the cuttings moist and prevent them from drying out. You can also mist the cuttings with water from a spray bottle several times a day.
6. Provide Indirect Light: Place the pot in a location with bright, indirect light. Avoid direct sunlight, which can scorch the cuttings.
7. Wait for Roots to Develop: It usually takes about 2-4 weeks for roots to develop. You can gently tug on the cuttings to check for resistance, which indicates that roots have formed.
8. Transplant the Rooted Cuttings: Once the cuttings have developed roots, you can transplant them into your hanging basket.
Planting Your Mint in the Hanging Basket
Whether you’re using seedlings or rooted cuttings, the planting process is essentially the same.
1. Prepare the Hanging Basket: If your hanging basket has a coco coir liner, make sure it’s securely in place. If it doesn’t have a liner, you can add one yourself using burlap or landscape fabric. This will help prevent the soil from falling out.
2. Add Potting Soil: Fill the hanging basket about two-thirds full with potting soil. If you’re using water-absorbing polymer crystals, mix them into the soil according to the package instructions. If you’re using slow-release fertilizer, sprinkle it over the soil surface.
3. Plant the Mint: Gently remove the mint seedlings or rooted cuttings from their containers. Loosen the roots slightly with your fingers.
4. Space the Plants: Plant the mint plants in the hanging basket, spacing them about 4-6 inches apart. This will give them enough room to grow and spread.
5. Fill with Soil: Fill the remaining space in the hanging basket with potting soil, leaving about an inch of space between the soil surface and the rim of the basket.
6. Water Thoroughly: Water the newly planted mint thoroughly until water drains out of the bottom of the basket. This will help settle the soil and ensure that the roots are well-hydrated.
Caring for Your Hanging Mint Garden
Now that your hanging mint garden is planted, it’s time to learn how to care for it. Mint is a relatively low-maintenance plant, but there are a few things you need to keep in mind to ensure that it thrives.
1. Watering: Mint prefers consistently moist soil, but it doesn’t like to be waterlogged. Water your hanging mint garden whenever the top inch of soil feels dry to the touch. Hanging baskets tend to dry out quickly, especially in hot weather, so you may need to water them daily.
2. Sunlight: Mint thrives in partial shade to full sun. In hot climates, it’s best to provide some afternoon shade to prevent the leaves from scorching.
3. Fertilizing: If you didn’t use slow-release fertilizer when planting, you can fertilize your mint every 2-4 weeks with a balanced liquid fertilizer. Follow the package instructions for application rates.
4. Pruning: Regular pruning is essential for keeping your mint plant healthy and productive. Pinch off the tips of the stems to encourage bushier growth. You can also harvest leaves as needed for culinary use.
5. Preventing Flowering: Mint tends to become less flavorful when it flowers. To prevent flowering, pinch off any flower buds as soon as you see them.
6. Overwintering: In colder climates, you’ll need to protect your hanging mint garden from frost. You can either bring it indoors or move it to a sheltered location, such as a garage or shed. Water sparingly during the winter months.
7. Pest Control: Mint is generally pest-resistant, but it can occasionally be affected by aphids or spider mites. If you notice any pests, spray the plant with insecticidal soap or neem oil.
Harvesting Your Mint
One of the best things about growing your own mint is being able to harvest fresh leaves whenever you need them.
1. Harvesting Leaves: To harvest mint leaves, simply pinch or cut off the stems just above a leaf node. You can harvest as much or as little as you need.
2. Using Fresh Mint: Fresh mint leaves can be used in a variety of culinary applications, such as teas, cocktails, salads, and desserts.
3. Drying Mint: If you have more mint than you can use fresh, you can dry it for later use. To dry mint, tie the stems together in small bundles and hang them upside down in a cool, dry place. Once the leaves are completely dry, you can crumble them and store them in an airtight container.
Troubleshooting
Even with the best care, you might encounter a few problems with your hanging mint garden. Here are some common issues and how to address them:
* Yellowing Leaves: Yellowing leaves can be caused by overwatering, underwatering, or nutrient deficiencies. Check the soil moisture and adjust your watering schedule accordingly. If the soil is consistently moist, you may be overwatering. If the soil is dry, you may be underwatering. You can also fertilize the plant to address any nutrient deficiencies.
* Brown Leaf Tips: Brown leaf tips can be caused by dry air or salt buildup in the soil. Increase the humidity around the plant by misting it with water or placing it near a humidifier. You can also flush the soil with water to remove any salt buildup.
* Leggy Growth: Leggy growth (long, spindly stems with few leaves) is usually caused by insufficient light. Move the plant to a location with more light.
Hey there, fellow plant enthusiasts! I’m so excited to share this super easy and rewarding DIY project with you: creating your very own hanging mint container garden. Not only will you have a readily available supply of fresh mint for mojitos, teas, and culinary creations, but it’ll also add a touch of green beauty to your porch, balcony, or even kitchen window. Plus, containing mint in a pot is crucial because it’s a notorious spreader! Let’s get started!
What You’ll Need:
Before we dive in, let’s gather our supplies. This is a pretty straightforward project, so you probably have a lot of these items already.
* Hanging Basket: Choose a basket that’s at least 10 inches in diameter. I prefer the ones with coco coir liners, as they provide good drainage and a natural look. You can find these at most garden centers or online.
* Potting Soil: Use a high-quality potting mix specifically formulated for containers. This will ensure good drainage and aeration for your mint. Avoid using garden soil, as it can become compacted in containers.
* Mint Seedlings or Cuttings: You can either start with established mint seedlings from a nursery or propagate your own from cuttings. I’ll explain both methods below.
* Water-Absorbing Polymer Crystals (Optional): These crystals help retain moisture in the soil, which is especially helpful for hanging baskets that tend to dry out quickly.
* Slow-Release Fertilizer (Optional): A slow-release fertilizer will provide your mint with a steady supply of nutrients over several months.
* Gardening Gloves: To keep your hands clean and protected.
* Trowel or Small Shovel: For scooping and transferring soil.
* Watering Can or Hose: For watering your newly planted mint.
* Scissors or Pruning Shears: For taking cuttings (if propagating).
* Rooting Hormone (Optional, for cuttings): This can help speed up the rooting process.
* Spray Bottle (Optional, for cuttings): To keep the cuttings humid.
Propagating Mint from Cuttings (If You’re Feeling Adventurous!)
If you already have a mint plant, propagating from cuttings is a fantastic way to expand your mint collection without spending extra money. It’s also surprisingly easy!
1. Select Healthy Stems: Choose healthy, non-flowering stems from your existing mint plant. Look for stems that are about 4-6 inches long and have several leaves.
2. Prepare the Cuttings: Using clean scissors or pruning shears, cut the stems just below a leaf node (the point where a leaf grows from the stem). Remove the leaves from the bottom 1-2 inches of the stem. This is where the roots will emerge.
3. Apply Rooting Hormone (Optional): Dip the cut end of each stem into rooting hormone powder or liquid. This will encourage root development.
4. Plant the Cuttings: Fill a small pot or container with moist potting mix. Make small holes in the soil and gently insert the cuttings, spacing them about an inch apart.
5. Create a Humid Environment: Cover the pot with a clear plastic bag or place it inside a humidity dome. This will help keep the cuttings moist and prevent them from drying out. You can also mist the cuttings with water from a spray bottle several times a day.
6. Provide Indirect Light: Place the pot in a location with bright, indirect light. Avoid direct sunlight, which can scorch the cuttings.
7. Wait for Roots to Develop: It usually takes about 2-4 weeks for roots to develop. You can gently tug on the cuttings to check for resistance, which indicates that roots have formed.
8. Transplant the Rooted Cuttings: Once the cuttings have developed roots, you can transplant them into your hanging basket.
Planting Your Mint in the Hanging Basket
Whether you’re using seedlings or rooted cuttings, the planting process is essentially the same.
1. Prepare the Hanging Basket: If your hanging basket has a coco coir liner, make sure it’s securely in place. If it doesn’t have a liner, you can add one yourself using burlap or landscape fabric. This will help prevent the soil from falling out.
2. Add Potting Soil: Fill the hanging basket about two-thirds full with potting soil. If you’re using water-absorbing polymer crystals, mix them into the soil according to the package instructions. If you’re using slow-release fertilizer, sprinkle it over the soil surface.
3. Plant the Mint: Gently remove the mint seedlings or rooted cuttings from their containers. Loosen the roots slightly with your fingers.
4. Space the Plants: Plant the mint plants in the hanging basket, spacing them about 4-6 inches apart. This will give them enough room to grow and spread.
5. Fill with Soil: Fill the remaining space in the hanging basket with potting soil, leaving about an inch of space between the soil surface and the rim of the basket.
6. Water Thoroughly: Water the newly planted mint thoroughly until water drains out of the bottom of the basket. This will help settle the soil and ensure that the roots are well-hydrated.
Caring for Your Hanging Mint Garden
Now that your hanging mint garden is planted, it’s time to learn how to care for it. Mint is a relatively low-maintenance plant, but there are a few things you need to keep in mind to ensure that it thrives.
1. Watering: Mint prefers consistently moist soil, but it doesn’t like to be waterlogged. Water your hanging mint garden whenever the top inch of soil feels dry to the touch. Hanging baskets tend to dry out quickly, especially in hot weather, so you may need to water them daily.
2. Sunlight: Mint thrives in partial shade to full sun. In hot climates, it’s best to provide some afternoon shade to prevent the leaves from scorching.
3. Fertilizing: If you didn’t use slow-release fertilizer when planting, you can fertilize your mint every 2-4 weeks with a balanced liquid fertilizer. Follow the package instructions for application rates.
4. Pruning: Regular pruning is essential for keeping your mint plant healthy and productive. Pinch off the tips of the stems to encourage bushier growth. You can also harvest leaves as needed for culinary use.
5. Preventing Flowering: Mint tends to become less flavorful when it flowers. To prevent flowering, pinch off any flower buds as soon as you see them.
6. Overwintering: In colder climates, you’ll need to protect your hanging mint garden from frost. You can either bring it indoors or move it to a sheltered location, such as a garage or shed. Water sparingly during the winter months.
7. Pest Control: Mint is generally pest-resistant, but it can occasionally be affected by aphids or spider mites. If you notice any pests, spray the plant with insecticidal soap or neem oil.
Harvesting Your Mint
One of the best things about growing your own mint is being able to harvest fresh leaves whenever you need them.
1. Harvesting Leaves: To harvest mint leaves, simply pinch or cut off the stems just above a leaf node. You can harvest as much or as little as you need.
2. Using Fresh Mint: Fresh mint leaves can be used in a variety of culinary applications, such as teas, cocktails, salads, and desserts.
3. Drying Mint: If you have more mint than you can use fresh, you can dry it for later use. To dry mint, tie the stems together in small bundles and hang them upside down in a cool, dry place. Once the leaves are completely dry, you can crumble them and store them in an airtight container.
Troubleshooting
Even with the best care, you might encounter a few problems with your hanging mint garden. Here are some common issues and how to address them:
* Yellowing Leaves: Yellowing leaves can be caused by overwatering, underwatering, or nutrient deficiencies. Check the soil moisture and adjust your watering schedule accordingly. If the soil is consistently moist, you may be overwatering. If the soil is dry, you may be underwatering. You can also fertilize the plant to address any nutrient deficiencies.
* Brown Leaf Tips: Brown leaf tips can be caused by dry air or salt buildup in the soil. Increase the humidity around the plant by misting it with water or placing it near a humidifier. You can also flush the soil with water to remove any salt buildup.
* Leggy Growth: Leggy growth (long, spindly stems with few leaves) is usually caused by insufficient light. Move the plant to a location with more light.
* Pests: As mentioned earlier, mint can occasionally be affected by aphids or spider mites. Spray the plant with insecticidal soap or neem oil to control these pests.

Conclusion
So, there you have it! Growing your own pineapple at home isn’t just a fun project; it’s a rewarding experience that brings a touch of the tropics right to your windowsill or garden. Forget those expensive grocery store pineapples – imagine the satisfaction of harvesting a sweet, juicy fruit that you nurtured from start to finish. This DIY pineapple growing trick is a game-changer for anyone who loves fresh produce and enjoys a little gardening adventure.
Why is this a must-try? Because it’s surprisingly simple, cost-effective, and incredibly gratifying. You’re essentially recycling a pineapple top that would otherwise be discarded, turning kitchen waste into a delicious treat. Plus, it’s a fantastic conversation starter and a unique way to impress your friends and family. Think of the bragging rights!
But the fun doesn’t stop there. Feel free to experiment with different pineapple varieties. Have you ever considered growing a Pinkglow pineapple? While it might require a bit more searching to find the top, the vibrant color and unique flavor are well worth the effort. Or perhaps you’d like to try a smaller, ornamental pineapple variety for a decorative touch? The possibilities are endless.
Consider the presentation, too. Instead of a standard pot, why not use a decorative container that complements your home décor? A terracotta pot with a Mediterranean design or a sleek, modern planter can add a touch of elegance to your pineapple growing project. You can also add companion plants around the base of your pineapple, such as herbs like rosemary or thyme, which can help deter pests and add a fragrant touch to your indoor garden.
Don’t be afraid to get creative with your growing environment. If you live in a colder climate, you can use a grow light to supplement natural sunlight and ensure your pineapple receives the warmth it needs to thrive. You can also use a humidity tray to increase the moisture levels around your plant, which is especially beneficial during the dry winter months.
And remember, patience is key. Growing a pineapple takes time, but the anticipation makes the eventual harvest even sweeter. Keep an eye on your plant, provide it with the care it needs, and you’ll be rewarded with a delicious, homegrown pineapple in due time.
We wholeheartedly encourage you to give this DIY pineapple growing trick a try. It’s a fantastic way to connect with nature, learn about plant life cycles, and enjoy the fruits (literally!) of your labor. Once you’ve harvested your first homegrown pineapple, we’d love to hear about your experience! Share your photos, tips, and stories with us in the comments below. Let’s create a community of pineapple enthusiasts and inspire others to embark on this exciting gardening journey. Happy growing!
Frequently Asked Questions (FAQs)
How long does it take to grow a pineapple from a top?
Growing a pineapple from a top is a process that requires patience. Generally, it takes anywhere from 2 to 3 years for a pineapple plant to mature and produce fruit. The exact timeframe can vary depending on factors such as climate, sunlight exposure, soil quality, and the specific pineapple variety. During the first few months, the plant will focus on developing its root system. You’ll start to see new leaves emerging from the center of the plant as it grows. After about a year, the plant will be well-established and will begin to resemble a mature pineapple plant. The flowering stage, which precedes fruit development, can take several months. Once the flower appears, it will take several more months for the pineapple to fully ripen.
What kind of soil is best for growing pineapples?
Pineapples thrive in well-draining, slightly acidic soil. A sandy loam soil is ideal, as it provides good drainage and aeration, preventing root rot. You can create a suitable soil mix by combining equal parts of potting soil, perlite, and sand. The perlite helps improve drainage, while the sand adds weight and prevents the soil from becoming compacted. Avoid using heavy clay soils, as they retain too much moisture and can lead to root problems. You can also amend your soil with organic matter, such as compost or well-rotted manure, to improve its fertility and drainage. A soil pH between 5.5 and 6.5 is optimal for pineapple growth. You can test your soil pH using a soil testing kit and adjust it accordingly with lime (to raise the pH) or sulfur (to lower the pH).
How much sunlight does a pineapple plant need?
Pineapple plants require plenty of sunlight to thrive. Aim for at least 6 to 8 hours of direct sunlight per day. If you’re growing your pineapple indoors, place it near a south-facing window where it can receive the most sunlight. If you don’t have access to enough natural light, you can supplement with a grow light. LED grow lights are a good option, as they are energy-efficient and provide the full spectrum of light that plants need to grow. Rotate your pineapple plant regularly to ensure that all sides receive equal exposure to sunlight. This will help prevent the plant from leaning towards the light source and promote even growth.
How often should I water my pineapple plant?
Water your pineapple plant when the top inch of soil feels dry to the touch. Avoid overwatering, as this can lead to root rot. During the growing season (spring and summer), you may need to water your plant more frequently than during the dormant season (fall and winter). When watering, thoroughly saturate the soil until water drains out of the bottom of the pot. Allow the excess water to drain away completely to prevent the plant from sitting in standing water. You can also mist your pineapple plant regularly to increase humidity, especially if you live in a dry climate.
What are some common problems when growing pineapples, and how can I fix them?
Some common problems when growing pineapples include root rot, pest infestations, and nutrient deficiencies. Root rot is caused by overwatering and poor drainage. To prevent root rot, ensure that your pineapple plant is planted in well-draining soil and avoid overwatering. If you suspect root rot, repot your plant in fresh soil and remove any affected roots. Pest infestations, such as mealybugs and scale, can also be a problem. You can control these pests by wiping them off with a cotton swab dipped in rubbing alcohol or by spraying your plant with insecticidal soap. Nutrient deficiencies can manifest as yellowing leaves or stunted growth. To address nutrient deficiencies, fertilize your pineapple plant regularly with a balanced fertilizer that is specifically formulated for tropical plants. Follow the instructions on the fertilizer label carefully to avoid over-fertilizing.
Can I grow a pineapple indoors, even if I live in a cold climate?
Yes, you can absolutely grow a pineapple indoors, even if you live in a cold climate. Pineapples are tropical plants that thrive in warm temperatures, but they can be successfully grown indoors with proper care. Provide your pineapple plant with plenty of sunlight, well-draining soil, and regular watering. Maintain a consistent temperature between 65°F and 80°F (18°C and 27°C). You can use a grow light to supplement natural sunlight and a humidity tray to increase moisture levels. During the winter months, when temperatures are cooler, you may need to reduce watering and provide extra warmth. Consider placing your pineapple plant near a radiator or using a heat mat to keep the soil warm.
How do I know when my pineapple is ripe and ready to harvest?
Determining when your homegrown pineapple is ripe and ready to harvest is a crucial step. Several indicators will tell you it’s time. First, the color of the pineapple will change from green to a golden yellow. The base of the fruit will typically turn yellow first, gradually spreading upwards. Second, the pineapple will emit a sweet, fragrant aroma. You should be able to smell the pineapple’s sweetness even without touching it. Third, the “eyes” or scales of the pineapple will flatten out and become more pronounced. Fourth, the pineapple will feel slightly soft to the touch when gently squeezed. Avoid squeezing too hard, as this can damage the fruit. Finally, you can try gently pulling on one of the leaves near the top of the pineapple. If it comes off easily, the pineapple is likely ripe. To harvest your pineapple, use a sharp knife to cut the fruit from the plant, leaving a few inches of stem attached. Enjoy your delicious, homegrown pineapple!
Leave a Comment