
Grow pumpkins at home, and transform your backyard into a festive autumn wonderland! Imagine the satisfaction of carving a jack-o’-lantern from a pumpkin you nurtured from a tiny seed. For centuries, pumpkins have been more than just a decorative gourd; they’ve been a symbol of harvest, abundance, and community. From Native American traditions where they were a vital food source, to the modern-day pumpkin spice craze, these vibrant fruits hold a special place in our hearts and cultures.
But let’s be honest, the thought of growing your own pumpkins can seem a little daunting. Where do you even start? That’s where this DIY guide comes in! I’m here to share some simple, effective tricks and hacks that will make grow pumpkins at home easier than you ever thought possible. Whether you have a sprawling garden or just a sunny balcony, I’ll show you how to cultivate these beauties, avoid common pitfalls, and reap a bountiful harvest. So, ditch the grocery store pumpkins this year and get ready to experience the joy of growing your own – it’s easier than you think!
Growing Pumpkins: From Seed to Spooky (or Delicious!) Harvest
Okay, pumpkin lovers, let’s get our hands dirty! I’m going to walk you through everything you need to know to grow your own pumpkins right at home. Whether you’re dreaming of carving the perfect jack-o’-lantern or baking a delicious pumpkin pie, this guide will help you achieve pumpkin-growing success.
Choosing Your Pumpkin Variety
Before we even think about planting, we need to decide what kind of pumpkin we want to grow. There are so many options! Here are a few popular choices:
* Jack O’ Lantern Pumpkins: These are your classic carving pumpkins. They’re generally medium to large in size and have a good shape for spooky faces.
* Pie Pumpkins (Sugar Pumpkins): Smaller and sweeter than carving pumpkins, these are perfect for baking. Look for varieties like ‘Baby Pam’ or ‘Sugar Pie’.
* Giant Pumpkins: If you’re feeling ambitious, you can try growing a giant pumpkin! These require a lot of space, attention, and specific varieties like ‘Atlantic Giant’.
* Ornamental Pumpkins: These come in a variety of shapes, sizes, and colors. They’re great for fall decorations. Think gourds and mini pumpkins!
Once you’ve chosen your variety, you can purchase seeds from a local garden center or online.
Preparing Your Pumpkin Patch
Pumpkins are hungry plants, so soil preparation is key! They need plenty of sunshine and well-drained soil.
* Sunlight: Pumpkins need at least 6-8 hours of direct sunlight per day. Choose a location in your yard that gets plenty of sun.
* Soil: Pumpkins thrive in rich, well-drained soil. Amend your soil with plenty of compost or well-rotted manure. This will provide the nutrients your pumpkins need to grow big and strong.
* Space: Pumpkins need a lot of space to spread out. Give each plant at least 4-6 feet of space. If you’re growing giant pumpkins, you’ll need even more room!
* Soil Testing: Ideally, test your soil’s pH. Pumpkins prefer a slightly acidic to neutral pH of 6.0 to 7.0. You can purchase a soil testing kit at most garden centers. If your soil is too acidic, you can add lime to raise the pH.
Planting Your Pumpkin Seeds
There are two ways to plant pumpkin seeds: direct sowing and starting indoors. I prefer direct sowing because it’s less work, but starting indoors can give you a head start, especially in cooler climates.
Direct Sowing (My Preferred Method)
1. Wait for Warm Weather: Pumpkins are sensitive to frost, so wait until the soil has warmed up to at least 60°F (15°C) before planting. This is usually a couple of weeks after the last expected frost.
2. Create Mounds: Create small mounds of soil about 1-2 feet in diameter and 1-2 inches high. These mounds will help with drainage and warm the soil.
3. Plant the Seeds: Plant 3-4 seeds per mound, about 1 inch deep. Space the mounds 4-6 feet apart.
4. Water Gently: Water the mounds gently to avoid washing away the seeds.
5. Thin the Seedlings: Once the seedlings emerge and have a few true leaves, thin them to the strongest plant per mound. This ensures that each plant has enough space and nutrients to thrive.
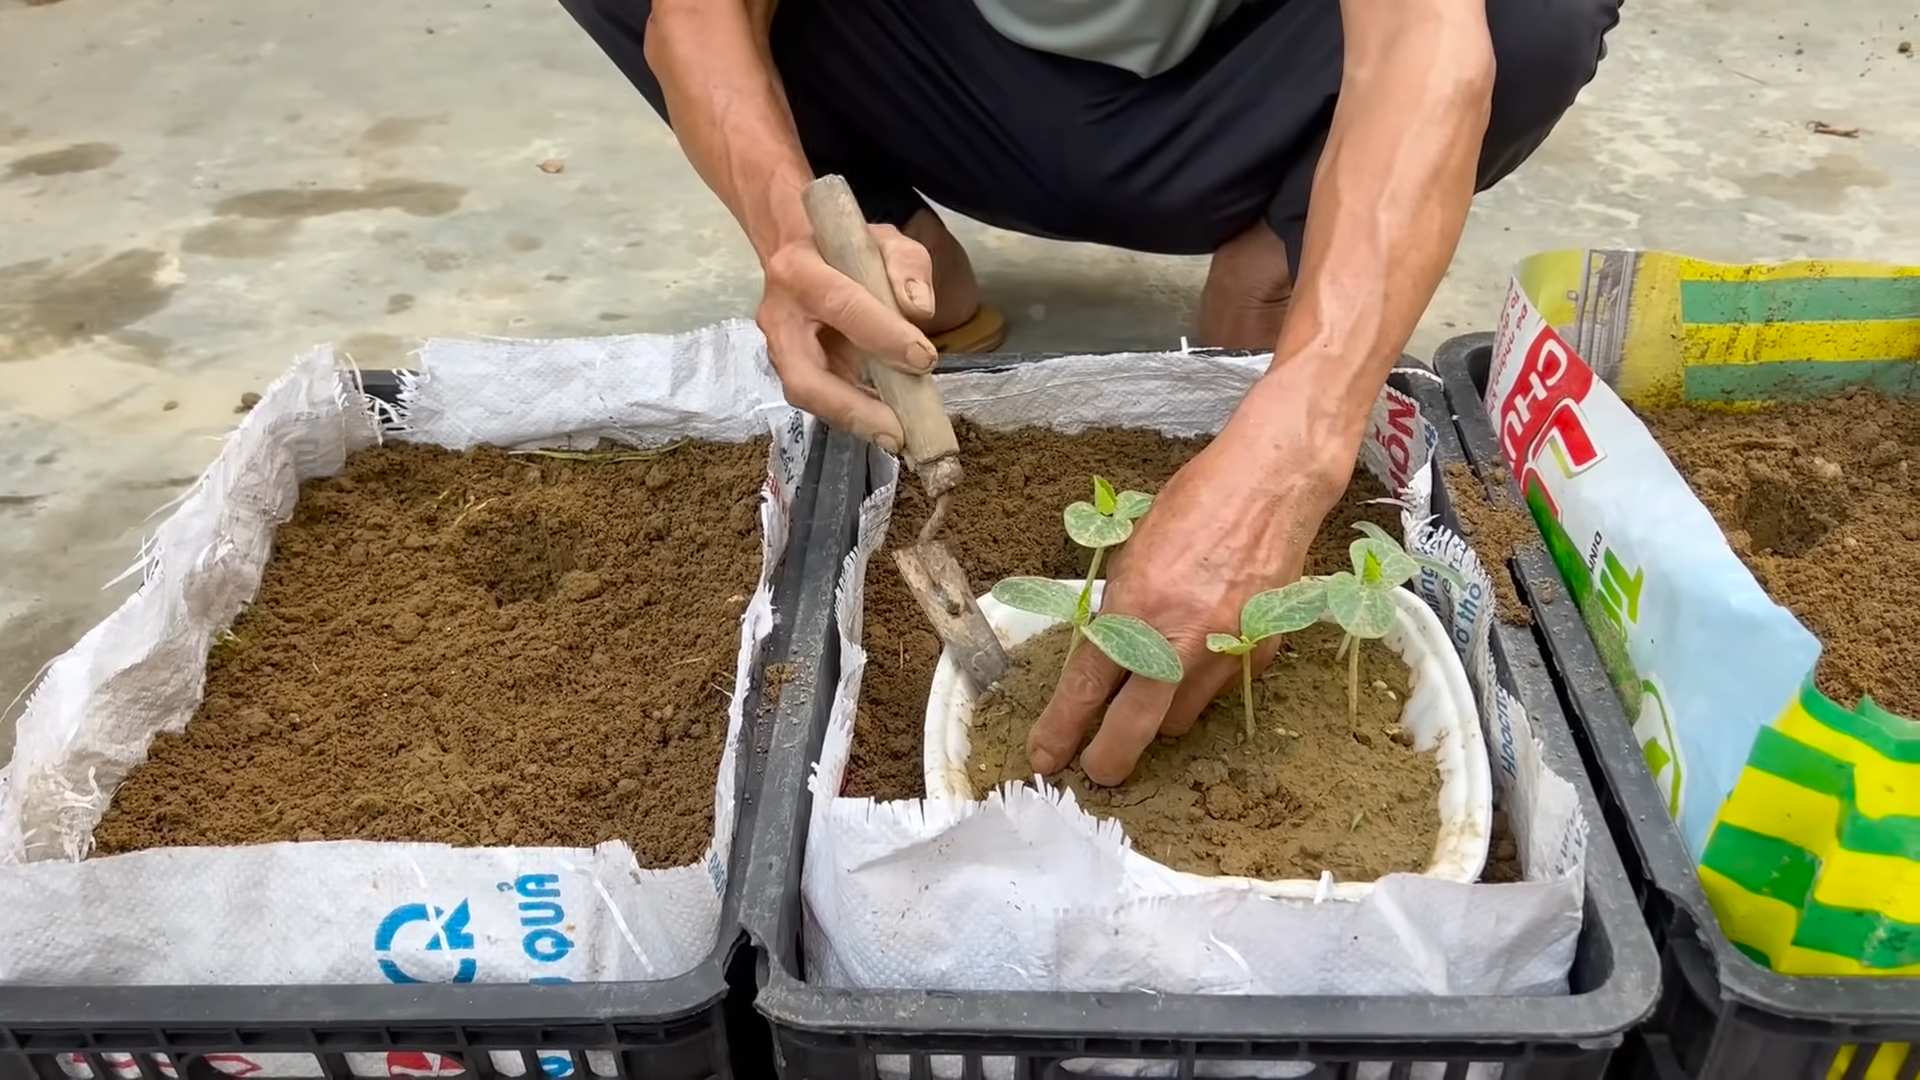
Starting Seeds Indoors (For a Head Start)
1. Start 2-3 Weeks Before Last Frost: Start your seeds indoors about 2-3 weeks before the last expected frost.
2. Use Peat Pots or Biodegradable Pots: Plant each seed in a peat pot or biodegradable pot filled with seed-starting mix. This will minimize root disturbance when you transplant the seedlings.
3. Plant the Seeds: Plant the seeds about 1 inch deep.
4. Keep Warm and Moist: Keep the soil moist and warm (around 70-75°F or 21-24°C). You can use a heat mat to help with germination.
5. Provide Light: Once the seedlings emerge, provide them with plenty of light. A sunny windowsill or grow lights will work.
6. Harden Off the Seedlings: Before transplanting the seedlings outdoors, you need to harden them off. This means gradually exposing them to outdoor conditions over a period of 7-10 days. Start by placing them in a sheltered location for a few hours each day, gradually increasing the amount of time they spend outdoors.
7. Transplant Carefully: Once the seedlings are hardened off and the soil has warmed up, transplant them into your prepared pumpkin patch. Plant each seedling in a mound of soil, spacing them 4-6 feet apart.
Caring for Your Pumpkin Plants
Once your pumpkin plants are established, it’s important to provide them with the care they need to thrive.
* Watering: Pumpkins need consistent watering, especially during hot, dry weather. Water deeply at the base of the plant, avoiding wetting the leaves. Aim for about 1 inch of water per week.
* Fertilizing: Pumpkins are heavy feeders, so fertilize them regularly. Use a balanced fertilizer (like 10-10-10) every 2-3 weeks. You can also side-dress the plants with compost or well-rotted manure.
* Weeding: Keep the area around your pumpkin plants free of weeds. Weeds compete with the pumpkins for nutrients and water.
* Pest Control: Pumpkins can be susceptible to pests like squash bugs, squash vine borers, and aphids. Inspect your plants regularly for signs of pests and take action promptly. You can use insecticidal soap or neem oil to control these pests.
* Pollination: Pumpkins have separate male and female flowers. The female flowers need to be pollinated in order to produce pumpkins. Bees are the primary pollinators, but if you’re not seeing a lot of bee activity, you can hand-pollinate the flowers. To hand-pollinate, use a small paintbrush to transfer pollen from the male flower to the female flower. The female flowers have a small, immature pumpkin at the base of the flower.
* Pruning: Pruning can help to improve air circulation and prevent disease. Remove any dead or yellowing leaves. You can also prune some of the side vines to encourage the plant to focus its energy on producing fewer, larger pumpkins.
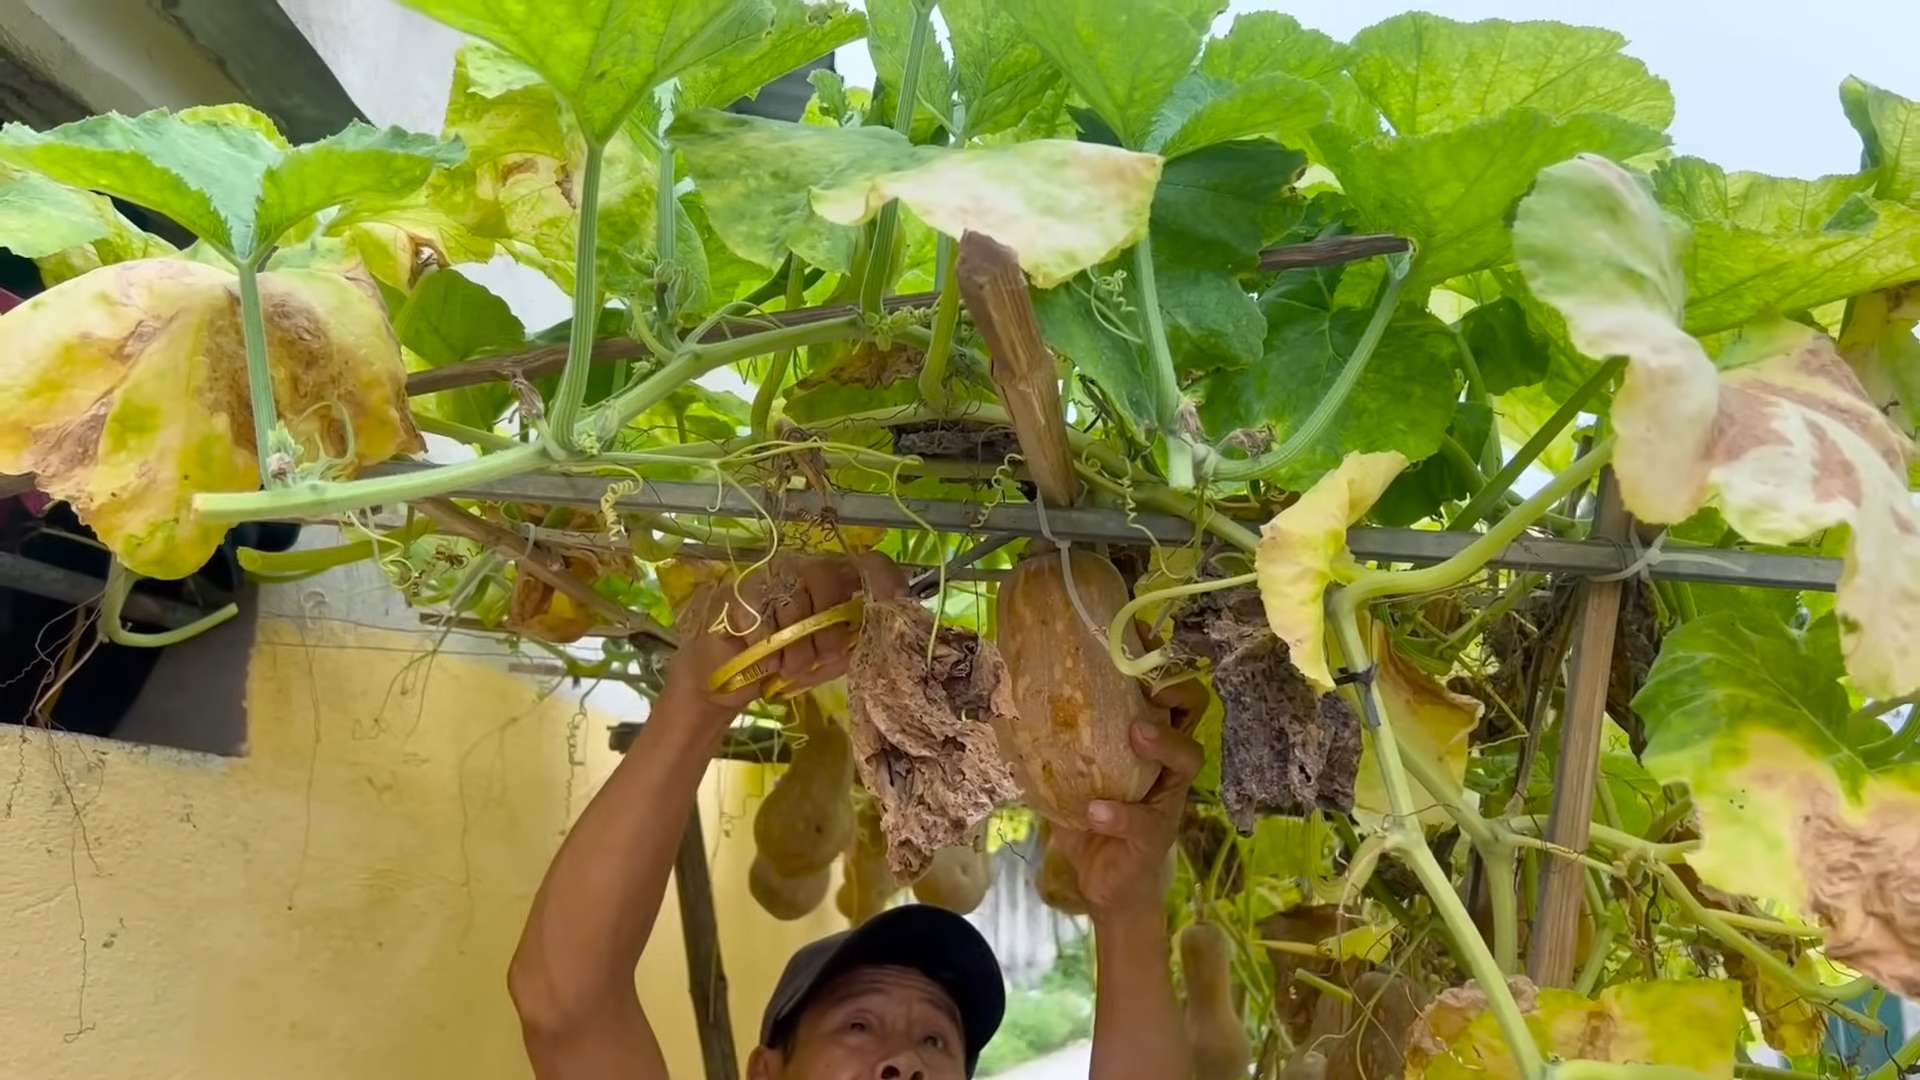
* Protecting Developing Pumpkins: As your pumpkins grow, you may want to protect them from pests and diseases. You can place a piece of cardboard or straw under the pumpkins to prevent them from rotting. You can also cover them with a row cover to protect them from insects.
Dealing with Common Pumpkin Problems
Even with the best care, you may encounter some problems while growing pumpkins. Here are a few common issues and how to deal with them:
* Powdery Mildew: This is a fungal disease that causes a white, powdery coating on the leaves. To prevent powdery mildew, provide good air circulation and avoid wetting the leaves when watering. If you see signs of powdery mildew, you can treat it with a fungicide.
* Squash Bugs: These pests can damage pumpkin plants by sucking the sap from the leaves. Inspect your plants regularly for squash bugs and their eggs. You can handpick the bugs and eggs or use insecticidal soap to control them.
* Squash Vine Borers: These pests bore into the stems of pumpkin plants and can kill the plant. To prevent squash vine borers, wrap the base of the stems with aluminum foil or netting. If you see signs of squash vine borers, you can try to remove them by slitting the stem and extracting the borer.
* Blossom End Rot: This is a condition that causes the blossom end of the pumpkin to rot. It’s usually caused by a calcium deficiency or inconsistent watering. To prevent blossom end rot, amend your soil with calcium and water consistently.
Harvesting Your Pumpkins
The moment we’ve all been waiting for! Knowing when to harvest your pumpkins is crucial for getting the best flavor and storage life.
1. Check the Color: The pumpkin should be a deep, solid color. The color will vary depending on the variety.
2. Tap the Pumpkin: The pumpkin should sound hollow when you tap it.
3. Check the Stem: The stem should be dry and hard.
4. Harvest Before Frost: Harvest your pumpkins before the first frost. Frost can damage the pumpkins and shorten their storage life.
5. Cut the Stem: Use a sharp knife or pruning shears to cut the stem, leaving about 3-4 inches of stem attached to the pumpkin.
6. Handle with Care: Handle the pumpkins carefully to avoid bruising them.
7. Cure the Pumpkins: Cure the pumpkins
Conclusion
So, there you have it! Growing pumpkins at home isn’t just a fun fall activity; it’s a rewarding experience that connects you with nature and provides you with delicious, homegrown produce. Forget those overpriced, often bland pumpkins from the store. Imagine the satisfaction of carving a jack-o’-lantern from a pumpkin you nurtured from a tiny seed. The vibrant color, the unique shape, and the undeniable freshness – it’s an experience that store-bought pumpkins simply can’t replicate.
This DIY trick, focusing on optimal soil preparation, strategic planting, and consistent care, unlocks the secret to a bountiful pumpkin harvest, even in smaller spaces. We’ve demystified the process, breaking it down into manageable steps that anyone can follow.
But the beauty of gardening lies in its adaptability. Feel free to experiment! Try different pumpkin varieties – from the classic orange carving pumpkins to the smaller, sweeter pie pumpkins, or even the unique and colorful gourds. Consider companion planting with herbs like basil or marigolds to deter pests naturally. If space is truly limited, explore vertical gardening techniques, training your pumpkin vines up a trellis or fence.
Don’t be afraid to get your hands dirty and embrace the learning process. Every pumpkin patch is unique, and your experience will be shaped by your local climate, soil conditions, and personal preferences. The most important thing is to start!
We are confident that with a little effort and these simple techniques, you’ll be harvesting your own beautiful pumpkins in no time. And we can’t wait to hear about your success! Share your pumpkin-growing journey with us in the comments below. Tell us about your favorite varieties, any challenges you faced, and the creative ways you used your homegrown pumpkins. Let’s build a community of pumpkin enthusiasts and inspire others to embrace the joy of growing their own food. So go ahead, give this DIY trick a try and discover the magic of growing pumpkins at home! You’ll be amazed at what you can achieve.
Frequently Asked Questions (FAQ)
Q: What is the best time to plant pumpkin seeds?
A: The ideal time to plant pumpkin seeds is late spring to early summer, typically from late May to early June in most regions. The key is to wait until the soil has warmed up to at least 65°F (18°C) and the danger of frost has passed. Pumpkins need a long growing season, usually between 90 and 120 days, so planting too late may not give them enough time to mature before the first frost. Check your local frost dates to determine the best planting time for your area. If you live in a region with a shorter growing season, you can start your pumpkin seeds indoors about 2-3 weeks before the last expected frost.
Q: What kind of soil is best for growing pumpkins?
A: Pumpkins thrive in well-drained, fertile soil that is rich in organic matter. The ideal soil pH is between 6.0 and 7.0. Before planting, amend your soil with compost, aged manure, or other organic materials to improve its fertility and drainage. Pumpkins are heavy feeders, so a soil rich in nutrients is essential for healthy growth and abundant fruit production. If your soil is heavy clay, consider adding sand or other amendments to improve drainage. A soil test can help you determine the specific nutrient needs of your soil and guide your fertilization strategy.
Q: How much sunlight do pumpkins need?
A: Pumpkins require at least 6-8 hours of direct sunlight per day to thrive. Choose a planting location that receives full sun throughout the day. Insufficient sunlight can result in weak plants, reduced fruit production, and smaller pumpkins. If you live in a particularly hot climate, some afternoon shade may be beneficial to prevent the plants from overheating.
Q: How often should I water my pumpkin plants?
A: Pumpkins need consistent moisture, especially during hot, dry weather. Water deeply and regularly, aiming to keep the soil consistently moist but not waterlogged. Water at the base of the plants to avoid wetting the foliage, which can increase the risk of fungal diseases. Mulching around the plants can help retain moisture in the soil and suppress weed growth. As the pumpkins mature, you may need to reduce watering slightly to prevent them from rotting.
Q: What are some common pests and diseases that affect pumpkins?
A: Pumpkins are susceptible to a variety of pests and diseases, including squash bugs, squash vine borers, powdery mildew, and downy mildew. Regularly inspect your plants for signs of pests or diseases and take action promptly to prevent them from spreading. Handpicking pests, using insecticidal soap, and applying fungicides can help control infestations and diseases. Crop rotation and choosing disease-resistant varieties can also help prevent problems.
Q: How do I know when my pumpkins are ripe?
A: Pumpkins are typically ripe when their skin is hard and resistant to scratching. The stem should also be dry and brown. The color of the pumpkin should be deep and uniform, depending on the variety. You can also tap the pumpkin; a ripe pumpkin will sound hollow. Leave about 3-4 inches of stem attached when harvesting to prevent rot.
Q: Can I grow pumpkins in containers?
A: Yes, you can grow pumpkins in containers, but you’ll need a large container (at least 20 gallons) and a dwarf or bush variety of pumpkin. Ensure the container has good drainage and use a high-quality potting mix. Container-grown pumpkins will require more frequent watering and fertilization than those grown in the ground.
Q: How can I get bigger pumpkins?
A: To grow larger pumpkins, choose a variety known for producing large fruit, such as Atlantic Giant. Provide your plants with plenty of sunlight, water, and nutrients. Prune the vines to encourage the plant to focus its energy on developing a few large pumpkins rather than many smaller ones. You can also remove any female flowers that appear late in the season to ensure that the remaining pumpkins have enough time to mature.
Q: What can I do with my homegrown pumpkins?
A: The possibilities are endless! You can carve them into jack-o’-lanterns, bake them into pies, roast the seeds for a healthy snack, or use the flesh to make soup, bread, or other delicious dishes. You can also use pumpkins for decorative purposes, such as centerpieces or fall displays. Don’t forget to save some seeds for planting next year!

Leave a Comment