
Grow Romaine Lettuce Easily, even if you think you don’t have a green thumb! Have you ever dreamed of stepping outside your back door and snipping fresh, crisp lettuce for your salad? It’s easier than you think, and this DIY guide will show you exactly how to make that dream a reality. For centuries, romaine lettuce has been a staple in diets around the world, from its origins in the Mediterranean to its current popularity in Caesar salads.
But why buy it at the store when you can grow romaine lettuce easily at home, knowing exactly where it came from and what went into it? Let’s be honest, store-bought lettuce can be expensive, and sometimes it wilts before you even get a chance to use it. Plus, there’s nothing quite like the satisfaction of harvesting your own food. I’m going to share my favorite tips and tricks for cultivating a thriving romaine patch, even in small spaces. Get ready to ditch the grocery store lettuce and enjoy the freshest, most flavorful salads you’ve ever tasted!
Grow Your Own Romaine Lettuce: A Beginner’s Guide
Hey there, fellow gardening enthusiasts! Ever dreamt of having fresh, crisp romaine lettuce right at your fingertips? Well, dream no more! Growing your own romaine is surprisingly easy, even if you’re a complete newbie like I was. This guide will walk you through every step, from seed to salad, ensuring you have a bountiful harvest. Let’s get our hands dirty!
Choosing Your Romaine Variety
First things first, let’s talk romaine varieties. There are tons of options out there, each with its own unique characteristics. Here are a few popular choices:
* ‘Paris Island Cos’: This is a classic, heat-tolerant variety known for its tall, upright heads and excellent flavor. It’s a reliable choice for most gardens.
* ‘Little Gem’: If you’re short on space, ‘Little Gem’ is your best bet. It produces small, compact heads that are perfect for single servings.
* ‘Rouge d’Hiver’: Looking for something a little different? ‘Rouge d’Hiver’ boasts beautiful reddish-bronze leaves and a slightly nutty flavor.
* ‘Valmaine’: This variety is known for its resistance to bolting (going to seed prematurely), making it a great choice for warmer climates.
I personally love ‘Paris Island Cos’ because it’s so dependable, but feel free to experiment and find your favorite!
Getting Started: Seeds vs. Seedlings
You have two main options for starting your romaine: seeds or seedlings.
* Seeds: Starting from seed is the most economical option, and it gives you more control over the entire growing process. However, it requires a bit more patience and attention.
* Seedlings: Buying seedlings from a nursery is a quicker and easier option, especially if you’re short on time or space. Just make sure to choose healthy-looking plants with vibrant green leaves.
I usually start from seed because I enjoy the process, but both methods work perfectly fine!
Sowing Your Seeds (If You Choose Seeds)
Okay, let’s get those seeds in the ground!
1. Prepare Your Seed Starting Mix: You’ll need a light, well-draining seed starting mix. You can buy a pre-made mix or make your own by combining equal parts peat moss, vermiculite, and perlite. I prefer to make my own – it’s cheaper and I know exactly what’s in it.
2. Choose Your Seed Starting Containers: You can use seed trays, peat pots, or even recycled yogurt containers. Just make sure they have drainage holes. I’ve had success with all of these!
3. Moisten the Mix: Dampen the seed starting mix with water until it’s evenly moist but not soggy.
4. Sow the Seeds: Sprinkle the seeds evenly over the surface of the mix, then lightly cover them with a thin layer of soil (about 1/4 inch). Romaine seeds need light to germinate, so don’t bury them too deep.
5. Water Gently: Water the seeds gently with a spray bottle to avoid disturbing them.
6. Provide Warmth and Light: Place the containers in a warm location (around 65-70°F) and provide plenty of light. A sunny windowsill or a grow light will work well. I use a grow light because my windowsill doesn’t get enough direct sunlight.
7. Keep the Soil Moist: Keep the soil consistently moist but not waterlogged. Check the moisture level daily and water as needed.
8. Thin the Seedlings: Once the seedlings have developed their first true leaves (the second set of leaves), thin them out so that they’re spaced about 1-2 inches apart. This will give them enough room to grow. I know it’s hard to thin them, but it’s necessary for healthy growth!
Transplanting Your Seedlings (or Planting Your Purchased Seedlings)
Whether you started from seed or bought seedlings, it’s time to get them into their permanent home!
1. Choose a Sunny Location: Romaine lettuce needs at least 6 hours of sunlight per day. Choose a spot in your garden that gets plenty of sun.
2. Prepare the Soil: Romaine prefers well-drained soil that’s rich in organic matter. Amend the soil with compost or well-rotted manure before planting. I always add a generous amount of compost – it makes a huge difference!
3. Harden Off Your Seedlings (If Starting from Seed): If you started your seedlings indoors, you’ll need to harden them off before transplanting them. This means gradually exposing them to outdoor conditions over a period of 7-10 days. Start by placing them outside for a few hours each day, gradually increasing the amount of time they spend outdoors. This will help them adjust to the sun, wind, and temperature changes.
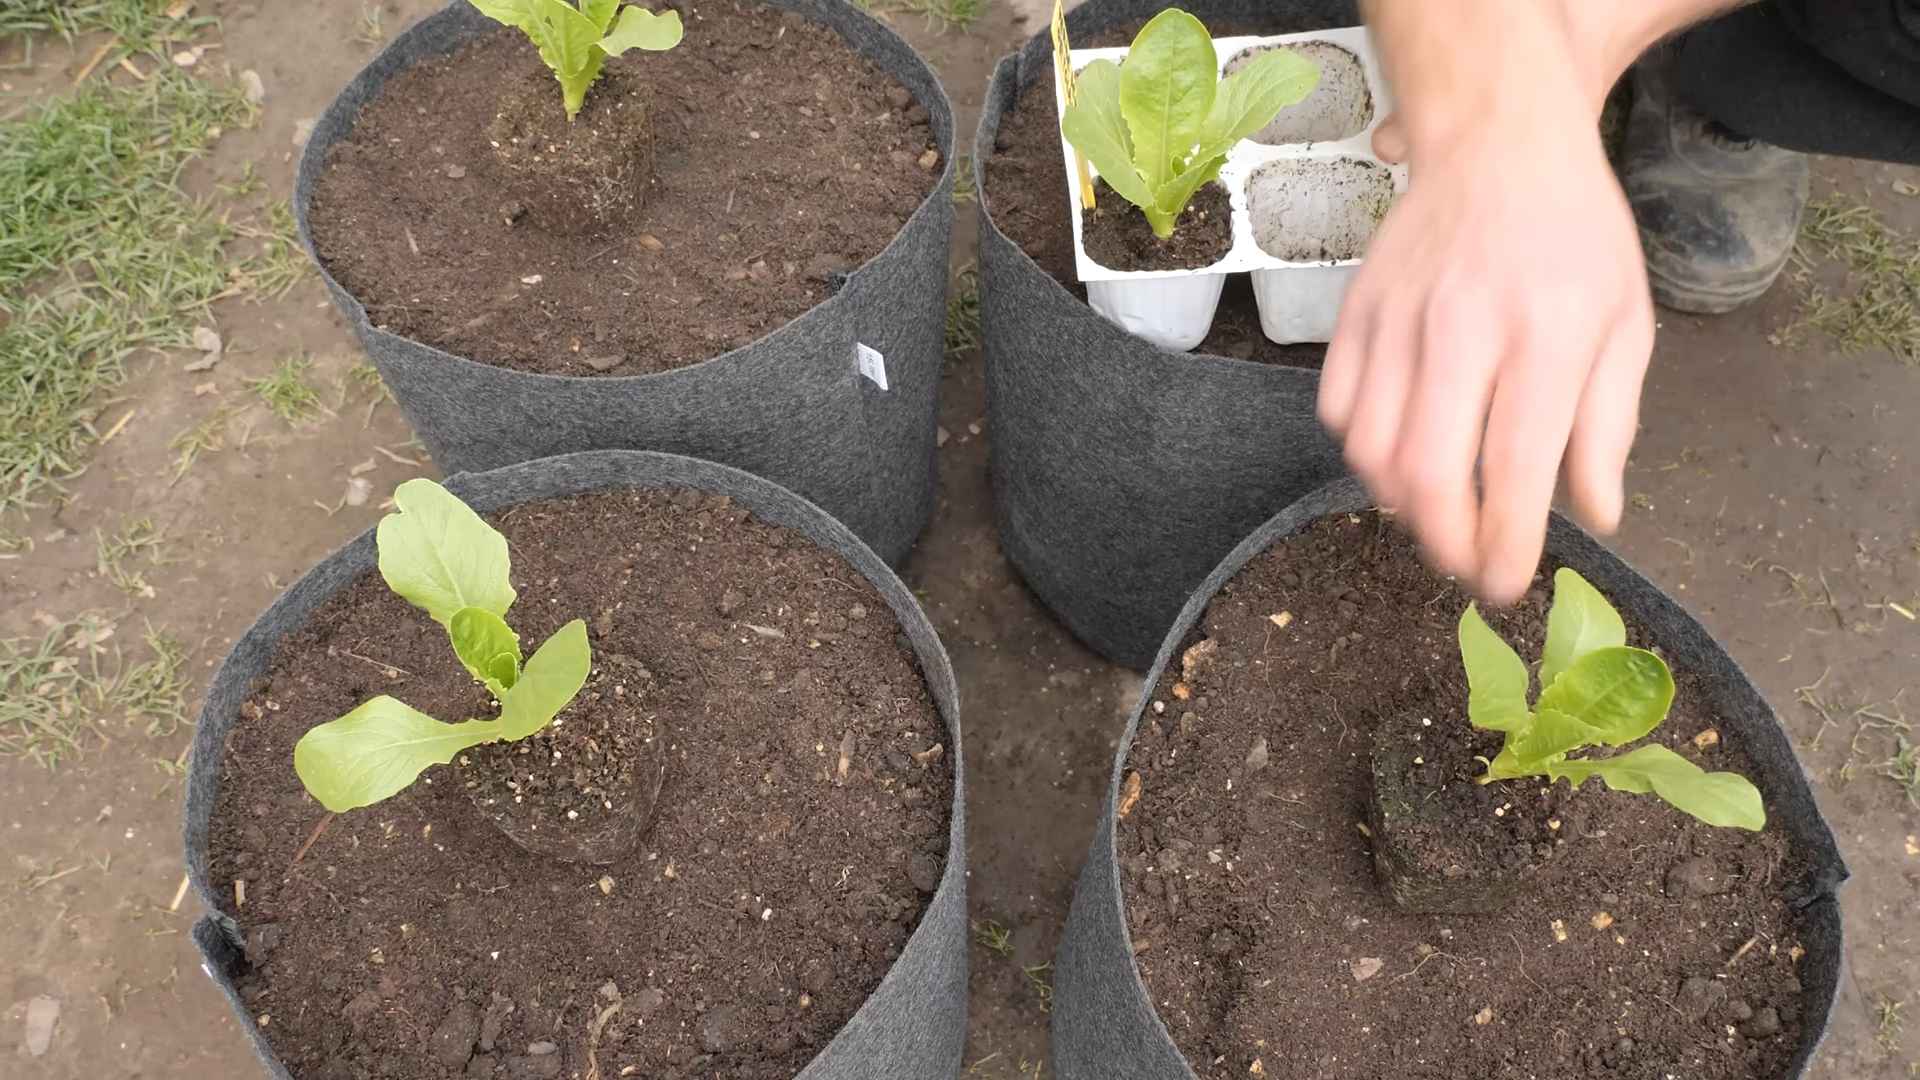
4. Dig Holes: Dig holes that are slightly larger than the root balls of your seedlings. Space the holes about 12 inches apart.
5. Gently Remove the Seedlings: Carefully remove the seedlings from their containers, being careful not to damage the roots.
6. Plant the Seedlings: Place the seedlings in the holes and gently backfill with soil. Make sure the top of the root ball is level with the surrounding soil.
7. Water Thoroughly: Water the seedlings thoroughly after planting.
Caring for Your Romaine Lettuce
Now that your romaine is planted, it’s time to give it some TLC!
1. Water Regularly: Romaine lettuce needs consistent moisture, especially during hot weather. Water deeply whenever the top inch of soil feels dry. I usually water every other day, but it depends on the weather.
2. Fertilize Lightly: Romaine is a light feeder, so you don’t need to fertilize it heavily. A side dressing of compost or a diluted liquid fertilizer every few weeks will be sufficient. I use a fish emulsion fertilizer – it works wonders!
3. Weed Regularly: Keep the area around your romaine free of weeds. Weeds compete with the lettuce for nutrients and water.
4. Protect from Pests: Romaine lettuce can be susceptible to pests like aphids, slugs, and snails. Inspect your plants regularly and take action if you see any signs of infestation. I use insecticidal soap for aphids and beer traps for slugs and snails.
5. Watch for Bolting: Bolting is when the lettuce starts to produce a flower stalk, which makes the leaves bitter. To prevent bolting, keep the soil consistently moist and provide shade during hot weather. Choose bolt-resistant varieties like ‘Valmaine’. If your lettuce does start to bolt, harvest it immediately.
Harvesting Your Romaine Lettuce
The moment we’ve all been waiting for – harvest time!
1. When to Harvest: You can start harvesting romaine lettuce when the heads are about 6-8 inches tall.
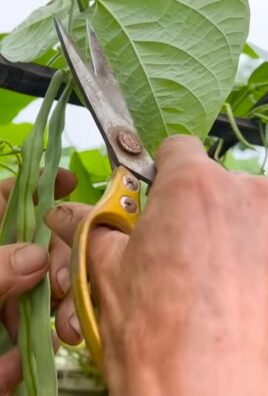
2. How to Harvest: You can harvest the entire head at once by cutting it off at the base with a sharp knife. Or, you can harvest individual leaves as needed, starting with the outer leaves. I prefer to harvest individual leaves because it allows me to enjoy fresh lettuce for a longer pe
Hey there, fellow gardening enthusiasts! Ever dreamt of having fresh, crisp romaine lettuce right at your fingertips? Well, dream no more! Growing your own romaine is surprisingly easy, even if you’re a complete newbie like I was. This guide will walk you through every step, from seed to salad, ensuring you have a bountiful harvest. Let’s get our hands dirty!
Choosing Your Romaine Variety
First things first, let’s talk romaine varieties. There are tons of options out there, each with its own unique characteristics. Here are a few popular choices:
* ‘Paris Island Cos’: This is a classic, heat-tolerant variety known for its tall, upright heads and excellent flavor. It’s a reliable choice for most gardens.
* ‘Little Gem’: If you’re short on space, ‘Little Gem’ is your best bet. It produces small, compact heads that are perfect for single servings.
* ‘Rouge d’Hiver’: Looking for something a little different? ‘Rouge d’Hiver’ boasts beautiful reddish-bronze leaves and a slightly nutty flavor.
* ‘Valmaine’: This variety is known for its resistance to bolting (going to seed prematurely), making it a great choice for warmer climates.
I personally love ‘Paris Island Cos’ because it’s so dependable, but feel free to experiment and find your favorite!
Getting Started: Seeds vs. Seedlings
You have two main options for starting your romaine: seeds or seedlings.
* Seeds: Starting from seed is the most economical option, and it gives you more control over the entire growing process. However, it requires a bit more patience and attention.
* Seedlings: Buying seedlings from a nursery is a quicker and easier option, especially if you’re short on time or space. Just make sure to choose healthy-looking plants with vibrant green leaves.
I usually start from seed because I enjoy the process, but both methods work perfectly fine!
Sowing Your Seeds (If You Choose Seeds)
Okay, let’s get those seeds in the ground!
1. Prepare Your Seed Starting Mix: You’ll need a light, well-draining seed starting mix. You can buy a pre-made mix or make your own by combining equal parts peat moss, vermiculite, and perlite. I prefer to make my own – it’s cheaper and I know exactly what’s in it.
2. Choose Your Seed Starting Containers: You can use seed trays, peat pots, or even recycled yogurt containers. Just make sure they have drainage holes. I’ve had success with all of these!
3. Moisten the Mix: Dampen the seed starting mix with water until it’s evenly moist but not soggy.
4. Sow the Seeds: Sprinkle the seeds evenly over the surface of the mix, then lightly cover them with a thin layer of soil (about 1/4 inch). Romaine seeds need light to germinate, so don’t bury them too deep.
5. Water Gently: Water the seeds gently with a spray bottle to avoid disturbing them.
6. Provide Warmth and Light: Place the containers in a warm location (around 65-70°F) and provide plenty of light. A sunny windowsill or a grow light will work well. I use a grow light because my windowsill doesn’t get enough direct sunlight.
7. Keep the Soil Moist: Keep the soil consistently moist but not waterlogged. Check the moisture level daily and water as needed.
8. Thin the Seedlings: Once the seedlings have developed their first true leaves (the second set of leaves), thin them out so that they’re spaced about 1-2 inches apart. This will give them enough room to grow. I know it’s hard to thin them, but it’s necessary for healthy growth!
Transplanting Your Seedlings (or Planting Your Purchased Seedlings)
Whether you started from seed or bought seedlings, it’s time to get them into their permanent home!
1. Choose a Sunny Location: Romaine lettuce needs at least 6 hours of sunlight per day. Choose a spot in your garden that gets plenty of sun.
2. Prepare the Soil: Romaine prefers well-drained soil that’s rich in organic matter. Amend the soil with compost or well-rotted manure before planting. I always add a generous amount of compost – it makes a huge difference!
3. Harden Off Your Seedlings (If Starting from Seed): If you started your seedlings indoors, you’ll need to harden them off before transplanting them. This means gradually exposing them to outdoor conditions over a period of 7-10 days. Start by placing them outside for a few hours each day, gradually increasing the amount of time they spend outdoors. This will help them adjust to the sun, wind, and temperature changes.
4. Dig Holes: Dig holes that are slightly larger than the root balls of your seedlings. Space the holes about 12 inches apart.
5. Gently Remove the Seedlings: Carefully remove the seedlings from their containers, being careful not to damage the roots.
6. Plant the Seedlings: Place the seedlings in the holes and gently backfill with soil. Make sure the top of the root ball is level with the surrounding soil.
7. Water Thoroughly: Water the seedlings thoroughly after planting.
Caring for Your Romaine Lettuce
Now that your romaine is planted, it’s time to give it some TLC!
1. Water Regularly: Romaine lettuce needs consistent moisture, especially during hot weather. Water deeply whenever the top inch of soil feels dry. I usually water every other day, but it depends on the weather.
2. Fertilize Lightly: Romaine is a light feeder, so you don’t need to fertilize it heavily. A side dressing of compost or a diluted liquid fertilizer every few weeks will be sufficient. I use a fish emulsion fertilizer – it works wonders!
3. Weed Regularly: Keep the area around your romaine free of weeds. Weeds compete with the lettuce for nutrients and water.
4. Protect from Pests: Romaine lettuce can be susceptible to pests like aphids, slugs, and snails. Inspect your plants regularly and take action if you see any signs of infestation. I use insecticidal soap for aphids and beer traps for slugs and snails.
5. Watch for Bolting: Bolting is when the lettuce starts to produce a flower stalk, which makes the leaves bitter. To prevent bolting, keep the soil consistently moist and provide shade during hot weather. Choose bolt-resistant varieties like ‘Valmaine’. If your lettuce does start to bolt, harvest it immediately.
Harvesting Your Romaine Lettuce
The moment we’ve all been waiting for – harvest time!
1. When to Harvest: You can start harvesting romaine lettuce when the heads are about 6-8 inches tall.
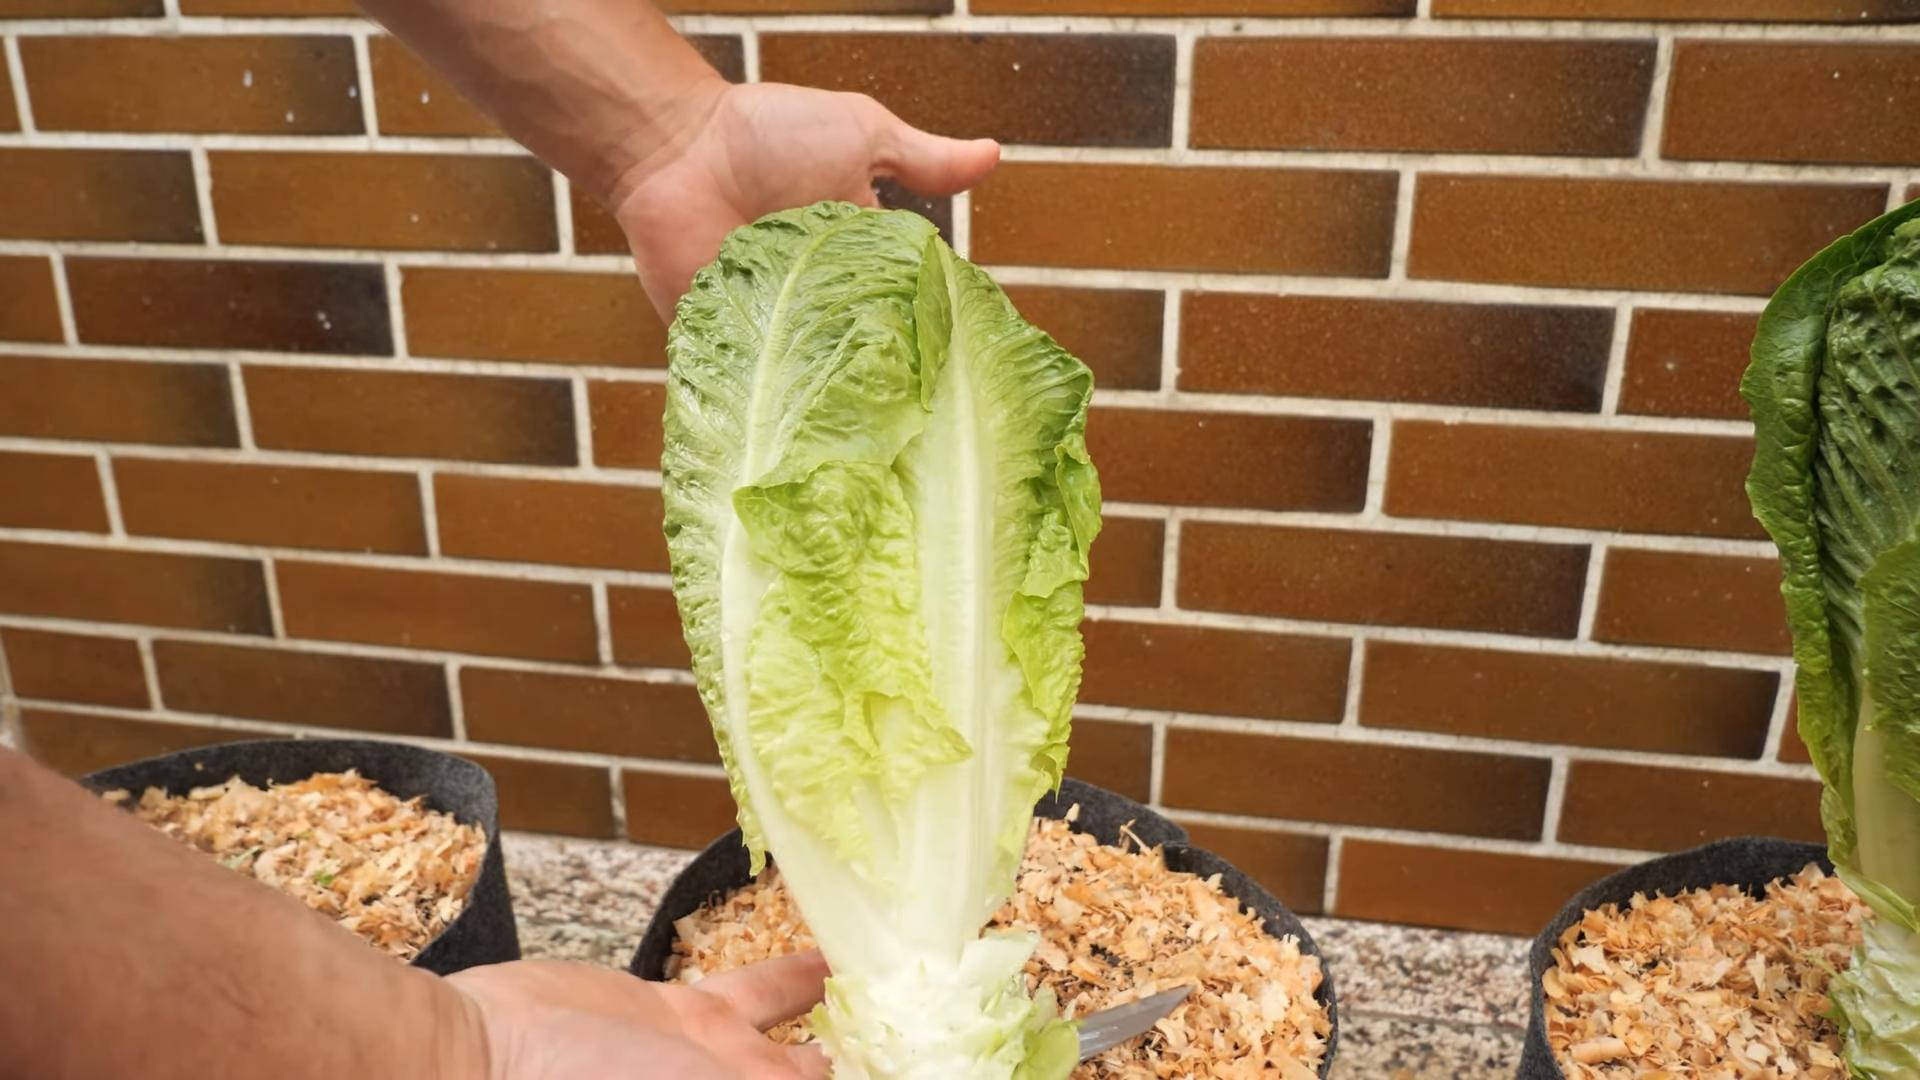
2. How to Harvest: You can harvest the entire head at once by cutting it off at the base with a sharp knife. Or, you can harvest individual leaves as needed, starting with the outer leaves. I prefer to harvest individual leaves because it allows me to enjoy fresh lettuce for a longer period.
3. Wash and Store: Wash the lettuce thoroughly and store it in the refrigerator in a plastic bag or container. It will keep for about a week.
Troubleshooting
Even with the best care, you might encounter some problems along the way. Here are a few common issues and how to deal with them:
* Yellowing Leaves: This could be a sign of overwatering, underwatering, or nutrient deficiency. Adjust your watering schedule and fertilize as needed.
* Aphids: These tiny pests can suck the sap from your lettuce leaves. Spray them with insecticidal soap or blast them off with a strong stream of water.
* Slugs and Snails: These slimy creatures can munch on your lettuce leaves at night. Set out beer traps or sprinkle diatomaceous earth around your plants.
* Bolting: As mentioned earlier, bolting is when the lettuce starts to produce a flower stalk. To prevent bolting, keep the soil consistently moist and provide shade during hot weather.
Enjoy Your Homegrown Romaine!
And there you have it! You’ve successfully grown your own romaine lettuce. Now you can enjoy fresh, delicious salads all season long. There’s nothing quite like the taste of homegrown produce, and I hope this guide has inspired you to give it a try. Happy gardening!
Conclusion
So, there you have it! Growing your own Romaine lettuce from kitchen scraps is not just a fun experiment; it’s a sustainable, cost-effective, and incredibly rewarding way to enjoy fresh, crisp lettuce whenever you want. Forget those wilted, overpriced heads at the grocery store. With a little water, sunlight, and patience, you can transform what would normally be tossed in the trash into a vibrant source of leafy greens.
This DIY trick is a must-try for several reasons. First, it’s incredibly easy. Even if you don’t have a green thumb, the simple steps outlined above make success highly achievable. Second, it’s eco-friendly. By regrowing your Romaine lettuce, you’re reducing food waste and minimizing your carbon footprint. Third, it saves you money. Think about how often you buy lettuce – this method can significantly cut down on your grocery bill. Finally, there’s the sheer satisfaction of nurturing something from seemingly nothing. Watching your Romaine lettuce sprout and grow is a truly gratifying experience.
But don’t stop there! Once you’ve mastered the basic technique, feel free to experiment. Try different types of lettuce, such as butter lettuce or even iceberg (though Romaine tends to be the most successful). You can also explore different growing mediums. While water propagation is a great starting point, you can eventually transplant your regrown Romaine lettuce into soil for even more robust growth. Consider adding a diluted liquid fertilizer to the water or soil to provide extra nutrients.
Another variation is to try growing your lettuce indoors under grow lights, especially if you live in a climate with limited sunlight. This will allow you to enjoy fresh Romaine lettuce year-round, regardless of the weather outside. You can also experiment with different containers. While a simple glass jar works well, you might find that a wider container allows for better root development.
Ultimately, the best way to learn is by doing. So, grab that Romaine lettuce stump, follow the steps, and get ready to witness the magic of regrowth. We’re confident that you’ll be amazed by the results.
We encourage you to try this simple yet effective DIY trick and share your experience with us! Let us know in the comments how your Romaine lettuce is growing, what variations you’ve tried, and any tips you’ve discovered along the way. We’re eager to hear your success stories and learn from your experiences. Happy growing! This method is a great way to introduce children to gardening and the concept of sustainability. It’s a hands-on learning experience that can spark a lifelong interest in growing their own food.
Why is this method so effective?
The effectiveness of this method lies in the fact that Romaine lettuce, like many other vegetables, has the ability to regenerate from its base. The core contains dormant cells that, when provided with the right conditions (water, light, and nutrients), can be stimulated to grow new roots and leaves. This is a natural process that allows the plant to continue its life cycle even after the edible portion has been harvested.
Don’t be discouraged if your first attempt isn’t perfect.
Sometimes, the lettuce core may rot or fail to sprout. This can be due to various factors, such as the quality of the lettuce, the water used, or the amount of sunlight. If this happens, simply try again with a fresh core. With a little practice, you’ll soon be enjoying a steady supply of homegrown Romaine lettuce.
FAQ
Q: What part of the Romaine lettuce do I need to regrow it?
A: You need the bottom part, the stump or core, of the Romaine lettuce head. This is the part that you would normally discard after using the leaves. Make sure it’s relatively firm and not too damaged.
Q: How much of the Romaine lettuce stump should I leave?
A: Leave about 2-3 inches of the stump. This provides enough material for the plant to regrow. Trim away any wilted or brown outer leaves to expose the fresh core.
Q: What kind of water should I use?
A: Use clean, fresh water. Tap water is generally fine, but if your tap water is heavily chlorinated, let it sit out for a few hours before using it to allow the chlorine to dissipate. Filtered water is also a good option.
Q: How often should I change the water?
A: Change the water every 1-2 days to prevent bacteria growth and keep the water fresh. This is crucial for healthy root development.
Q: How much sunlight does the Romaine lettuce need?
A: Romaine lettuce needs bright, indirect sunlight. Avoid placing it in direct sunlight, especially during the hottest part of the day, as this can scorch the leaves. A spot near a sunny window is ideal. If you don’t have enough natural light, consider using a grow light.
Q: How long does it take for the Romaine lettuce to start growing?
A: You should start to see new roots and leaves within a few days to a week. The exact time will depend on the temperature, sunlight, and the overall health of the lettuce stump.
Q: Can I grow Romaine lettuce indoors permanently?
A: Yes, you can grow Romaine lettuce indoors permanently, but it will require more effort than simply regrowing it from a stump. You’ll need to transplant it into soil and provide it with adequate light, water, and nutrients.
Q: When should I transplant the Romaine lettuce to soil?
A: Once the roots are about 1-2 inches long and you see significant new leaf growth, you can transplant the Romaine lettuce to soil. Choose a well-draining potting mix and a pot that’s large enough to accommodate the roots.
Q: What kind of soil should I use?
A: Use a well-draining potting mix that’s rich in organic matter. You can also add some compost to the soil to provide extra nutrients.
Q: How often should I water the Romaine lettuce after transplanting it to soil?
A: Water the Romaine lettuce regularly, keeping the soil consistently moist but not waterlogged. Check the soil moisture by sticking your finger into the soil. If the top inch feels dry, it’s time to water.
Q: Can I use fertilizer?
A: Yes, you can use a diluted liquid fertilizer to provide extra nutrients to the Romaine lettuce. Follow the instructions on the fertilizer package and avoid over-fertilizing, as this can burn the roots.
Q: How long will the regrown Romaine lettuce last?
A: The regrown Romaine lettuce won’t grow into a full-sized head like the original. It will produce new leaves for a few weeks to a month. Eventually, the plant will start to decline.
Q: Can I regrow Romaine lettuce multiple times from the same stump?
A: While it’s possible to get a second or even third flush of growth from the same stump, the subsequent harvests will be smaller and less vigorous. It’s best to start with a fresh stump for each regrowth cycle.
Q: What if my Romaine lettuce stump starts to rot?
A: If your Romaine lettuce stump starts to rot, it’s likely due to bacteria growth or poor water quality. Discard the stump and start with a fresh one, making sure to change the water frequently and use clean water.
Q: Can I grow other types of lettuce using this method?
A: Yes, you can try growing other types of lettuce using this method, but Romaine lettuce tends to be the most successful. Butter lettuce and green leaf lettuce may also work, but iceberg lettuce is less likely to regrow.
Q: Is it safe to eat the regrown Romaine lettuce?
A: Yes, it’s safe to eat the regrown Romaine lettuce, as long as you’ve followed proper hygiene practices and the lettuce looks healthy. Wash the leaves thoroughly before eating.
Q: My regrown Romaine lettuce is bitter. Why?
A: Bitterness in lettuce can be caused by several factors, including heat stress, lack of water, or bolting (when the plant starts to flower). Make sure your lettuce is getting enough water and is not exposed to excessive heat.
Q: Can I grow Romaine lettuce from seed indoors?
A: Yes, growing Romaine lettuce from seed indoors is a great option, especially if you want a larger and more robust plant. You’ll need to start the seeds in a seed-starting mix and provide them with adequate light and water.
Q: Where can I find more information about growing Romaine lettuce?
A: There are many resources available online and in libraries about growing Romaine lettuce. Search for articles, videos, and books on gardening and vegetable gardening. You can also consult with local gardening experts or join a gardening club.

Leave a Comment