
Grow Strawberries at Home and unlock a world of fresh, juicy goodness right in your backyard! Imagine plucking sun-ripened strawberries, still warm from the sun, and enjoying their unparalleled sweetness. Forget those bland, store-bought berries – with a few simple tricks, you can cultivate a thriving strawberry patch, even if you have limited space.
The allure of growing your own food is deeply rooted in human history. For centuries, cultivating the land and nurturing plants has been a source of sustenance, connection, and pride. Strawberries, in particular, have a rich cultural significance, symbolizing love, purity, and abundance in various traditions. From ancient Roman gardens to modern-day balconies, the desire to grow strawberries at home has persisted.
But why should *you* embark on this delicious adventure? Well, beyond the superior taste and satisfaction of harvesting your own produce, growing strawberries at home offers numerous benefits. You’ll know exactly what goes into your food, avoiding harmful pesticides and chemicals. Plus, it’s a fantastic way to connect with nature, relieve stress, and even get some gentle exercise. In this article, I’m going to share some easy-to-follow DIY tricks and hacks that will help you create a flourishing strawberry haven, no matter your gardening experience. Get ready to enjoy a bountiful harvest of sweet, homegrown strawberries!
Erdbeeren zu Hause anbauen: Dein DIY-Guide für eine reiche Ernte
Hallo liebe Gartenfreunde! Habt ihr euch jemals vorgestellt, frische, saftige Erdbeeren direkt von eurem Balkon oder Garten zu pflücken? Ich zeige euch, wie ihr diesen Traum ganz einfach in die Realität umsetzen könnt. Erdbeeren anzubauen ist gar nicht so schwer, wie man denkt, und mit ein paar einfachen Tricks könnt ihr schon bald eure eigene Erdbeerernte genießen. Lasst uns gemeinsam loslegen!
Was du für den Erdbeeranbau brauchst
Bevor wir mit dem Pflanzen beginnen, ist es wichtig, dass wir alles vorbereitet haben. Hier ist eine Liste der Dinge, die du benötigen wirst:
* Erdbeerpflanzen: Wähle robuste Sorten, die für dein Klima geeignet sind. Frag am besten in deiner Gärtnerei nach, welche Sorten sich bewährt haben.
* Pflanzgefäße: Du kannst Töpfe, Balkonkästen, Hängekörbe oder sogar spezielle Erdbeertürme verwenden. Achte darauf, dass sie ausreichend groß sind und Drainagelöcher haben.
* Erdbeerspezifische Erde: Normale Blumenerde ist oft zu nährstoffreich. Spezielle Erdbeererde ist lockerer und bietet die optimalen Bedingungen für das Wachstum.
* Dünger: Ein spezieller Erdbeerdünger versorgt deine Pflanzen mit allen wichtigen Nährstoffen.
* Gießkanne oder Gartenschlauch: Zum regelmäßigen Gießen.
* Mulchmaterial: Stroh oder Holzhackschnitzel helfen, die Feuchtigkeit im Boden zu halten und Unkraut zu unterdrücken.
* Gartenschere: Zum Entfernen von alten Blättern und Ausläufern.
* Handschuhe: Um deine Hände sauber zu halten.
* Sonniger Standort: Erdbeeren lieben die Sonne!
Die richtige Vorbereitung ist das A und O
Bevor wir die Erdbeeren einpflanzen, müssen wir die Pflanzgefäße vorbereiten und die Erde richtig aufbereiten.
1. Pflanzgefäße vorbereiten: Stelle sicher, dass deine Töpfe oder Balkonkästen sauber sind und ausreichend Drainagelöcher haben. Lege eine Schicht Tonscherben oder Blähton auf den Boden, um Staunässe zu vermeiden.
2. Erde vorbereiten: Fülle die Pflanzgefäße mit Erdbeerspezifischer Erde. Drücke die Erde leicht an, aber nicht zu fest.
3. Dünger hinzufügen: Mische etwas Erdbeerdünger unter die Erde, um den Pflanzen einen guten Start zu ermöglichen. Achte dabei auf die Dosierungsanleitung auf der Verpackung.
Erdbeeren einpflanzen: Schritt für Schritt
Jetzt kommt der spannende Teil: das Einpflanzen der Erdbeeren!
1. Erdbeerpflanzen vorbereiten: Nimm die Erdbeerpflanzen vorsichtig aus ihren Töpfen. Lockere die Wurzeln etwas auf, damit sie sich besser im neuen Pflanzgefäß ausbreiten können.
2. Pflanzlöcher graben: Grabe kleine Löcher in die Erde, die groß genug sind, um die Wurzelballen der Erdbeerpflanzen aufzunehmen. Achte darauf, dass die Löcher ausreichend Abstand zueinander haben (ca. 20-25 cm).
3. Erdbeerpflanzen einsetzen: Setze die Erdbeerpflanzen in die Löcher ein. Die Oberseite des Wurzelballens sollte mit der Erdoberfläche abschließen. Achte darauf, dass das Herz der Pflanze (der Punkt, an dem die Blätter aus dem Wurzelballen wachsen) nicht mit Erde bedeckt ist, da dies zu Fäulnis führen kann.
4. Löcher auffüllen: Fülle die Löcher mit Erde auf und drücke sie leicht an.
5. Gießen: Gieße die Erdbeerpflanzen gründlich an. Achte darauf, dass die Erde gut durchfeuchtet ist.
6. Mulchen: Verteile eine Schicht Stroh oder Holzhackschnitzel um die Erdbeerpflanzen. Dies hilft, die Feuchtigkeit im Boden zu halten, Unkraut zu unterdrücken und die Früchte vor Schmutz zu schützen.
Die richtige Pflege für eine reiche Ernte
Damit deine Erdbeeren prächtig gedeihen und eine reiche Ernte bringen, ist die richtige Pflege entscheidend.
1. Gießen: Erdbeeren benötigen regelmäßig Wasser, besonders während der Blütezeit und der Fruchtbildung. Gieße die Pflanzen am besten morgens, damit die Blätter über den Tag abtrocknen können. Vermeide Staunässe, da dies zu Wurzelfäule führen kann.
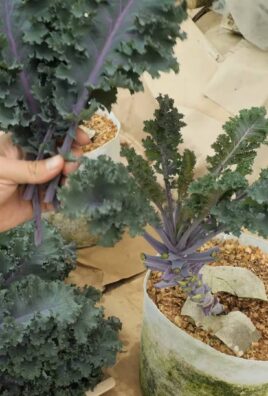
2. Düngen: Dünge deine Erdbeerpflanzen regelmäßig mit einem speziellen Erdbeerdünger. Achte dabei auf die Dosierungsanleitung auf der Verpackung. Eine Düngung alle zwei bis drei Wochen ist in der Regel ausreichend.
3. Ausläufer entfernen: Erdbeerpflanzen bilden Ausläufer, an denen sich neue Pflanzen entwickeln. Wenn du eine reiche Ernte erzielen möchtest, solltest du die Ausläufer regelmäßig entfernen, da sie der Mutterpflanze Energie rauben. Du kannst die Ausläufer aber auch nutzen, um neue Erdbeerpflanzen zu ziehen.
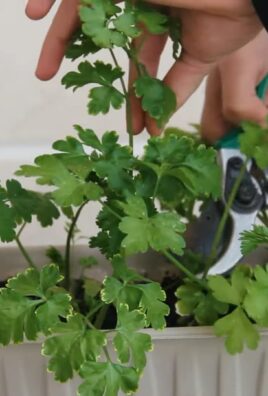
4. Alte Blätter entfernen: Entferne regelmäßig alte, gelbe oder braune Blätter, um Krankheiten vorzubeugen und die Luftzirkulation zu verbessern.
5. Schutz vor Schädlingen: Erdbeeren können von verschiedenen Schädlingen befallen werden, wie z.B. Schnecken, Blattläusen oder Erdbeermilben. Kontrolliere deine Pflanzen regelmäßig und bekämpfe Schädlinge bei Bedarf mit geeigneten Mitteln.
6. Schutz vor Vögeln: Vögel lieben Erdbeeren! Schütze deine Früchte mit einem Netz oder einer Vogelscheuche.
7. Überwinterung: Erdbeerpflanzen sind in der Regel winterhart, aber in sehr kalten Regionen solltest du sie mit Reisig oder Stroh abdecken, um sie vor Frost zu schützen.
Die Ernte: Der Lohn deiner Mühe
Nach all der Arbeit und Pflege kommt endlich der Moment, auf den du gewartet hast: die Ernte!
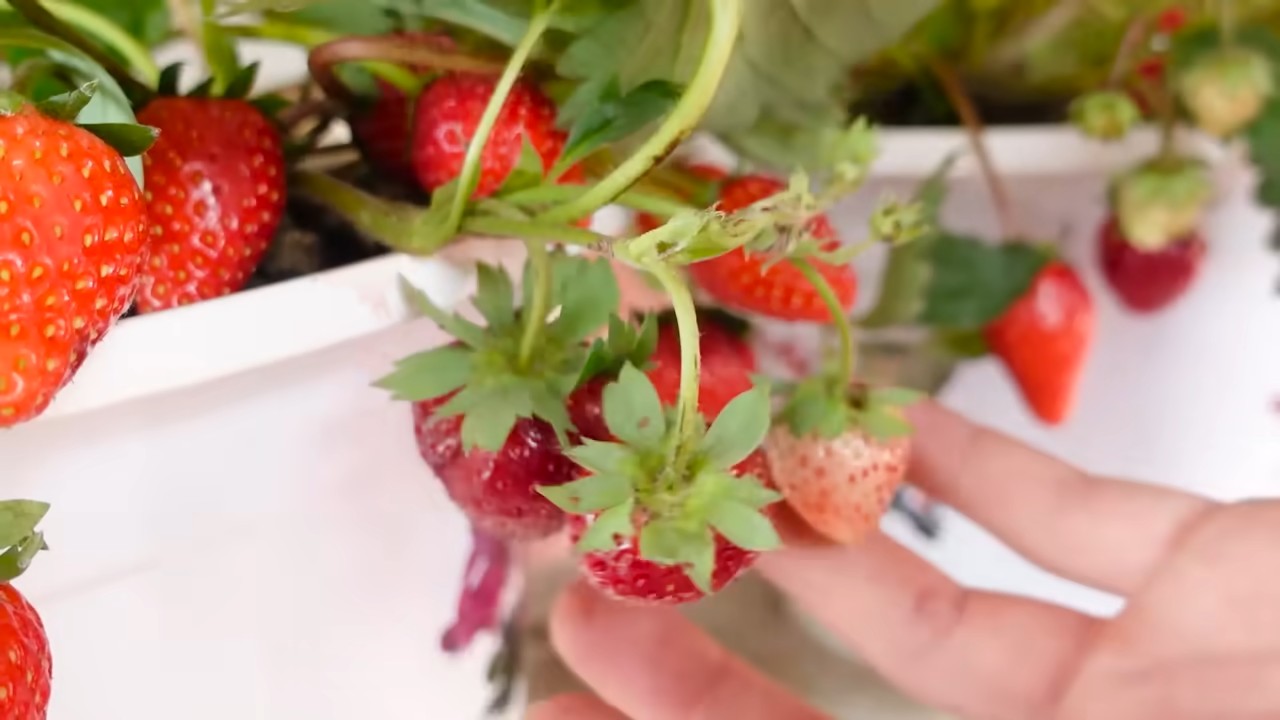
1. Reife erkennen: Erdbeeren sind reif, wenn sie eine tiefrote Farbe haben und leicht vom Stiel abzulösen sind.
2. Erdbeeren pflücken: Pflücke die Erdbeeren vorsichtig, um sie nicht zu beschädigen. Schneide sie am besten mit einer Schere ab, um die Pflanze nicht zu verletzen.
3. Erdbeeren genießen: Genieße deine frisch geernteten Erdbeeren pur, im Joghurt, im Kuchen oder als Marmelade. Deiner Fantasie sind keine Grenzen gesetzt!
Erdbeeren im Erdbeerturm anbauen
Eine besonders platzsparende und dekorative Möglichkeit, Erdbeeren anzubauen, ist der Erdbeerturm. Hier ist, wie du ihn baust und bepflanzt:
Materialien für den Erdbeerturm
* Ein großer Pflanzkübel: Der Durchmesser sollte mindestens 40 cm betragen.
* Ein PVC-Rohr: Das Rohr sollte etwas kürzer sein als der Pflanzkübel hoch ist und einen Durchmesser von etwa 10 cm haben.
* Bohrmaschine mit Lochsäge: Für die Löcher im PVC-Rohr.
* Vlies oder Jute: Zum Auskleiden des PVC-Rohrs.
* Erdbeerspezifische Erde: Für die Bepflanzung.
* Erdbeerpflanzen: Am besten kleinwüchsige Sorten.
* Kies oder Blähton: Für die Drainage.
Anleitung für den Bau des Erdbeerturms
1. PVC-Rohr vorbereiten: Bohre mit der Lochsäge in regelmäßigen Abständen (ca. 15-20 cm) Löcher in das PVC-Rohr. Die Löcher sollten groß genug sein, damit die Erdbeerpflanzen später hindurchwachsen können.
2. PVC-Rohr auskleiden: Wickle das PVC-Rohr mit Vlies oder Jute ein und fixiere es mit Klebeband oder Schnur. Dies verhindert, dass Erde durch die Löcher gespült wird.
3. Pflanzkübel vorbereiten: Lege eine Schicht Kies oder Blähton auf den Boden des Pflanzkübels, um die Drainage zu verbessern.
4. PVC-Rohr platzieren:
Conclusion
So, there you have it! Growing strawberries at home isn’t just a whimsical dream; it’s an achievable reality with a little know-how and a dash of enthusiasm. We’ve explored a simple yet effective DIY trick that can transform your balcony, patio, or even a sunny windowsill into a thriving strawberry patch. Forget those bland, overpriced berries from the supermarket – imagine plucking juicy, sun-ripened strawberries straight from your own plants, bursting with flavor and packed with vitamins.
This method, focusing on efficient space utilization and optimal growing conditions, is a game-changer for urban gardeners and anyone looking to enjoy the freshest possible produce. The satisfaction of nurturing a plant from seedling to fruit is unparalleled, and the delicious reward is well worth the effort.
But the beauty of this DIY approach lies in its adaptability. Feel free to experiment with different container sizes and materials. Terracotta pots offer excellent drainage, while repurposed plastic containers are a budget-friendly option. Consider adding companion plants like basil or marigolds to deter pests and enhance the overall health of your strawberry plants. For those with limited sunlight, grow lights can be a lifesaver, ensuring your strawberries receive the necessary energy for optimal growth.
Furthermore, don’t be afraid to explore different strawberry varieties. Everbearing strawberries will provide a continuous harvest throughout the growing season, while June-bearing varieties offer a larger, more concentrated yield. Research which varieties thrive in your local climate and choose accordingly. You can even try growing alpine strawberries, which are smaller and more intensely flavored.
This DIY trick for growing strawberries at home is more than just a gardening project; it’s an invitation to connect with nature, cultivate patience, and savor the simple pleasures of life. It’s a chance to reduce your carbon footprint, support sustainable practices, and enjoy the unparalleled taste of homegrown goodness.
We wholeheartedly encourage you to give this method a try. Whether you’re a seasoned gardener or a complete novice, you’ll be amazed at how easy and rewarding it is to grow your own strawberries. Don’t be discouraged by initial setbacks – gardening is a learning process, and every mistake is an opportunity to improve.
Once you’ve harvested your first batch of homegrown strawberries, we’d love to hear about your experience! Share your photos, tips, and challenges in the comments section below. Let’s create a community of strawberry enthusiasts and inspire others to embark on this delicious and fulfilling journey. Happy growing!
Frequently Asked Questions (FAQ)
What is the best time of year to start growing strawberries?
The ideal time to plant strawberries depends on your climate and the type of strawberry you’re growing. In general, early spring or late fall are the best times to plant. Spring planting allows the plants to establish themselves before the heat of summer, while fall planting gives them a head start for the following spring. For everbearing varieties, you can often plant them throughout the growing season, as long as you provide adequate water and protection from extreme temperatures. Check your local gardening resources for specific recommendations based on your region.
What kind of soil is best for growing strawberries?
Strawberries thrive in well-draining, slightly acidic soil with a pH between 5.5 and 6.5. Amend your soil with compost or other organic matter to improve drainage and fertility. If your soil is heavy clay, consider growing your strawberries in raised beds or containers to ensure proper drainage. A soil test can help you determine the pH and nutrient levels of your soil, allowing you to make necessary adjustments before planting.
How much sunlight do strawberries need?
Strawberries require at least 6-8 hours of direct sunlight per day to produce a bountiful harvest. Choose a location that receives ample sunlight throughout the day. If you’re growing strawberries indoors, supplement with grow lights to ensure they receive enough light. Insufficient sunlight can result in smaller, less flavorful berries.
How often should I water my strawberry plants?
Water your strawberry plants regularly, especially during dry periods. Aim to keep the soil consistently moist but not waterlogged. Overwatering can lead to root rot, while underwatering can stress the plants and reduce fruit production. Check the soil moisture regularly and water when the top inch feels dry to the touch. Drip irrigation or soaker hoses are excellent options for providing consistent moisture without wetting the foliage, which can help prevent fungal diseases.
What are some common pests and diseases that affect strawberries?
Strawberries are susceptible to various pests and diseases, including aphids, spider mites, slugs, snails, and fungal diseases like powdery mildew and gray mold. Regularly inspect your plants for signs of infestation or disease. Remove any affected leaves or fruit promptly. Use organic pest control methods, such as insecticidal soap or neem oil, to control pests. Ensure good air circulation around your plants to prevent fungal diseases. Consider using a copper fungicide as a preventative measure.
How do I fertilize my strawberry plants?
Fertilize your strawberry plants regularly with a balanced fertilizer. Apply a slow-release fertilizer at planting time and then supplement with liquid fertilizer every few weeks during the growing season. Avoid over-fertilizing, as this can lead to excessive foliage growth at the expense of fruit production. Choose a fertilizer specifically formulated for berries or fruits and follow the instructions on the label.
When should I harvest my strawberries?
Strawberries are ready to harvest when they are fully red and slightly soft to the touch. Gently twist the berry off the plant, leaving the green cap and a short stem attached. Harvest your strawberries in the morning, after the dew has dried. Store them in the refrigerator for up to a week.
How do I overwinter my strawberry plants?
In colder climates, protect your strawberry plants from frost and freezing temperatures by covering them with a layer of straw or mulch. This will help insulate the roots and prevent them from being damaged by the cold. You can also move container-grown strawberries to a sheltered location, such as a garage or shed. In milder climates, you may not need to provide any winter protection.
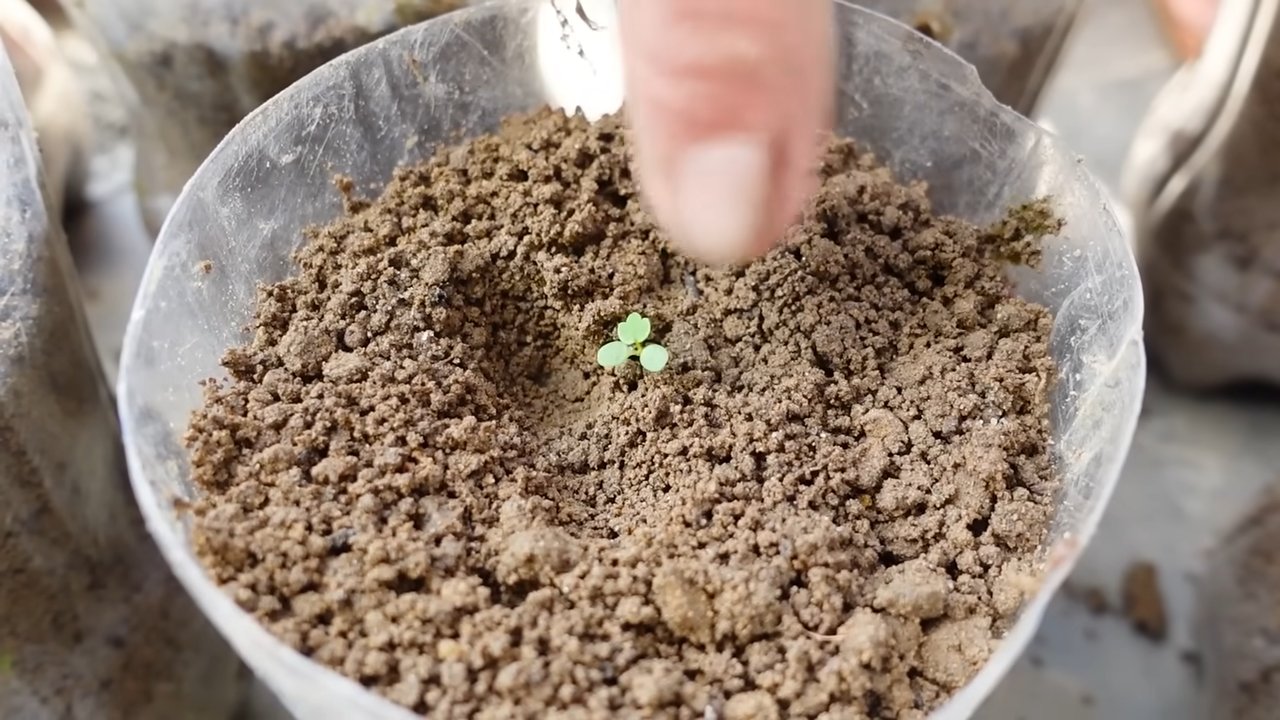
Can I grow strawberries from seed?
While it is possible to grow strawberries from seed, it is a more challenging and time-consuming process than starting with established plants or runners. Strawberry seeds require a period of cold stratification before they will germinate. Sow the seeds indoors in late winter and transplant the seedlings outdoors in the spring. Be patient, as it may take several months for the plants to mature and produce fruit.
What are runners, and how do I use them?
Runners are horizontal stems that strawberry plants produce to propagate themselves. They develop roots and form new plantlets. You can use runners to expand your strawberry patch or to start new plants in containers. Simply clip the runner from the mother plant once the new plantlet has developed roots. You can then transplant the new plantlet to a new location. Removing runners can also encourage the mother plant to produce more fruit.

Leave a Comment