
Grow Sweet Potatoes Home – sounds like a dream, right? Imagine harvesting your own vibrant, nutrient-packed sweet potatoes right from your backyard! Forget those bland, store-bought spuds; we’re talking about homegrown goodness bursting with flavor. For centuries, sweet potatoes have been a staple in diets around the world, from their origins in Central and South America to becoming a beloved dish in many cultures. They represent sustenance, resilience, and the simple joy of reaping what you sow.
But let’s be honest, the thought of growing them can seem intimidating. Where do you even start? That’s where this DIY guide comes in! I’m here to show you that growing sweet potatoes at home is not only achievable but also incredibly rewarding. We’ll break down the process into easy-to-follow steps, sharing insider tricks and hacks that will have you harvesting a bountiful crop in no time.
Why do you need this DIY trick, you ask? Because everyone deserves access to fresh, healthy food, and there’s nothing quite like the satisfaction of nurturing a plant from sprout to harvest. Plus, growing your own sweet potatoes is a fantastic way to save money, reduce your carbon footprint, and connect with nature. So, let’s ditch the grocery store and grow sweet potatoes home – your taste buds (and your wallet) will thank you!
Growing Sweet Potatoes at Home: A Beginner’s Guide
Hey there, fellow gardening enthusiasts! I’m so excited to share my experience with growing sweet potatoes at home. It’s surprisingly easy and incredibly rewarding. Imagine harvesting your own delicious, homegrown sweet potatoes – the taste is just unbeatable! This guide will walk you through every step, from sprouting slips to harvesting your bounty. Let’s get started!
Choosing Your Sweet Potato Variety
Before we dive in, let’s talk varieties. Sweet potatoes come in a range of colors, textures, and flavors. Some popular choices include:
* Beauregard: A classic orange-fleshed variety, known for its reliable yields and sweet flavor. It’s a great all-around choice.
* Jewel: Another orange-fleshed variety, but slightly sweeter than Beauregard. It’s also a good keeper, meaning it stores well.
* Garnet: This one has a deep red skin and vibrant orange flesh. It’s known for its moist texture and rich flavor.
* Japanese Sweet Potato (Muraski): This variety has purple skin and white flesh that turns golden when cooked. It has a nutty, almost chestnut-like flavor.
* Okinawan Sweet Potato (Hawaiian): This one boasts purple skin and purple flesh! It’s less sweet than other varieties and has a slightly drier texture.
I recommend starting with Beauregard or Jewel – they’re generally easy to grow and widely available.
Sprouting Sweet Potato Slips
Sweet potatoes don’t grow directly from seeds. Instead, we grow them from “slips,” which are sprouts that emerge from the sweet potato itself. Here’s how to sprout your own slips:
1. Choose Your Sweet Potato: Select a healthy, organic sweet potato. Organic is important because non-organic potatoes may be treated to prevent sprouting.
2. Prepare the Potato: There are two main methods for sprouting:
* Water Method: Suspend the sweet potato in a jar or glass of water, with the bottom half submerged. You can use toothpicks to hold it in place.
* Soil Method: Bury the sweet potato horizontally in a container filled with moist potting mix, leaving the top slightly exposed.
3. Provide Warmth and Light: Place the jar or container in a warm, sunny location. A temperature of around 75-85°F (24-29°C) is ideal.
4. Maintain Moisture: For the water method, replenish the water as needed. For the soil method, keep the soil consistently moist but not soggy.
5. Wait Patiently: It can take several weeks for slips to emerge. Be patient! You’ll start to see small sprouts appearing from the potato.
6. Harvesting the Slips: Once the slips are 6-8 inches long, they’re ready to be harvested. Gently twist or cut them off the sweet potato. Try to get as much of the base of the slip as possible.
7. Rooting the Slips: Place the harvested slips in a glass of water, ensuring that the bottom inch or two is submerged. Change the water every day or two. Within a few days, you should see roots starting to form.
Preparing Your Garden Bed
Sweet potatoes need plenty of sunshine and well-drained soil. Here’s how to prepare your garden bed:
1. Choose a Sunny Location: Select a spot in your garden that receives at least 6-8 hours of direct sunlight per day.
2. Test Your Soil: Sweet potatoes prefer slightly acidic soil with a pH of 6.0-6.5. You can test your soil using a home soil test kit or by sending a sample to your local agricultural extension office.
3. Amend the Soil: If your soil is heavy clay or sandy, amend it with plenty of organic matter, such as compost, aged manure, or leaf mold. This will improve drainage and fertility.
4. Create Raised Beds (Optional): Sweet potatoes thrive in raised beds, as they provide excellent drainage. If your soil is prone to waterlogging, consider building raised beds.
5. Loosen the Soil: Till or dig the soil to a depth of at least 12 inches. This will allow the sweet potato roots to easily penetrate the soil.
6. Fertilize (Optional): While sweet potatoes don’t need a lot of fertilizer, you can add a small amount of a balanced fertilizer (e.g., 10-10-10) to the soil before planting. Follow the instructions on the fertilizer package.
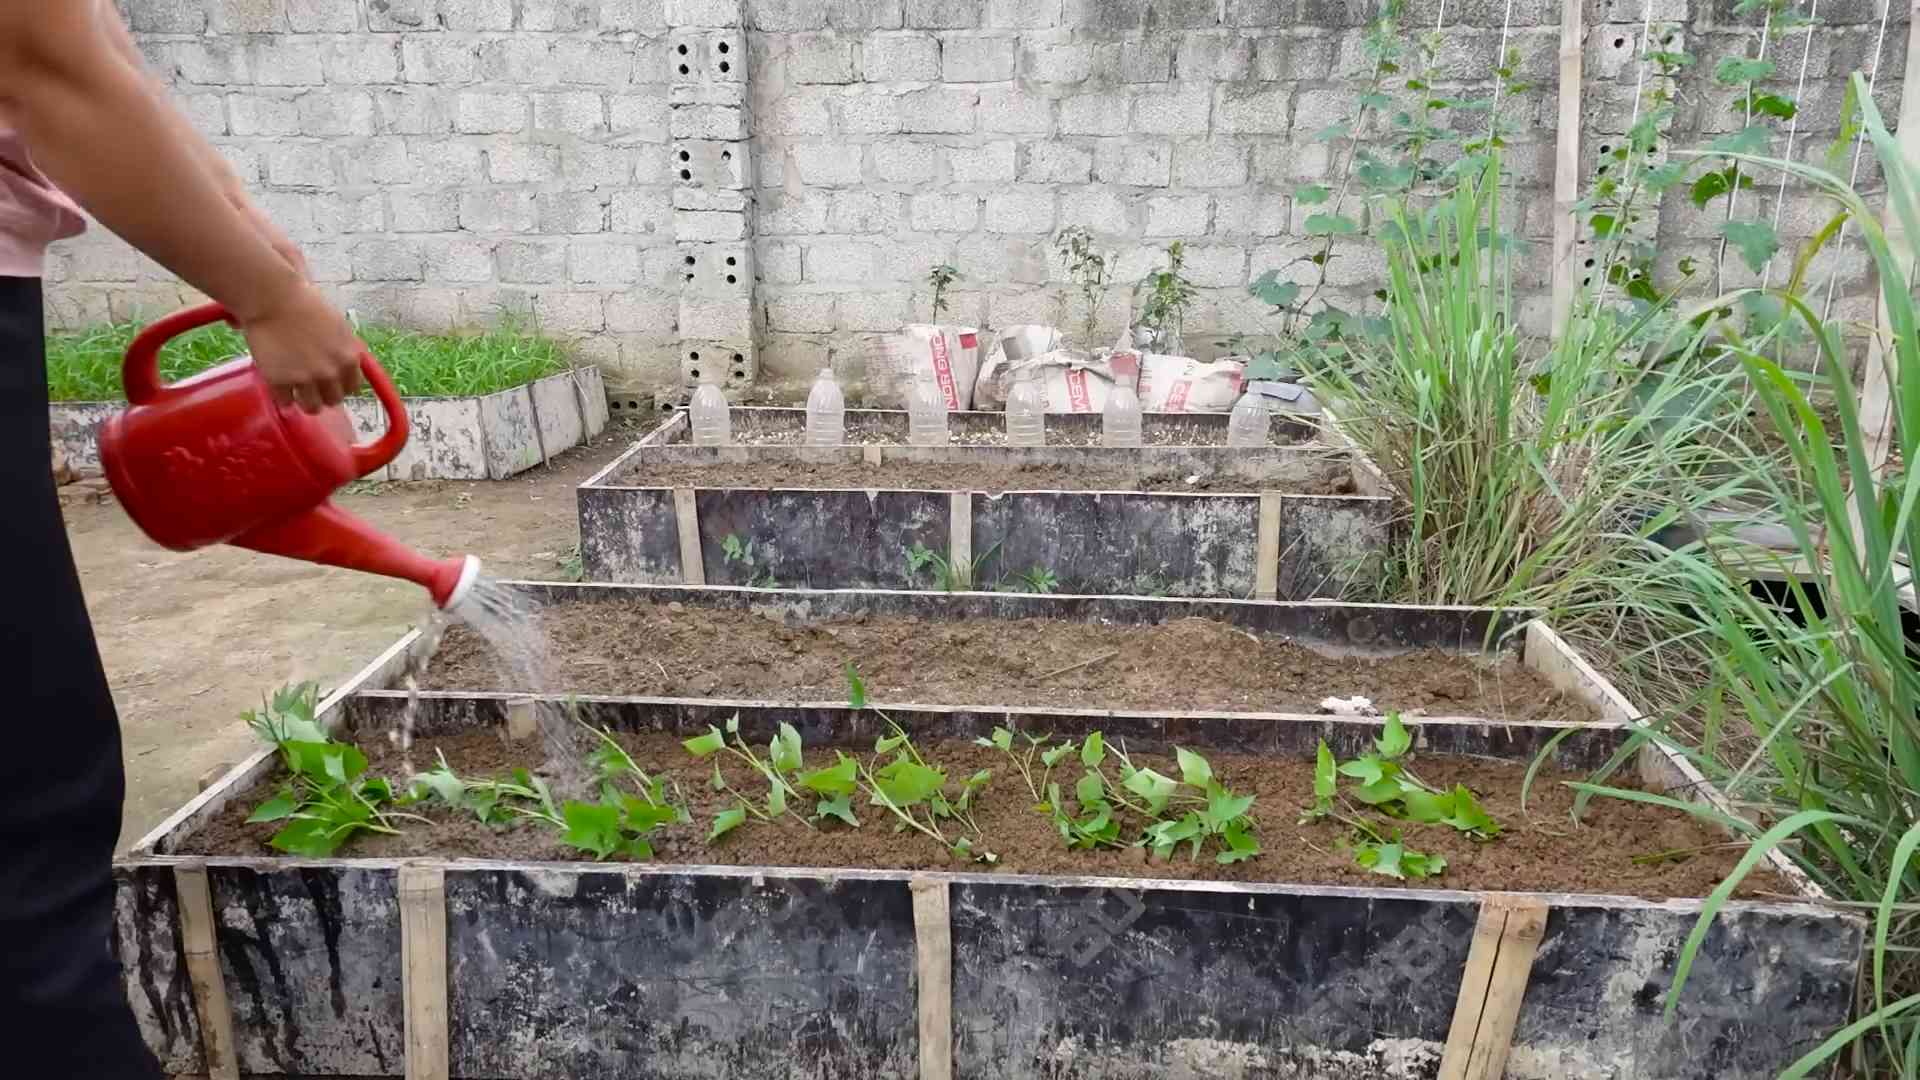
Planting Your Sweet Potato Slips
Now for the fun part – planting your slips!
1. Wait for Warm Weather: Sweet potatoes are sensitive to frost, so wait until the danger of frost has passed and the soil has warmed up to at least 60°F (16°C) before planting.
2. Water the Slips: Before planting, water the rooted slips thoroughly.
3. Dig Holes: Dig holes that are about 4-6 inches deep and spaced 12-18 inches apart in rows that are 3-4 feet apart.
4. Plant the Slips: Gently place each slip in a hole, covering the roots with soil. Leave the top leaves exposed.
5. Water Thoroughly: Water the newly planted slips thoroughly to help them establish.
6. Mulch (Optional): Apply a layer of mulch around the plants to help retain moisture, suppress weeds, and regulate soil temperature. Straw, hay, or wood chips are good choices.
Caring for Your Sweet Potato Plants
Once your sweet potato plants are in the ground, here’s how to care for them:
1. Water Regularly: Water the plants regularly, especially during dry periods. Sweet potatoes need consistent moisture to develop healthy roots. Aim for about 1 inch of water per week.
2. Weed Regularly: Keep the garden bed free of weeds, as they can compete with the sweet potato plants for nutrients and water. Hand-pull weeds or use a hoe to remove them.
3. Fertilize Lightly (Optional): If your plants are not growing vigorously, you can apply a side dressing of a balanced fertilizer a few weeks after planting.
4. Control Pests and Diseases: Sweet potatoes are generally pest-resistant, but they can be susceptible to certain pests, such as sweet potato weevils and flea beetles. Inspect your plants regularly and take action if you notice any signs of infestation. Similarly, watch out for diseases like fungal leaf spots. Treat any problems promptly with appropriate organic pesticides or fungicides.
5. Vine Management: Sweet potato vines can grow quite long and spread out. You can prune the vines to keep them under control, but be careful not to remove too much foliage, as this can reduce yields. You can also train the vines to grow along a trellis or fence.
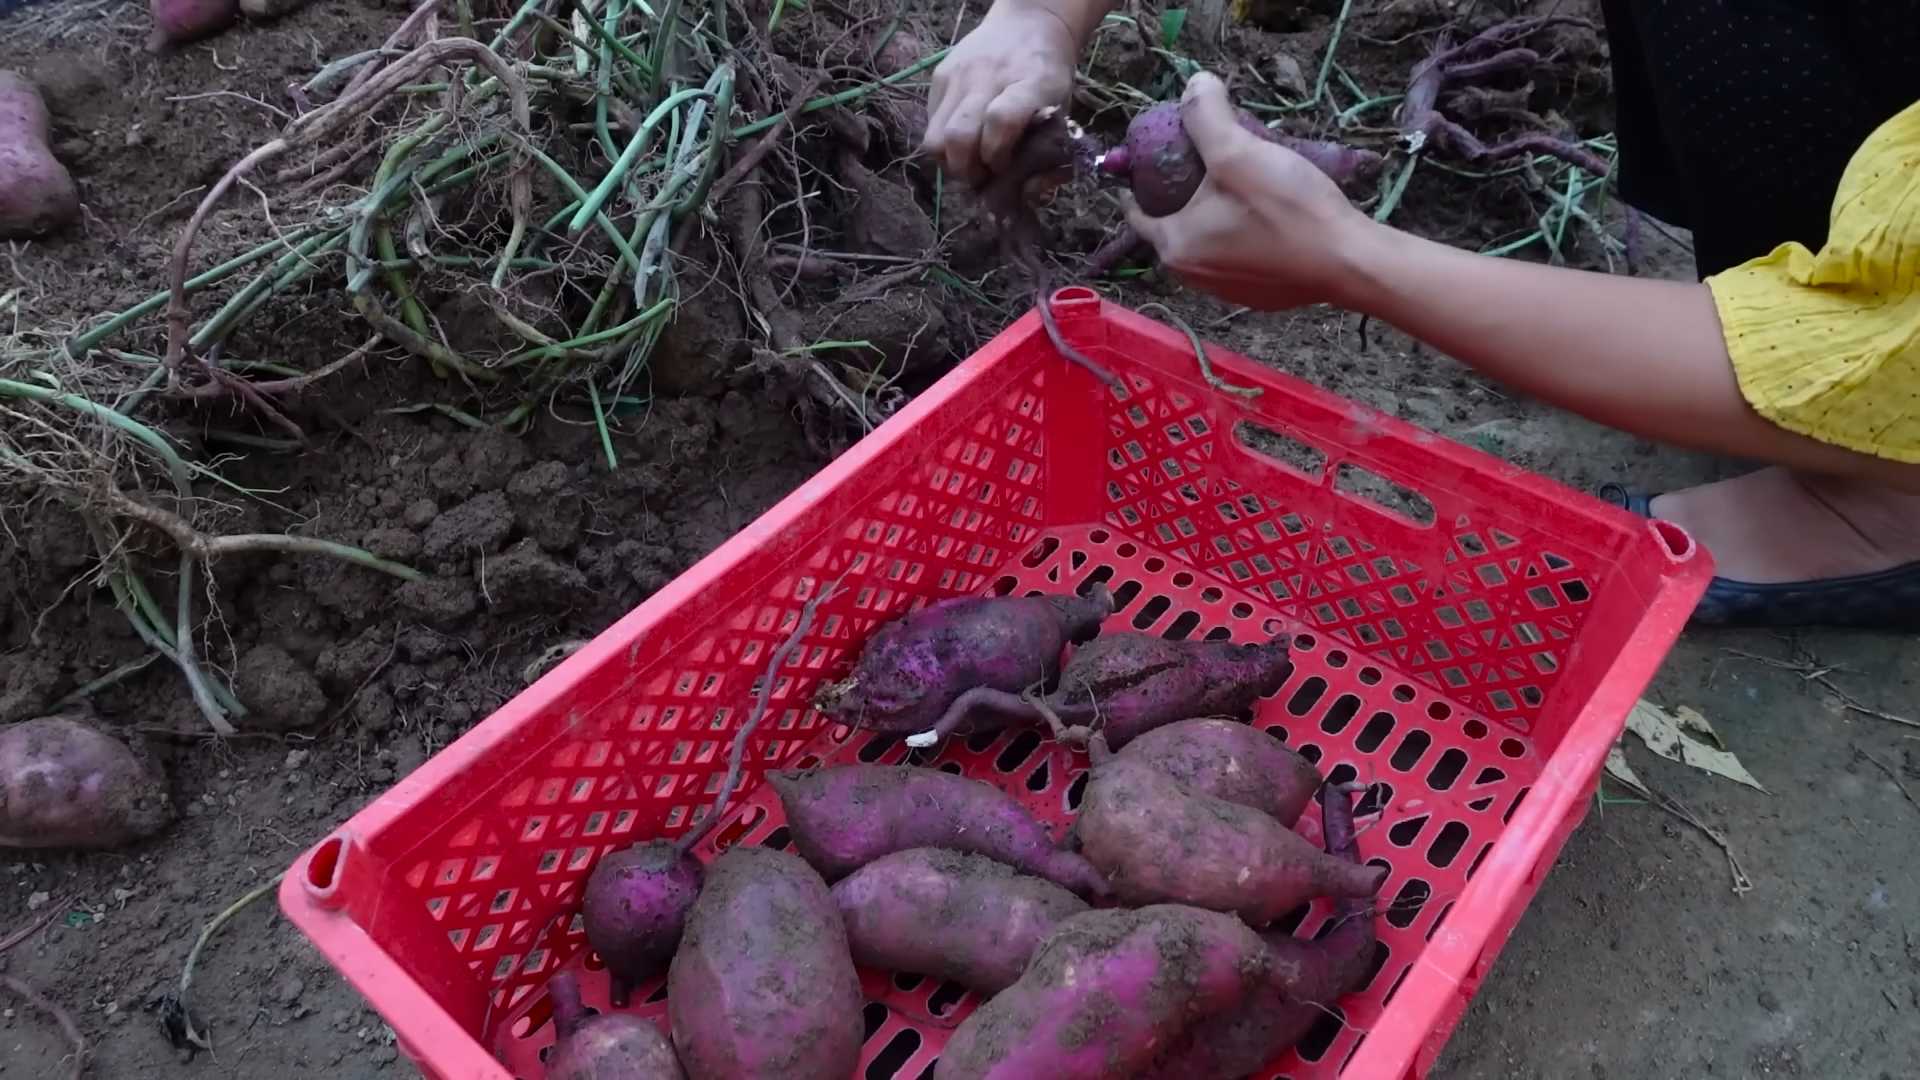
Harvesting Your Sweet Potatoes
The moment we’ve all been waiting for – harvesting!
1. Timing is Key: Sweet potatoes are typically ready to harvest about 90-120 days after planting, depending on the variety. A good indicator is when the leaves start to turn yellow and the vines begin to die back.
2. Choose a Dry Day: Harvest your sweet potatoes on a dry day to prevent them from rotting.
3. Dig Carefully: Use a garden fork or shovel to carefully dig around the plants, being careful not to damage the sweet potatoes. Start digging a foot or so away from the base of the plant.
4. Lift the Potatoes: Gently lift the sweet potatoes from the soil.
5. Curing Your Sweet Potatoes: Curing is essential for developing the sweet flavor and improving the storage life of your sweet potatoes.
* Clean the Potatoes: Brush off any excess soil from the sweet potatoes, but don’t wash them.
* Cure in a Warm, Humid Place: Place the sweet potatoes in a warm, humid place (80-85°F or 27-29°C and 85-90% humidity) for 7-10 days. A greenhouse, garage, or shed can work well. You can increase humidity by placing a humidifier nearby or by covering the potatoes with a damp cloth.
* Monitor for Rot: Check the sweet potatoes regularly for signs of rot. Discard any that are damaged or diseased.
6. Storing Your Sweet Potatoes: After curing, store your sweet potatoes in a cool, dry, and dark place (55-60°F or 13-16°C). A root cellar or unheated basement is ideal. Properly cured and stored sweet potatoes can last for several months.
Troubleshooting
Even with the best planning, things can sometimes go wrong. Here are a few common problems and how to address them:
* Slips Not Sprouting: Make sure the sweet potato is organic and that
Conclusion
So, there you have it! Growing sweet potatoes at home is not only achievable, but it’s also incredibly rewarding. Forget those bland, store-bought sweet potatoes – imagine sinking your teeth into a freshly harvested, vibrant orange sweet potato that you nurtured from start to finish. This DIY trick transforms the often-intimidating process of sweet potato cultivation into a manageable and even enjoyable experience.
Why is this a must-try? Because it puts you in control. You dictate the growing conditions, ensuring your sweet potatoes are free from unwanted chemicals and bursting with natural flavor. Plus, there’s an undeniable satisfaction in watching those little slips transform into sprawling vines and, ultimately, a bountiful harvest of delicious sweet potatoes. It’s a connection to your food that you just can’t get from a grocery store.
But the fun doesn’t stop there! Feel free to experiment with different varieties of sweet potatoes. From the classic Beauregard to the more exotic Japanese sweet potato with its purple skin and creamy white flesh, the possibilities are endless. You can also adjust the growing medium to suit your specific needs and preferences. Try adding compost for extra nutrients or using raised beds for improved drainage.
Consider growing your sweet potatoes in containers if you have limited space. A large pot or even a grow bag can provide ample room for a single plant to thrive. Just be sure to choose a container with good drainage and plenty of sunlight.
Another variation to explore is vertical gardening. Train your sweet potato vines to climb a trellis or fence, creating a beautiful and productive living wall. This is a great way to maximize space and add a touch of greenery to your garden.
Don’t be afraid to get creative with your sweet potato growing setup. The beauty of DIY is that you can tailor it to your specific circumstances and preferences.
We wholeheartedly encourage you to give this DIY trick a try. It’s a fantastic way to connect with nature, enjoy fresh, homegrown produce, and impress your friends and family with your gardening prowess. And most importantly, you’ll be enjoying the unparalleled taste of homegrown sweet potatoes.
Once you’ve harvested your first batch of homegrown goodness, we’d love to hear about your experience! Share your tips, tricks, and photos in the comments below. Let’s build a community of sweet potato enthusiasts and inspire others to embark on this rewarding gardening adventure. What variety did you grow? What challenges did you face, and how did you overcome them? Your insights could be invaluable to other aspiring sweet potato growers. Happy growing!
Frequently Asked Questions (FAQ)
What are sweet potato slips, and where can I get them?
Sweet potato slips are sprouts that grow from a mature sweet potato. You can either purchase them from a reputable nursery or garden center, or you can easily grow your own. To grow your own slips, simply suspend a sweet potato in a jar of water, ensuring that the bottom half is submerged. Place the jar in a warm, sunny location, and within a few weeks, you should see sprouts emerging from the potato. Once the sprouts are several inches long, gently twist them off and root them in water before planting them in soil.
How much sunlight do sweet potatoes need?
Sweet potatoes thrive in full sun, requiring at least 6-8 hours of direct sunlight per day. Insufficient sunlight can result in stunted growth and reduced yields. Choose a planting location that receives ample sunlight throughout the day. If you’re growing sweet potatoes in containers, make sure to position them in a sunny spot.
What type of soil is best for growing sweet potatoes?
Sweet potatoes prefer well-drained, sandy loam soil with a pH between 6.0 and 6.5. Heavy clay soil can hinder root development and lead to misshapen sweet potatoes. Amend heavy soil with compost or other organic matter to improve drainage and aeration. Raised beds are also an excellent option for growing sweet potatoes in areas with poor soil drainage.
How often should I water my sweet potato plants?
Water sweet potato plants regularly, especially during dry periods. Keep the soil consistently moist, but avoid overwatering, which can lead to root rot. Water deeply and less frequently, rather than shallowly and more often. Mulching around the plants can help retain moisture in the soil and reduce the need for frequent watering.
When is the best time to harvest sweet potatoes?
Sweet potatoes are typically ready to harvest about 90-120 days after planting. The leaves will start to turn yellow and the vines will begin to die back, indicating that the sweet potatoes are mature. Harvest before the first frost, as frost can damage the sweet potatoes. Gently dig around the plants with a garden fork, being careful not to damage the sweet potatoes. Cure the harvested sweet potatoes in a warm, humid place for about a week to allow the skins to harden and the sugars to develop.
Can I grow sweet potatoes in containers?
Yes, sweet potatoes can be successfully grown in containers. Choose a large container with good drainage, at least 15-20 gallons in size. Fill the container with a well-draining potting mix and plant one or two sweet potato slips per container. Provide adequate sunlight and water, and fertilize regularly with a balanced fertilizer.
What are some common pests and diseases that affect sweet potatoes?
Some common pests that can affect sweet potatoes include sweet potato weevils, flea beetles, and aphids. Diseases that can affect sweet potatoes include fusarium wilt, scurf, and black rot. Practice good garden hygiene to prevent pest and disease problems. Rotate crops regularly, remove infected plants promptly, and use organic pest control methods when necessary.
How do I store sweet potatoes after harvesting?
After curing, store sweet potatoes in a cool, dry, and dark place with good ventilation. The ideal storage temperature is between 55 and 60 degrees Fahrenheit. Avoid storing sweet potatoes in the refrigerator, as this can cause them to develop a hard core and lose their flavor. Properly stored sweet potatoes can last for several months.
Can I grow sweet potatoes from store-bought sweet potatoes?
Yes, you can grow sweet potato slips from store-bought sweet potatoes, but it’s important to choose organic sweet potatoes that have not been treated with sprout inhibitors. Follow the same method as described above for growing slips from sweet potatoes. Keep in mind that store-bought sweet potatoes may not produce the same quality or yield as those grown from certified slips.
What are the nutritional benefits of sweet potatoes?
Sweet potatoes are a nutritional powerhouse, packed with vitamins, minerals, and antioxidants. They are an excellent source of vitamin A, vitamin C, potassium, and fiber. Sweet potatoes are also rich in beta-carotene, an antioxidant that is converted to vitamin A in the body. Eating sweet potatoes can help boost your immune system, improve your vision, and promote healthy digestion.


Leave a Comment