
Grow Taro Indoors Organically? Absolutely! Imagine harvesting your own delicious, nutrient-rich taro right from your living room. It sounds like a dream, right? Well, it’s a dream that can become a reality with a few simple tricks and a little bit of love. For centuries, taro has been a staple food in many cultures, particularly in the Pacific Islands and Asia, where it’s revered not just for its nutritional value but also for its cultural significance. It’s often used in traditional ceremonies and celebrations, symbolizing prosperity and abundance.
But you don’t need a tropical island to enjoy this amazing plant. I’m going to show you how to grow taro indoors organically, even if you have limited space or experience. Why should you bother? Well, store-bought taro can be expensive and may not always be organically grown. Plus, there’s nothing quite like the satisfaction of nurturing a plant from start to finish and then enjoying the fruits (or, in this case, the roots!) of your labor. This DIY guide will provide you with easy-to-follow steps and insider tips to ensure your indoor taro thrives, providing you with a sustainable and delicious source of food. Let’s get started!
Growing Taro Indoors Organically: A Step-by-Step Guide
Hey there, fellow plant enthusiasts! Ever thought about growing your own taro indoors? It’s totally doable, and trust me, the satisfaction of harvesting your own organically grown taro is amazing. I’ve been doing it for a while now, and I’m excited to share my secrets with you. This guide will walk you through everything you need to know, from choosing the right taro variety to harvesting your very own homegrown goodness. Let’s get started!
Choosing Your Taro Variety
First things first, you need to pick the right taro variety. Not all taro plants are created equal, especially when it comes to indoor growing. Some varieties are simply too large and demanding for a container environment. I’ve found that smaller, more compact varieties tend to thrive indoors. Here are a few suggestions:
* ‘Bun Long’ Taro: This is a popular choice for its relatively small size and delicious corms. It’s also known for its attractive foliage.
* ‘Elepaio’ Taro: Another great option for indoor growing, ‘Elepaio’ is known for its tolerance to varying light conditions.
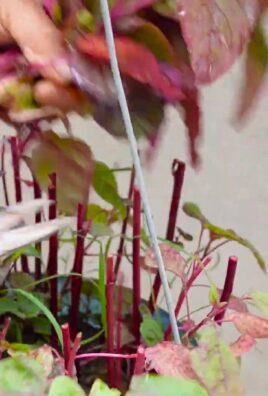
* ‘Lehua Maoli’ Taro: If you’re looking for a taro with beautiful reddish-purple stems, ‘Lehua Maoli’ is a fantastic choice. It’s also relatively compact.
Gathering Your Supplies
Okay, now that you’ve chosen your taro variety, let’s gather all the supplies you’ll need. Having everything on hand before you start will make the whole process much smoother. Here’s what I recommend:
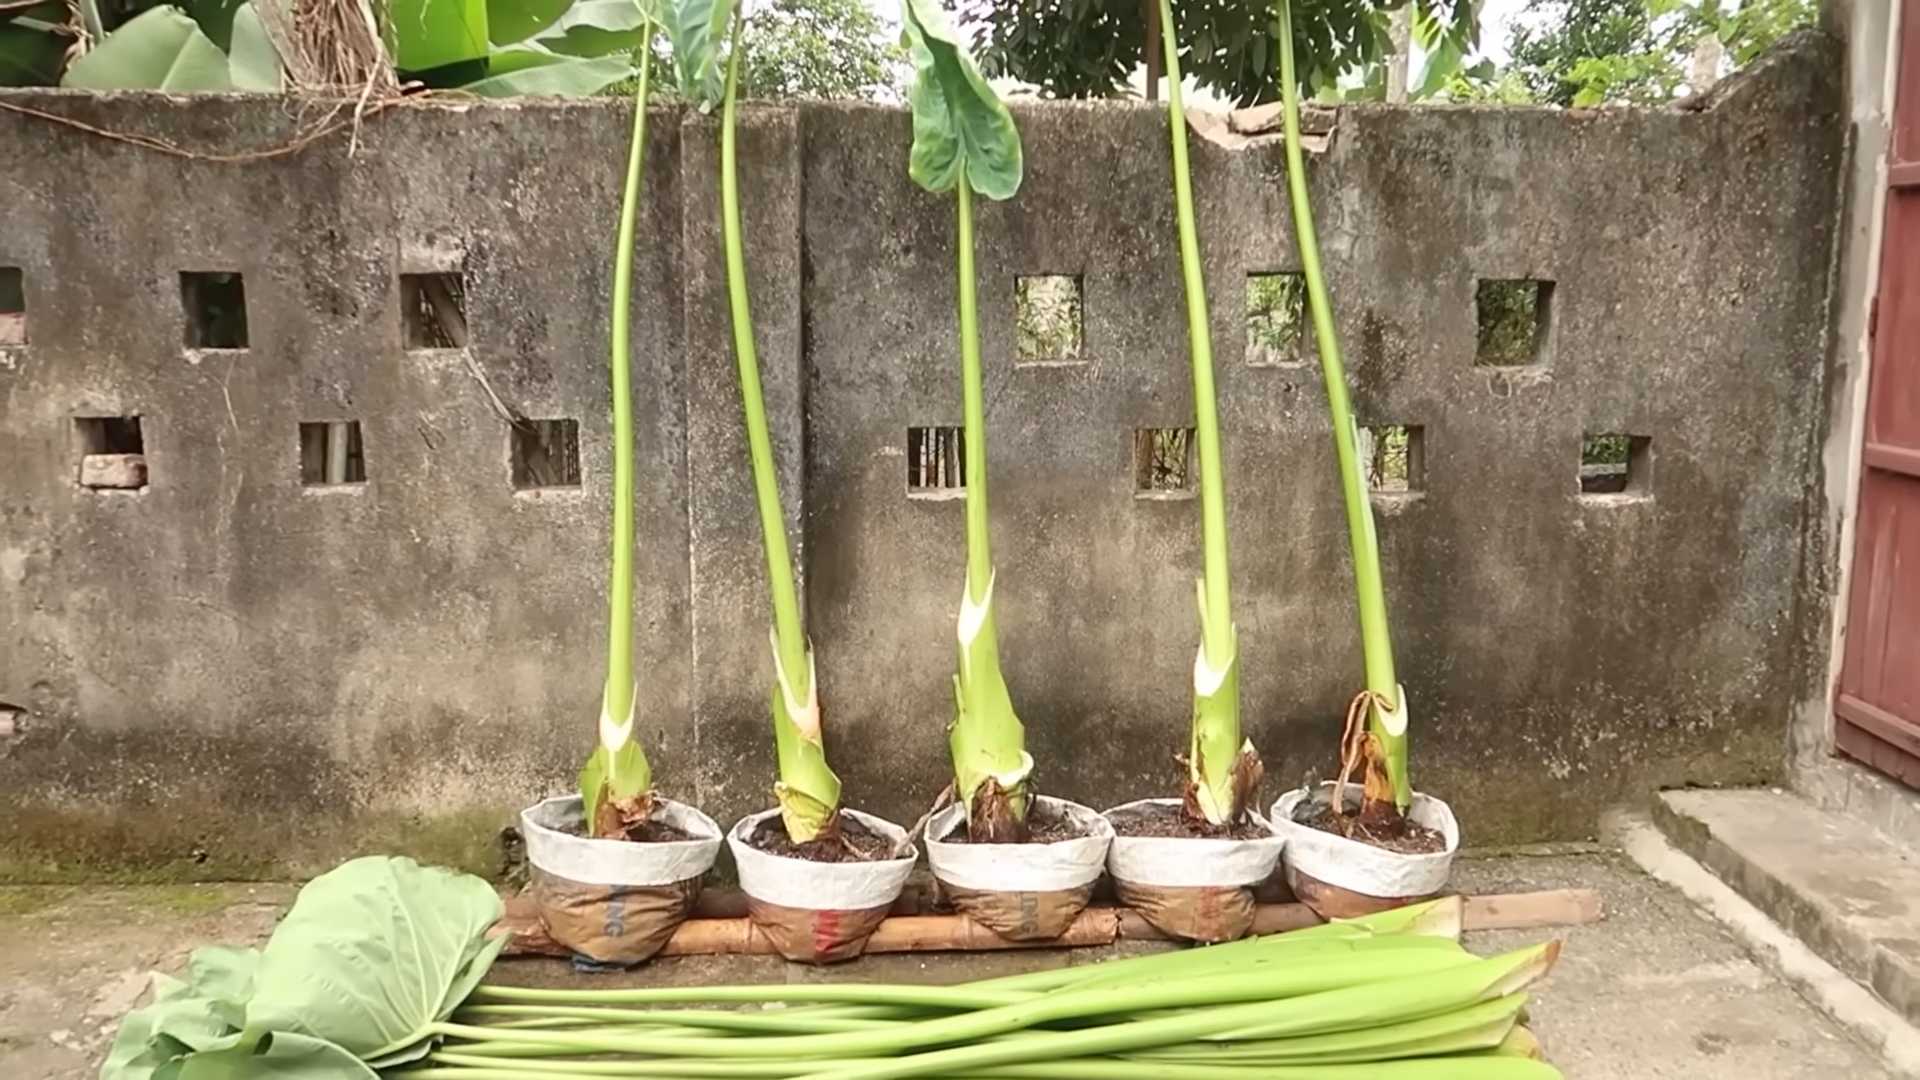
* Taro Corm or Seed: Of course, you’ll need something to start with! You can either purchase a taro corm (the underground stem) or try growing from seed, although corms are generally easier and faster.
* Large Container: Taro plants need plenty of room for their roots to grow, so choose a large container – at least 15-20 gallons. Make sure it has drainage holes!
* Organic Potting Mix: Use a high-quality organic potting mix that’s well-draining but also retains moisture. I like to mix in some compost for added nutrients.
* Compost: As mentioned above, compost is a great addition to your potting mix. It provides essential nutrients and improves soil structure.
* Perlite or Vermiculite: These help improve drainage and aeration in the potting mix.
* Water: You’ll need plenty of water to keep your taro plant happy.
* Organic Fertilizer: Choose an organic fertilizer that’s specifically formulated for leafy greens or root vegetables.
* Spray Bottle: For misting the leaves to increase humidity.
* Grow Light (Optional): If you don’t have a sunny spot, a grow light can provide the necessary light for your taro plant.
* Pebbles or Gravel: To create a drainage layer at the bottom of the container.
Planting Your Taro Corm
Alright, let’s get our hands dirty! Planting the taro corm is a crucial step, so pay close attention.
1. Prepare the Container: Start by placing a layer of pebbles or gravel at the bottom of your container. This will help with drainage and prevent the roots from sitting in water.
2. Mix the Potting Mix: In a large bucket or container, mix your organic potting mix with compost and perlite or vermiculite. I usually go for a ratio of 2 parts potting mix, 1 part compost, and 1 part perlite/vermiculite.
3. Fill the Container: Fill the container with the potting mix, leaving a few inches of space at the top.
4. Plant the Corm: Dig a hole in the center of the potting mix, about 4-6 inches deep. Place the taro corm in the hole, with the pointed end facing up.
5. Cover the Corm: Gently cover the corm with potting mix, making sure the top of the corm is just below the surface.
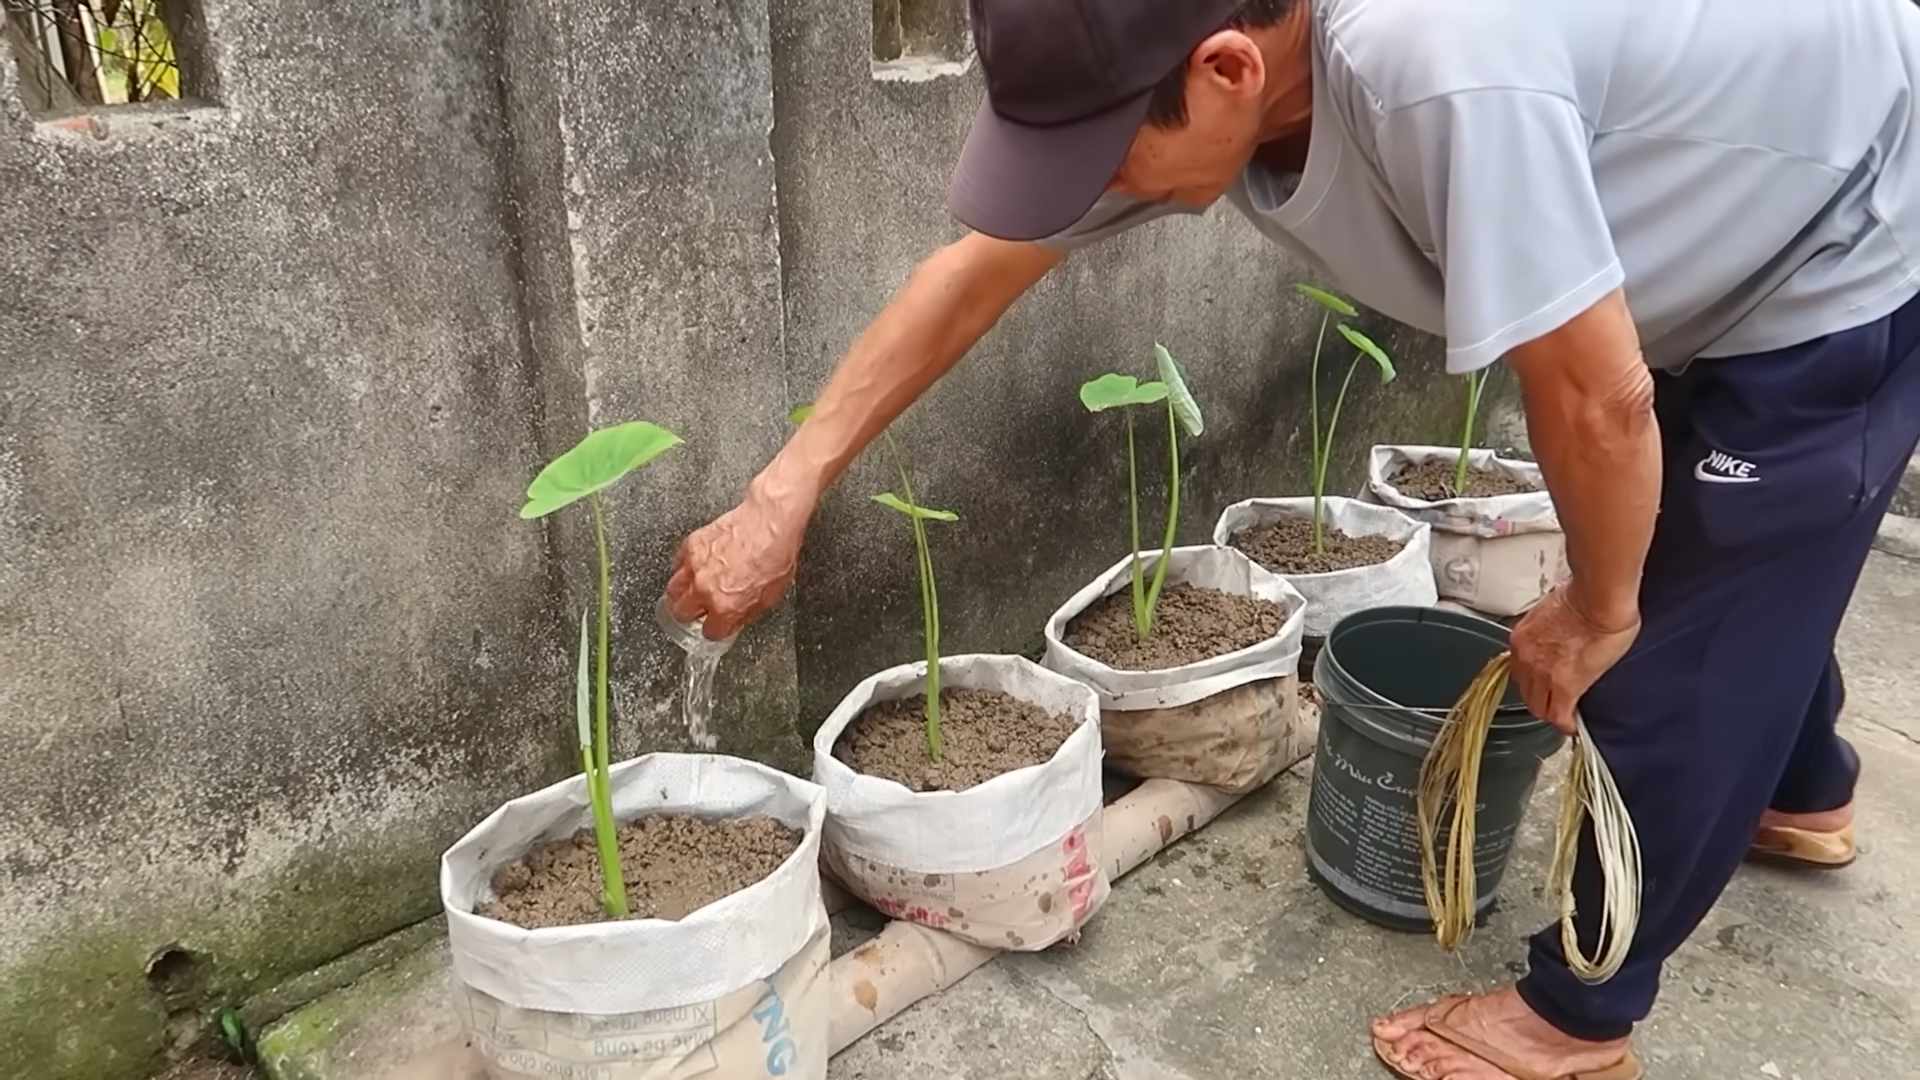
6. Water Thoroughly: Water the container thoroughly until water drains out of the drainage holes. This will help settle the soil and ensure the corm has enough moisture to start growing.
Caring for Your Indoor Taro Plant
Now that your taro plant is planted, it’s time to provide it with the care it needs to thrive indoors. Here’s what I’ve learned over the years:
1. Light: Taro plants need plenty of bright, indirect light. A south-facing window is ideal, but an east- or west-facing window can also work. If you don’t have enough natural light, consider using a grow light. I usually keep my grow light on for about 12-14 hours a day.
2. Watering: Taro plants love moisture, so you’ll need to water them regularly. Keep the soil consistently moist, but not soggy. I usually water my taro plant every 2-3 days, or whenever the top inch of soil feels dry.
3. Humidity: Taro plants thrive in high humidity. If your indoor environment is dry, you can increase humidity by misting the leaves regularly with a spray bottle. You can also place the container on a tray filled with pebbles and water. Just make sure the bottom of the container isn’t sitting directly in the water.
4. Fertilizing: Taro plants are heavy feeders, so you’ll need to fertilize them regularly. I use an organic fertilizer that’s specifically formulated for leafy greens or root vegetables. Follow the instructions on the fertilizer package for application rates. I usually fertilize my taro plant every 2-3 weeks during the growing season (spring and summer).
5. Temperature: Taro plants prefer warm temperatures, between 65-85°F (18-29°C). Avoid exposing your taro plant to cold drafts or extreme temperature fluctuations.
6. Pruning: You can prune your taro plant to encourage bushier growth. Simply trim off any yellowing or damaged leaves.
7. Pest Control: Keep an eye out for common houseplant pests like aphids, spider mites, and mealybugs. If you spot any pests, treat them with an organic insecticide or insecticidal soap. I prefer using neem oil, which is a natural and effective pest control option.
Harvesting Your Taro
After several months of care, your taro plant should be ready for harvest! Here’s how to tell when it’s time:
1. Check the Leaves: The leaves will start to turn yellow and die back. This is a sign that the plant is putting its energy into developing the corms.
2. Feel the Corms: Gently feel around the base of the plant. The corms should be firm and well-developed.
3. Harvesting: To harvest the taro, carefully dig around the plant and lift it out of the container. Gently remove the soil from the corms.
4. Cleaning: Wash the corms thoroughly with water to remove any remaining soil.
5. Storing: Store the taro corms in a cool, dry place. They should keep for several weeks.
Troubleshooting Common Problems
Even with the best care, you might encounter some problems while growing taro indoors. Here are a few common issues and how to address them:
* Yellowing Leaves: This could be a sign of overwatering, underwatering, nutrient deficiency, or pest infestation. Check the soil moisture, fertilize the plant, and inspect for pests.
* Stunted Growth: This could be due to insufficient light, poor soil, or rootbound conditions. Provide more light, repot the plant into a larger container with fresh potting mix, and fertilize regularly.
* Root Rot: This is caused by overwatering and poor drainage. Make sure your container has drainage holes and avoid overwatering. If you suspect root rot, repot the plant into fresh potting mix and remove any affected roots.
* Pest Infestation: As mentioned earlier, keep an eye out for common houseplant pests and treat them with an organic insecticide or insecticidal soap.
Enjoying Your Homegrown Taro
Now that you’ve harvested your taro, it’s time to enjoy the fruits (or rather, corms) of your labor! Taro can be used in a variety of dishes, from soups and stews to chips and fries. Just remember that taro corms must be cooked before eating, as they contain calcium oxalate crystals that can cause irritation.
I hope this guide has been helpful! Growing taro indoors organically is a rewarding experience, and I encourage you to give it a try. With a little patience and care, you can enjoy your own homegrown taro all year round. Happy gardening!
Conclusion
So, there you have it! Growing taro indoors organically might seem like a tropical dream reserved for seasoned gardeners, but with a little patience and these simple steps, you can cultivate your own thriving taro plant right in your home. This DIY trick isn’t just about adding a touch of exotic greenery to your living space; it’s about connecting with nature, understanding the life cycle of a plant, and enjoying the satisfaction of nurturing something from a humble corm to a vibrant, leafy specimen.
Why is this a must-try? Beyond the aesthetic appeal, growing taro indoors organically offers a unique opportunity to control the growing environment, ensuring your plant receives the optimal conditions for healthy development. You can avoid the unpredictable weather patterns and potential pests that outdoor taro plants often face. Plus, you’ll be using organic methods, meaning no harmful chemicals leaching into your home or the environment. You’ll be contributing to a healthier ecosystem, one taro plant at a time.
But the benefits don’t stop there. Imagine the conversations sparked by your unusual houseplant. Picture the fresh, vibrant leaves adding a touch of the tropics to your winter blues. And consider the potential for harvesting your own taro corms, knowing they were grown with care and free from pesticides.
Looking for variations? Absolutely! Experiment with different pot sizes to see how they affect growth. Try using a self-watering pot to simplify your watering routine. You can also explore different organic fertilizers to find what works best for your taro. Consider adding companion plants to your indoor garden to create a more diverse and balanced ecosystem. Plants like basil or mint can help deter pests naturally.
Don’t be afraid to get creative with your setup. Taro thrives in humid environments, so consider placing your plant near a humidifier or grouping it with other moisture-loving plants. You can even create a mini-bog garden indoors to mimic taro’s natural habitat.
We understand that embarking on a new gardening adventure can be daunting, but we’re confident that with our guide, you’ll be well-equipped to succeed. Remember, the key to successful indoor taro cultivation is patience, observation, and a willingness to learn.
We wholeheartedly encourage you to try this DIY trick and experience the joy of growing taro indoors organically. It’s a rewarding and sustainable way to bring a touch of the tropics into your home.
Once you’ve given it a try, we’d love to hear about your experience! Share your photos, tips, and challenges in the comments below. Let’s create a community of indoor taro enthusiasts and learn from each other. Your insights could be invaluable to other aspiring taro growers. Happy gardening!
Frequently Asked Questions (FAQ)
What exactly is taro, and why should I grow it indoors?
Taro (Colocasia esculenta) is a tropical plant primarily grown for its edible corms (underground stems), which are a staple food in many cultures. Growing it indoors allows you to control the environment, protect it from pests and diseases, and enjoy a unique and beautiful houseplant. Plus, you can ensure it’s grown organically, free from harmful chemicals.
What kind of soil is best for growing taro indoors organically?
Taro thrives in rich, well-draining soil that retains moisture. A good mix would be equal parts of potting soil, compost, and perlite or vermiculite. The compost provides nutrients, while the perlite or vermiculite improves drainage and aeration. Make sure the potting soil is also organic.
How much sunlight does indoor taro need?
Taro needs bright, indirect sunlight. Avoid direct sunlight, which can scorch the leaves. A spot near an east-facing or west-facing window is ideal. If you don’t have enough natural light, you can supplement with a grow light.
How often should I water my indoor taro plant?
Taro loves moisture, so keep the soil consistently moist but not waterlogged. Water thoroughly when the top inch of soil feels dry to the touch. Reduce watering slightly during the winter months when the plant’s growth slows down.
What is the ideal temperature and humidity for growing taro indoors?
Taro prefers warm temperatures between 65°F and 85°F (18°C and 29°C). It also thrives in high humidity. You can increase humidity by misting the plant regularly, placing it on a pebble tray filled with water, or using a humidifier.
What kind of fertilizer should I use for my indoor taro plant?
Use an organic fertilizer specifically formulated for leafy plants. Apply the fertilizer according to the package instructions, usually every 2-4 weeks during the growing season (spring and summer). Avoid over-fertilizing, which can damage the plant.
How do I propagate taro indoors?
Taro can be propagated from corms or cormels (small corms that grow around the main corm). To propagate from corms, simply plant a healthy corm in a pot filled with the appropriate soil mix. To propagate from cormels, carefully separate them from the main corm and plant them individually.
What are some common pests and diseases that affect indoor taro plants?
Common pests include aphids, spider mites, and mealybugs. You can control these pests by spraying the plant with insecticidal soap or neem oil. Diseases are less common in indoor taro plants, but root rot can occur if the soil is too wet.
Can I eat the taro corms grown indoors?
Yes, you can eat the taro corms grown indoors, but it’s important to cook them thoroughly. Raw taro contains calcium oxalate crystals, which can cause irritation and discomfort. Cooking breaks down these crystals, making the taro safe to eat.
How long does it take to grow taro indoors?
It can take several months to a year to grow a mature taro plant indoors, depending on the size of the corm you start with and the growing conditions. Be patient and provide your plant with the care it needs, and you’ll be rewarded with a beautiful and productive plant.
What are the signs of an unhealthy taro plant?
Yellowing leaves can indicate overwatering, underwatering, or nutrient deficiency. Brown spots can be caused by sunburn or fungal infections. Drooping leaves can be a sign of underwatering or root rot. If you notice any of these signs, adjust your care accordingly.
Is growing taro indoors organically difficult?
No, it’s not difficult, but it requires attention and consistency. Providing the right soil, light, water, and humidity is crucial. With a little effort and observation, you can successfully grow taro indoors organically.
What if my taro plant isn’t growing?
Several factors could contribute to slow growth. Ensure your plant receives adequate light, water, and nutrients. Check the soil drainage and make sure the roots aren’t waterlogged. Also, consider the temperature and humidity levels. If all conditions are optimal, be patient; taro can sometimes take its time to establish itself.
Can I grow taro in water only?
While taro can be started in water, it’s not ideal for long-term growth. Taro needs nutrients from the soil to thrive. You can start the corm in water until roots develop, then transplant it into a pot with soil.
How do I harvest the taro corms?
Harvesting taro corms typically occurs after the plant has matured for several months. The leaves may start to yellow and die back. Carefully dig up the plant and separate the corms from the roots. Remember to cook the corms thoroughly before eating.
Leave a Comment