
Grow Yardlong Beans at Home and unlock a world of culinary possibilities right in your backyard! Have you ever dreamt of harvesting beans so long they practically touch the ground? Well, dream no more! This DIY guide is your passport to cultivating these fascinating and delicious legumes with ease.
Yardlong beans, also known as asparagus beans or Chinese long beans, aren’t just a novelty; they’re a staple in Asian cuisine, adding a delightful crunch and subtle sweetness to stir-fries, salads, and more. Their history stretches back centuries, deeply rooted in Southeast Asian cultures where they’ve been prized for their nutritional value and unique flavor. Imagine the satisfaction of serving a dish featuring beans you nurtured from seed to plate!
But why should you learn to grow yardlong beans at home? In today’s world, knowing where your food comes from is more important than ever. Growing your own produce allows you to control what goes into your food, avoiding harmful pesticides and ensuring freshness. Plus, it’s incredibly rewarding! This DIY project is perfect for gardeners of all levels, from beginners to seasoned pros. We’ll break down the process into simple, easy-to-follow steps, so you can enjoy a bountiful harvest of these extraordinary beans. Get ready to impress your friends and family with your gardening prowess and the delicious meals you create!
Grow Your Own Delicious Yardlong Beans: A DIY Guide
Hey there, fellow gardening enthusiasts! Ever dreamt of harvesting beans that are literally a yard long? Well, dream no more! Growing yardlong beans (also known as asparagus beans or Chinese long beans) at home is totally achievable, and I’m here to guide you through the entire process. Trust me, the satisfaction of picking these impressive veggies from your own garden is unbeatable. Let’s get started!
Choosing the Right Variety and Location
Before we dive into the nitty-gritty, let’s talk about variety and location. This is crucial for success!
* Variety Selection: Look for varieties specifically suited to your climate. Some popular and reliable choices include ‘Red Noodle,’ ‘Chinese Red Noodle,’ and ‘Orient Wonder.’ Check seed catalogs or your local nursery for recommendations tailored to your region. I personally love ‘Red Noodle’ because of its beautiful color and excellent flavor.
* Sunlight: Yardlong beans are sun-worshippers! They need at least 6-8 hours of direct sunlight each day to thrive. Choose a spot in your garden that gets plenty of sunshine.
* Soil: Well-draining soil is key. Yardlong beans don’t like to sit in soggy soil. Amend your soil with compost or well-rotted manure to improve drainage and fertility. A slightly acidic to neutral pH (around 6.0-7.0) is ideal.
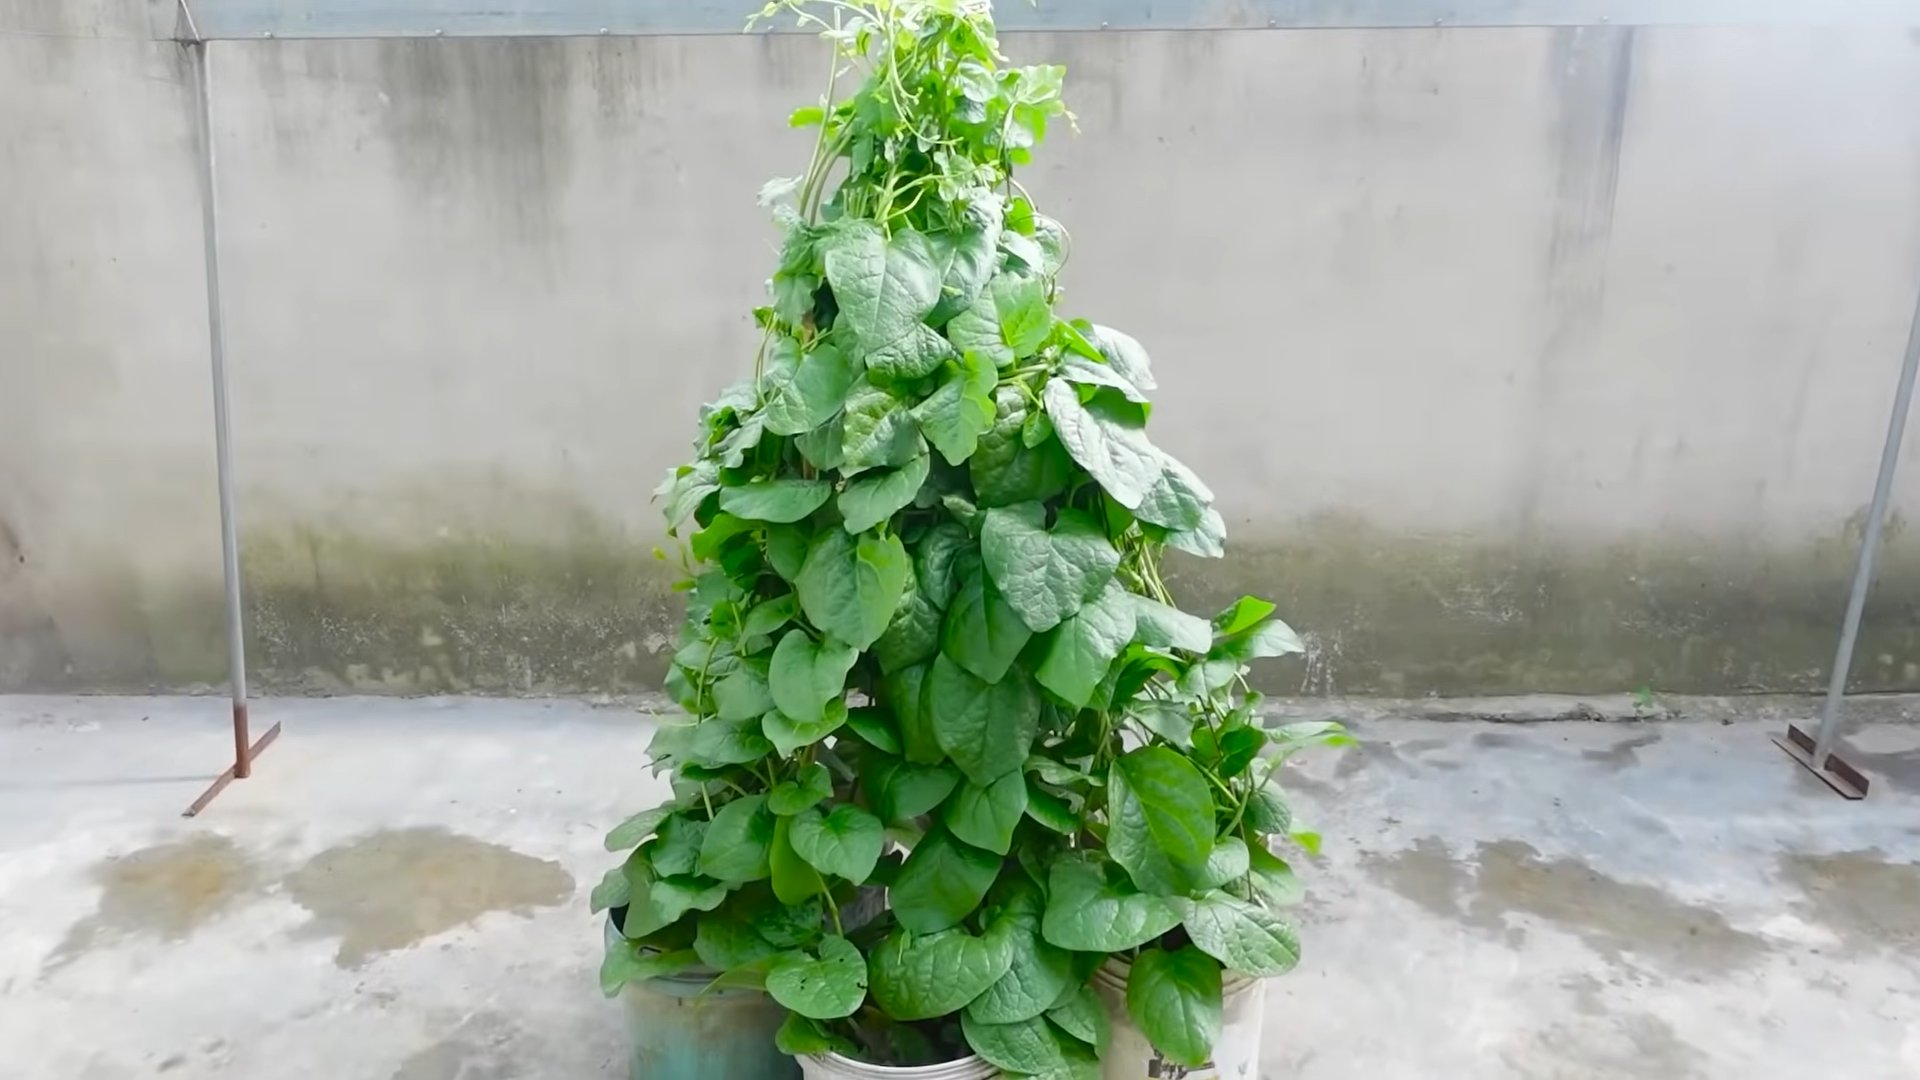
* Support System: These beans are climbers! They need a sturdy trellis, fence, or other support structure to grow on. I’ve used everything from bamboo poles to cattle panels, and they all work great. Just make sure it’s tall enough – these beans can reach 8-10 feet!
Getting Started: Planting Your Yardlong Beans
Now for the fun part – planting! You have two options: starting seeds indoors or direct sowing. I usually prefer direct sowing to avoid transplant shock, but starting indoors can give you a head start in cooler climates.
Starting Seeds Indoors (Optional)
If you live in a region with a short growing season, starting seeds indoors 3-4 weeks before the last expected frost is a good idea.
1. Prepare Your Seed Starting Mix: Use a seed starting mix that’s light and well-draining. Avoid using garden soil, as it can be too heavy and compact.
2. Sow the Seeds: Plant the seeds about 1 inch deep in small pots or seed trays. I usually plant 2-3 seeds per pot to increase my chances of germination.
3. Water Gently: Keep the soil consistently moist but not waterlogged. Use a spray bottle to gently water the seeds.
4. Provide Warmth and Light: Place the pots in a warm location (around 70-80°F) and provide plenty of light. A heat mat can help speed up germination. Once the seedlings emerge, move them to a sunny windowsill or under grow lights.
5. Harden Off the Seedlings: Before transplanting the seedlings outdoors, you need to harden them off. This means gradually exposing them to outdoor conditions over a period of 7-10 days. Start by placing them in a sheltered spot for a few hours each day, gradually increasing the amount of time they spend outdoors.
Direct Sowing
Direct sowing is the easiest method, especially if you live in a warmer climate.
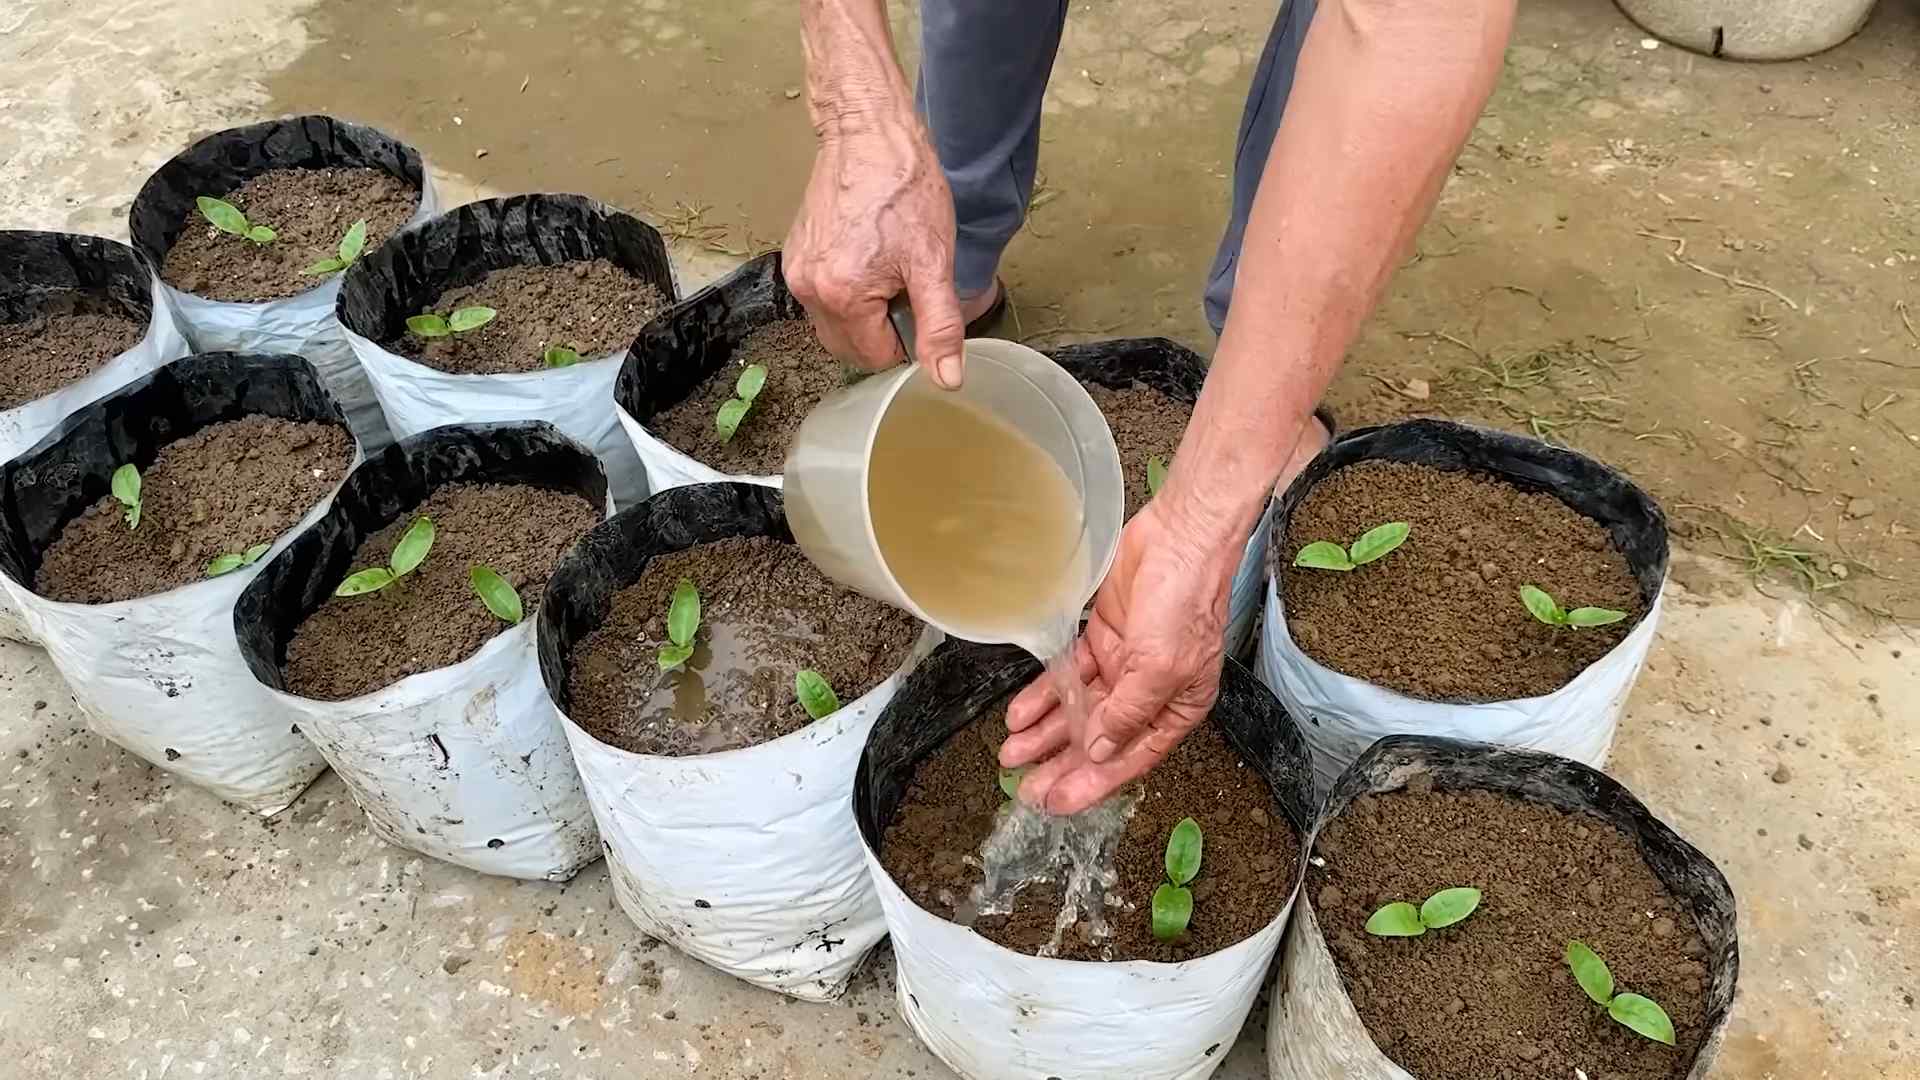
1. Prepare the Soil: Make sure the soil is loose, well-draining, and free of weeds. Amend with compost or well-rotted manure if necessary.
2. Create Rows or Hills: You can plant yardlong beans in rows or hills. If planting in rows, space the rows about 2-3 feet apart. If planting in hills, create small mounds of soil about 1 foot in diameter and space them about 2-3 feet apart.
3. Sow the Seeds: Plant the seeds about 1 inch deep and 2-3 inches apart. I usually plant 2-3 seeds per hole to ensure good germination.
4. Water Gently: Water the soil gently after planting. Keep the soil consistently moist until the seeds germinate.
5. Thin the Seedlings: Once the seedlings emerge, thin them to one plant per hole or every 4-6 inches in rows. Choose the strongest, healthiest seedlings to keep.
Providing Support: Setting Up Your Trellis
Yardlong beans are vigorous climbers, so a sturdy support system is essential.
1. Choose Your Support: As I mentioned earlier, you can use a trellis, fence, bamboo poles, or cattle panels. The key is to choose something that’s tall enough (8-10 feet) and strong enough to support the weight of the vines.
2. Install the Support: Install the support system before or shortly after planting the seeds or transplanting the seedlings. This will prevent you from disturbing the roots later on.
3. Guide the Vines: As the vines grow, gently guide them onto the support system. You may need to tie them to the support with twine or plant clips.
Caring for Your Yardlong Beans: Watering, Fertilizing, and Pest Control
Once your yardlong beans are planted and supported, it’s time to focus on care.
* Watering: Water regularly, especially during dry periods. Yardlong beans need consistent moisture to thrive. Aim for about 1 inch of water per week. Water deeply and less frequently, rather than shallowly and often.
* Fertilizing: Fertilize every 4-6 weeks with a balanced fertilizer or compost tea. Avoid over-fertilizing, as this can lead to excessive foliage growth and fewer beans. I like to use a fertilizer that’s high in phosphorus and potassium to promote flowering and bean production.
* Weeding: Keep the area around your yardlong beans free of weeds. Weeds compete with the beans for water and nutrients.
* Pest Control: Keep an eye out for common garden pests like aphids, bean beetles, and spider mites. Hand-picking pests, using insecticidal soap, or introducing beneficial insects like ladybugs can help control infestations. I’ve found that a strong blast of water from the hose can often dislodge aphids.
* Disease Prevention: Yardlong beans can be susceptible to fungal diseases like powdery mildew and bean rust. To prevent these diseases, provide good air circulation, avoid overhead watering, and remove any infected leaves promptly.
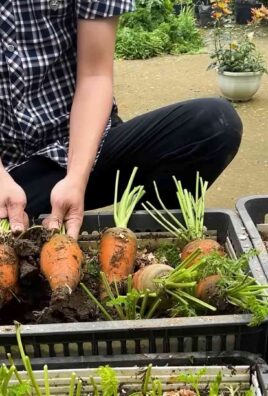
Harvesting Your Yardlong Beans: The Moment of Truth!
This is what we’ve been waiting for! Harvesting yardlong beans is a rewarding experience.
1. Timing: Harvest the beans when they are young and tender, usually about 6-8 inches long. They should be firm and snap easily when bent. If you wait too long, the beans will become tough and stringy.
2. Technique: Use scissors or pruning shears to cut the beans from the vine. Be careful not to damage the vine.
3. Frequency: Harvest regularly to encourage continued production. The more you harvest, the more beans the plant will produce.
4. Storage: Freshly harvested yardlong beans can be stored in the refrigerator for up to a week. For longer storage, you can blanch and freeze them.
Troubleshooting: Common Problems and Solutions
Even with the best care, you might encounter some problems along the way. Here are a few common issues and how to address them:
* Poor Germination: If your seeds aren’t germinating, make sure the soil is warm enough and consistently moist. You can also try scarifying the seeds (gently scratching the outer coating) before planting to improve germination rates.
* Yellowing Leaves: Yellowing leaves can be a sign of nutrient deficiency, overwatering, or disease. Check the soil drainage, fertilize if necessary, and inspect the leaves for signs of pests or diseases.
* Lack of Flowers or Beans: If your plants are growing well but not producing flowers or beans, it could be due to insufficient sunlight, over-fertilizing with nitrogen, or high temperatures. Make sure your plants are getting enough sunlight, use a fertilizer that’s high in phosphorus and potassium, and provide shade during the hottest part of the day.
* Pest Infestations: As mentioned earlier, keep an eye out for common garden pests and take action promptly to control infestations.
Enjoying Your Harvest: Delicious Yardlong Bean Recipes
Now that you’ve harvested your yardlong beans, it’s time to enjoy them! These beans are incredibly versatile and can be used in a variety of dishes.
* Stir-fries: Yardlong beans are a classic ingredient in stir-fries. They pair well with garlic, ginger, soy sauce, and other Asian flavors.
* Salads: Add blanched or steamed yardlong beans to salads for a crunchy and nutritious boost.
* Soups and Stews: Yardlong beans can be added to soups and stews for extra flavor and texture.
* Grilled: Grill yardlong beans with a little olive oil and
Conclusion
So, there you have it! Growing yardlong beans at home is not only achievable, but it’s also incredibly rewarding. Forget those bland, overpriced beans from the grocery store. Imagine stepping into your own backyard and harvesting vibrant, crisp, and flavorful yardlong beans whenever you desire. This DIY trick unlocks a world of culinary possibilities and gardening satisfaction.
Why is this a must-try? Because it puts you in control. You control the quality, the freshness, and the growing practices. You know exactly what goes into your food, avoiding harmful pesticides and ensuring the most nutritious and delicious harvest possible. Plus, the sheer novelty of growing these impressively long beans is a conversation starter and a source of pride.
But the fun doesn’t stop there! Feel free to experiment with different varieties of yardlong beans. Some are a deep purple, adding a splash of color to your garden and your plate. Others offer slightly different flavor profiles, from subtly sweet to intensely savory. You can also adjust your growing methods to suit your specific climate and space constraints. Consider vertical gardening techniques if you’re short on ground space, or try companion planting to deter pests and boost yields.
Think about adding marigolds around your yardlong bean plants to deter nematodes, or basil to repel aphids. You could even try intercropping with low-growing vegetables like lettuce or spinach to maximize space utilization. The possibilities are endless!
This DIY trick for growing yardlong beans is more than just a gardening project; it’s an investment in your health, your culinary creativity, and your connection to nature. It’s a chance to learn new skills, enjoy the fruits (or rather, the beans!) of your labor, and share your bounty with friends and family.
We wholeheartedly encourage you to give this a try. Don’t be intimidated by the length of the beans – the growing process is surprisingly straightforward. Follow our guide, adapt it to your specific needs, and get ready to be amazed by the results.
And most importantly, we want to hear about your experience! Share your photos, your tips, and your challenges in the comments below. Let’s build a community of yardlong bean enthusiasts and learn from each other. What varieties did you try? What growing techniques worked best for you? What delicious dishes did you create with your homegrown beans? Your insights will help others succeed and inspire even more people to embark on this rewarding gardening adventure. So, grab your seeds, get your hands dirty, and get ready to grow some amazing yardlong beans! We can’t wait to see what you create!
Frequently Asked Questions (FAQ)
What are yardlong beans and why should I grow them?
Yardlong beans, also known as asparagus beans or Chinese long beans, are a type of legume characterized by their exceptionally long pods, often reaching lengths of 1 to 3 feet. They offer a unique flavor and texture compared to common green beans, with a slightly nutty and subtly sweet taste. Growing them at home allows you to enjoy fresh, pesticide-free produce, control the quality of your food, and experience the satisfaction of harvesting your own vegetables. Plus, their impressive length makes them a fun and visually appealing addition to any garden.
How much space do yardlong beans need?
Yardlong beans are climbing plants and require vertical support such as a trellis, fence, or stakes. Each plant needs about 6-8 inches of space along the support structure. If you’re planting in rows, space the rows about 2-3 feet apart to allow for easy access and air circulation. Consider the mature height of the plants (typically 6-8 feet) when choosing a location and support system.
What kind of soil is best for yardlong beans?
Yardlong beans thrive in well-drained soil that is rich in organic matter. Amend your soil with compost or aged manure before planting to improve its fertility and drainage. A slightly acidic to neutral soil pH (around 6.0 to 7.0) is ideal. Avoid heavy clay soils, as they can become waterlogged and hinder root development. If you have clay soil, consider planting in raised beds or containers with a well-draining potting mix.
How often should I water yardlong beans?
Yardlong beans need consistent moisture, especially during flowering and pod development. Water deeply and regularly, aiming to keep the soil consistently moist but not waterlogged. Check the soil moisture regularly, especially during hot, dry weather. Mulching around the plants can help retain moisture and suppress weeds. Avoid overhead watering, as it can increase the risk of fungal diseases. Drip irrigation or soaker hoses are excellent options for delivering water directly to the roots.
What are some common pests and diseases that affect yardlong beans?
Common pests that can affect yardlong beans include aphids, bean beetles, spider mites, and nematodes. Diseases include fungal infections like powdery mildew and bean rust. Regularly inspect your plants for signs of pests or diseases. Use organic pest control methods such as insecticidal soap, neem oil, or introducing beneficial insects like ladybugs. Ensure good air circulation around the plants to prevent fungal diseases. Remove any infected leaves or plants promptly to prevent the spread of disease. Crop rotation can also help reduce the risk of soilborne diseases.
How long does it take for yardlong beans to mature?
Yardlong beans typically take about 60-80 days to mature from planting. You can start harvesting the pods when they reach about 12-18 inches in length, depending on the variety. Harvest regularly to encourage continued production. The more you pick, the more the plant will produce.
Can I grow yardlong beans in containers?
Yes, you can grow yardlong beans in containers, but you’ll need a large container (at least 12 inches in diameter and depth) with good drainage. Use a high-quality potting mix and provide a sturdy trellis or support system for the vines to climb. Container-grown plants may require more frequent watering and fertilization than those grown in the ground. Choose a sunny location that receives at least 6-8 hours of sunlight per day.
How do I harvest yardlong beans?
Harvest yardlong beans when the pods are firm, smooth, and about the thickness of a pencil. Use scissors or pruning shears to cut the pods from the vine, leaving a short stem attached. Avoid pulling the pods, as this can damage the plant. Harvest regularly, every few days, to encourage continued production. Overripe pods can become tough and less flavorful.
What are some ways to cook yardlong beans?
Yardlong beans are incredibly versatile in the kitchen. They can be stir-fried, steamed, grilled, or added to soups and stews. They pair well with Asian flavors like soy sauce, ginger, garlic, and chili. They can also be used in salads, casseroles, and side dishes. Try them in a stir-fry with garlic and black bean sauce, or grilled with a drizzle of olive oil and a sprinkle of salt and pepper.
Can I save seeds from my yardlong beans?
Yes, you can save seeds from your yardlong beans, but it’s important to allow some pods to fully mature and dry on the vine. Choose healthy, disease-free plants for seed saving. Once the pods are completely dry and brittle, shell the seeds and store them in a cool, dry place in an airtight container. Label the container with the variety and date of harvest. Keep in mind that if you grew a hybrid variety, the seeds may not produce plants that are true to type.
What are some companion plants for yardlong beans?
Good companion plants for yardlong beans include marigolds (to deter nematodes), basil (to repel aphids), rosemary, and nasturtiums. Avoid planting yardlong beans near onions or garlic, as they can inhibit growth.
How do I deal with yellowing leaves on my yardlong bean plants?
Yellowing leaves can indicate several issues, including nutrient deficiencies, overwatering, or disease. Check the soil moisture and ensure that the plants are not sitting in waterlogged soil. Fertilize with a balanced fertilizer to provide essential nutrients. Inspect the leaves for signs of pests or diseases and treat accordingly. If the yellowing is localized to older leaves, it may be a sign of nitrogen deficiency.
Are yardlong beans the same as green beans?
No, yardlong beans are not the same as green beans, although they are both legumes. Yardlong beans have a distinct flavor and texture, and their pods are significantly longer than those of green beans. They also belong to a different species (Vigna unguiculata subsp. sesquipedalis) than common green beans (Phaseolus vulgaris).
Leave a Comment