
Growing Butternut Squash Indoors might sound like a challenge reserved for seasoned gardeners, but trust me, it’s more achievable than you think! Imagine harvesting your own sweet, nutty butternut squash right from the comfort of your home, even when the weather outside is frightful. No more relying solely on grocery store produce – you can have fresh, organic squash at your fingertips.
Butternut squash, a staple in many autumn dishes, has a rich history, tracing back to Central and South America thousands of years ago. It’s been a beloved ingredient in indigenous cuisines and has since become a global favorite. But traditionally, growing these beauties required ample outdoor space and a long growing season. That’s where our DIY magic comes in!
Why should you learn this trick? Well, for starters, growing butternut squash indoors extends your growing season, allowing you to enjoy this delicious vegetable even in colder climates. Plus, it’s a fantastic way to control pests and diseases, ensuring a healthier and more abundant harvest. I’m excited to share these simple yet effective DIY hacks that will empower you to cultivate your own indoor butternut squash patch, bringing a touch of autumnal warmth and flavor to your home all year round!
Growing Butternut Squash Indoors: A Comprehensive Guide
Hey there, fellow gardening enthusiasts! Ever dreamt of harvesting your own butternut squash, even if you don’t have a sprawling outdoor garden? Well, you’re in luck! Growing butternut squash indoors is totally achievable, and I’m here to walk you through every step of the process. It might seem daunting at first, but trust me, with a little patience and the right know-how, you’ll be enjoying homegrown butternut squash in no time.
Choosing the Right Butternut Squash Variety
Not all butternut squash varieties are created equal when it comes to indoor growing. You’ll want to opt for bush or semi-bush varieties, as they tend to be more compact and manageable in a confined space. Here are a few of my favorites:
- ‘Butterbush’: This is a classic choice for indoor growing. It’s a true bush variety, meaning it stays relatively small and doesn’t require a ton of space. The fruits are also a good size for individual servings.
- ‘Early Butternut’: As the name suggests, this variety matures relatively quickly, which is a huge plus when you’re growing indoors. It produces smaller fruits, perfect for smaller spaces.
- ‘Honeybaby Butternut’: This is another compact variety that produces sweet and flavorful fruits. It’s known for its good disease resistance, which is always a bonus.
Gathering Your Supplies
Before we dive into the planting process, let’s make sure you have everything you need. Here’s a checklist of essential supplies:
- Butternut Squash Seeds: Choose a variety suitable for indoor growing, as mentioned above.
- Seed Starting Trays or Small Pots: These will be used to germinate your seeds.
- Seed Starting Mix: This is a lightweight, sterile mix that’s perfect for starting seeds.
- Large Pots (at least 10-gallon): You’ll need these to transplant your seedlings into.
- Potting Soil: A good quality potting soil that drains well is essential.
- Grow Lights: Butternut squash needs plenty of light, so grow lights are a must, especially if you don’t have a south-facing window.
- Fertilizer: A balanced fertilizer (e.g., 10-10-10) will help your plants thrive.
- Watering Can or Spray Bottle: For watering your seedlings and plants.
- Trellis or Stakes: To support the vines as they grow (optional, but recommended for some varieties).
- Small Paintbrush: For hand-pollinating your squash flowers.
Starting Your Seeds
Okay, let’s get those seeds germinating! This is a crucial step, so pay close attention.
- Prepare Your Seed Starting Trays: Fill your seed starting trays or small pots with seed starting mix. Moisten the mix thoroughly with water.
- Sow Your Seeds: Plant 2-3 seeds per cell or pot, about 1 inch deep.
- Cover and Water: Gently cover the seeds with more seed starting mix and water again.
- Provide Warmth: Butternut squash seeds germinate best in warm temperatures (around 70-80°F). You can use a heat mat to provide bottom heat.
- Maintain Moisture: Keep the seed starting mix consistently moist, but not soggy. You can cover the trays with a plastic dome or plastic wrap to help retain moisture.
- Wait for Germination: Germination typically takes 5-10 days. Once the seedlings emerge, remove the plastic cover and place them under grow lights.
Transplanting Your Seedlings
Once your seedlings have developed a few sets of true leaves (the leaves that look like miniature butternut squash leaves), it’s time to transplant them into larger pots.
- Prepare Your Large Pots: Fill your 10-gallon (or larger) pots with potting soil. Make sure the pots have drainage holes.
- Carefully Remove Seedlings: Gently remove the seedlings from the seed starting trays or pots. Be careful not to damage the roots.
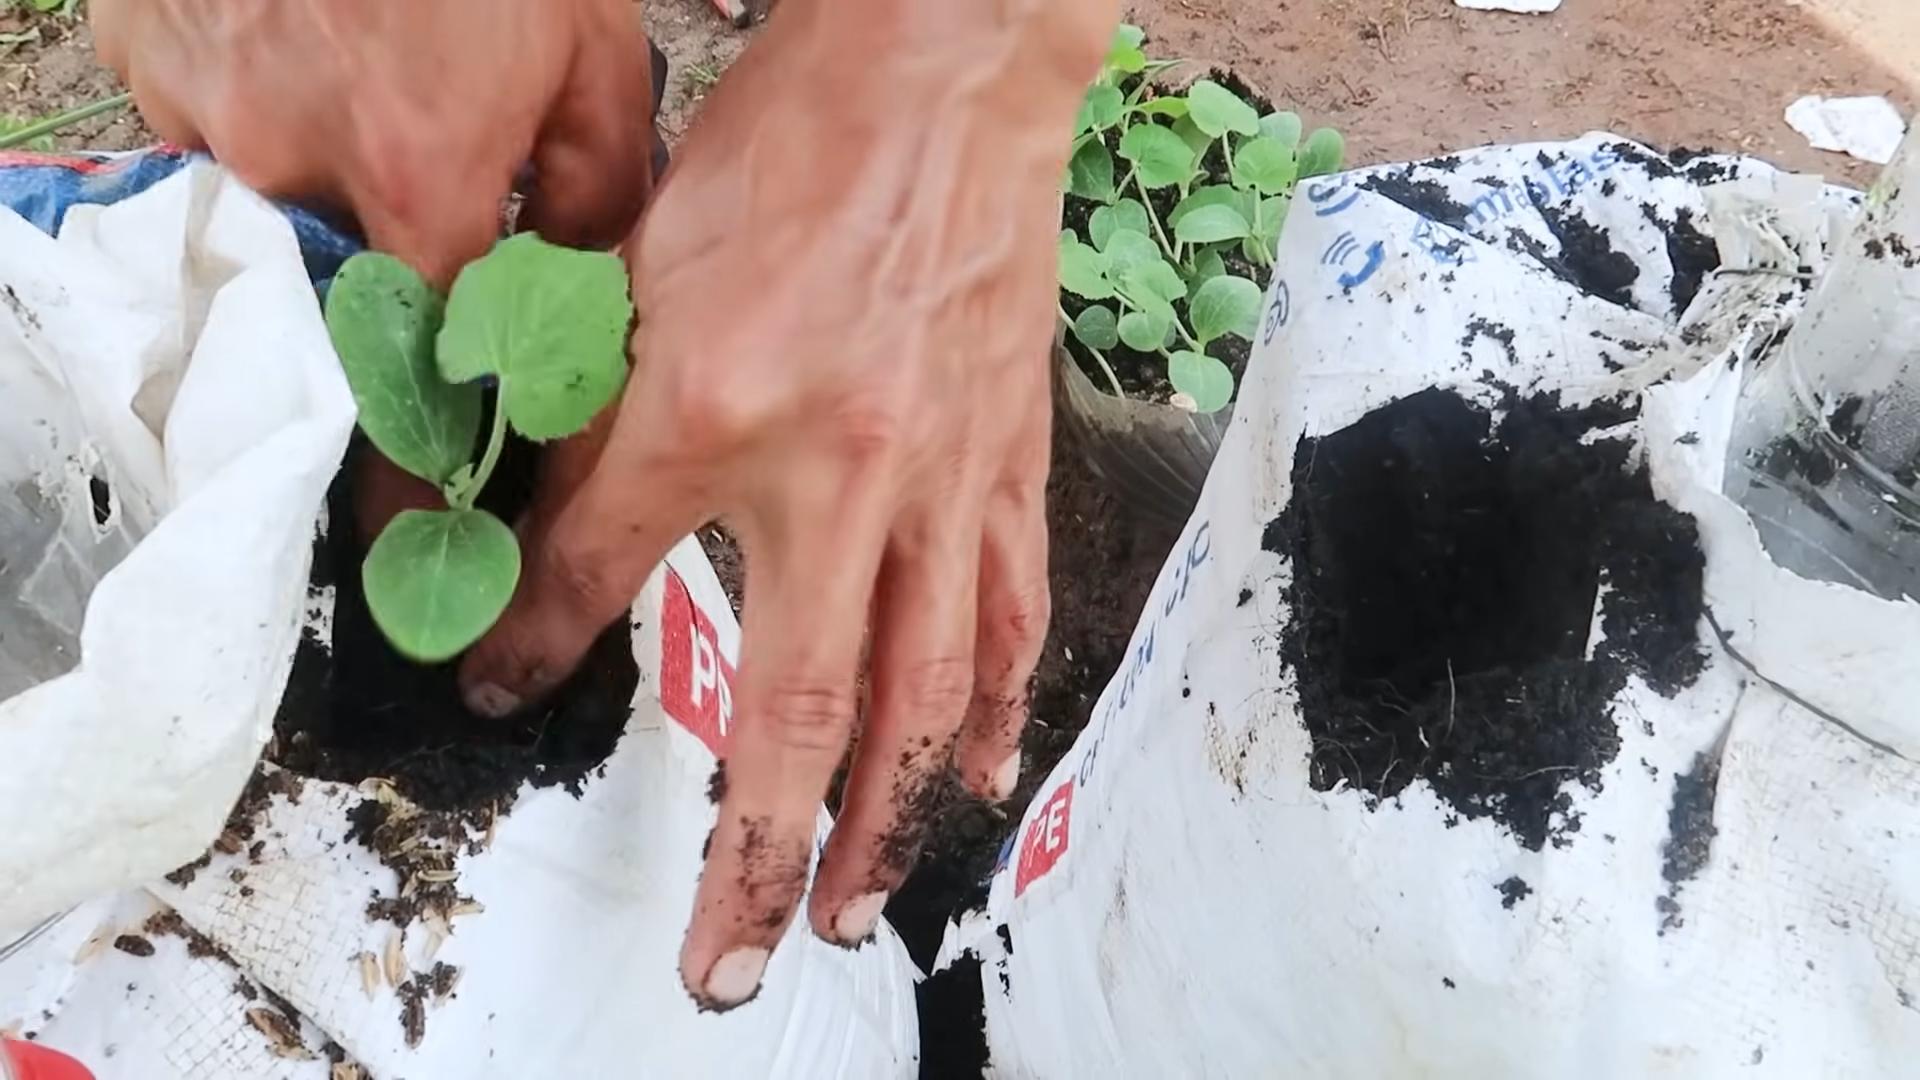
- Plant Seedlings: Plant one seedling per pot. Dig a hole in the potting soil that’s large enough to accommodate the root ball. Place the seedling in the hole and gently backfill with soil.
- Water Thoroughly: Water the newly transplanted seedlings thoroughly.
- Provide Support: If you’re growing a variety that tends to vine, install a trellis or stakes to provide support.
Providing the Right Environment
Butternut squash needs specific conditions to thrive indoors. Here’s what you need to keep in mind:
- Light: Butternut squash requires at least 6-8 hours of direct light per day. If you don’t have a sunny south-facing window, you’ll need to use grow lights. Position the grow lights a few inches above the plants and adjust them as the plants grow.
- Temperature: Maintain a consistent temperature of 65-75°F. Avoid exposing your plants to drafts or extreme temperature fluctuations.
- Humidity: Butternut squash prefers moderate humidity. You can increase humidity by placing a tray of water near your plants or using a humidifier.
- Air Circulation: Good air circulation is important to prevent fungal diseases. Make sure your plants have enough space between them and consider using a small fan to circulate the air.
Watering and Fertilizing
Proper watering and fertilization are essential for healthy butternut squash plants.
- Watering: Water your plants deeply whenever the top inch of soil feels dry to the touch. Avoid overwatering, as this can lead to root rot.
- Fertilizing: Fertilize your plants every 2-3 weeks with a balanced fertilizer (e.g., 10-10-10). Follow the instructions on the fertilizer label. You can also use a liquid seaweed fertilizer for an extra boost.
Hand-Pollinating Your Squash Flowers
This is where things get a little interesting! Butternut squash plants have separate male and female flowers. Since you don’t have bees buzzing around indoors, you’ll need to hand-pollinate the flowers yourself.
- Identify Male and Female Flowers: Male flowers have a long, thin stem, while female flowers have a small, immature fruit (the squash) at the base of the flower.
- Pollinate in the Morning: The best time to pollinate is in the morning, when the flowers are fully open.
- Transfer Pollen: Use a small paintbrush to collect pollen from the male flower. Gently brush the pollen onto the stigma (the center part) of the female flower.
- Repeat Daily: Repeat this process daily for several days to ensure successful pollination.
- Mark Pollinated Flowers: You can mark the pollinated flowers with a piece of yarn or ribbon to keep track of which ones you’ve already pollinated.
Dealing with Pests and Diseases
Even indoors, your butternut squash plants can be susceptible to pests and diseases. Here are a few common problems and how to deal with them:
- Aphids: These tiny insects can suck the sap from your plants. You can control aphids by spraying them with insecticidal soap or neem oil.
- Spider Mites: These tiny pests can cause yellowing and stippling on the leaves. You can control spider mites by spraying them with insecticidal soap or neem oil. Increasing humidity can also help.
- Powdery Mildew: This fungal disease causes a white, powdery coating on the leaves. You can prevent powdery mildew by providing good air circulation and avoiding overhead watering. If you see signs of powdery mildew, spray your plants with a fungicide.
Harvesting Your Butternut Squash
After all your hard work, it’s finally time to harvest your butternut squash!
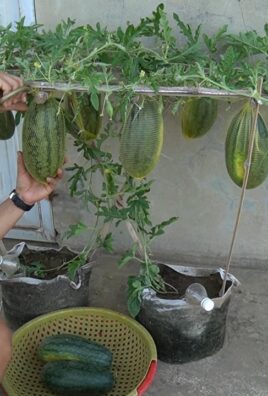
- Check for Maturity: Butternut squash is typically ready to harvest about 90-100 days after planting. The squash should be a deep tan color and the skin should be hard. You can also check the stem – it should be dry and brown.
- Cut the Stem: Use a sharp knife or pruning shears to cut the stem of the squash, leaving about 2-3 inches of stem attached.
- Cure Your Squash: Cure your squash in a warm, dry place for about 1-2 weeks. This will help to harden the skin and improve the flavor.
- Store Your Squash: Store your cured butternut squash in a cool, dry place. It should keep for several months.
Troubleshooting Tips
Here are

Conclusion
So, there you have it! Growing butternut squash indoors might seem like a challenge reserved for seasoned gardeners, but with a little planning, patience, and our simple DIY trick, you can absolutely cultivate these delicious, nutrient-rich vegetables right in your own home. We’ve walked you through the essential steps, from selecting the right seeds and providing optimal lighting to hand-pollinating and ensuring proper support for your burgeoning vines.
Why is this DIY trick a must-try? Because it opens up a world of possibilities! Imagine fresh, homegrown butternut squash gracing your table throughout the year, regardless of the weather outside. Think of the satisfaction of nurturing a plant from seed to harvest, knowing exactly where your food comes from and how it was grown. Plus, it’s a fantastic way to add a touch of green to your living space and enjoy the therapeutic benefits of gardening.
But the adventure doesn’t stop here! Feel free to experiment with different varieties of butternut squash. Perhaps you’d like to try a smaller, more compact cultivar that’s better suited for indoor growing. Or maybe you’re feeling adventurous and want to explore other winter squash varieties like acorn squash or delicata. You can also play around with different soil mixes and fertilizer combinations to find what works best for your specific growing environment. Consider adding companion plants like marigolds to deter pests naturally.
Don’t be afraid to get creative with your support system for the vines. While we suggested using a trellis, you could also try training them along a window frame or even creating a custom-built structure. The key is to provide adequate support to prevent the squash from becoming too heavy and damaging the vines.
Remember, growing butternut squash indoors is a learning process. You might encounter a few challenges along the way, but don’t let that discourage you. Every mistake is an opportunity to learn and improve your gardening skills. The reward of harvesting your own homegrown butternut squash is well worth the effort.
We are confident that with our guide, you can successfully grow butternut squash indoors. We encourage you to give it a try and share your experiences with us! Post photos of your growing butternut squash on social media using #IndoorButternutSquash and tag us so we can see your progress. Let us know what worked well for you, what challenges you faced, and any tips you have for other indoor gardeners. We’re all in this together, and we can learn so much from each other’s experiences.
So, grab your seeds, prepare your soil, and get ready to embark on a rewarding journey of growing butternut squash indoors. Happy gardening!
Frequently Asked Questions (FAQ)
What is the best time of year to start growing butternut squash indoors?
The best time to start growing butternut squash indoors is typically 6-8 weeks before the last expected frost in your area. This allows the seedlings to develop a strong root system before being transplanted outdoors (if you choose to do so) or continuing their growth indoors. If you plan to grow them entirely indoors, you can start them at any time of year, provided you have adequate lighting and temperature control. Starting in late winter or early spring will allow you to harvest in the fall.
How much light do butternut squash plants need indoors?
Butternut squash plants require a significant amount of light, ideally 12-16 hours per day. Natural sunlight from a south-facing window is beneficial, but it’s usually not enough, especially during the shorter days of winter. Supplement with grow lights. Fluorescent grow lights or LED grow lights are excellent choices. Position the lights a few inches above the plants and adjust them as the plants grow. Insufficient light can lead to leggy growth, weak stems, and poor fruit production.
How often should I water my indoor butternut squash plants?
Watering frequency depends on several factors, including the size of the pot, the type of soil, and the temperature and humidity of your growing environment. Generally, you should water your butternut squash plants when the top inch of soil feels dry to the touch. Water deeply, ensuring that the water drains out of the bottom of the pot. Avoid overwatering, as this can lead to root rot. During the fruiting stage, the plants may require more frequent watering.
How do I hand-pollinate butternut squash flowers indoors?
Since there are no bees or other pollinators indoors, you’ll need to hand-pollinate your butternut squash flowers. Butternut squash plants have separate male and female flowers. The male flowers have a long, thin stem, while the female flowers have a small, immature squash at the base. To hand-pollinate, use a small paintbrush or cotton swab to collect pollen from the male flower and transfer it to the stigma of the female flower. The best time to hand-pollinate is in the morning when the flowers are fully open. Repeat the process for several days to increase the chances of successful pollination.
What kind of fertilizer should I use for my indoor butternut squash plants?
Butternut squash plants are heavy feeders and require regular fertilization. Start with a balanced fertilizer (e.g., 10-10-10) during the seedling stage. Once the plants start to flower, switch to a fertilizer that is higher in phosphorus and potassium (e.g., 5-10-10) to promote fruit development. Follow the instructions on the fertilizer label for application rates. You can also supplement with organic fertilizers like compost tea or fish emulsion.
How much space do butternut squash plants need indoors?
Butternut squash plants are vining plants and require a significant amount of space. Choose a large pot, at least 10-15 gallons in size, to accommodate the root system. Provide a trellis or other support system for the vines to climb. You may need to prune the vines to control their size and prevent them from overcrowding your growing space. Consider growing a bush variety if space is limited.
What are some common pests and diseases that affect indoor butternut squash plants?
Common pests that can affect indoor butternut squash plants include aphids, spider mites, and whiteflies. Inspect your plants regularly for signs of infestation and take action promptly. You can control these pests with insecticidal soap, neem oil, or by introducing beneficial insects like ladybugs. Diseases that can affect butternut squash plants include powdery mildew and fungal infections. Ensure good air circulation and avoid overwatering to prevent these diseases. You can also use fungicides if necessary.
How long does it take to grow butternut squash indoors?
From seed to harvest, it typically takes 90-100 days to grow butternut squash indoors. The exact time will depend on the variety of squash, the growing conditions, and your level of care. Be patient and monitor your plants closely. You’ll know the squash is ready to harvest when the skin is hard and the stem is dry and brown.
Can I grow butternut squash in a container on a balcony?
Yes, you can absolutely grow butternut squash in a container on a balcony, provided you have enough sunlight and space. Choose a large container with good drainage and use a well-draining potting mix. Provide a trellis or other support system for the vines to climb. Water regularly and fertilize as needed. Be sure to protect the plants from strong winds and extreme temperatures.
What are some signs that my butternut squash plant is not doing well?
Several signs can indicate that your butternut squash plant is not thriving. These include yellowing leaves, stunted growth, wilting, lack of flowering, and fruit rot. Investigate the cause of the problem and take corrective action. Common causes include insufficient light, overwatering, underwatering, nutrient deficiencies, pests, and diseases. By addressing these issues promptly, you can help your butternut squash plant recover and produce a bountiful harvest.

Leave a Comment