
Growing Celery Hydroponically might sound like something out of a futuristic farm, but trust me, it’s surprisingly simple and incredibly rewarding! Have you ever dreamt of snipping fresh, crisp celery stalks right from your kitchen counter, even in the dead of winter? Well, stop dreaming and start doing! This DIY guide will unlock the secrets to cultivating this crunchy veggie without any soil, bringing a touch of green and a whole lot of flavor into your home.
While hydroponics might seem like a modern marvel, the concept actually dates back centuries. From the Hanging Gardens of Babylon to ancient Aztec chinampas, humans have been experimenting with soilless cultivation for ages. Today, we’re bringing that ingenuity into our homes, making fresh produce accessible to everyone, regardless of space or climate.
Why should you try growing celery hydroponically? Because it’s a game-changer! Imagine having a constant supply of organic celery, free from pesticides and herbicides. Plus, it’s a fantastic way to reduce food waste, as you only harvest what you need. Whether you’re a seasoned gardener or a complete beginner, this DIY project is a fun, educational, and delicious way to connect with your food. Let’s dive in and discover how to grow your own celery oasis indoors!

Growing Celery Hydroponically: A Beginner’s Guide
Hey there, fellow plant enthusiasts! Ever thought about growing your own celery? It’s surprisingly easy, and even more fun when you ditch the soil and go hydroponic! I’m going to walk you through the process, step-by-step, so you can enjoy fresh, crunchy celery right from your own home. Trust me, it’s a rewarding experience!
Choosing Your Hydroponic System
Before we dive into the nitty-gritty, let’s talk about the type of hydroponic system that works best for celery. While you can technically grow celery in various setups, I’ve found that deep water culture (DWC) and Kratky methods are the most beginner-friendly and effective.
* **Deep Water Culture (DWC):** This involves suspending the celery roots in a nutrient-rich water solution that’s constantly aerated with an air pump and air stone. It’s a great option for faster growth and larger yields.
* **Kratky Method:** This is a passive hydroponic system where the plant’s roots are partially submerged in a nutrient solution, and the water level gradually decreases as the plant drinks it up. No air pump is needed, making it super simple and low-maintenance.
For this guide, I’ll focus on the Kratky method because it’s incredibly easy to set up and maintain, perfect for beginners like us!
Materials You’ll Need
Alright, let’s gather our supplies. Here’s what you’ll need to get started:
* **Celery Stalk:** You can use a celery stalk from the grocery store. Make sure it has a healthy-looking base.
* **Container:** A dark-colored, opaque container is ideal (a bucket, tub, or even a large plastic storage container will work). The darkness prevents algae growth. I recommend something that holds at least 2-3 gallons of water.
* **Net Pot:** A net pot is a small, plastic pot with holes in the sides and bottom. This will hold your celery stalk and allow the roots to grow into the nutrient solution.
* **Growing Medium:** You’ll need something to support the celery stalk in the net pot. Coco coir, perlite, or rockwool are all excellent choices. I personally prefer coco coir because it’s sustainable and holds moisture well.
* **Hydroponic Nutrients:** You’ll need a balanced hydroponic nutrient solution specifically formulated for leafy greens. Look for a two-part nutrient solution for optimal results.
* **Water:** Use clean, pH-balanced water. Tap water is usually fine, but let it sit out for 24 hours to allow chlorine to evaporate.
* **pH Meter (Optional but Recommended):** A pH meter will help you ensure that your nutrient solution is within the optimal range (5.5-6.5) for celery growth.
* **Measuring Cups and Spoons:** For accurately measuring your nutrient solution.
* **Razor Blade or Sharp Knife:** For cutting the celery stalk.
* **Drill (Optional):** If your container doesn’t already have a hole for the net pot.
Step-by-Step Instructions: Growing Celery with the Kratky Method
Okay, let’s get our hands dirty (or rather, wet!). Follow these steps carefully, and you’ll be well on your way to harvesting your own hydroponic celery.
1. Preparing the Celery Stalk
This is where the magic begins!
1. **Cut the Celery Base:** Using a sharp knife or razor blade, cut off the bottom 2-3 inches of the celery stalk. Make sure the cut is clean and even. This is the part that will regrow.
2. **Prepare the Celery Base:** Remove the outer stalks, leaving the inner, younger stalks intact. This will encourage new growth.
3. Place in Water: Place the celery base in a glass of water, ensuring the cut end is submerged. Place the glass in a bright, indirect light location. Change the water every 1-2 days. You should see roots starting to grow within a week or so.
2. Preparing the Container
Now, let’s get our hydroponic setup ready.
1. **Clean the Container:** Thoroughly clean your container with soap and water to remove any dirt or debris. Rinse it well to ensure no soap residue remains.
2. **Create a Hole for the Net Pot (If Necessary):** If your container doesn’t already have a hole, use a drill to create one that’s slightly smaller than the diameter of your net pot. The net pot should fit snugly into the hole.
3. Test the Fit: Place the net pot in the hole to ensure it fits securely. The bottom of the net pot should be suspended above the bottom of the container, leaving space for the nutrient solution.
3. Preparing the Net Pot and Growing Medium
Time to get our celery ready for its new home!
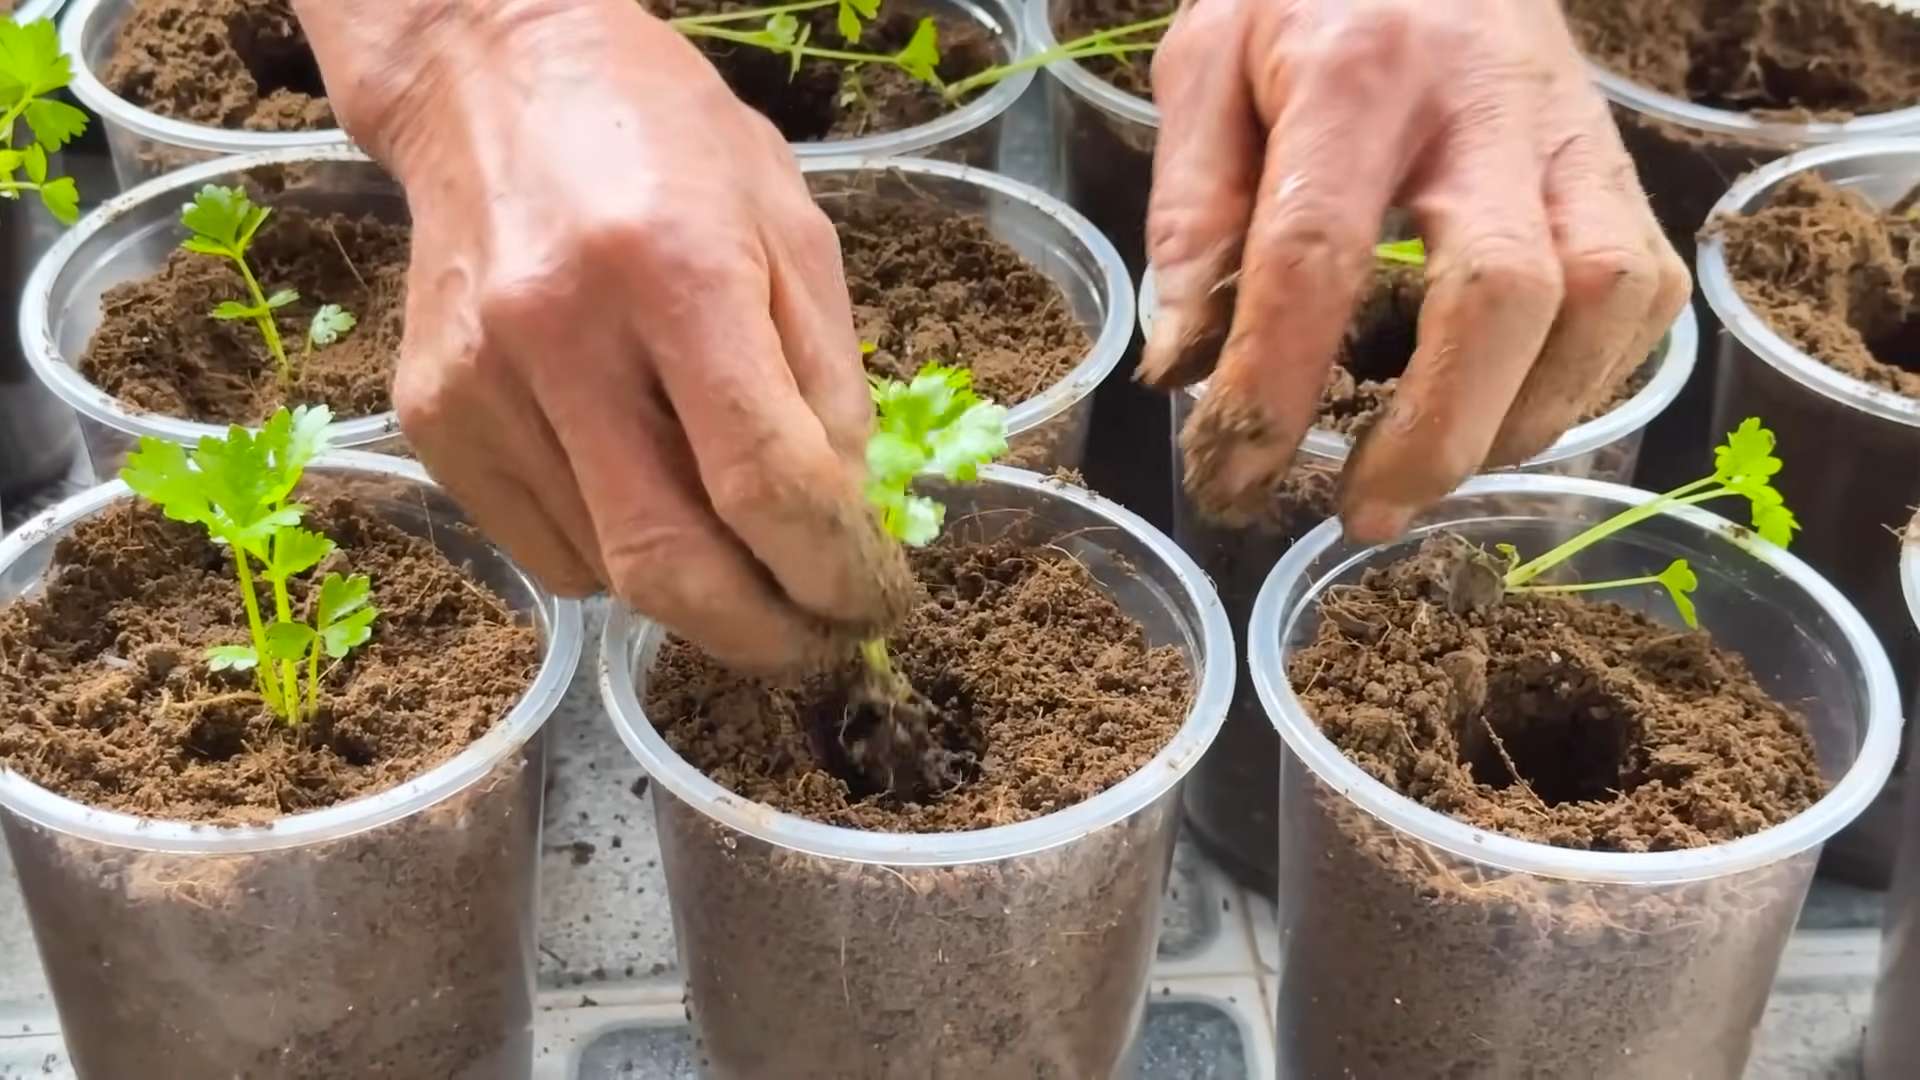
1. **Rinse the Growing Medium:** Rinse your coco coir, perlite, or rockwool thoroughly with water to remove any dust or debris. This will also help to hydrate the medium.
2. **Fill the Net Pot:** Fill the net pot with the rinsed growing medium. Leave a small space at the top for the celery stalk.
3. Create a Cavity:** Gently create a small cavity in the center of the growing medium to accommodate the celery base.
4. Setting Up the Hydroponic System
Almost there! Let’s put everything together.
1. **Prepare the Nutrient Solution:** Follow the instructions on your hydroponic nutrient solution to mix the correct concentration. Use measuring cups and spoons to ensure accuracy. I usually start with half the recommended strength for young plants and gradually increase it as they grow.
2. **Fill the Container:** Pour the nutrient solution into the container, filling it to a level that’s just below the bottom of the net pot. The growing medium should be slightly moist but not completely submerged.
3. **Check the pH (Optional but Recommended):** Use your pH meter to check the pH of the nutrient solution. Adjust it to the optimal range of 5.5-6.5 using pH up or pH down solutions if necessary.
4. Place the Celery in the Net Pot:** Carefully place the celery stalk into the cavity in the growing medium. Gently pack the medium around the base of the stalk to provide support.
5. Place the Net Pot in the Container:** Place the net pot with the celery stalk into the hole in the container. Make sure the bottom of the net pot is suspended above the nutrient solution.
5. Providing Light and Care
Now that your hydroponic celery is set up, it’s time to provide the right environment for it to thrive.
1. **Provide Adequate Light:** Celery needs plenty of light to grow. Place your hydroponic system in a location that receives at least 6-8 hours of direct sunlight per day. If you don’t have enough natural light, you can supplement with a grow light.
2. **Monitor the Water Level:** Check the water level in the container regularly. As the celery grows, it will absorb water and nutrients. Add more nutrient solution as needed to maintain the water level just below the bottom of the net pot.
3. **Change the Nutrient Solution:** Every 2-3 weeks, completely change the nutrient solution to prevent the buildup of salts and maintain optimal nutrient levels.
4. **Monitor for Pests and Diseases:** Keep an eye out for any signs of pests or diseases. If you notice any problems, address them promptly with appropriate organic pest control methods.
5. Maintain Air Circulation:** Good air circulation is important for preventing fungal diseases. Ensure that your hydroponic system is located in a well-ventilated area.
Troubleshooting Tips
Even with the best planning, you might encounter a few hiccups along the way. Here are some common issues and how to address them:
* **Yellowing Leaves:** This could be a sign of nutrient deficiency. Make sure you’re using a balanced hydroponic nutrient solution and that the pH is within the optimal range.
* **Slow Growth:** This could be due to insufficient light, low nutrient levels, or improper pH. Adjust the lighting, nutrient solution, and pH as needed.
* **Algae Growth:** Algae can grow in the nutrient solution if it’s exposed to too much light. Use a dark-colored container to prevent algae growth. You can also add a small amount of hydrogen peroxide to the nutrient solution to kill algae.
* **Root Rot:** Root rot is a fungal disease that can occur if the roots are constantly submerged in water. Ensure that the bottom of the net pot is suspended above the nutrient solution and that the water level is not too high.
Harvesting Your Celery
After a few weeks of care, you should start to see your celery growing taller and producing new stalks. You can harvest your celery when it reaches the desired size.
1. **Harvesting Individual Stalks:** You can harvest individual stalks as needed by cutting them off at the base. This will allow the remaining stalks to continue growing.
2. **Harvesting the
Conclusion
So, there you have it! Growing celery hydroponically isn’t just a fun science experiment; it’s a genuinely rewarding way to enjoy fresh, crisp celery right from your own home, regardless of the season or your outdoor space. We’ve walked you through the simple steps, from choosing the right celery base to nurturing its growth in a nutrient-rich water environment.
Why is this DIY trick a must-try? Because it offers a multitude of benefits. First and foremost, you get to control the growing environment, minimizing the risk of pests and diseases that often plague traditional soil-based gardening. This means healthier, more vibrant celery, free from harmful chemicals. Secondly, hydroponics is incredibly space-efficient. Whether you live in a sprawling suburban home or a cozy city apartment, you can easily set up a hydroponic system on a windowsill, balcony, or even a dedicated indoor grow area. Thirdly, and perhaps most importantly, it’s incredibly satisfying to watch your celery regrow from a seemingly discarded base. It’s a tangible demonstration of nature’s resilience and a constant reminder of the delicious meals to come.
But the fun doesn’t stop there! Feel free to experiment with different nutrient solutions to see how they affect the taste and growth rate of your celery. You could also try varying the lighting conditions, perhaps using a grow light to supplement natural sunlight during the darker months. Consider adding companion plants like basil or parsley to your hydroponic setup for a more diverse and aromatic garden. Another exciting variation is to try growing different varieties of celery, such as Pascal celery or Chinese celery, to discover your favorite flavor profile. You can even explore different hydroponic systems, from simple Kratky setups to more advanced deep water culture (DWC) or nutrient film technique (NFT) systems, as you become more experienced.
Don’t be intimidated by the term “hydroponics.” It’s far simpler than it sounds, and the rewards are well worth the effort. This method of growing celery hydroponically is a fantastic way to introduce yourself to the world of soilless gardening and experience the joy of harvesting your own fresh produce.
We wholeheartedly encourage you to give this DIY trick a try. It’s an affordable, sustainable, and incredibly rewarding way to enjoy fresh celery. Once you’ve experienced the satisfaction of growing your own celery hydroponically, we’re confident you’ll be hooked!
And finally, we want to hear about your experiences! Share your photos, tips, and challenges in the comments below. Let’s build a community of hydroponic celery growers and learn from each other. What nutrient solutions worked best for you? Did you encounter any unexpected problems? What delicious recipes did you create with your homegrown celery? Your insights will be invaluable to other readers who are just starting their hydroponic journey. So, get growing, get sharing, and get ready to enjoy the freshest celery you’ve ever tasted!
Frequently Asked Questions (FAQ)
What exactly is hydroponics, and is it difficult to learn?
Hydroponics is a method of growing plants without soil, using water-based nutrient solutions to provide the necessary elements for growth. Instead of relying on soil to deliver nutrients, the roots are directly exposed to a carefully balanced solution containing all the essential minerals and vitamins. This allows for faster growth, higher yields, and reduced risk of soilborne diseases.
While the term “hydroponics” might sound intimidating, the basic principles are quite simple. The difficulty level depends on the complexity of the system you choose. Starting with a simple method like regrowing celery from its base in water is an excellent way to learn the fundamentals without investing in expensive equipment or complex setups. As you gain experience, you can gradually explore more advanced hydroponic techniques. There are tons of resources available online, including videos, articles, and forums, to help you learn and troubleshoot any issues you encounter.
What kind of celery is best for regrowing hydroponically?
Generally, any type of celery you buy from the grocery store can be used for regrowing. However, organic celery is often preferred because it’s less likely to have been treated with chemicals that could inhibit regrowth. Look for celery stalks that are firm, crisp, and have a healthy-looking base with visible root nodes (small bumps where roots will emerge). Avoid celery that is wilted, discolored, or has a slimy base, as these are signs of spoilage and are less likely to regrow successfully. Pascal celery, the most common type found in supermarkets, works exceptionally well. You can also experiment with other varieties like Chinese celery, which has a stronger flavor.
What kind of water should I use for my hydroponic celery?
The best water to use for hydroponic celery is filtered or dechlorinated water. Tap water often contains chlorine and other chemicals that can be harmful to plants, especially young seedlings. You can dechlorinate tap water by letting it sit out in an open container for 24 hours, allowing the chlorine to evaporate. Alternatively, you can use a water filter to remove chlorine and other impurities. Rainwater is also a good option, as long as it’s collected from a clean source and hasn’t been contaminated by pollutants. Avoid using softened water, as it contains high levels of sodium, which can be detrimental to plant growth.
How often should I change the water and add nutrients?
The frequency of water changes depends on the size of your container and the growth rate of your celery. As a general rule, you should change the water every 1-2 days initially, especially when you are just regrowing the base. Once the celery starts to actively grow, you can extend the interval to every 3-5 days. When you change the water, add a hydroponic nutrient solution specifically formulated for leafy greens. Follow the instructions on the nutrient solution packaging for the correct dosage. It’s important to maintain a consistent nutrient level to ensure healthy growth. You can use a TDS (Total Dissolved Solids) meter to monitor the nutrient concentration in the water and adjust accordingly.
What kind of lighting does hydroponic celery need?
Celery needs plenty of light to grow well hydroponically. Ideally, it should receive at least 6-8 hours of direct sunlight per day. If you don’t have access to enough natural light, you can supplement with artificial grow lights. LED grow lights are a popular choice because they are energy-efficient and produce a full spectrum of light that is beneficial for plant growth. Place the grow light about 6-12 inches above the celery and adjust the height as the plant grows. You can also use fluorescent grow lights, but they are less energy-efficient than LEDs.
How long does it take for hydroponic celery to regrow?
The time it takes for hydroponic celery to regrow depends on several factors, including the variety of celery, the lighting conditions, the nutrient solution, and the temperature. Generally, you should start to see new growth within a week or two. Within a month, you should have a substantial amount of new celery stalks that you can harvest. Keep in mind that regrowing celery from its base will not produce a full-sized head of celery like you would buy in the store. Instead, it will produce smaller, more tender stalks that are perfect for salads, soups, and other dishes.
Can I grow other vegetables hydroponically using the same method?
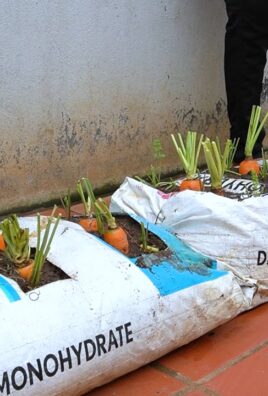
Yes, absolutely! The same basic principles of hydroponics can be applied to grow a wide variety of vegetables, herbs, and fruits. Some popular choices for hydroponic gardening include lettuce, spinach, kale, tomatoes, peppers, cucumbers, strawberries, and basil. Each plant has its own specific nutrient requirements and environmental preferences, so it’s important to do some research before you start growing a new type of plant hydroponically. There are many resources available online and in libraries that can provide you with the information you need to succeed.
What are some common problems I might encounter when growing celery hydroponically, and how can I fix them?
Some common problems you might encounter when growing celery hydroponically include:
* **Yellowing leaves:** This can be caused by a nutrient deficiency, insufficient light, or overwatering. Make sure you are using a balanced hydroponic nutrient solution and providing adequate light. Adjust the watering schedule as needed.
* **Root rot:** This is caused by a fungal infection that thrives in overly wet conditions. Ensure proper drainage and avoid overwatering. You can also add a small amount of hydrogen peroxide to the water to help kill the fungus.
* **Pest infestations:** Although hydroponics reduces the risk of pests, it’s still possible for insects like aphids or spider mites to infest your plants. Inspect your plants regularly and treat any infestations with an appropriate insecticide or horticultural oil.
* **Slow growth:** This can be caused by a variety of factors, including insufficient light, nutrient deficiencies, or temperature fluctuations. Make sure you are providing adequate light, using a balanced nutrient solution, and maintaining a stable temperature.
By carefully monitoring your plants and addressing any problems promptly, you can ensure a successful hydroponic celery growing experience.


Leave a Comment