
Growing chili peppers at home can seem daunting, but trust me, it’s more rewarding than you might think! Imagine plucking fiery, vibrant peppers straight from your own garden to spice up your favorite dishes. Forget those bland, store-bought options – we’re talking about fresh, flavorful chilies bursting with sunshine and homegrown goodness.
For centuries, chili peppers have been prized not only for their culinary kick but also for their medicinal properties and cultural significance. From ancient Aztec rituals to the vibrant street food of Southeast Asia, these fiery fruits have played a vital role in shaping cuisines and traditions around the globe. Now, you can bring a piece of that history to your own backyard!
Why should you embark on this spicy adventure? Well, for starters, growing chili peppers at home allows you to control exactly what goes into your food – no harmful pesticides or mystery ingredients. Plus, it’s incredibly satisfying to nurture a plant from seed to harvest. And let’s be honest, who wouldn’t want to impress their friends and family with their green thumb and a homemade hot sauce featuring their very own chilies? This DIY guide is packed with simple tricks and hacks to help you cultivate a thriving chili pepper garden, even if you’re a complete beginner. Get ready to turn up the heat!

Chili-Anbau für Jedermann: So ziehst du scharfe Schoten selbst!
Hey Chili-Liebhaber! Du träumst von einer eigenen Chili-Ernte, die deine Gerichte mit feuriger Schärfe veredelt? Dann bist du hier genau richtig! Ich zeige dir, wie du ganz einfach zu Hause deine eigenen Chili-Pflanzen ziehen kannst – egal ob auf dem Balkon, der Terrasse oder im Garten. Keine Angst, es ist einfacher als du denkst!
Was du für den Chili-Anbau brauchst:
* Chili-Samen: Wähle deine Lieblingssorten! Von milden Jalapeños bis zu höllisch scharfen Habaneros ist alles möglich. Achte auf qualitativ hochwertige Samen von vertrauenswürdigen Anbietern.
* Anzuchterde: Normale Blumenerde ist zu nährstoffreich für die empfindlichen Keimlinge. Anzuchterde ist locker, durchlässig und enthält weniger Nährstoffe.
* Anzuchtgefäße: Kleine Töpfe, Anzuchtschalen oder Torfquelltöpfe eignen sich hervorragend.
* Mini-Gewächshaus (optional): Hilft, die Luftfeuchtigkeit hoch zu halten und die Keimung zu beschleunigen. Eine durchsichtige Plastiktüte tut es aber auch!
* Sprühflasche: Zum Befeuchten der Erde.
* Pikierstab oder Bleistift: Zum Vereinzeln der Keimlinge.
* Blumenerde: Für das Umtopfen in größere Töpfe.
* Töpfe oder Kübel: In verschiedenen Größen, je nach Wachstumsstadium der Pflanzen.
* Dünger: Spezieller Chili-Dünger oder Tomatendünger.
* Gießkanne: Zum Bewässern der Pflanzen.
* Sonniger Standort: Chili-Pflanzen lieben die Sonne!
* Geduld: Chili-Anbau braucht Zeit und Pflege.
Aussaat und Keimung: Der Start ins Chili-Abenteuer
Die Aussaat ist der erste Schritt zu deiner eigenen Chili-Ernte. Ich empfehle, die Samen im Februar oder März vorzuziehen, damit die Pflanzen genügend Zeit haben, bis zum Sommer Früchte zu tragen.
1. Vorbereitung der Anzuchtgefäße: Fülle die Anzuchtgefäße mit Anzuchterde. Drücke die Erde leicht an und befeuchte sie mit der Sprühflasche. Die Erde sollte feucht, aber nicht nass sein.
2. Aussaat der Samen: Lege pro Anzuchtgefäß 1-2 Samen auf die Erde. Bedecke die Samen mit einer dünnen Schicht Anzuchterde (ca. 0,5 cm).
3. Befeuchten und Abdecken: Befeuchte die Erde erneut mit der Sprühflasche. Decke die Anzuchtgefäße mit einem Mini-Gewächshaus oder einer durchsichtigen Plastiktüte ab, um die Luftfeuchtigkeit zu erhöhen.
4. Warmer Standort: Stelle die Anzuchtgefäße an einen warmen Ort (ca. 22-28°C). Eine Fensterbank über der Heizung ist ideal.
5. Regelmäßige Kontrolle: Kontrolliere die Erde regelmäßig und halte sie feucht. Lüfte das Mini-Gewächshaus oder die Plastiktüte täglich, um Schimmelbildung zu vermeiden.
6. Geduld haben: Die Keimung kann je nach Sorte und Temperatur 1-3 Wochen dauern. Sobald die ersten Keimlinge erscheinen, entferne die Abdeckung.
Pikieren: Den kleinen Chili-Pflanzen mehr Raum geben
Sobald die Keimlinge ihre ersten richtigen Blätter (nach den Keimblättern) entwickelt haben, ist es Zeit zum Pikieren. Das bedeutet, dass du die kleinen Pflanzen in größere Töpfe umpflanzt, damit sie mehr Platz zum Wachsen haben.
1. Vorbereitung der Töpfe: Fülle kleine Töpfe (ca. 8-10 cm Durchmesser) mit Blumenerde.
2. Vereinzeln der Keimlinge: Löse die Keimlinge vorsichtig mit einem Pikierstab oder Bleistift aus der Anzuchterde. Achte darauf, die Wurzeln nicht zu beschädigen.
3. Einsetzen in die Töpfe: Setze jeden Keimling in einen eigenen Topf. Die Wurzeln sollten ausreichend Platz haben. Fülle den Topf mit Erde auf und drücke sie leicht an.
4. Angießen: Gieße die Pflanzen vorsichtig an.
5. Heller Standort: Stelle die pikierten Pflanzen an einen hellen, aber nicht zu sonnigen Ort.
Pflege der Chili-Pflanzen: Gießen, Düngen, Sonne tanken
Nach dem Pikieren brauchen die Chili-Pflanzen regelmäßige Pflege, um kräftig zu wachsen und viele Früchte zu tragen.
1. Gießen: Gieße die Pflanzen regelmäßig, aber vermeide Staunässe. Die Erde sollte immer leicht feucht sein. Am besten gießt du morgens, damit die Blätter über den Tag abtrocknen können.
2. Düngen: Dünge die Pflanzen regelmäßig mit speziellem Chili-Dünger oder Tomatendünger. Beginne mit dem Düngen etwa 2-3 Wochen nach dem Pikieren. Beachte die Dosierungsanleitung auf der Verpackung.
3. Sonniger Standort: Chili-Pflanzen lieben die Sonne! Stelle die Pflanzen an einen möglichst sonnigen Standort. Mindestens 6 Stunden Sonne pro Tag sind ideal.
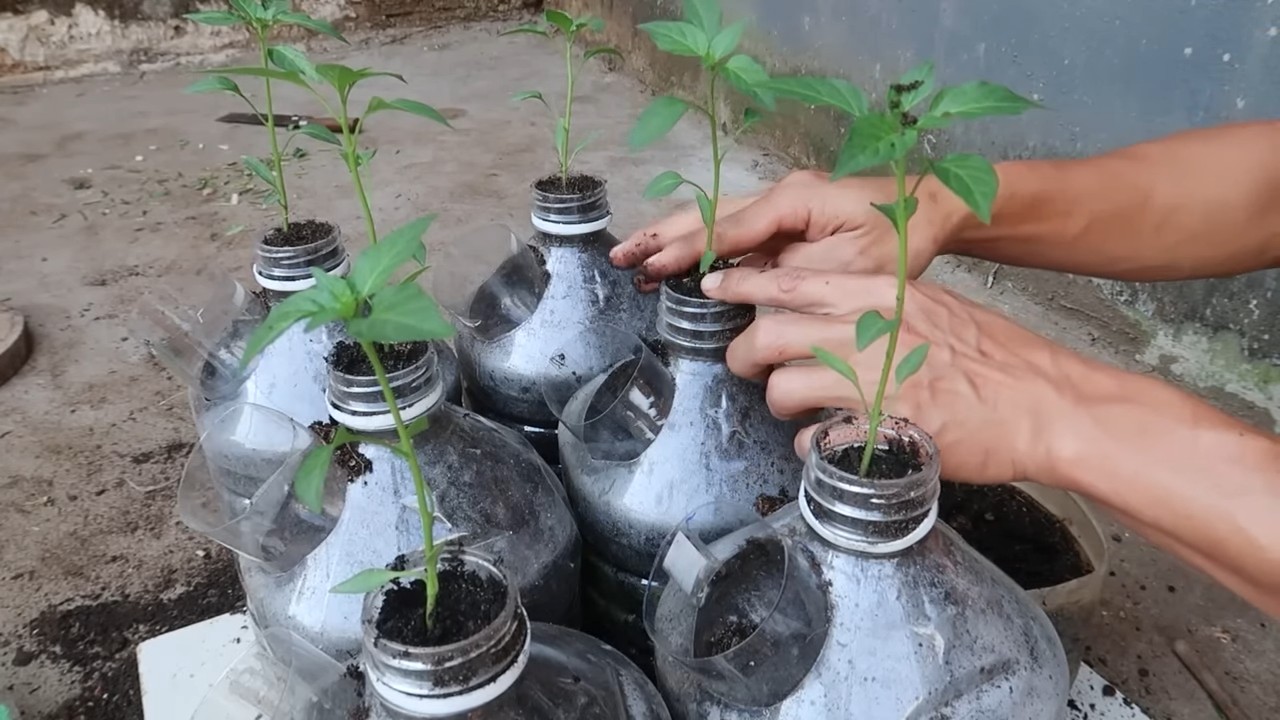
4. Umpflanzen: Wenn die Pflanzen zu groß für die kleinen Töpfe geworden sind, musst du sie in größere Töpfe oder Kübel umpflanzen. Wähle einen Topf mit ausreichend Volumen (mindestens 10 Liter).
5. Ausgeizen (optional): Bei einigen Chili-Sorten kann es sinnvoll sein, die Seitentriebe (Geiztriebe) auszugeizen, um die Fruchtbildung zu fördern. Informiere dich, ob das für deine Sorte empfehlenswert ist.
6. Stützen (optional): Wenn die Pflanzen sehr hoch wachsen und viele Früchte tragen, kann es notwendig sein, sie mit Stäben zu stützen, damit sie nicht umknicken.
Überwinterung: Chili-Pflanzen mehrjährig halten
Chili-Pflanzen sind eigentlich mehrjährig, aber in unseren Breitengraden überleben sie den Winter im Freien meist nicht. Mit der richtigen Überwinterung kannst du deine Pflanzen aber retten und im nächsten Jahr wieder ernten.
1. Vorbereitung: Vor dem ersten Frost solltest du die Pflanzen ins Haus holen. Schneide die Pflanzen zurück, entferne alle Blätter und Früchte.
2. Kühler Standort: Stelle die Pflanzen an einen kühlen, hellen Ort (ca. 10-15°C). Ein Kellerraum oder ein unbeheizter Wintergarten eignet sich gut.
3. Weniger Gießen: Gieße die Pflanzen während der Überwinterung nur sehr wenig. Die Erde sollte nicht austrocknen, aber auch nicht zu feucht sein.
4. Kein Düngen: Während der Überwinterung brauchen die Pflanzen keinen Dünger.
5. Frühjahr: Im Frühjahr, wenn die Temperaturen wieder steigen, kannst du die Pflanzen wieder ins Freie stellen. Gewöhne sie langsam an die Sonne, damit sie keinen Sonnenbrand bekommen. Dünge die Pflanzen und topfe sie gegebenenfalls um.
Ernte: Der Lohn für deine Mühe
Endlich ist es soweit: Du kannst deine eigenen Chili-Schoten ernten! Der Zeitpunkt der Ernte hängt von der Sorte ab. Die meisten Chilis sind reif, wenn sie ihre endgültige Farbe erreicht haben (rot, gelb, orange, braun oder schwarz).
1. Ernten: Schneide die Chilis mit einer Schere oder einem Messer ab. Trage dabei Handschuhe, um Hautreizungen zu vermeiden.
2. Verarbeiten: Du kannst die Chilis frisch verwenden, trocknen, einlegen oder zu Soßen und Pulvern verarbeiten.
Häufige Probleme und Lösungen:
* Blattläuse: Blattläuse sind häufige Schädlinge an Chili-Pflanzen. Du kannst sie mit einem Wasserstrahl abspülen oder mit einem biologischen Insektizid bekämpfen.
* Spinnmilben: Spinnmilben sind kleine, saugende Schädlinge, die feine Netze auf den Blättern bilden.
Conclusion
So, there you have it! Growing chili peppers at home isn’t just a fun hobby; it’s a gateway to a world of fresh, flavorful possibilities. Forget those bland, overpriced peppers at the grocery store. With a little patience and these simple DIY tricks, you can cultivate a vibrant garden bursting with fiery goodness, tailored precisely to your heat preference.
This isn’t just about saving money; it’s about experiencing the satisfaction of nurturing something from seed to table. Imagine the pride you’ll feel when you sprinkle your homegrown habaneros onto your tacos or blend your own signature hot sauce with peppers you cultivated yourself. The flavor difference is undeniable – a vibrant, fresh taste that store-bought peppers simply can’t match.
But the best part? You’re in complete control. Want a milder pepper for everyday cooking? Opt for jalapeños or poblanos. Craving intense heat? Scotch bonnets or ghost peppers are your answer. You can even experiment with different varieties and create your own unique blends. Consider trying a rainbow of chili peppers, from the deep purple of the Black Pearl to the bright yellow of the Lemon Drop. Each pepper offers a unique flavor profile, adding depth and complexity to your culinary creations.
Don’t be afraid to experiment with different growing methods too. Try container gardening if you’re short on space, or build a raised bed for a more traditional garden. You can even try hydroponics for a faster, more efficient growing experience. The possibilities are endless!
And remember, growing chili peppers at home is a learning process. Don’t be discouraged if you encounter challenges along the way. Every mistake is an opportunity to learn and improve. The key is to be patient, observant, and willing to adapt your approach as needed.
We’ve armed you with the knowledge and the inspiration. Now it’s your turn to get your hands dirty. Start small, experiment with different varieties, and most importantly, have fun! We’re confident that you’ll be amazed at the results.
So, grab your seeds, prepare your soil, and get ready to embark on a fiery adventure. We can’t wait to hear about your experiences! Share your tips, tricks, and photos in the comments below. Let’s build a community of chili pepper enthusiasts and inspire others to discover the joy of growing their own. Happy growing!
Frequently Asked Questions (FAQ)
Q: What are the best chili pepper varieties for beginners?
A: For beginners, we highly recommend starting with easier-to-grow varieties like jalapeños, poblanos, or Anaheim peppers. These peppers are relatively mild in heat and are known for their resilience. They are also readily available as seeds or starter plants at most garden centers. Jalapeños are incredibly versatile and can be used in a wide range of dishes, while poblanos are perfect for stuffing or roasting. Anaheim peppers offer a slightly sweeter flavor and are great for adding a mild kick to salsas and sauces. Starting with these varieties will give you a good foundation and boost your confidence before moving on to more challenging peppers.
Q: How much sunlight do chili peppers need?
A: Chili peppers thrive in full sunlight, requiring at least 6-8 hours of direct sunlight per day. Sunlight is crucial for photosynthesis, which is the process by which plants convert light energy into chemical energy for growth. Insufficient sunlight can lead to stunted growth, reduced fruit production, and less flavorful peppers. If you’re growing chili peppers indoors, consider using grow lights to supplement natural sunlight. Position your plants near a south-facing window for maximum sun exposure. If you notice your plants are leggy or have pale leaves, it’s a sign that they need more sunlight.
Q: What kind of soil is best for growing chili peppers?
A: Chili peppers prefer well-draining soil that is rich in organic matter. Good drainage is essential to prevent root rot, which can be a common problem for chili pepper plants. Amend your soil with compost, aged manure, or other organic materials to improve its fertility and drainage. A slightly acidic to neutral pH (around 6.0 to 7.0) is ideal. You can test your soil’s pH using a soil testing kit available at most garden centers. Avoid heavy clay soils, as they tend to retain too much water. If you have clay soil, consider growing your chili peppers in raised beds or containers with a well-draining potting mix.
Q: How often should I water my chili pepper plants?
A: Water your chili pepper plants deeply but infrequently, allowing the soil to dry out slightly between waterings. Overwatering can lead to root rot, while underwatering can stress the plants and reduce fruit production. Check the soil moisture by sticking your finger about an inch into the soil. If the soil feels dry, it’s time to water. Water at the base of the plant to avoid wetting the foliage, which can increase the risk of fungal diseases. During hot, dry weather, you may need to water more frequently. Mulching around the base of the plants can help retain moisture and reduce the need for frequent watering.
Q: How do I fertilize my chili pepper plants?
A: Chili peppers benefit from regular fertilization, especially during the growing season. Use a balanced fertilizer with equal amounts of nitrogen, phosphorus, and potassium (e.g., 10-10-10) early in the season to promote healthy growth. Once the plants start to flower and produce fruit, switch to a fertilizer with a higher phosphorus content (e.g., 5-10-5) to encourage fruit development. Follow the instructions on the fertilizer package for application rates. Avoid over-fertilizing, as this can lead to excessive foliage growth at the expense of fruit production. You can also supplement with organic fertilizers like compost tea or fish emulsion.
Q: How do I protect my chili pepper plants from pests and diseases?
A: Regularly inspect your chili pepper plants for signs of pests and diseases. Common pests include aphids, spider mites, and whiteflies. You can control these pests with insecticidal soap, neem oil, or by handpicking them off the plants. Fungal diseases like powdery mildew and leaf spot can be prevented by ensuring good air circulation and avoiding overhead watering. If you notice signs of disease, remove the affected leaves and treat the plants with a fungicide. Companion planting with herbs like basil and marigolds can also help deter pests.
Q: When is the best time to harvest chili peppers?
A: The best time to harvest chili peppers depends on the variety and your desired level of heat. Most chili peppers will change color as they ripen, typically from green to red, yellow, or orange. You can harvest them at any stage of ripeness, but the flavor and heat will intensify as they mature. Use pruning shears or scissors to cut the peppers from the plant, leaving a small stem attached. Handle the peppers with care, especially if they are hot, and wear gloves if necessary.
Q: Can I grow chili peppers indoors?
A: Yes, you can absolutely grow chili peppers indoors, especially if you live in a climate with short growing seasons. Choose a sunny location near a south-facing window or use grow lights to provide adequate light. Use a well-draining potting mix and ensure the container has drainage holes. Water regularly and fertilize as needed. Indoor chili pepper plants may require hand-pollination to ensure fruit production. You can do this by gently shaking the plants or using a small brush to transfer pollen from one flower to another.
Q: How do I store chili peppers?
A: There are several ways to store chili peppers. You can dry them, freeze them, pickle them, or make them into hot sauce. To dry chili peppers, string them together and hang them in a well-ventilated area until they are completely dry. You can also dry them in a dehydrator or oven. To freeze chili peppers, wash them, remove the stems, and freeze them whole or chopped. Pickled chili peppers can be stored in the refrigerator for several weeks. Hot sauce can be stored in the refrigerator for several months.
Leave a Comment