
Growing Choi Sum Easier is something I know many of you are eager to achieve, and I’m here to tell you it’s absolutely possible! Have you ever dreamt of stepping into your backyard and harvesting fresh, vibrant Choi Sum for a delicious stir-fry? Imagine the satisfaction of knowing exactly where your food comes from and that it’s free from harmful chemicals. This isn’t just a dream; it’s a reality you can create with a few simple tricks and DIY hacks.
Choi Sum, also known as Chinese flowering cabbage, has been a staple in Asian cuisine for centuries. Its delicate flavor and nutritional benefits have made it a beloved vegetable across cultures. But let’s be honest, sometimes growing it can feel a little tricky, right? That’s where this guide comes in.
Many gardeners struggle with common issues like bolting (premature flowering), pest infestations, and inconsistent growth. These challenges can be frustrating, leading to smaller yields and less-than-perfect produce. But don’t worry, I’ve got you covered! This article is packed with practical, easy-to-follow DIY tips and tricks that will help you overcome these hurdles and enjoy a bountiful harvest of delicious Choi Sum. I will show you how growing Choi Sum easier is possible with the right knowledge and a little bit of effort. Let’s get started!
Choi Sum Anbauen: Dein einfacher DIY-Leitfaden für den Garten
Hey Gartenfreunde! Habt ihr Lust, euer eigenes frisches Choi Sum anzubauen? Dieses knackige, leckere Gemüse ist super einfach zu ziehen und bringt eine tolle asiatische Note in eure Küche. Ich zeige euch, wie ihr das ganz easy selbst machen könnt. Los geht’s!
Was du brauchst: Die Zutaten für deinen Choi Sum Erfolg
Bevor wir loslegen, hier eine Liste mit allem, was du brauchst. Keine Sorge, das meiste davon hast du wahrscheinlich schon zu Hause oder kannst es leicht besorgen:
* Choi Sum Samen: Die gibt’s im Gartencenter oder online. Achte auf frische Samen für eine gute Keimrate.
* Anzuchterde: Spezielle Anzuchterde ist feiner und nährstoffärmer als normale Blumenerde und ideal für die empfindlichen Keimlinge.
* Blumenerde oder Kompost: Für das spätere Umpflanzen ins Beet oder in größere Töpfe.
* Anzuchttöpfe oder -schalen: Kleine Töpfe oder Schalen mit Drainagelöchern sind perfekt für die Anzucht.
* Gießkanne mit Brauseaufsatz: Damit du die zarten Pflänzchen nicht überwässerst.
* Pflanzschilder und Stift: Damit du den Überblick behältst, was wo wächst.
* Gartenwerkzeug: Eine kleine Schaufel oder ein Pikierstab sind hilfreich.
* (Optional) Frühbeet oder Mini-Gewächshaus: Für eine frühere Aussaat und besseren Schutz der Pflanzen.
* (Optional) Schneckenzaun oder Schneckenkorn: Choi Sum ist leider bei Schnecken sehr beliebt.
Aussaat: Der Start in dein Choi Sum Abenteuer
Die Aussaat ist der erste Schritt zu deinem eigenen Choi Sum. Ich zeige dir, wie du es richtig machst:
1. Vorbereitung der Anzuchttöpfe: Fülle die Anzuchttöpfe oder -schalen mit Anzuchterde. Drücke die Erde leicht an.
2. Aussaat der Samen: Verteile die Choi Sum Samen gleichmäßig auf der Erde. Sie sind recht klein, also nicht zu viele auf einmal.
3. Bedecken der Samen: Bedecke die Samen mit einer dünnen Schicht Anzuchterde (ca. 0,5 cm).
4. Angießen: Befeuchte die Erde vorsichtig mit der Gießkanne. Achte darauf, dass die Erde gleichmäßig feucht ist, aber nicht nass.
5. Beschriften: Beschrifte die Töpfe mit Pflanzschildern, damit du weißt, was du gesät hast.
6. Standort: Stelle die Anzuchttöpfe an einen hellen, warmen Ort. Ideal ist eine Temperatur zwischen 18 und 22 Grad Celsius. Ein Fensterbrett oder ein Mini-Gewächshaus sind perfekt.
7. Feuchtigkeit: Halte die Erde gleichmäßig feucht, aber vermeide Staunässe. Besprühe die Erde bei Bedarf mit einer Sprühflasche.
Pflege der Keimlinge: Damit deine Choi Sum Babys groß und stark werden
Nach ein paar Tagen sollten die ersten Keimlinge sprießen. Jetzt ist es wichtig, dass du sie gut pflegst:
1. Licht: Sorge für ausreichend Licht. Wenn die Keimlinge zu wenig Licht bekommen, werden sie lang und dünn.
2. Gießen: Gieße die Keimlinge regelmäßig, aber nicht zu viel. Die Erde sollte immer leicht feucht sein.
3. Lüften: Wenn du ein Mini-Gewächshaus verwendest, lüfte es regelmäßig, um Schimmelbildung zu vermeiden.
4. Pikieren: Sobald die Keimlinge ihre ersten richtigen Blätter (nach den Keimblättern) entwickelt haben, ist es Zeit zum Pikieren. Das bedeutet, dass du die Pflänzchen in größere Töpfe umpflanzt, damit sie mehr Platz zum Wachsen haben.
* Fülle größere Töpfe mit Blumenerde oder Kompost.
* Lockere die Erde um die Keimlinge vorsichtig mit einem Pikierstab oder einer kleinen Gabel.
* Hebe die Keimlinge vorsichtig aus der Erde und setze sie in die neuen Töpfe.
* Achte darauf, dass die Wurzeln nicht beschädigt werden.
* Fülle die Töpfe mit Erde auf und drücke sie leicht an.
* Gieße die Pflänzchen gut an.
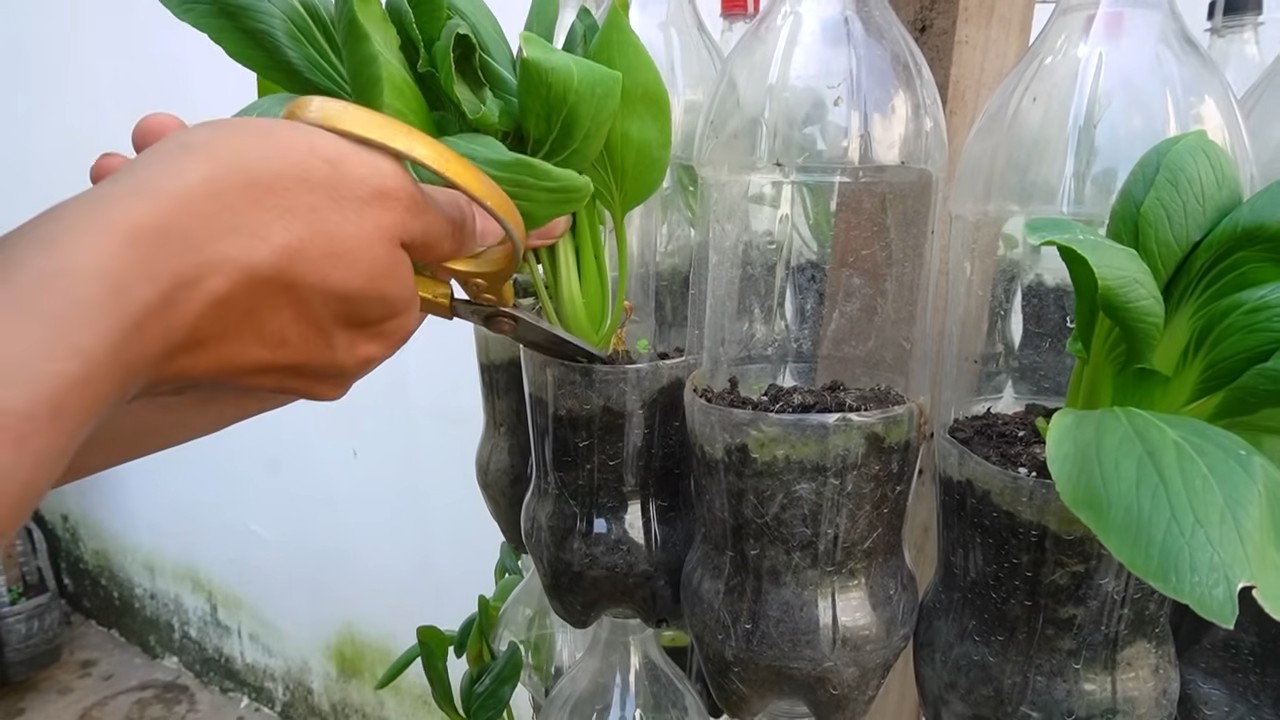
Auspflanzen: Ab ins Beet oder in den Topf
Sobald die Choi Sum Pflänzchen kräftig genug sind (ca. 10-15 cm hoch), kannst du sie ins Beet oder in größere Töpfe auspflanzen.
1. Vorbereitung des Beets oder der Töpfe: Lockere die Erde im Beet oder in den Töpfen gut auf und entferne Unkraut.
2. Pflanzabstand: Achte auf einen Pflanzabstand von ca. 20-30 cm zwischen den Pflanzen.
3. Auspflanzen: Hebe die Pflänzchen vorsichtig aus den Töpfen und setze sie in die vorbereiteten Löcher.
4. Angießen: Gieße die Pflänzchen gut an.
5. Schutz vor Schnecken: Schütze die jungen Pflanzen vor Schnecken, indem du einen Schneckenzaun aufstellst oder Schneckenkorn streust.
Pflege im Beet oder Topf: Damit dein Choi Sum prächtig gedeiht
Auch nach dem Auspflanzen brauchen deine Choi Sum Pflanzen noch etwas Pflege:
1. Gießen: Gieße die Pflanzen regelmäßig, besonders bei Trockenheit.
2. Düngen: Dünge die Pflanzen alle paar Wochen mit einem organischen Dünger.
3. Unkraut entfernen: Entferne regelmäßig Unkraut, damit die Choi Sum Pflanzen nicht von Nährstoffen und Wasser konkurriert werden.
4. Schutz vor Schädlingen: Kontrolliere die Pflanzen regelmäßig auf Schädlinge wie Blattläuse oder Kohlweißlingsraupen. Bei Bedarf kannst du biologische Schädlingsbekämpfungsmittel einsetzen.
5. Sonnenschutz: An sehr heißen Tagen kann es sinnvoll sein, die Pflanzen mit einem Vlies oder einem Schattiernetz vor direkter Sonneneinstrahlung zu schützen.
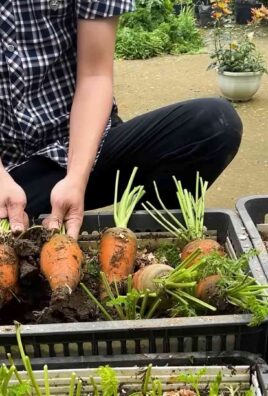
Ernte: Der Lohn deiner Mühe
Nach ca. 4-6 Wochen kannst du dein selbst angebautes Choi Sum ernten.
1. Erntezeitpunkt: Ernte das Choi Sum, wenn die Stiele und Blätter noch jung und zart sind.
2. Erntemethode: Schneide die Pflanzen knapp über dem Boden ab.
3. Mehrfache Ernte: Wenn du nur die äußeren Blätter erntest, können die Pflanzen weiterwachsen und du kannst mehrmals ernten.
4. Verwendung: Choi Sum ist vielseitig verwendbar. Du kannst es roh in Salaten essen, dünsten, braten oder in Suppen und Eintöpfen verwenden.
Tipps und Tricks für den Choi Sum Anbau
Hier noch ein paar zusätzliche Tipps, die dir den Anbau erleichtern:
* Direktsaat: Du kannst Choi Sum auch direkt ins Beet säen. Achte darauf, dass der Boden gut vorbereitet ist und die Samen ausreichend Feuchtigkeit haben.
* Nachsaat: Säe alle paar Wochen neue Samen aus, um eine kontinuierliche Ernte zu gewährleisten.
* Sortenwahl: Es gibt verschiedene Choi Sum Sorten. Probiere verschiedene Sorten aus, um deine Lieblingssorte zu finden.
* Mischkultur: Choi Sum verträgt sich gut mit anderen Gemüsesorten wie Karotten, Radieschen oder Salat.
* Blüte verhindern: Wenn Choi Sum blüht, werden die Blätter bitter. Um die Blüte zu verhindern, solltest du die Pflanzen regelmäßig ernten und für ausreichend Wasser und Nährstoffe sorgen.
* Schneckenbekämpfung: Schnecken lieben Choi Sum. Schütze deine Pflanzen mit einem Schneckenzaun, Schneckenkorn oder anderen natürlichen Methoden.
* Bodenverbesserung: Verbessere den Boden vor der Aussaat oder dem Auspflanzen mit Kompost oder organischem Dünger.
Ich hoffe, dieser Leitfaden hilft dir dabei, dein eigenes Choi Sum anzubauen. Viel Spaß beim Gärtnern und guten Appetit!

Conclusion
So, there you have it! Growing Choi Sum easier than you ever imagined, right in your own backyard (or even on your balcony!). This isn’t just about saving a few dollars at the grocery store; it’s about connecting with your food, understanding the growing process, and enjoying the unparalleled freshness of homegrown vegetables. Forget those wilted, pre-packaged greens – imagine crisp, vibrant Choi Sum, bursting with flavor, ready to be stir-fried, steamed, or added to your favorite soups.
This DIY trick is a must-try for several compelling reasons. First, it empowers you to control the quality of your food. You know exactly what goes into your Choi Sum – no harmful pesticides, no questionable fertilizers, just pure, natural goodness. Second, it’s incredibly rewarding. There’s a unique satisfaction in nurturing a plant from seed to harvest, witnessing its growth, and ultimately enjoying the fruits (or rather, the vegetables!) of your labor. Third, it’s surprisingly easy and accessible, even for beginners. You don’t need a sprawling garden or extensive gardening experience to succeed. With a few simple supplies and a little bit of patience, you can be harvesting your own Choi Sum in no time.
But don’t just take our word for it! We encourage you to experiment and find what works best for you. Consider these variations to personalize your Choi Sum growing experience:
* Succession Planting: Plant seeds every few weeks to ensure a continuous harvest throughout the growing season. This way, you’ll always have fresh Choi Sum on hand.
* Container Gardening: If you’re short on space, grow your Choi Sum in containers. Choose pots that are at least 6 inches deep and wide to allow for adequate root development.
* Companion Planting: Plant Choi Sum alongside other vegetables like carrots, radishes, and lettuce. These companion plants can help deter pests and improve soil health.
* Different Varieties: Explore different varieties of Choi Sum, such as the dwarf variety for smaller spaces or the flowering variety for added visual appeal.
* Organic Fertilizers: Use organic fertilizers like compost tea or fish emulsion to nourish your plants and promote healthy growth.
Growing your own Choi Sum is more than just a gardening project; it’s an investment in your health, your well-being, and your connection to nature. It’s a chance to learn new skills, enjoy the outdoors, and savor the delicious taste of homegrown vegetables.
So, what are you waiting for? Grab some seeds, prepare your soil, and get ready to embark on your Choi Sum growing adventure! We’re confident that you’ll be amazed by the results. And once you’ve harvested your first batch, be sure to share your experience with us! We’d love to hear your tips, your challenges, and your delicious Choi Sum recipes. Share your photos and stories on our social media pages using #HomeGrownChoiSum. Let’s inspire others to discover the joy of growing their own food!
FAQ
What is Choi Sum and why should I grow it?
Choi Sum, also known as Choy Sum or Chinese Flowering Cabbage, is a leafy green vegetable popular in Asian cuisine. It’s known for its tender stems, flavorful leaves, and small yellow flowers. Growing it yourself ensures freshness, allows you to control pesticide use, and provides a rewarding gardening experience. Plus, homegrown Choi Sum tastes significantly better than store-bought!
How much sunlight does Choi Sum need?
Choi Sum thrives in full sun, requiring at least 6 hours of direct sunlight per day. However, it can tolerate partial shade, especially in hotter climates. If you’re growing it indoors, supplement with grow lights to ensure adequate light exposure.
What kind of soil is best for growing Choi Sum?
Choi Sum prefers well-draining, fertile soil that is rich in organic matter. Amend your soil with compost or well-rotted manure before planting to improve its fertility and drainage. A slightly acidic to neutral soil pH (around 6.0 to 7.0) is ideal.
How often should I water my Choi Sum plants?
Water your Choi Sum plants regularly, especially during dry periods. Keep the soil consistently moist but not waterlogged. Water deeply at the base of the plants to avoid wetting the leaves, which can increase the risk of fungal diseases. Check the soil moisture regularly by sticking your finger about an inch into the soil. If it feels dry, it’s time to water.
When is the best time to plant Choi Sum?
Choi Sum is a cool-season crop, so the best time to plant it is in early spring or late summer/early fall. Avoid planting during the hottest months of summer, as high temperatures can cause the plants to bolt (go to seed prematurely).
How long does it take for Choi Sum to grow?
Choi Sum is a fast-growing vegetable, typically ready for harvest in 4-6 weeks after planting. You can start harvesting the outer leaves as soon as they are large enough to eat, or you can harvest the entire plant at once.
How do I harvest Choi Sum?
To harvest Choi Sum, you can either cut the entire plant at the base or harvest the outer leaves as needed. If you’re harvesting the entire plant, cut it just above the soil line. If you’re harvesting the outer leaves, be sure to leave the central bud intact so that the plant can continue to produce new leaves.
What are some common pests and diseases that affect Choi Sum?
Common pests that affect Choi Sum include aphids, flea beetles, and cabbage worms. Common diseases include downy mildew and clubroot. To prevent pest and disease problems, practice good garden hygiene, such as removing weeds and debris, and use organic pest control methods like insecticidal soap or neem oil.
Can I grow Choi Sum in containers?
Yes, Choi Sum can be successfully grown in containers. Choose pots that are at least 6 inches deep and wide to allow for adequate root development. Use a well-draining potting mix and water regularly.
How do I store harvested Choi Sum?
Store harvested Choi Sum in the refrigerator in a plastic bag or container. It will keep for several days. For longer storage, you can blanch and freeze it.
What are some ways to cook with Choi Sum?
Choi Sum is a versatile vegetable that can be used in a variety of dishes. It can be stir-fried, steamed, boiled, or added to soups and stews. It pairs well with garlic, ginger, soy sauce, and other Asian flavors.
Can I eat the flowers of Choi Sum?
Yes, the flowers of Choi Sum are edible and have a mild, slightly sweet flavor. They can be added to salads, stir-fries, or used as a garnish.
How can I prevent my Choi Sum from bolting?
Bolting is when a plant prematurely goes to seed, often due to stress from heat or lack of water. To prevent bolting, plant Choi Sum during the cooler months of spring or fall, provide adequate water, and protect the plants from extreme heat.
Is Choi Sum nutritious?
Yes, Choi Sum is a nutritious vegetable that is rich in vitamins A and C, as well as calcium, iron, and fiber. It’s a healthy and delicious addition to any diet.

Leave a Comment