
Growing corn on concrete? Sounds impossible, right? I thought so too, until I stumbled upon a game-changing DIY trick that completely revolutionized my urban gardening game! Forget sprawling fields and acres of farmland; we’re bringing the taste of summer to the most unlikely of places.
For centuries, corn has been a staple crop, deeply woven into the cultures of indigenous peoples of the Americas. From sacred ceremonies to nourishing meals, corn has sustained communities and shaped traditions. Now, imagine harnessing that ancient power, not in a vast field, but in your own backyard, patio, or even balcony!
Let’s face it, not everyone has access to fertile soil or a sprawling garden. Many of us are confined to urban environments with limited space. But that shouldn’t stop us from enjoying the simple pleasure of fresh, homegrown corn. That’s where this DIY trick comes in. It’s a game-changer for apartment dwellers, city gardeners, and anyone looking to maximize their yields in a small space. This method of growing corn on concrete is not only possible, but surprisingly effective, allowing you to enjoy sweet, juicy corn even without a traditional garden. So, ditch the store-bought stuff and get ready to learn how to cultivate your own little patch of sunshine, right on your concrete jungle!
Maisanbau auf Beton: Ein ungewöhnliches DIY-Projekt
Hey Leute, habt ihr schon mal darüber nachgedacht, Mais auf Beton anzubauen? Klingt verrückt, oder? Aber mit ein bisschen Kreativität und den richtigen Materialien ist es tatsächlich möglich! Ich zeige euch heute, wie ihr euren eigenen kleinen Maisgarten auf Beton erschaffen könnt. Es ist ein tolles Projekt, um ungenutzte Betonflächen zu begrünen und frisches Gemüse anzubauen, selbst wenn ihr keinen traditionellen Garten habt.
Was ihr braucht:
* Pflanzgefäße: Große, robuste Pflanzgefäße sind das A und O. Denkt daran, dass Maispflanzen groß werden, also wählt Gefäße mit einem Volumen von mindestens 50 Litern pro Pflanze. Kübel, große Töpfe oder sogar umfunktionierte Fässer eignen sich hervorragend.
* Hochwertige Pflanzerde: Mais ist ein Starkzehrer, daher ist eine nährstoffreiche Erde unerlässlich. Ich empfehle eine Mischung aus Gartenerde, Kompost und etwas Sand für eine gute Drainage.
* Maiskörner: Wählt eine Maissorte, die für den Anbau in Gefäßen geeignet ist. Zwergmaissorten oder spezielle Topfmaissorten sind ideal. Ihr bekommt sie im Gartencenter oder online.
* Dünger: Ein Langzeitdünger oder regelmäßige Flüssigdüngergaben sind wichtig, um die Maispflanzen mit ausreichend Nährstoffen zu versorgen.
* Drainagematerial: Blähton, Kies oder Tonscherben am Boden der Pflanzgefäße sorgen für eine gute Drainage und verhindern Staunässe.
* Gießkanne oder Gartenschlauch: Zum regelmäßigen Gießen der Pflanzen.
* Pflanzschaufel: Zum Befüllen der Pflanzgefäße und Einsetzen der Maiskörner.
* Stützmaterial (optional): Bei starkem Wind können Stäbe oder Bambusrohre helfen, die Maispflanzen zu stützen.
* Mulch (optional): Mulch aus Stroh, Holzhackschnitzeln oder Rasenschnitt hilft, die Feuchtigkeit im Boden zu halten und Unkraut zu unterdrücken.
Schritt-für-Schritt-Anleitung:
1. Vorbereitung der Pflanzgefäße:
* Reinigt die Pflanzgefäße gründlich, falls sie gebraucht sind.
* Bohrt Löcher in den Boden der Gefäße, falls noch keine vorhanden sind, um eine gute Drainage zu gewährleisten.
* Füllt eine Schicht Drainagematerial (Blähton, Kies oder Tonscherben) auf den Boden der Gefäße. Diese Schicht sollte etwa 5-10 cm dick sein.
* Füllt die Pflanzgefäße mit der vorbereiteten Pflanzerde. Lasst etwa 5 cm Platz bis zum Rand.
2. Aussaat der Maiskörner:
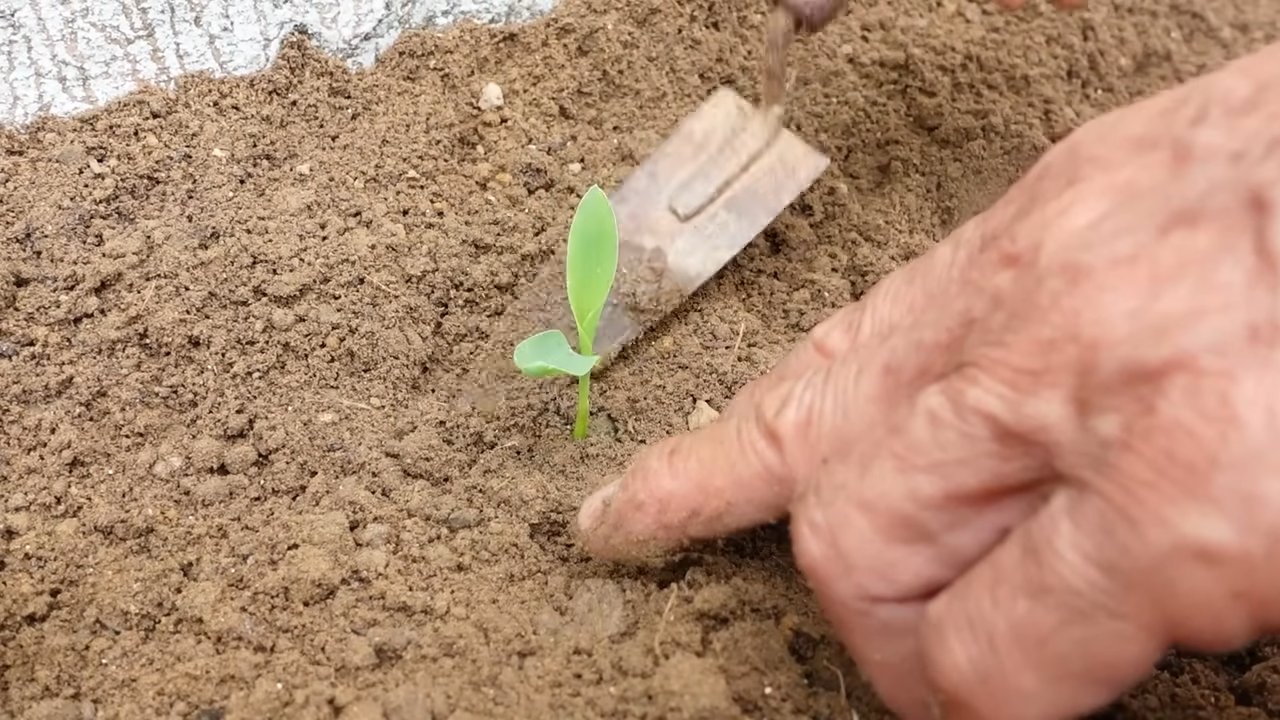
* Drückt mit dem Finger kleine Mulden in die Erde, etwa 2-3 cm tief.
* Legt in jede Mulde 2-3 Maiskörner. Das erhöht die Wahrscheinlichkeit, dass mindestens eine Pflanze keimt.
* Bedeckt die Maiskörner mit Erde und drückt sie leicht an.
* Gießt die Erde vorsichtig an, sodass sie gut durchfeuchtet ist.
3. Standortwahl und Pflege:
* Stellt die Pflanzgefäße an einen sonnigen Standort. Mais braucht mindestens 6-8 Stunden Sonne pro Tag, um gut zu wachsen.
* Haltet die Erde feucht, aber nicht nass. Gießt regelmäßig, besonders an heißen Tagen. Vermeidet Staunässe, da dies zu Wurzelfäule führen kann.
* Sobald die Maispflanzen etwa 10-15 cm hoch sind, könnt ihr die schwächsten Pflanzen entfernen, sodass nur die stärkste Pflanze pro Stelle übrig bleibt.
* Düngt die Maispflanzen regelmäßig mit einem Langzeitdünger oder Flüssigdünger. Beachtet dabei die Anweisungen auf der Verpackung.
* Kontrolliert die Pflanzen regelmäßig auf Schädlinge und Krankheiten. Bei Bedarf könnt ihr biologische Schädlingsbekämpfungsmittel einsetzen.
* Wenn die Maispflanzen sehr hoch werden, könnt ihr sie mit Stäben oder Bambusrohren stützen, um zu verhindern, dass sie bei starkem Wind umknicken.
Zusätzliche Tipps für den erfolgreichen Maisanbau auf Beton:
* Die richtige Maissorte wählen: Wie bereits erwähnt, sind Zwergmaissorten oder spezielle Topfmaissorten ideal für den Anbau in Gefäßen. Sie bleiben kleiner und sind besser an die Bedingungen im Topf angepasst. Informiert euch im Gartencenter oder online über die verschiedenen Sorten und wählt diejenige aus, die am besten zu euren Bedürfnissen und Vorlieben passt.
* Die Bedeutung der Bestäubung: Mais ist windbestäubt, das heißt, der Pollen muss von den männlichen Blüten (den Fahnen oben an der Pflanze) zu den weiblichen Blüten (den Seidenfäden an den Kolben) gelangen. Wenn ihr nur wenige Maispflanzen habt, kann es schwierig sein, eine ausreichende Bestäubung zu gewährleisten. Ihr könnt die Bestäubung unterstützen, indem ihr die Pflanzen leicht schüttelt oder den Pollen mit einem Pinsel von den Fahnen auf die Seidenfäden übertragt.
* Mulchen für mehr Feuchtigkeit und weniger Unkraut: Eine Mulchschicht aus Stroh, Holzhackschnitzeln oder Rasenschnitt hilft, die Feuchtigkeit im Boden zu halten und Unkraut zu unterdrücken. Außerdem schützt der Mulch den Boden vor starker Sonneneinstrahlung und verhindert, dass er zu schnell austrocknet.
* Regelmäßiges Gießen ist entscheidend: Maispflanzen brauchen viel Wasser, besonders während der Wachstums- und Blütezeit. Achtet darauf, die Erde regelmäßig zu gießen, besonders an heißen Tagen. Überprüft die Feuchtigkeit der Erde, indem ihr mit dem Finger etwa 2-3 cm tief in die Erde stecht. Wenn sich die Erde trocken anfühlt, ist es Zeit zu gießen.
* Düngen für eine reiche Ernte: Mais ist ein Starkzehrer und benötigt viele Nährstoffe, um gut zu wachsen und eine reiche Ernte zu produzieren. Düngt die Pflanzen regelmäßig mit einem Langzeitdünger oder Flüssigdünger. Beachtet dabei die Anweisungen auf der Verpackung. Eine gute Düngung sorgt für kräftige Pflanzen und gut gefüllte Maiskolben.
* Schutz vor Schädlingen und Krankheiten: Kontrolliert die Maispflanzen regelmäßig auf Schädlinge und Krankheiten. Häufige Schädlinge sind Maiszünsler, Blattläuse und Schnecken. Bei Bedarf könnt ihr biologische Schädlingsbekämpfungsmittel einsetzen. Achtet auch auf Anzeichen von Krankheiten wie Maisbeulenbrand oder Rost. Entfernt befallene Blätter oder Pflanzen, um die Ausbreitung der Krankheit zu verhindern.
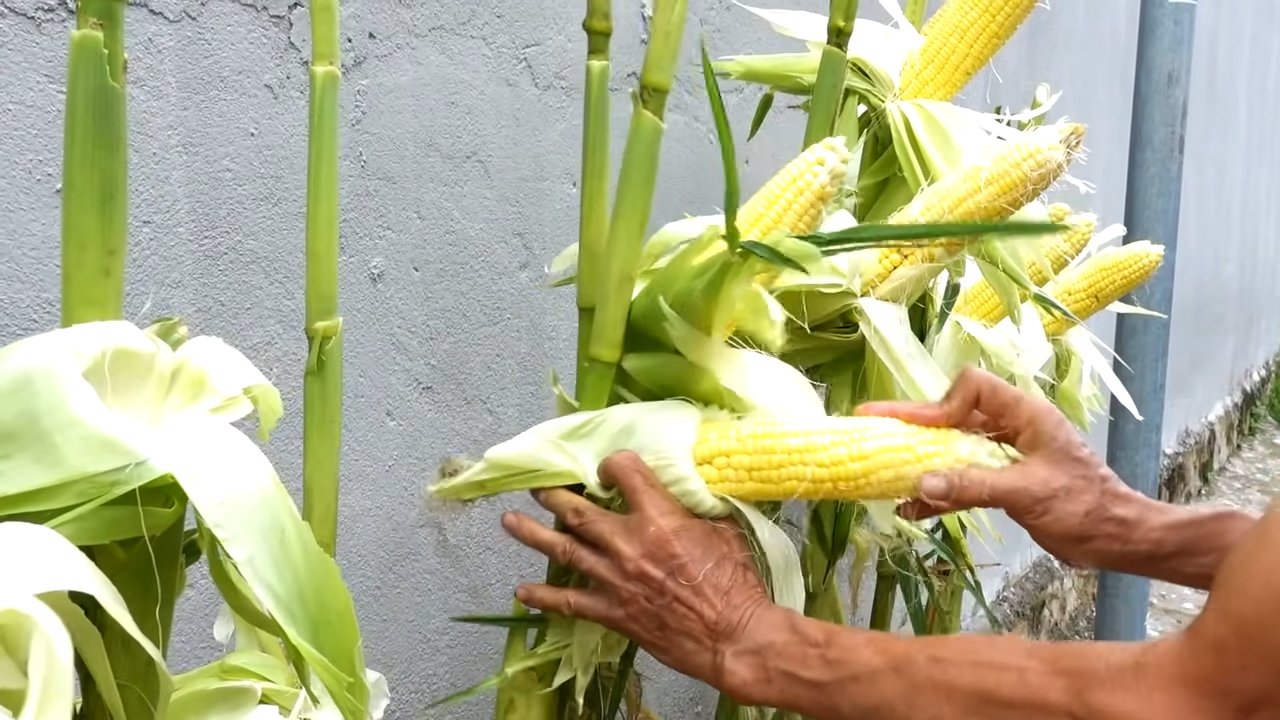
* Die Erntezeit erkennen: Die Maiskolben sind reif, wenn die Seidenfäden braun und trocken sind und die Kolben sich prall anfühlen. Drückt mit dem Fingernagel auf ein Korn. Wenn eine milchige Flüssigkeit austritt, ist der Mais reif. Erntet die Kolben, indem ihr sie vorsichtig von der Pflanze dreht.
* Kreative Gestaltungsmöglichkeiten: Der Maisanbau auf Beton bietet viele kreative Gestaltungsmöglichkeiten. Ihr könnt die Pflanzgefäße mit bunten Farben bemalen oder mit Mosaiken verzieren. Ihr könnt auch verschiedene Maissorten anbauen, um ein abwechslungsreiches Bild zu schaffen. Oder ihr kombiniert den Maisanbau mit anderen Pflanzen wie Bohnen oder Kürbis, um ein sogenanntes “Three Sisters”-Beet zu gestalten.
Häufige Fehler vermeiden:
* Zu kleine Pflanzgefäße: Wie bereits erwähnt, brauchen Maispflanzen viel Platz, um ihre Wurzeln zu entwickeln. Zu kleine Pflanzgefäße führen zu kümmerlichem Wachstum und geringen Erträgen.
* Mangelnde Drainage: Staunässe ist Gift für Maispflanzen. Achtet darauf, dass die Pflanzgefäße eine gute Drainage haben, damit überschüssiges Wasser ablaufen kann.
* Falsche Erde: Eine nährstoffarme Erde führt zu Mangelerscheinungen und schwachen Pflanzen. Verwendet eine hochwertige Pflanzerde, die reich an Nährstoffen ist.
* Zu wenig Sonne: Mais braucht viel Sonne, um gut zu wachsen. Stellt die Pflanzgefäße
Conclusion
So, there you have it! Growing corn on concrete might sound like an impossible feat, a horticultural oxymoron, but with this DIY trick, it’s surprisingly achievable. We’ve debunked the myth that you need acres of fertile soil to enjoy the sweet taste of homegrown corn. This method, born out of necessity and ingenuity, opens up the possibility of fresh corn on the cob to apartment dwellers, urban gardeners with limited space, and anyone facing challenging soil conditions.
Why is this DIY trick a must-try? Because it’s empowering! It allows you to take control of your food source, even in the most unconventional environments. Imagine the satisfaction of harvesting plump, juicy ears of corn from your balcony or patio, knowing you nurtured them from seed to table. It’s a conversation starter, a testament to your resourcefulness, and a delicious reward all rolled into one.
Beyond the sheer novelty, this method offers practical benefits. It’s a fantastic way to recycle containers, turning discarded buckets and tubs into thriving mini-farms. It minimizes weeding, as the concrete surface prevents unwanted growth. And it allows for precise control over soil composition and watering, ensuring your corn receives the optimal nutrients for healthy growth.
Don’t be afraid to experiment with variations! Try different corn varieties to see which thrives best in your specific microclimate. Consider adding companion plants like beans or squash to your containers to create a miniature Three Sisters garden. You can also adjust the soil mix to suit your local conditions, adding more compost or perlite as needed.
Ready to embark on your concrete corn-growing adventure? We encourage you to give this DIY trick a try. It’s a fun, rewarding, and surprisingly simple way to enjoy fresh, homegrown corn, no matter where you live. And most importantly, don’t forget to share your experiences! We’d love to hear about your successes, challenges, and any modifications you make to the method. Post pictures of your concrete corn patch on social media, tag us, and let’s inspire others to embrace the possibilities of urban gardening. Let’s prove that with a little creativity and determination, you really can grow corn on concrete!
Frequently Asked Questions (FAQ)
What type of corn is best for growing on concrete?
While you can technically grow any type of corn in containers, smaller varieties like sweet corn and popcorn tend to be more successful. These varieties generally have shorter stalks and require less space, making them well-suited for container gardening. Look for “early maturing” varieties, as they will have a shorter growing season, which is beneficial in container environments. Consider researching specific cultivars known for their adaptability to container growing. Some dwarf varieties are specifically bred for smaller spaces.
What size container do I need for growing corn on concrete?
The size of the container is crucial for successful corn growth. Each corn stalk needs adequate space for its roots to develop. A minimum of 12 inches in diameter and 12 inches deep is recommended for each stalk. However, larger containers, such as 5-gallon buckets or larger tubs, are preferable, especially if you plan to grow multiple stalks in the same container. Remember that corn is a heavy feeder, and larger containers provide more soil volume to support their nutrient needs. Ensure the container has drainage holes to prevent waterlogging.
What type of soil should I use for growing corn on concrete?
The ideal soil mix for growing corn in containers should be well-draining, nutrient-rich, and slightly acidic to neutral (pH 6.0-7.0). A good starting point is a mix of equal parts potting soil, compost, and perlite or vermiculite. The potting soil provides a base for the mix, the compost adds essential nutrients and improves water retention, and the perlite or vermiculite enhances drainage and aeration. You can also add a slow-release fertilizer to the mix to provide a steady supply of nutrients throughout the growing season. Avoid using garden soil, as it can be too heavy and compact for container gardening.
How often should I water my corn growing on concrete?
Corn requires consistent moisture, especially during germination and ear development. Water deeply whenever the top inch of soil feels dry to the touch. The frequency of watering will depend on the weather conditions, the size of the container, and the type of soil mix you’re using. In hot, sunny weather, you may need to water daily, while in cooler, cloudy weather, you may only need to water every few days. Avoid overwatering, as this can lead to root rot. Ensure the container has adequate drainage to prevent water from pooling at the bottom.
How much sunlight does corn need when growing on concrete?
Corn is a sun-loving plant and requires at least 6-8 hours of direct sunlight per day to thrive. Choose a location for your containers that receives ample sunlight throughout the day. If you live in a particularly hot climate, you may need to provide some afternoon shade to prevent the plants from overheating. If you don’t have access to enough natural sunlight, you can supplement with grow lights.
How do I pollinate corn growing on concrete?
Corn is wind-pollinated, meaning that pollen from the tassels (male flowers) at the top of the plant needs to reach the silks (female flowers) on the ears. In a container environment, where there may be limited wind, you may need to hand-pollinate your corn. To do this, gently shake the tassels over the silks, or use a small paintbrush to collect pollen from the tassels and apply it to the silks. Repeat this process every day for several days to ensure adequate pollination. You’ll know pollination has been successful when the silks turn brown and dry.
What are some common pests and diseases that affect corn growing on concrete?
Common pests that can affect corn include aphids, corn earworms, and spider mites. Diseases include fungal infections like rust and smut. Regularly inspect your plants for signs of pests or diseases. If you find any, treat them promptly with appropriate organic pesticides or fungicides. You can also prevent pests and diseases by providing good air circulation, avoiding overwatering, and removing any infected leaves or stalks.
How long does it take to grow corn on concrete?
The time it takes to grow corn from seed to harvest varies depending on the variety, the growing conditions, and the climate. Generally, it takes about 60-100 days for sweet corn to mature. Popcorn varieties may take longer. Check the seed packet for specific information on the maturity date of your chosen variety.
How do I know when my corn is ready to harvest when growing on concrete?
There are several indicators that your corn is ready to harvest. The silks will turn brown and dry, the ears will feel plump and full, and the kernels will be milky when pierced with a fingernail. For sweet corn, harvest when the kernels are still slightly immature, as they will become tougher and less sweet as they mature. For popcorn, allow the ears to dry completely on the stalk before harvesting.
Can I grow other vegetables in the same container as corn on concrete?
Yes, you can practice companion planting by growing other vegetables in the same container as corn. Good companion plants for corn include beans, squash, and cucumbers. These plants can help to improve soil fertility, suppress weeds, and deter pests. Avoid planting vegetables that compete with corn for nutrients or sunlight, such as tomatoes or peppers. Remember to provide adequate space for all plants to grow and thrive.

Leave a Comment