
Growing Fennel at Home can seem daunting, but trust me, it’s more rewarding than you might think! Imagine stepping outside your back door and snipping fresh, fragrant fennel fronds to add a burst of anise-like flavor to your salads, soups, or even grilled fish. Forget those sad, wilted bulbs at the grocery store – we’re talking about vibrant, homegrown goodness right at your fingertips.
Fennel has a rich history, dating back to ancient Greece and Rome, where it was prized for its medicinal properties and culinary uses. The Romans even believed it granted strength and longevity! Today, while we might not be seeking immortality through fennel, its culinary appeal remains strong. But why buy it when you can easily cultivate your own?
Let’s face it, fresh herbs and vegetables from the garden simply taste better. Plus, growing fennel at home allows you to control exactly what goes into your food, avoiding harmful pesticides and ensuring peak freshness. This DIY guide will walk you through every step, from choosing the right variety to harvesting your bounty. Whether you have a sprawling garden or just a sunny windowsill, I’ll show you how to successfully grow this versatile herb and vegetable. Get ready to unlock the secrets to a thriving fennel patch – you’ll be amazed at how easy and satisfying it is!
Growing Fennel at Home: A Beginner’s Guide
Hey there, fellow gardening enthusiasts! I’m so excited to share my experience with growing fennel at home. It’s surprisingly easy, and the rewards are fantastic – fresh, flavorful bulbs and feathery fronds for all sorts of culinary adventures. Plus, the beautiful anise-like aroma is just divine! Let’s dive in!
Choosing Your Fennel Variety
Before we get our hands dirty, let’s talk about fennel varieties. There are two main types: bulb fennel (also called Florence fennel) and herb fennel.
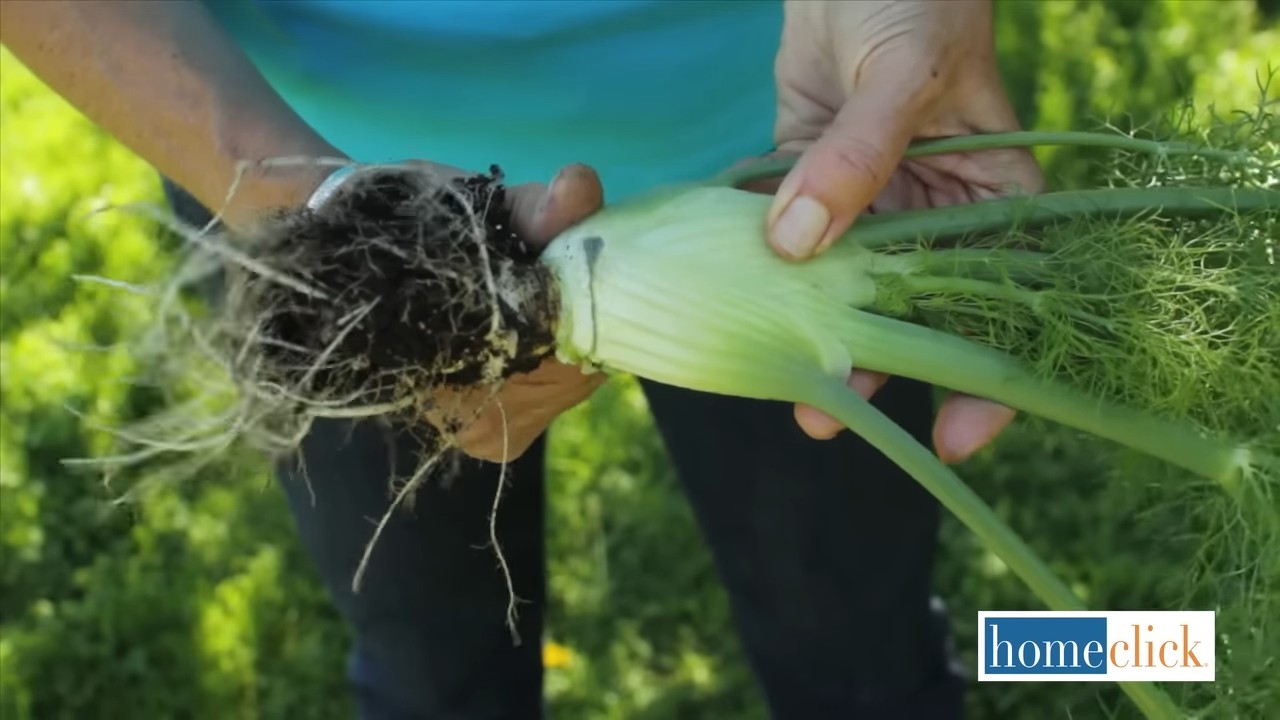
* **Bulb Fennel:** This is the one you’re probably thinking of – the one with the swollen, bulbous base that you can slice and roast, grill, or eat raw. Popular varieties include ‘Florence’, ‘Perfection’, and ‘Rondo’.
* **Herb Fennel:** This type is grown primarily for its leaves and seeds. It doesn’t form a large bulb. Bronze fennel is a particularly attractive variety with beautiful, dark foliage.
For this guide, we’ll focus on growing bulb fennel, but the general principles apply to herb fennel as well.
Getting Started: Seeds vs. Transplants
You have two options for starting your fennel: seeds or transplants.
* **Seeds:** Starting from seed is more economical and gives you a wider selection of varieties. However, it requires a bit more patience and attention.
* **Transplants:** Buying transplants from a nursery is quicker and easier, but you’ll have fewer variety choices.
I personally prefer starting from seed, as I love the satisfaction of watching them sprout and grow. But if you’re short on time or want a head start, transplants are a great option.
Timing is Everything: When to Plant
Fennel is a cool-season crop, meaning it thrives in cooler temperatures. Bolting (premature flowering) is a common problem if it gets too hot, which makes the bulb bitter and less desirable.
* **Spring Planting:** In most regions, the best time to plant fennel is in early spring, about 2-3 weeks before the last expected frost.
* **Fall Planting:** You can also plant fennel in the fall for a winter or early spring harvest in milder climates.
Check your local frost dates to determine the best planting time for your area. I usually start my seeds indoors about 6-8 weeks before the last frost, then transplant them outdoors when the weather warms up.
Preparing the Soil: A Happy Home for Fennel
Fennel needs well-drained, fertile soil to thrive. Here’s how to prepare your garden bed:
* **Choose a Sunny Spot:** Fennel needs at least 6-8 hours of sunlight per day.
* **Amend the Soil:** Incorporate plenty of compost or well-rotted manure into the soil to improve drainage and fertility.
* **Check the pH:** Fennel prefers a slightly acidic to neutral soil pH (around 6.0-7.0). You can test your soil pH with a home testing kit or send a sample to your local extension office.
Step-by-Step Guide: Planting Fennel from Seed
Alright, let’s get planting! Here’s my tried-and-true method for starting fennel from seed:
1. **Start Seeds Indoors (Optional):** Fill seed trays or small pots with seed-starting mix. Sow seeds about ¼ inch deep and gently water. Keep the soil moist but not soggy. Place the trays in a warm, sunny location or under grow lights.
2. **Direct Sow Seeds (Alternative):** If you prefer to direct sow, wait until the soil has warmed up to at least 50°F (10°C). Sow seeds about ½ inch deep and 2-3 inches apart in rows.
3. **Thin Seedlings:** Once the seedlings have emerged and have a few true leaves, thin them to about 8-12 inches apart. This will give them enough space to grow and develop.
4. **Harden Off Seedlings (If Starting Indoors):** Before transplanting your seedlings outdoors, you need to “harden them off.” This means gradually exposing them to outdoor conditions over a period of 1-2 weeks. Start by placing them in a sheltered spot for a few hours each day, gradually increasing the amount of time they spend outdoors.
5. **Transplant Seedlings (If Starting Indoors):** Once the seedlings are hardened off, transplant them into your prepared garden bed, spacing them about 8-12 inches apart.
6. **Water Thoroughly:** After planting, water the seedlings thoroughly to help them establish.
Step-by-Step Guide: Planting Fennel Transplants
If you’re using transplants, the process is even simpler:
1. **Prepare the Planting Hole:** Dig a hole that is slightly larger than the root ball of the transplant.
2. **Remove the Transplant from its Container:** Gently remove the transplant from its container, being careful not to damage the roots.
3. **Loosen the Roots:** Gently loosen the roots of the transplant before planting.
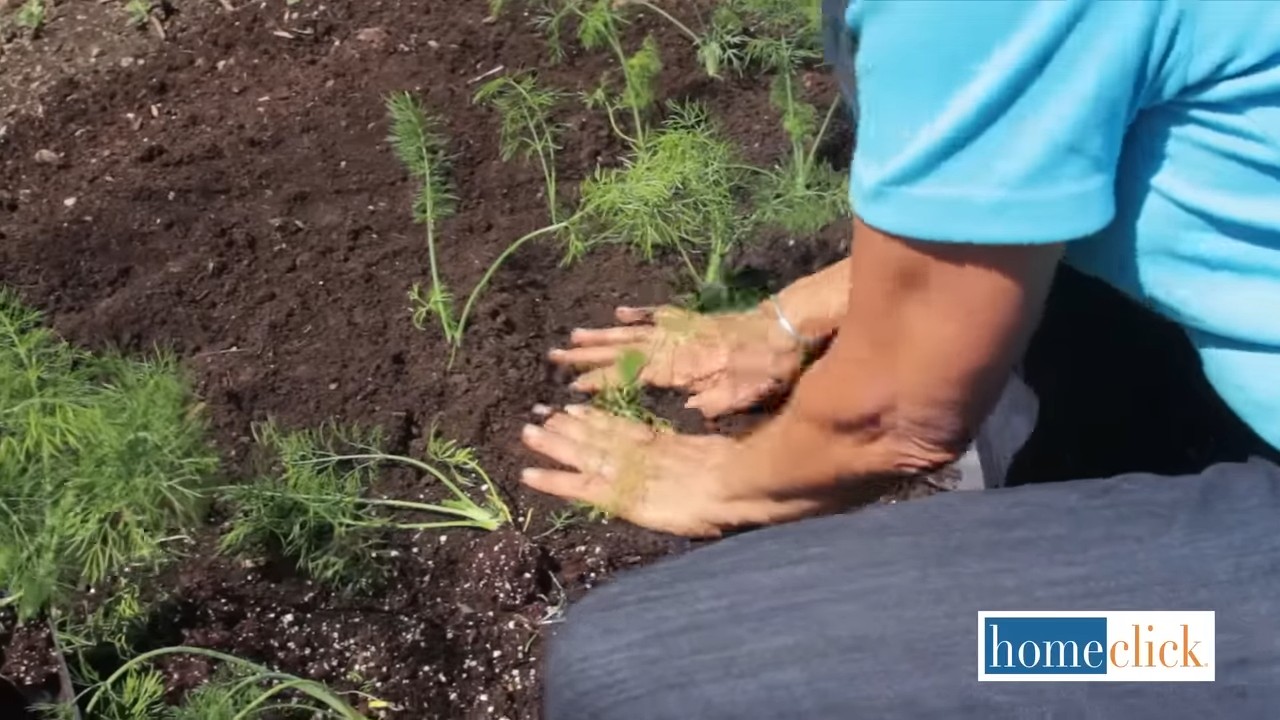
4. **Place the Transplant in the Hole:** Place the transplant in the hole, making sure that the top of the root ball is level with the soil surface.
5. **Fill the Hole with Soil:** Fill the hole with soil and gently firm it around the base of the plant.
6. **Water Thoroughly:** Water the transplant thoroughly to help it establish.
Caring for Your Fennel Plants: Watering, Weeding, and Feeding
Once your fennel plants are in the ground, it’s important to provide them with proper care to ensure a bountiful harvest.
* **Watering:** Fennel needs consistent moisture, especially during hot, dry weather. Water deeply whenever the top inch of soil feels dry. Avoid overhead watering, as this can promote fungal diseases.
* **Weeding:** Keep the area around your fennel plants free of weeds, which can compete for nutrients and water. Hand-pull weeds regularly or use a hoe to cultivate the soil.
* **Fertilizing:** Fennel is a moderate feeder. You can fertilize your plants every few weeks with a balanced organic fertilizer. Avoid over-fertilizing, as this can lead to excessive foliage growth at the expense of bulb development. I like to use a liquid seaweed fertilizer diluted in water.
* **Mulching:** Apply a layer of mulch around your fennel plants to help retain moisture, suppress weeds, and regulate soil temperature. Straw, wood chips, or shredded leaves are all good options.
Preventing Bolting: Keeping Your Fennel Happy
As I mentioned earlier, bolting is a common problem with fennel, especially in hot weather. Here are some tips to prevent bolting:
* **Choose Bolt-Resistant Varieties:** Some fennel varieties are more resistant to bolting than others. Look for varieties that are specifically bred for hot weather.
* **Plant at the Right Time:** Avoid planting fennel during the hottest part of the year. Plant in early spring or late summer for a fall harvest.
* **Provide Shade:** If you live in a hot climate, consider providing your fennel plants with some afternoon shade. You can use shade cloth or plant them near taller plants that will provide some protection from the sun.
* **Water Regularly:** Consistent moisture is essential for preventing bolting. Make sure to water your fennel plants deeply and regularly, especially during hot weather.
* **Harvest Promptly:** Once the bulb has reached a good size, harvest it promptly to prevent it from bolting.
Pest and Disease Control: Keeping Your Fennel Healthy
Fennel is generally a relatively pest-free plant, but there are a few common pests and diseases to watch out for:
* **Aphids:** These tiny insects can suck the sap from your fennel plants, causing them to weaken and become distorted. You can control aphids with insecticidal soap or by introducing beneficial insects like ladybugs.
* **Fennel Bulb Fly:** This pest lays its eggs on the fennel bulb, and the larvae burrow into the bulb, causing it to rot. You can prevent fennel bulb fly by covering your plants with row covers.
* **Downy Mildew:** This fungal disease can cause yellow spots on the leaves of your fennel plants. You can prevent downy mildew by providing good air circulation and avoiding overhead watering.
If you notice any signs of pests or diseases, take action promptly to prevent them from spreading. Organic pest control methods are always the best option.
Harvesting Your Fennel: Enjoying the Fruits (and Bulbs!) of Your Labor
The best part of growing fennel is, of course, the harvest!
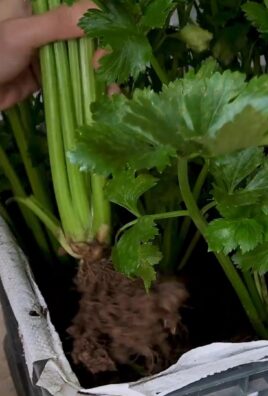
* **When to Harvest:** You can harvest the bulb when it reaches about 3-4 inches in diameter. The exact timing will depend on the variety and growing conditions.
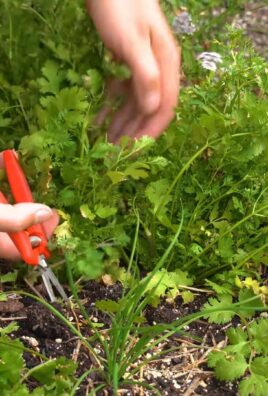
* **How to Harvest:** To harvest the bulb, use a sharp knife to cut it off at the base of the plant. You can also harvest the fronds (leaves) at any time. Simply snip them off with scissors or pruning shears.
* **Storing Fennel:** Store fennel bulbs in the refrigerator for up to a week. Wrap them in plastic wrap or place them in a plastic bag to prevent them from drying out. You can also
Conclusion
So, there you have it! Growing fennel at home is not only achievable, but it’s also a deeply rewarding experience that brings the fresh, anise-flavored goodness of this versatile herb directly to your kitchen. We’ve walked through the process, from selecting the right variety and preparing your soil to nurturing your plants and harvesting both the bulb and the fronds.
Why is this DIY trick a must-try? Because store-bought fennel simply can’t compare to the vibrant flavor and freshness of homegrown. Imagine adding freshly chopped fennel fronds to your salads, using the bulb in a creamy gratin, or even grilling it for a smoky, caramelized side dish. The possibilities are endless! Plus, you’ll have the satisfaction of knowing exactly where your food comes from and that it’s free from harmful pesticides.
But the benefits extend beyond just flavor. Growing your own fennel is a sustainable practice that reduces your carbon footprint and connects you with nature. It’s a therapeutic activity that can relieve stress and boost your mood. And let’s not forget the beautiful, feathery foliage that adds a touch of elegance to your garden.
Ready to take your fennel game to the next level? Consider these variations:
* **Bronze Fennel:** For a stunning visual impact, try growing bronze fennel. Its dark, coppery foliage adds a dramatic touch to any garden and offers a slightly sweeter flavor than green fennel.
* **Florence Fennel ‘Romanesco’:** If you’re primarily interested in the bulb, this variety is known for its large, round bulbs and excellent flavor.
* **Companion Planting:** Plant fennel near dill, chamomile, or yarrow to attract beneficial insects and improve pollination. However, avoid planting it near tomatoes, beans, or peppers, as it can inhibit their growth.
Don’t be intimidated if you’re a beginner gardener. Growing fennel at home is surprisingly easy, and with a little patience and care, you’ll be enjoying a bountiful harvest in no time. Remember to provide your plants with plenty of sunlight, well-drained soil, and regular watering. Keep an eye out for pests and diseases, and take action promptly if you notice any problems.
We encourage you to embark on this culinary adventure and discover the joys of growing your own fennel. It’s a simple yet profound way to enhance your cooking, connect with nature, and live a more sustainable lifestyle.
Now, we want to hear from you! Have you tried growing fennel at home? What are your favorite tips and tricks? Share your experiences in the comments below. We can’t wait to learn from your successes and help you troubleshoot any challenges you may encounter. Let’s create a community of fennel enthusiasts and inspire others to embrace the joys of homegrown goodness!
Frequently Asked Questions (FAQ)
What is the best time of year to plant fennel?
The ideal time to plant fennel depends on your climate. In regions with mild winters, you can sow seeds directly into the ground in early spring or late summer. In colder climates, it’s best to start seeds indoors 6-8 weeks before the last expected frost and transplant them outdoors once the weather warms up. Aim for soil temperatures above 60°F (15°C) for optimal germination.
How much sunlight does fennel need?
Fennel thrives in full sun, requiring at least 6-8 hours of direct sunlight per day. Insufficient sunlight can result in leggy growth and reduced bulb development. Choose a sunny location in your garden or, if growing in containers, place them in a spot that receives ample sunlight.
What type of soil is best for growing fennel?
Fennel prefers well-drained soil that is rich in organic matter. Amend your soil with compost or aged manure before planting to improve its fertility and drainage. A slightly acidic to neutral soil pH (6.0-7.0) is ideal. Avoid heavy clay soils, as they can retain too much moisture and lead to root rot.
How often should I water my fennel plants?
Water your fennel plants regularly, especially during dry periods. Keep the soil consistently moist but not waterlogged. Water deeply at the base of the plants, avoiding wetting the foliage, which can increase the risk of fungal diseases. Mulching around the plants can help retain moisture and suppress weeds.
How do I harvest fennel?
You can harvest fennel fronds at any time once the plants are established. Simply snip off the fronds as needed. For the bulb, wait until it reaches a desirable size, typically 2-3 inches in diameter. To harvest the bulb, loosen the soil around the base of the plant and gently pull it up. You can also harvest fennel seeds once the flower heads have dried and turned brown. Cut the flower heads and hang them upside down in a paper bag to dry completely. Then, shake the bag to release the seeds.
What are some common pests and diseases that affect fennel?
Fennel can be susceptible to aphids, slugs, snails, and carrot root flies. Inspect your plants regularly and take action promptly if you notice any pests. You can use insecticidal soap or neem oil to control aphids. Handpick slugs and snails or use beer traps. Protect your plants from carrot root flies by covering them with netting. Fennel can also be affected by fungal diseases such as powdery mildew and root rot. Ensure good air circulation and avoid overwatering to prevent these diseases.
Can I grow fennel in containers?
Yes, fennel can be successfully grown in containers. Choose a large container that is at least 12 inches deep and wide to accommodate the plant’s root system. Use a well-draining potting mix and ensure the container has drainage holes. Water regularly and fertilize every few weeks with a balanced fertilizer.
Is fennel a perennial or an annual?
Fennel is technically a short-lived perennial in zones 4-9, but it is often grown as an annual, especially in colder climates. In warmer regions, it may survive for several years, but its bulb production may decline after the first year.
How do I prevent fennel from bolting (going to seed)?
Bolting is when a plant prematurely flowers and goes to seed, which can affect the flavor and texture of the bulb. To prevent bolting, provide your fennel plants with consistent moisture, avoid stressing them with extreme temperatures, and harvest the bulb before it becomes too large.
Can I eat the entire fennel plant?
Yes, the entire fennel plant is edible, including the bulb, fronds, stalks, and seeds. The bulb is typically eaten raw or cooked, while the fronds are used as a herb to flavor dishes. The stalks can be used in soups and stews, and the seeds are used as a spice.
Leave a Comment