
Grow potatoes at home, even if you think you don’t have the space! Imagine harvesting your own fresh, earthy potatoes right from your backyard (or even your balcony!). There’s something incredibly satisfying about nurturing a plant from seed (or in this case, a sprouted potato!) to table. For centuries, potatoes have been a staple food source, particularly in regions with challenging climates. From the Inca civilization in the Andes to the Irish potato famine, the humble potato has played a significant role in shaping history and cultures around the globe.
But let’s be honest, most of us aren’t growing potatoes to survive a famine! We’re doing it because it’s fun, rewarding, and gives us access to incredibly fresh produce. Plus, store-bought potatoes just can’t compare to the flavor of homegrown ones. This DIY guide is packed with simple tricks and hacks to help you grow potatoes at home successfully, regardless of your gardening experience. I’ll show you how to maximize your yield, deal with common pests, and even grow potatoes in containers if you’re short on space. So, grab your gardening gloves, and let’s get started on this exciting journey to potato-growing success!
Grow Your Own Potatoes: A Beginner’s Guide to Spud-tastic Success!
Hey there, fellow gardening enthusiasts! Ever dreamt of digging up your own fresh, flavorful potatoes right in your backyard? Well, dream no more! Growing potatoes at home is surprisingly easy and incredibly rewarding. I’m going to walk you through the whole process, from choosing the right potatoes to harvesting your bounty. Get ready to get your hands dirty!
Choosing Your Seed Potatoes
First things first, you can’t just plant any old potato from the grocery store. You need “seed potatoes.” These are potatoes specifically grown for planting, and they’re certified disease-free.
* Where to Find Them: Local nurseries, garden centers, and online seed suppliers are your best bet.
* Variety is the Spice of Life (and Potatoes!): Consider what kind of potatoes you enjoy eating. Russets are great for baking and fries, Yukon Golds are creamy and delicious, and red potatoes are perfect for boiling and salads. Experiment!
* Size Matters (Sort Of): You don’t need huge seed potatoes. In fact, smaller ones are often better. If you have larger seed potatoes, you can cut them into pieces, making sure each piece has at least one or two “eyes” (those little buds that sprout).
* Organic is Awesome: If you’re aiming for organic potatoes, make sure your seed potatoes are certified organic too.
Sprouting (Chitting) Your Seed Potatoes
This step isn’t strictly necessary, but it gives your potatoes a head start and can lead to an earlier harvest. “Chitting” simply means encouraging the potatoes to sprout before planting.
* Timing is Key: Start chitting about 4-6 weeks before your last expected frost.
* The Setup: Place your seed potatoes in a cool, bright, frost-free location. Egg cartons or trays work perfectly.
* Eyes Up: Position the potatoes with the “eyes” facing upwards.
* Patience is a Virtue: Over the next few weeks, you’ll see small, green sprouts emerging. Don’t worry if they look a little weird – that’s perfectly normal!
Preparing Your Potato Patch
Potatoes need plenty of sunshine and well-drained soil. Here’s how to get your garden ready:
* Sun’s Out, Spuds Out: Choose a spot that gets at least 6-8 hours of direct sunlight per day.
* Soil Matters: Potatoes prefer slightly acidic soil with a pH between 6.0 and 6.8. Amend your soil with compost or well-rotted manure to improve drainage and fertility.
* Loosen Up: Dig deep! Potatoes need loose soil to grow properly. Till or dig the soil to a depth of at least 12 inches.
* Ridges or Rows: You can plant potatoes in rows or in raised ridges. Ridges are particularly helpful in areas with heavy clay soil, as they improve drainage.
Planting Your Seed Potatoes
Now for the fun part! Time to get those potatoes in the ground.
1. Dig Your Trenches (or Holes): If planting in rows, dig trenches about 6-8 inches deep and 2-3 feet apart. If planting in individual holes, dig them about 6-8 inches deep and 12 inches apart.
2. Space Them Out: Place your seed potatoes (or cut pieces) in the trenches or holes, with the sprouts facing upwards. Space them about 12 inches apart.
3. Cover Them Up: Gently cover the seed potatoes with soil.
4. Water Well: Give your newly planted potatoes a good watering.
Hilling Your Potatoes
This is a crucial step for maximizing your potato harvest. “Hilling” involves gradually mounding soil around the potato plants as they grow. This encourages the plants to produce more potatoes along the buried stems.
* When to Hill: When the potato plants are about 6-8 inches tall, it’s time to start hilling.
* How to Hill: Use a hoe or shovel to gently pull soil from between the rows and mound it around the base of the plants, covering the lower part of the stems. Leave the top few inches of the plant exposed.
* Repeat as Needed: Continue hilling every few weeks as the plants grow, until you have a mound of soil about 12 inches high around each plant.
Watering and Fertilizing
Potatoes need consistent moisture, especially during tuber formation.
* Watering Wisely: Water deeply and regularly, especially during dry spells. Aim for about 1-2 inches of water per week.
* Fertilizing for Success: Potatoes are heavy feeders. Side-dress your plants with a balanced fertilizer (like 10-10-10) a few weeks after planting and again after hilling. Follow the instructions on the fertilizer package.
* Organic Options: If you prefer organic gardening, use compost tea or fish emulsion to fertilize your potatoes.
Pest and Disease Control
Keep an eye out for common potato pests and diseases.
* Potato Beetles: These pesky beetles can defoliate your plants. Handpick them off or use an organic insecticide like neem oil.
* Fungal Diseases: Blight and other fungal diseases can be a problem, especially in humid climates. Ensure good air circulation around your plants and use a fungicide if necessary.
* Prevention is Key: Choose disease-resistant potato varieties and practice crop rotation to minimize pest and disease problems.
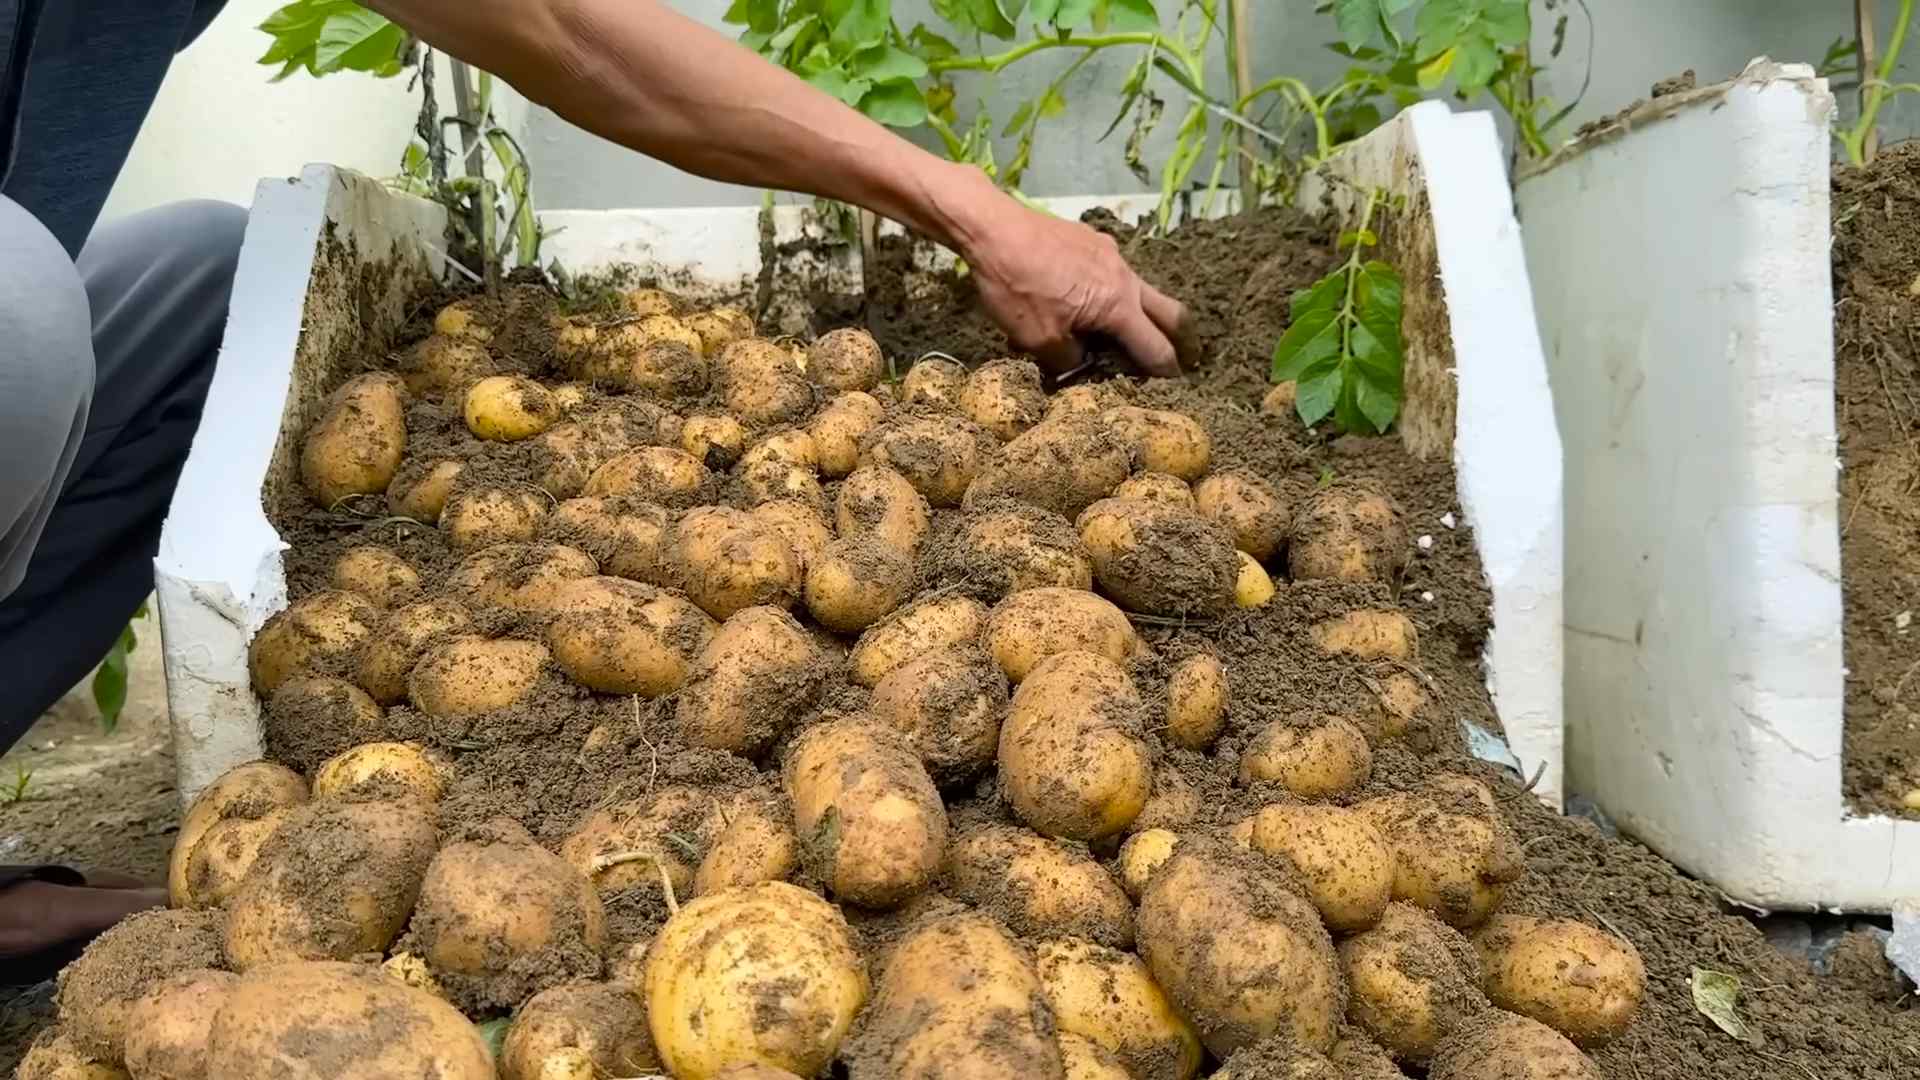
Harvesting Your Potatoes
The moment you’ve been waiting for! Time to reap the rewards of your hard work.
* When to Harvest: You can harvest “new potatoes” (small, tender potatoes) about 2-3 weeks after the plants flower. For mature potatoes, wait until the foliage starts to die back and turn yellow. This usually takes about 80-100 days after planting.
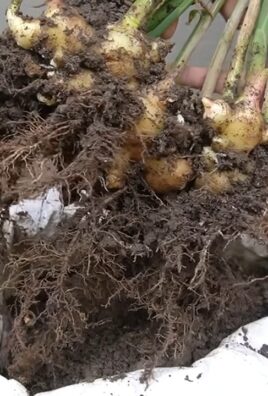
* Digging Them Up: Use a garden fork or shovel to carefully dig around the potato plants, being careful not to damage the tubers.
* Gently Unearth: Gently lift the plants and loosen the soil to reveal the potatoes.
* Curing for Storage: If you plan to store your potatoes, let them dry in a cool, dark, well-ventilated place for a week or two. This “curing” process helps to toughen the skins and prevent rot.
Storing Your Potatoes
Proper storage is essential for keeping your potatoes fresh and delicious.
* Cool, Dark, and Dry: Store your potatoes in a cool (40-50°F), dark, and dry place. A root cellar is ideal, but a cool basement or garage will also work.
* Avoid Sunlight: Exposure to sunlight can cause potatoes to turn green and produce solanine, a toxic compound.
* Don’t Wash Them: Washing potatoes before storing them can encourage rot. Brush off any excess dirt instead.
* Check Regularly: Inspect your stored potatoes regularly and remove any that are showing signs of rot.
Troubleshooting Tips
Even with the best planning, things can sometimes go wrong. Here are a few common potato-growing problems and how to fix them:
* Poor Sprouting: If your seed potatoes aren’t sprouting, make sure they’re getting enough light and warmth. You can also try gently scratching the “eyes” to encourage sprouting.
* Yellowing Leaves: Yellowing leaves can be a sign of nutrient deficiency, overwatering, or disease. Check your soil pH and nutrient levels, adjust your watering schedule, and treat any diseases promptly.
* Small Potatoes: Small potatoes can be caused by overcrowding, poor soil fertility, or insufficient watering. Space your plants properly, fertilize regularly, and water deeply.
* Green Potatoes: As mentioned earlier, green potatoes contain solanine and should not be eaten. Discard any green potatoes.
Beyond the Basics: Advanced Potato Growing Techniques
Once you’ve mastered the basics, you can try some more advanced techniques to boost your potato harvest:
* Succession Planting: Plant potatoes every few weeks to extend your harvest season.
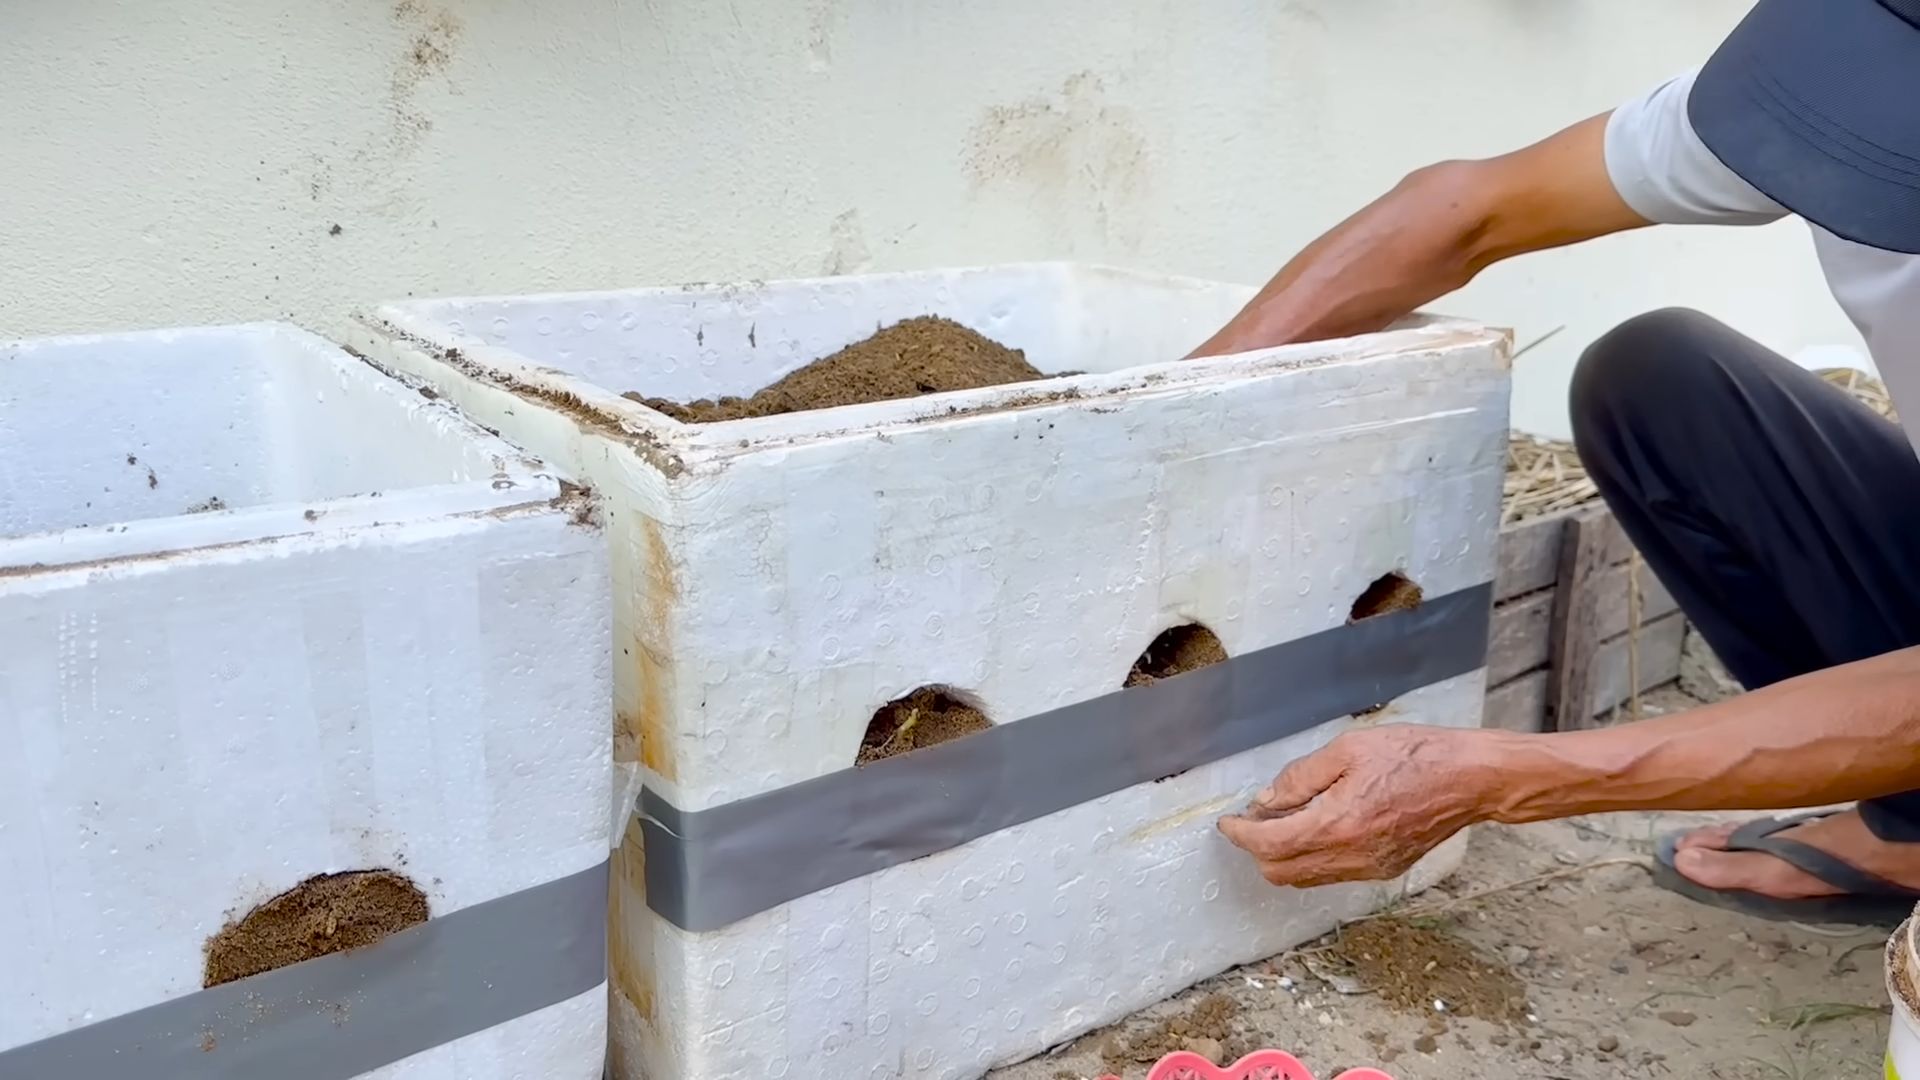
* Growing in Containers: Potatoes can be grown in large containers or grow bags. This is a great option for gardeners with limited space.
* Using Cover Crops: Plant cover crops like buckwheat or rye in the fall to improve soil health and suppress weeds.
* Companion Planting: Plant potatoes alongside beneficial companion plants like beans, cabbage, or marigolds.
Enjoying Your Homegrown Potatoes
Congratulations! You’ve successfully grown your own potatoes. Now it’s time to enjoy the fruits (or rather, tubers) of your labor.
* Fresh is Best: Homegrown potatoes taste amazing, especially when they’re freshly dug.
* Endless Possibilities: From mashed potatoes to roasted potatoes to potato salad, the possibilities are endless.
* Share the Bounty: Share
Conclusion
So, there you have it! Growing potatoes at home, especially using this simple and effective DIY trick, is more than just a gardening project; it’s a rewarding experience that connects you to your food source and provides you with the freshest, most flavorful potatoes imaginable. Forget those bland, store-bought spuds – imagine the taste of freshly dug, homegrown potatoes gracing your dinner table. This method, focusing on maximizing yield in a small space, is a game-changer for urban gardeners, apartment dwellers with balconies, or anyone looking to supplement their grocery shopping with homegrown goodness.
Why is this DIY potato growing trick a must-try? Firstly, it’s incredibly space-efficient. The vertical growing technique, whether you choose a potato tower, a fabric grow bag, or even a repurposed container, allows you to cultivate a significant number of potatoes in a fraction of the space required by traditional in-ground planting. Secondly, it’s cost-effective. You can start with seed potatoes (or even potatoes that have sprouted in your pantry!), readily available soil, and recycled containers. The initial investment is minimal, and the return – a bountiful harvest of delicious potatoes – is substantial. Thirdly, it’s incredibly satisfying. There’s nothing quite like the thrill of unearthing your own potatoes, knowing that you nurtured them from tiny sprouts to plump, earthy treasures.
But the benefits don’t stop there. Growing your own potatoes allows you to control the entire process, from the type of soil you use to the fertilizers you apply (or don’t apply!). This means you can ensure your potatoes are grown organically and free from harmful chemicals. You’ll also have access to varieties that are rarely found in supermarkets, opening up a world of culinary possibilities.
Looking for variations? Absolutely! Experiment with different potato varieties. Russets are great for baking and frying, Yukon Golds are perfect for mashed potatoes, and red potatoes are ideal for boiling and salads. You can also try adding different amendments to your soil, such as compost or bone meal, to boost nutrient levels and improve drainage. Consider companion planting – marigolds can help deter pests, while basil can improve the flavor of your potatoes. For those in colder climates, starting your potatoes indoors a few weeks before the last frost can give them a head start. You can even try growing potatoes in straw bales for a unique and visually appealing garden feature.
Don’t be intimidated! This DIY potato growing trick is surprisingly easy to master, even for beginners. The key is to provide your potatoes with plenty of sunlight, well-draining soil, and consistent moisture. Remember to “hill” the potatoes as they grow, covering the stems with soil to encourage more tuber formation. And be patient! It takes time for potatoes to mature, but the wait is well worth it.
We wholeheartedly encourage you to give this DIY potato growing trick a try. It’s a fun, rewarding, and sustainable way to enjoy fresh, delicious potatoes right from your own backyard (or balcony!). Once you’ve harvested your first crop, we’d love to hear about your experience. Share your photos, tips, and tricks in the comments below. Let’s build a community of home potato growers and inspire others to embrace the joy of homegrown food! Let us know what variety of potato you grew and any challenges you faced. Your insights can help others succeed in their own potato-growing adventures. Happy growing!
Frequently Asked Questions (FAQ)
What kind of container should I use for growing potatoes at home?
The best container for growing potatoes at home depends on your space and preferences. Fabric grow bags are a popular choice because they are lightweight, breathable, and allow for excellent drainage. Plastic containers, such as large buckets or tubs, can also be used, but make sure they have drainage holes to prevent waterlogging. You can even repurpose old tires or build a potato tower using wood or wire mesh. The key is to choose a container that is at least 18 inches deep and wide enough to accommodate the growing potato plants. Remember that darker containers can heat up more quickly in direct sunlight, potentially harming the roots, so consider lighter-colored options or providing shade during the hottest part of the day.
How often should I water my potato plants?
Potato plants need consistent moisture, especially during tuber formation. Water deeply whenever the top inch of soil feels dry to the touch. The frequency of watering will depend on the weather, the type of soil you’re using, and the size of your container. In hot, dry weather, you may need to water daily, while in cooler, wetter weather, you may only need to water every few days. Avoid overwatering, as this can lead to root rot. A good way to check if your potatoes need water is to stick your finger into the soil – if it feels dry, it’s time to water. Also, be mindful of the drainage in your container; excess water should be able to drain freely.
What kind of soil is best for growing potatoes?
Potatoes thrive in well-draining, slightly acidic soil. A mix of equal parts garden soil, compost, and peat moss or coco coir is a good starting point. The soil should be loose and friable to allow the potato tubers to expand easily. Avoid heavy clay soils, as they can become waterlogged and restrict root growth. Adding organic matter, such as compost or well-rotted manure, will improve soil drainage, fertility, and water retention. You can also amend the soil with a slow-release fertilizer specifically formulated for vegetables. Before planting, test the soil pH to ensure it is between 6.0 and 6.5.
How do I “hill” my potato plants?
Hilling is the process of covering the stems of potato plants with soil as they grow. This encourages the formation of more tubers along the buried stems, resulting in a larger harvest. When the potato plants are about 6 inches tall, add a few inches of soil around the base of the stems, leaving the top leaves exposed. Repeat this process every few weeks as the plants grow, until the container is nearly full. Hilling also helps to protect the developing tubers from sunlight, which can cause them to turn green and produce solanine, a toxic compound.
When are my potatoes ready to harvest?
The time it takes for potatoes to mature depends on the variety and growing conditions. Generally, potatoes are ready to harvest when the plants begin to flower or when the foliage starts to turn yellow and die back. You can harvest “new potatoes” (small, immature potatoes) a few weeks after flowering begins. For mature potatoes, wait until the foliage has completely died back before digging them up. Gently loosen the soil around the plants and carefully lift the potatoes out of the ground. Handle them with care to avoid bruising or damaging the skin.
Can I grow potatoes from store-bought potatoes?
Yes, you can grow potatoes from store-bought potatoes, but it’s important to choose organic potatoes that haven’t been treated with sprout inhibitors. Look for potatoes that have already started to sprout “eyes.” Cut the potatoes into pieces, making sure each piece has at least one eye. Allow the cut pieces to dry for a day or two to form a callus, which will help prevent rot. Plant the potato pieces with the eyes facing up, about 4 inches deep in the soil. While store-bought potatoes can work, seed potatoes from a reputable supplier are generally recommended for better results and disease resistance.
What are common pests and diseases that affect potato plants?
Common pests that affect potato plants include aphids, potato beetles, and flea beetles. Diseases include early blight, late blight, and potato scab. To prevent pests and diseases, choose disease-resistant potato varieties, practice crop rotation, and maintain good soil drainage. Inspect your plants regularly for signs of pests or diseases and take action promptly. Organic pest control methods, such as insecticidal soap or neem oil, can be effective for controlling aphids and other pests. For diseases, remove and destroy infected foliage and avoid overhead watering.
Can I grow potatoes in the shade?
Potatoes need at least 6-8 hours of direct sunlight per day to thrive. While they can tolerate some shade, they will not produce as many tubers in shady conditions. Choose a location that receives plenty of sunlight for best results. If you are growing potatoes indoors, use grow lights to supplement natural sunlight.
How do I store my harvested potatoes?
Store harvested potatoes in a cool, dark, and well-ventilated place. The ideal temperature is between 45-50°F (7-10°C). Avoid storing potatoes in the refrigerator, as this can cause them to convert starch to sugar, resulting in a sweet taste. Store potatoes in a breathable container, such as a burlap sack or a cardboard box with holes. Do not wash the potatoes before storing them, as this can promote rot. Properly stored potatoes can last for several months.
What if my potatoes turn green?
Green potatoes contain solanine, a toxic compound that can cause nausea, vomiting, and diarrhea. Green potatoes are not safe to eat. The green color is caused by exposure to sunlight, which triggers the production of solanine. To prevent potatoes from turning green, hill them properly and store them in a dark place. If you find green potatoes, discard them.
Leave a Comment