
Growing garlic in plastic bags might sound unconventional, but trust me, it’s a game-changer for home gardeners like us! Are you tired of limited garden space or battling unpredictable weather? Do you dream of fresh, pungent garlic readily available for your culinary creations? Then this DIY guide is exactly what you need.
Garlic, with its rich history dating back thousands of years, has been cultivated across cultures for both its culinary and medicinal properties. From ancient Egypt, where it fueled the pyramid builders, to its prominent role in Mediterranean cuisine, garlic has always been a staple. But you don’t need acres of land to enjoy this flavorful bulb.
This ingenious method of growing garlic in plastic bags allows you to cultivate your own supply of this essential ingredient, regardless of your living situation. Whether you have a sprawling backyard or just a sunny balcony, this DIY trick offers a simple, space-saving, and cost-effective solution. Imagine the satisfaction of harvesting your own homegrown garlic, knowing exactly where it came from and how it was grown. Plus, it’s a fantastic way to reduce waste by repurposing those plastic bags we all seem to accumulate. Let’s dive in and unlock the secrets to a bountiful garlic harvest, one plastic bag at a time!
Knoblauch Anbauen in Plastiktüten: Eine Einfache DIY Anleitung
Hallo Gartenfreunde! Habt ihr Lust, euren eigenen Knoblauch anzubauen, aber wenig Platz? Oder vielleicht wollt ihr einfach mal etwas Neues ausprobieren? Dann ist das hier genau das Richtige für euch! Ich zeige euch, wie ihr Knoblauch ganz einfach in Plastiktüten ziehen könnt. Klingt komisch? Ist aber super effektiv und platzsparend!
Warum Knoblauch in Plastiktüten?
Bevor wir loslegen, kurz ein paar Vorteile dieser Methode:
* Platzsparend: Ideal für Balkone, Terrassen oder kleine Gärten.
* Einfach: Keine komplizierten Gartenarbeiten notwendig.
* Kostengünstig: Ihr braucht nur wenige Materialien, die ihr wahrscheinlich schon zu Hause habt.
* Flexibel: Ihr könnt die Tüten leicht umstellen, um den Knoblauch optimal mit Sonnenlicht zu versorgen.
* Frühe Ernte: Oftmals könnt ihr den Knoblauch etwas früher ernten als im Freiland.
Was ihr braucht:
* Knoblauchzehen: Am besten Bio-Knoblauch, da dieser oft nicht mit Wachstumsinhibitoren behandelt wurde. Wählt große, gesunde Zehen aus.
* Plastiktüten: Stabile Plastiktüten, z.B. Gefrierbeutel oder Einkaufstüten. Achtet darauf, dass sie sauber sind.
* Erde: Hochwertige Blumenerde oder eine Mischung aus Gartenerde und Kompost.
* Wasser: Zum Gießen.
* Sprühflasche: Optional, zum Befeuchten der Erde.
* Schere oder Messer: Zum Anbringen von Drainagelöchern.
* Etiketten und Stift: Zum Beschriften der Tüten (optional).
Schritt-für-Schritt Anleitung:
Vorbereitung der Tüten und Erde
1. Drainagelöcher anbringen: Nehmt eure Plastiktüten und schneidet oder stecht mehrere kleine Löcher in den Boden der Tüten. Das ist super wichtig, damit überschüssiges Wasser ablaufen kann und die Knoblauchzehen nicht faulen. Ich mache meistens so 5-6 Löcher pro Tüte.
2. Erde vorbereiten: Füllt die Tüten mit eurer Erde. Lasst oben etwa 5-7 cm Platz frei. Die Erde sollte locker und gut durchlässig sein. Wenn ihr Gartenerde verwendet, mischt sie am besten mit etwas Kompost, um sie aufzulockern und mit Nährstoffen anzureichern.
3. Erde befeuchten: Befeuchtet die Erde leicht mit einer Sprühflasche oder gießt vorsichtig mit einer Gießkanne. Die Erde sollte feucht, aber nicht nass sein.
Pflanzen der Knoblauchzehen
1. Knoblauchzehen vorbereiten: Löst die Knoblauchzehen vorsichtig von der Knolle. Achtet darauf, die äußere Haut der Zehen nicht zu beschädigen. Nur die größten und gesündesten Zehen verwenden.
2. Zehen pflanzen: Steckt die Knoblauchzehen mit der spitzen Seite nach oben etwa 5-7 cm tief in die Erde. Achtet darauf, dass zwischen den Zehen genügend Platz ist (etwa 8-10 cm), damit sie sich gut entwickeln können. In eine normale Einkaufstüte passen so 3-4 Zehen.
3. Erde andrücken: Drückt die Erde um die Zehen herum leicht an.
4. Gießen: Gießt die Erde vorsichtig an, sodass sie gut durchfeuchtet ist.
Pflege und Wachstum
1. Standort wählen: Stellt die Tüten an einen sonnigen Standort. Knoblauch braucht mindestens 6 Stunden Sonnenlicht pro Tag, um gut zu wachsen. Ein Südbalkon oder eine sonnige Terrasse sind ideal.
2. Gießen: Gießt regelmäßig, aber vermeidet Staunässe. Die Erde sollte immer leicht feucht sein. Am besten testet ihr mit dem Finger, ob die Erde trocken ist, bevor ihr gießt.
3. Düngen: Knoblauch ist ein Starkzehrer. Düngt ihn alle paar Wochen mit einem organischen Dünger, z.B. Komposttee oder verdünnter Brennnesseljauche. Das fördert das Wachstum und die Knollenbildung.
4. Unkraut entfernen: Entfernt regelmäßig Unkraut, das in den Tüten wächst.
5. Beobachten: Achtet auf Anzeichen von Schädlingen oder Krankheiten. Bei Bedarf könnt ihr biologische Schädlingsbekämpfungsmittel einsetzen.
Ernte
1. Erntezeitpunkt erkennen: Der Knoblauch ist erntereif, wenn die Blätter gelb werden und umknicken. Das ist meistens im Sommer, etwa 8-9 Monate nach dem Pflanzen.
2. Knoblauch ernten: Zieht die Knoblauchknollen vorsichtig aus der Erde. Wenn die Erde sehr fest ist, könnt ihr sie mit einer kleinen Schaufel oder einem Messer lockern.
3. Trocknen: Lasst den Knoblauch an einem trockenen, luftigen Ort trocknen. Ihr könnt ihn entweder auf einem Gitter auslegen oder zu Zöpfen flechten und aufhängen. Das Trocknen dauert etwa 2-3 Wochen.
4. Lagern: Lagert den getrockneten Knoblauch an einem kühlen, trockenen und dunklen Ort. So hält er sich mehrere Monate.
Zusätzliche Tipps und Tricks:
* Sortenwahl: Es gibt verschiedene Knoblauchsorten. Informiert euch, welche Sorten in eurer Region gut wachsen.
* Kälteperiode: Knoblauch braucht eine Kälteperiode, um gut zu wachsen. Wenn ihr in einer Region mit milden Wintern wohnt, könnt ihr die Knoblauchzehen vor dem Pflanzen für ein paar Wochen in den Kühlschrank legen.
* Gründüngung: Wenn ihr die Tüten im nächsten Jahr wiederverwenden wollt, könnt ihr nach der Knoblauchernte eine Gründüngung aussäen, z.B. Phacelia oder Ringelblumen. Das verbessert die Bodenqualität.
* Schädlinge: Knoblauch kann von verschiedenen Schädlingen befallen werden, z.B. Zwiebelfliegen oder Knoblauchmilben. Achtet auf Anzeichen von Befall und handelt entsprechend.
* Krankheiten: Auch verschiedene Krankheiten können den Knoblauch befallen, z.B. Falscher Mehltau oder Weißfäule. Achtet auf Anzeichen von Krankheit und handelt entsprechend.
* Beschriftung: Vergesst nicht, eure Tüten zu beschriften, damit ihr wisst, welche Sorte ihr gepflanzt habt.
* Experimentieren: Probiert verschiedene Sorten und Anbaumethoden aus, um herauszufinden, was für euch am besten funktioniert.
Häufige Fehler und wie man sie vermeidet:
* Staunässe: Vermeidet Staunässe, da dies zu Fäulnis führen kann. Achtet auf eine gute Drainage und gießt nicht zu viel.
* Zu wenig Sonne: Knoblauch braucht viel Sonne. Stellt die Tüten an einen sonnigen Standort.
* Falsche Erde: Verwendet hochwertige Blumenerde oder eine Mischung aus Gartenerde und Kompost.
* Zu dicht gepflanzt: Achtet darauf, dass zwischen den Zehen genügend Platz ist.
* Nicht gedüngt: Knoblauch ist ein Starkzehrer. Düngt ihn regelmäßig.
* Schädlinge und Krankheiten ignoriert: Achtet auf Anzeichen von Schädlingen und Krankheiten und handelt entsprechend.
Ich hoffe, diese Anleitung hilft euch dabei, euren eigenen Knoblauch in Plastiktüten anzubauen. Es ist wirklich einfacher als man denkt und macht total Spaß! Viel Erfolg und eine reiche Ernte!
Conclusion
So, there you have it! Growing garlic in plastic bags is not just a quirky gardening experiment; it’s a genuinely effective and space-saving method that can yield a surprisingly bountiful harvest, even if you’re short on garden space or live in an apartment. We’ve walked you through the simple steps, highlighting the benefits of this unconventional approach. From the ease of monitoring moisture levels to the protection against soilborne diseases, the advantages are clear.
This method is a must-try for several reasons. First, it democratizes garlic cultivation. No sprawling garden? No problem! A sunny balcony or even a well-lit windowsill can become your personal garlic farm. Second, it’s incredibly efficient. The controlled environment of the plastic bag allows you to optimize growing conditions, leading to potentially larger and healthier bulbs. Third, it’s a fantastic way to recycle and repurpose those plastic bags that often clutter our homes.
But don’t just take our word for it. The real magic happens when you experience the joy of harvesting your own homegrown garlic. Imagine the satisfaction of adding freshly harvested, pungent cloves to your favorite dishes, knowing that you nurtured them from start to finish, all within the confines of a simple plastic bag.
Ready to take your garlic growing to the next level? Consider these variations:
* Experiment with different garlic varieties: Try softneck varieties for braiding or hardneck varieties for their flavorful scapes. See which thrives best in your bag garden.
* Add companion plants: Interplant your garlic with herbs like chamomile or dill to deter pests and enhance growth.
* Use different types of plastic bags: While we recommend heavy-duty bags, experiment with different thicknesses and opacities to see how they affect temperature and moisture levels. Just ensure they have drainage holes.
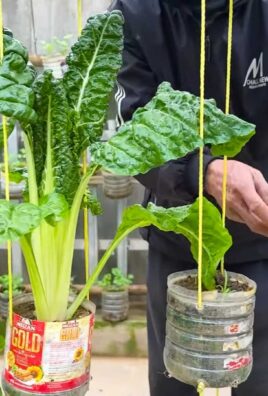
* Vertical Growing: Create a vertical garlic garden by hanging multiple bags from a sturdy structure. This maximizes space and adds a unique aesthetic to your growing area.
We are confident that you’ll find growing garlic in plastic bags to be a rewarding and surprisingly simple experience. Don’t be afraid to experiment, adapt the method to your specific environment, and most importantly, have fun!
We encourage you to embark on this garlic-growing adventure. Once you’ve harvested your first crop, we’d love to hear about your experience. Share your photos, tips, and any variations you’ve tried in the comments below. Let’s build a community of bag-gardeners and spread the word about this fantastic DIY trick! Your insights could inspire others to discover the joys of homegrown garlic, no matter their space constraints. So, grab some garlic cloves, some plastic bags, and get ready to experience the magic of growing your own delicious, pungent garlic. This is a simple, effective, and sustainable way to enjoy fresh garlic year-round.
Frequently Asked Questions (FAQ)
What kind of plastic bags are best for growing garlic?
The best plastic bags for growing garlic are heavy-duty, opaque or semi-opaque bags. Grocery bags or construction-grade bags work well. Avoid thin, flimsy bags that are prone to tearing. The opacity helps to regulate soil temperature and prevent excessive sunlight from reaching the roots. Make sure the bags are clean and free of any harmful chemicals. You can also use grow bags made of fabric, which offer excellent drainage and aeration.
How many drainage holes should I put in the plastic bag?
You should create at least 6-8 drainage holes in the bottom of the plastic bag. These holes are crucial for preventing waterlogging, which can lead to root rot and other fungal diseases. Use a sharp object like a knife or scissors to create the holes. Ensure the holes are evenly spaced to allow for uniform drainage.
What type of soil should I use for growing garlic in plastic bags?
Use a well-draining potting mix that is rich in organic matter. A mixture of compost, peat moss, and perlite works well. Avoid using garden soil, as it can be too heavy and compact, hindering drainage and root growth. The ideal soil pH for garlic is between 6.0 and 7.0. You can amend the soil with bone meal or rock phosphate to provide essential nutrients for bulb development.
How often should I water the garlic in plastic bags?
Water the garlic regularly, keeping the soil consistently moist but not waterlogged. The frequency of watering will depend on the climate, the type of plastic bag used, and the stage of growth. Check the soil moisture by inserting your finger into the soil. If the top inch feels dry, it’s time to water. Avoid overwatering, as this can lead to root rot. During hot, dry weather, you may need to water more frequently.
How much sunlight does garlic need when grown in plastic bags?
Garlic needs at least 6-8 hours of direct sunlight per day to thrive. Place the plastic bags in a sunny location, such as a south-facing balcony or windowsill. If you don’t have enough natural sunlight, you can supplement with grow lights. Rotate the bags regularly to ensure that all sides of the plants receive adequate sunlight.
When is the best time to plant garlic in plastic bags?
The best time to plant garlic in plastic bags is in the fall, about 4-6 weeks before the first expected frost. This allows the garlic to establish roots before winter dormancy. In warmer climates, you can plant garlic in late winter or early spring. Choose a variety of garlic that is suitable for your climate.
How do I know when the garlic is ready to harvest?
Garlic is typically ready to harvest when the lower leaves start to turn yellow and brown. This usually occurs in late spring or early summer. Gently dig up a bulb to check its size and maturity. The bulb should be well-formed and the cloves should be plump and easy to separate.
Can I reuse the plastic bags for growing garlic again?
Yes, you can reuse the plastic bags for growing garlic again, but it’s essential to clean and disinfect them thoroughly before replanting. Wash the bags with soap and water, and then soak them in a solution of bleach and water (1 part bleach to 10 parts water) for 30 minutes. Rinse the bags thoroughly and allow them to dry completely before using them again. This will help to prevent the spread of diseases and pests.
What are some common problems when growing garlic in plastic bags and how can I fix them?
Some common problems when growing garlic in plastic bags include:
* Root rot: Caused by overwatering or poor drainage. Ensure the bags have adequate drainage holes and avoid overwatering.
* Pests: Garlic can be susceptible to pests like aphids and thrips. Inspect the plants regularly and treat with insecticidal soap or neem oil if necessary.
* Fungal diseases: Prevent fungal diseases by providing good air circulation and avoiding overhead watering. Treat with a fungicide if necessary.
* Nutrient deficiencies: Garlic needs adequate nutrients to thrive. Amend the soil with compost or fertilizer to provide essential nutrients.
Can I grow other vegetables in plastic bags using the same method?
Yes, you can grow other vegetables in plastic bags using the same method. Some vegetables that thrive in plastic bags include tomatoes, peppers, lettuce, and herbs. Choose vegetables that have shallow root systems and don’t require a lot of space. Ensure the bags have adequate drainage holes and use a well-draining potting mix.
How do I store the harvested garlic?
After harvesting, cure the garlic by hanging it in a cool, dry, and well-ventilated place for 2-3 weeks. Once the garlic is cured, you can store it in a cool, dark, and dry place for several months. Braiding the garlic is a traditional way to store it, as it allows for good air circulation. Avoid storing garlic in the refrigerator, as it can sprout or become moldy.
Leave a Comment