
Growing Green Onions in Bottles: Sounds a little crazy, right? But trust me, this simple DIY project is about to revolutionize your kitchen and your cooking! Forget those sad, wilted green onions languishing in the crisper drawer. Imagine fresh, vibrant green onions, ready to snip and add a burst of flavor to your meals, all grown right on your windowsill.
For centuries, resourceful gardeners have sought innovative ways to maximize their yields, even in limited spaces. While the exact origins of bottle gardening are hard to pinpoint, the spirit of resourcefulness and upcycling has always been a part of human history. Think about it – our grandparents and great-grandparents were masters of making do with what they had! This method of growing green onions in bottles taps into that same ingenuity.
Let’s face it, we’re all looking for ways to save money and reduce waste. Buying green onions from the store every week can add up, and often, you only use a portion before the rest goes bad. This DIY trick not only saves you money but also reduces food waste. Plus, it’s incredibly easy and requires minimal effort. I’m going to show you how to transform those empty plastic bottles into mini-gardens, providing you with a constant supply of fresh green onions. Get ready to unleash your inner gardener and enjoy the satisfaction of growing your own food, one bottle at a time!
Growing Green Onions Indoors: A Simple DIY Bottle Garden
Hey there, fellow plant enthusiasts! Ever find yourself needing just a sprinkle of green onion and hating to buy a whole bunch that ends up wilting in the fridge? Well, I’ve got the perfect solution for you: growing green onions indoors, right in a recycled plastic bottle! It’s super easy, incredibly rewarding, and a fantastic way to reduce waste. Plus, fresh green onions are always at your fingertips!
What You’ll Need
Before we dive in, let’s gather our supplies. This project is wonderfully low-cost and uses items you probably already have around the house.
* **Plastic Bottle:** A 2-liter soda bottle or any similar size works great. Just make sure it’s clean!
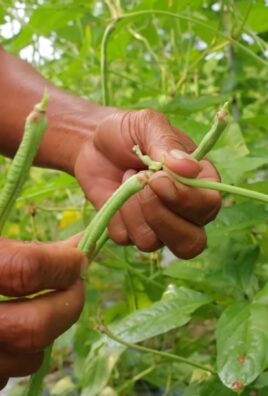
* **Green Onions:** You’ll need green onions with the roots still attached. You can use the ones you buy from the store, just save the root ends after using the green parts.
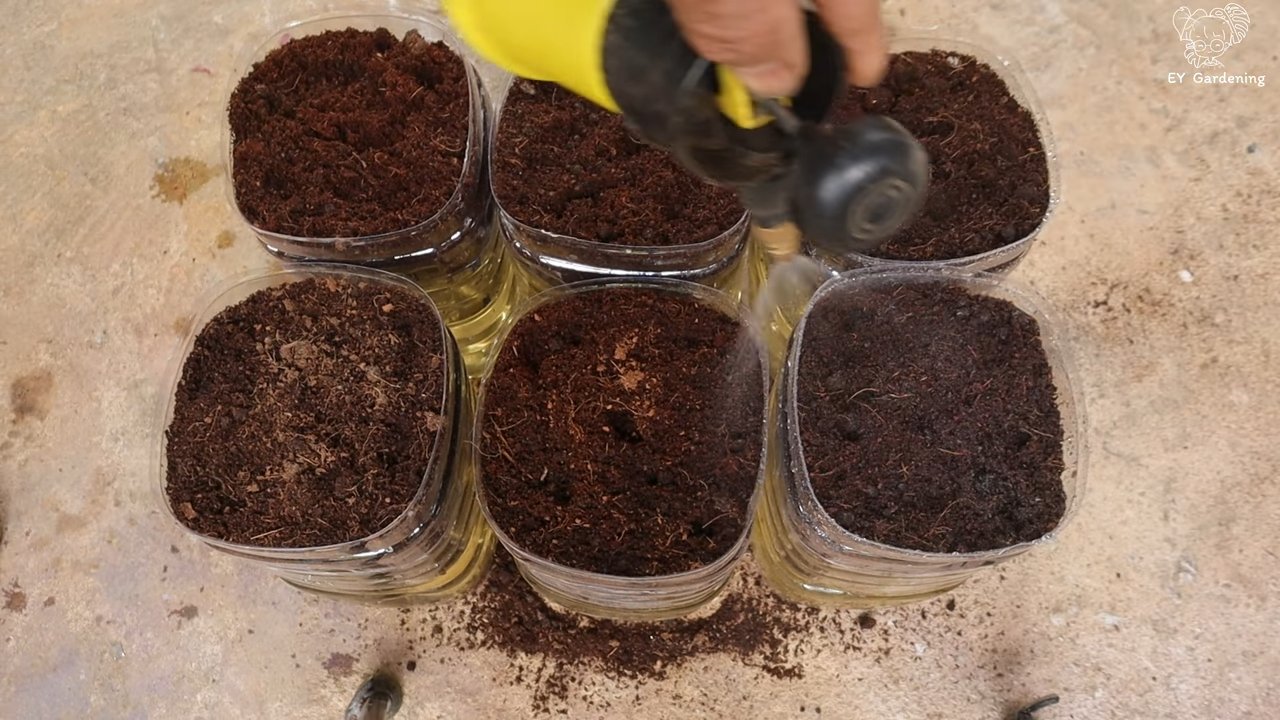
* **Potting Soil:** Regular potting soil is perfect.
* **Scissors or a Utility Knife:** For cutting the plastic bottle. Be careful!
* **Water:** For watering your green onions.
* **Optional: Pebbles or Gravel:** For drainage (more on this later).
* **Optional: Spray Paint or Decorative Materials:** If you want to jazz up your bottle garden.
Preparing the Bottle
This is where we transform our humble plastic bottle into a mini-garden.
1. **Clean the Bottle:** First things first, give your plastic bottle a good rinse with soap and water. Make sure to remove any sticky residue or labels. A clean bottle helps prevent mold and keeps your green onions healthy.
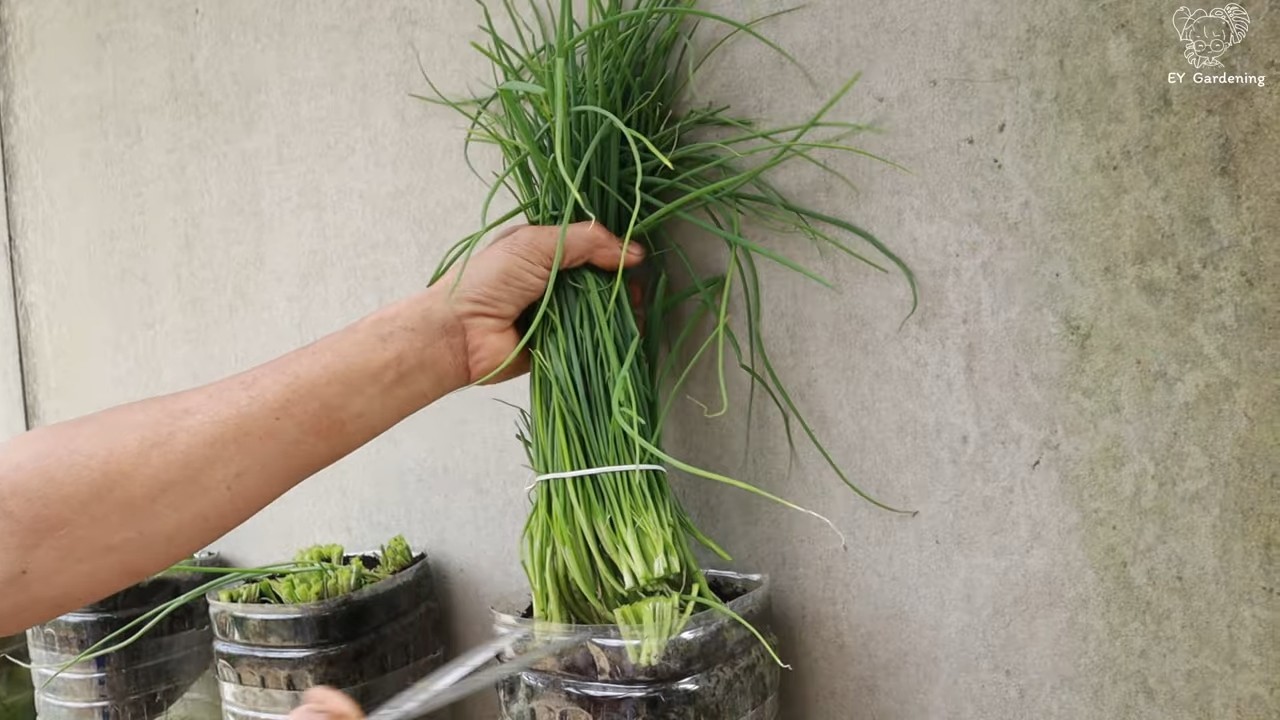
2. **Cut the Bottle:** Now, carefully cut the bottle in half horizontally. You’ll be using the bottom half as your planter. I usually cut it about two-thirds of the way up, leaving a deeper bottom section. This gives the roots plenty of room to grow.
3. **Optional: Drainage Holes:** If you’re worried about overwatering, you can poke a few small drainage holes in the bottom of the bottle. I usually skip this step, but if you tend to be a heavy-handed waterer, it’s a good idea. If you do add holes, place a layer of pebbles or gravel at the bottom of the bottle before adding soil to prevent the soil from washing out.
4. **Optional: Decorate the Bottle:** This is where you can get creative! You can spray paint the bottle, cover it with fabric scraps, or even draw on it with permanent markers. Just make sure whatever you use is waterproof. Let your imagination run wild!
Planting the Green Onions
Now for the fun part: planting our green onions!
1. **Add Soil:** Fill the bottom half of the bottle with potting soil, leaving about an inch of space at the top. Don’t pack the soil down too tightly; you want it to be loose and airy so the roots can breathe.
2. **Plant the Green Onion Roots:** Take your green onion root ends and gently push them into the soil, root-side down. Space them out evenly, giving them enough room to grow. I usually plant about 3-5 root ends in a 2-liter bottle.
3. **Water Thoroughly:** Once the roots are planted, give them a good watering. Make sure the soil is evenly moist, but not soggy. You want the water to drain through the soil (if you added drainage holes) or settle at the bottom.
4. **Find a Sunny Spot:** Place your bottle garden in a sunny spot, like a windowsill or under a grow light. Green onions need at least 6 hours of sunlight per day to thrive.
Caring for Your Green Onions
Maintaining your green onion garden is super simple.
1. **Water Regularly:** Check the soil moisture every day or two. Water when the top inch of soil feels dry to the touch. Be careful not to overwater, as this can lead to root rot.
2. **Fertilize (Optional):** If you want to give your green onions an extra boost, you can fertilize them every few weeks with a diluted liquid fertilizer. I usually use a balanced fertilizer diluted to half strength.
3. **Harvesting:** The best part! Once the green onions have grown to a decent size (usually a few inches tall), you can start harvesting them. Simply snip off the green tops with scissors, leaving about an inch or two of the green part above the soil. The green onions will continue to grow back, providing you with a continuous supply of fresh greens.
4. **Replanting:** After a while, the green onions may start to lose their vigor. When this happens, you can simply replant them with fresh root ends. Just repeat the planting process with new green onion scraps.
Troubleshooting
Even with the best care, you might encounter a few issues. Here are some common problems and how to fix them:
* **Yellowing Leaves:** This could be a sign of overwatering, underwatering, or nutrient deficiency. Check the soil moisture and adjust your watering schedule accordingly. If the soil is dry, water more often. If it’s soggy, water less often. You can also try fertilizing with a diluted liquid fertilizer.
* **Leggy Growth:** This means the green onions aren’t getting enough sunlight. Move your bottle garden to a sunnier location or supplement with a grow light.
* **Root Rot:** This is caused by overwatering. Make sure the soil is well-draining and avoid letting the roots sit in standing water. If you suspect root rot, you can try repotting the green onions in fresh soil.
* **Pests:** Green onions are generally pest-resistant, but occasionally you might find aphids or other small insects. You can usually get rid of them by spraying the plants with a mixture of water and dish soap.
Advanced Techniques (Optional)
Want to take your green onion growing to the next level? Here are a few advanced techniques you can try:
* **Hydroponics:** Instead of using soil, you can grow your green onions hydroponically in water. Simply suspend the root ends in water using a net pot or other support. Add a hydroponic nutrient solution to the water to provide the plants with the nutrients they need.
* **Succession Planting:** To ensure a continuous supply of green onions, plant new root ends every few weeks. This way, you’ll always have fresh greens ready to harvest.
* **Different Varieties:** Experiment with different varieties of green onions. Some varieties are milder, while others are more pungent. Find the ones you like best!
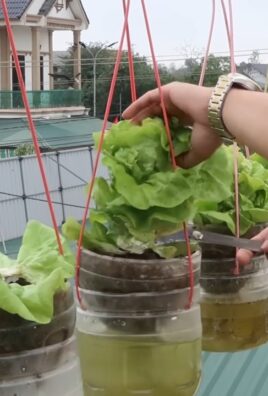
* **Vertical Garden:** Create a vertical green onion garden by stacking multiple bottle planters on top of each other. This is a great way to save space and add a touch of greenery to your home.
Why This Works
The beauty of this DIY project lies in its simplicity and effectiveness. Green onions are incredibly resilient and readily regrow from their root ends. The plastic bottle provides a contained environment, protecting the roots and retaining moisture. The potting soil provides the necessary nutrients for growth, and the sunlight fuels the process of photosynthesis. It’s a perfect example of how you can turn waste into something useful and delicious!
Benefits of Growing Your Own Green Onions
Besides being a fun and rewarding project, growing your own green onions offers several benefits:
* **Fresh, Flavorful Greens:** Homegrown green onions taste much better than store-bought ones. They’re fresher, more flavorful, and haven’t been sitting on a shelf for days.
* **Cost-Effective:** You’ll save money on groceries by growing your own green onions.
* **Sustainable:** You’re reducing waste by recycling plastic bottles and growing your own food.
* **Convenient:** You’ll always have fresh green onions on hand whenever you need them.
* **Therapeutic:** Gardening is a great way to relax and de-stress.
Final Thoughts
Growing green onions in bottles is a fantastic way to add a touch of green to your home, reduce waste, and enjoy fresh, flavorful greens. It’s a simple project that anyone can do, regardless of their gardening experience. So, grab a plastic bottle, some green onion scraps, and get growing! You’ll be amazed at how easy and rewarding it is. Happy gardening!
Conclusion
So, there you have it! Transforming humble plastic bottles into thriving green onion gardens is not just a fun project; it’s a sustainable, cost-effective, and incredibly rewarding way to ensure you always have fresh green onions at your fingertips. Forget those wilting bunches from the grocery store that end up forgotten in the crisper drawer. With this simple DIY trick, you’re taking control of your kitchen garden and minimizing food waste.
But why is this method a must-try? Beyond the obvious convenience, it’s about embracing a more eco-conscious lifestyle. Repurposing plastic bottles reduces landfill waste and gives them a new lease on life. Plus, growing your own food, even something as simple as green onions, connects you to the natural world and provides a sense of accomplishment. It’s a small step towards self-sufficiency that can have a big impact.
Don’t be afraid to experiment! While we’ve focused on green onions, this method can be adapted for other herbs and vegetables with shallow root systems, such as lettuce or even certain types of spinach. Consider using different types of plastic bottles – larger bottles can accommodate more green onion bulbs, while smaller bottles are perfect for a windowsill herb garden. You can also get creative with the aesthetics. Paint the bottles, decorate them with twine, or even create a vertical garden by hanging them on a wall. The possibilities are endless!
This DIY green onion growing method is a game-changer for any home cook. It’s easy, affordable, and yields delicious results. Imagine the satisfaction of snipping fresh green onions directly from your bottle garden to garnish your favorite dishes. The vibrant flavor and aroma will elevate your meals to a whole new level.
We wholeheartedly encourage you to give this DIY trick a try. It’s a fantastic project for individuals, families, and even classrooms. It’s a great way to teach children about gardening, sustainability, and the importance of reducing waste.
Once you’ve set up your bottle garden and started harvesting your own fresh green onions, we’d love to hear about your experience! Share your photos, tips, and variations in the comments below. Let’s create a community of bottle gardeners and inspire others to embrace this simple yet effective way to grow their own food. What are you waiting for? Grab some plastic bottles, some green onion bulbs, and get growing! You’ll be amazed at how easy it is to have a constant supply of fresh, flavorful green onions right at your fingertips.
Frequently Asked Questions (FAQ)
What kind of green onions work best for this method?
Any type of green onion will work, but those with a visible bulb at the base tend to regrow more vigorously. Look for green onions that are firm and have healthy-looking green stalks. You can use store-bought green onions, but those from your own garden or a local farmer’s market are often hardier and more likely to thrive. When selecting green onions from the store, choose those that haven’t started to wilt or turn yellow. The fresher they are, the better the chances of successful regrowth.
How often should I change the water in the bottles?
It’s crucial to change the water every 1-2 days. Stagnant water can lead to bacterial growth and root rot, which will hinder the growth of your green onions. When changing the water, gently rinse the roots to remove any debris or algae that may have accumulated. Using filtered water can also help prevent mineral buildup and keep your green onions healthy.
How much sunlight do the green onions need?
Green onions thrive in bright, indirect sunlight. Aim for at least 4-6 hours of sunlight per day. A windowsill that faces east or west is usually ideal. If you don’t have access to enough natural light, you can supplement with a grow light. Position the grow light a few inches above the green onions and keep it on for 12-14 hours per day. Be careful not to expose the green onions to direct sunlight for extended periods, as this can scorch the leaves.
Can I use any type of plastic bottle?
While most plastic bottles will work, it’s best to use bottles that are food-grade and BPA-free. Look for recycling codes 1 (PET or PETE) or 2 (HDPE) on the bottom of the bottle. Avoid using bottles that have contained harsh chemicals or cleaning products, as these can contaminate the water and harm the green onions. Thoroughly wash and rinse the bottles before using them to remove any residue.
How long will the green onions continue to regrow?
With proper care, green onions can regrow for several weeks or even months. However, the regrowth will eventually slow down as the bulbs deplete their energy reserves. To prolong the life of your green onions, you can add a diluted liquid fertilizer to the water every few weeks. Once the regrowth starts to decline significantly, it’s time to start with fresh green onion bulbs.
What kind of fertilizer should I use?
A diluted liquid fertilizer specifically formulated for vegetables or herbs is ideal. Look for a fertilizer with a balanced NPK ratio (nitrogen, phosphorus, and potassium). Follow the instructions on the fertilizer label carefully and use only the recommended amount. Over-fertilizing can damage the roots and hinder growth. You can also use organic fertilizers, such as compost tea or fish emulsion, but be sure to dilute them properly before adding them to the water.
Can I plant the green onions in soil after they’ve regrown in water?
Yes, you can definitely transplant the green onions into soil after they’ve regrown in water. This can help them grow larger and produce more green stalks. Choose a well-draining potting mix and plant the green onions in a sunny location. Water them regularly and fertilize them as needed. When transplanting, be careful not to damage the roots. Gently loosen the soil around the roots and plant them at the same depth they were growing in the water.
What if the green onions start to turn yellow or brown?
Yellowing or browning leaves can indicate a few different problems. It could be due to overwatering, underwatering, lack of sunlight, or nutrient deficiency. Check the water level and make sure the roots are not sitting in stagnant water. Ensure the green onions are receiving enough sunlight. If the problem persists, try adding a diluted liquid fertilizer to the water. If the leaves are severely damaged, you can trim them off to encourage new growth.
Are there any pests or diseases that can affect green onions grown in bottles?
Green onions grown indoors are generally less susceptible to pests and diseases than those grown outdoors. However, they can still be affected by aphids, spider mites, or fungal infections. Inspect your green onions regularly for any signs of pests or diseases. If you find any, you can try washing them off with a strong stream of water or using an insecticidal soap or fungicide. Make sure to follow the instructions on the product label carefully.
Can I grow other vegetables or herbs using this bottle method?
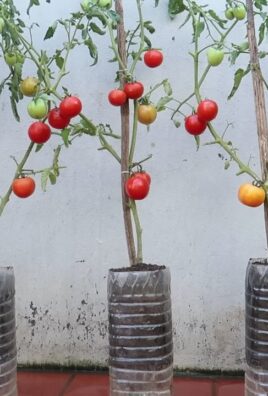
Yes, you can experiment with growing other vegetables and herbs using this bottle method. Some good options include lettuce, spinach, basil, mint, and parsley. Choose plants with shallow root systems and that don’t require a lot of space. Be sure to provide them with adequate sunlight, water, and nutrients. You may need to adjust the size of the bottle and the frequency of watering depending on the specific plant.
Leave a Comment