
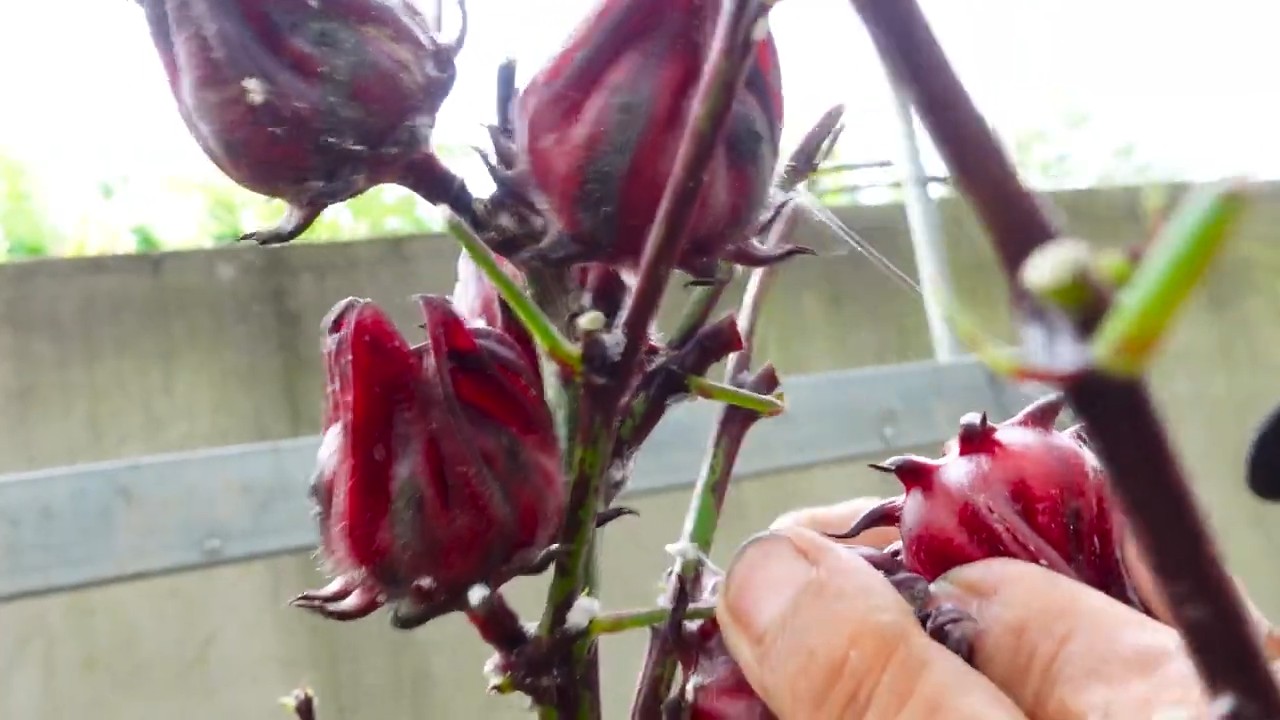
Growing Hibiscus at Home can transform your garden into a vibrant, tropical paradise! Imagine stepping outside to be greeted by the bold, beautiful blooms of hibiscus, adding a splash of color and a touch of exotic flair to your everyday life. But, let’s be honest, sometimes the idea of nurturing these beauties feels a bit daunting, right?
Hibiscus flowers have captivated hearts for centuries, holding cultural significance in many societies. In some cultures, they symbolize delicate beauty and fleeting glory, while in others, they represent hospitality and warmth. Whether you’re drawn to their rich history or simply their stunning appearance, bringing hibiscus into your home garden is a rewarding experience.
That’s where this DIY guide comes in! I’m here to share some simple, effective tricks and hacks that will make growing hibiscus at home not only achievable but also incredibly enjoyable. We’ll demystify the process, covering everything from choosing the right variety for your climate to mastering the art of pruning for abundant blooms.
Why do you need these DIY tricks? Because let’s face it, gardening can sometimes feel like a guessing game. With the right knowledge and a few clever techniques, you can avoid common pitfalls, nurture healthy, thriving hibiscus plants, and enjoy a garden bursting with color all season long. So, grab your gardening gloves, and let’s get started!
Hibiskus zu Hause ziehen: Dein umfassender DIY-Leitfaden
Hallo Pflanzenfreunde! Ich liebe Hibiskusblüten – diese leuchtenden, tropischen Schönheiten bringen einfach Freude in jeden Garten oder jedes Zuhause. Und das Beste daran? Sie sind gar nicht so schwer zu ziehen, wie man vielleicht denkt! In diesem Artikel zeige ich dir Schritt für Schritt, wie du deinen eigenen Hibiskus erfolgreich zu Hause anbauen kannst, egal ob im Topf oder im Garten. Los geht’s!
Was du brauchst: Die richtige Vorbereitung
Bevor wir loslegen, lass uns sicherstellen, dass wir alles Nötige beisammen haben. Hier ist eine Liste der Dinge, die du für dein Hibiskus-Projekt brauchst:
* Hibiskussamen oder Stecklinge: Du kannst Hibiskussamen online oder in Gartencentern kaufen. Stecklinge sind eine tolle Alternative, wenn du bereits einen Hibiskus hast oder von einem Freund einen Ableger bekommen kannst.
* Anzuchterde oder Blumenerde: Eine gute, durchlässige Erde ist entscheidend für den Erfolg.
* Töpfe oder Pflanzgefäße: Wähle Töpfe mit ausreichend Drainagelöchern, damit das Wasser gut ablaufen kann. Die Größe sollte dem Wachstum des Hibiskus angepasst sein.
* Gartenschere oder Messer: Für das Schneiden von Stecklingen.
* Bewurzelungshormon (optional): Hilft den Stecklingen, schneller Wurzeln zu bilden.
* Sprühflasche: Zum Befeuchten der Erde und der Blätter.
* Dünger: Ein spezieller Hibiskusdünger oder ein ausgewogener Blumendünger.
* Gießkanne oder Schlauch: Zum Bewässern der Pflanzen.
* Handschuhe: Zum Schutz deiner Hände.
* Ein sonniger Standort: Hibiskus liebt die Sonne!
Hibiskus aus Samen ziehen: Geduld zahlt sich aus
Hibiskus aus Samen zu ziehen, erfordert etwas mehr Geduld, aber es ist eine lohnende Erfahrung. Hier sind die Schritte:
1. Samen vorbereiten: Die Hibiskussamen haben eine harte Schale. Um die Keimung zu beschleunigen, kannst du die Samen vorsichtig anrauen. Das geht am besten mit feinem Sandpapier oder einer Nagelfeile. Reibe die Samen leicht an, aber achte darauf, die innere Schicht nicht zu beschädigen.
2. Einweichen: Lege die angerauten Samen für 24 Stunden in lauwarmes Wasser. Das hilft, die Schale aufzuweichen und die Keimung zu fördern.
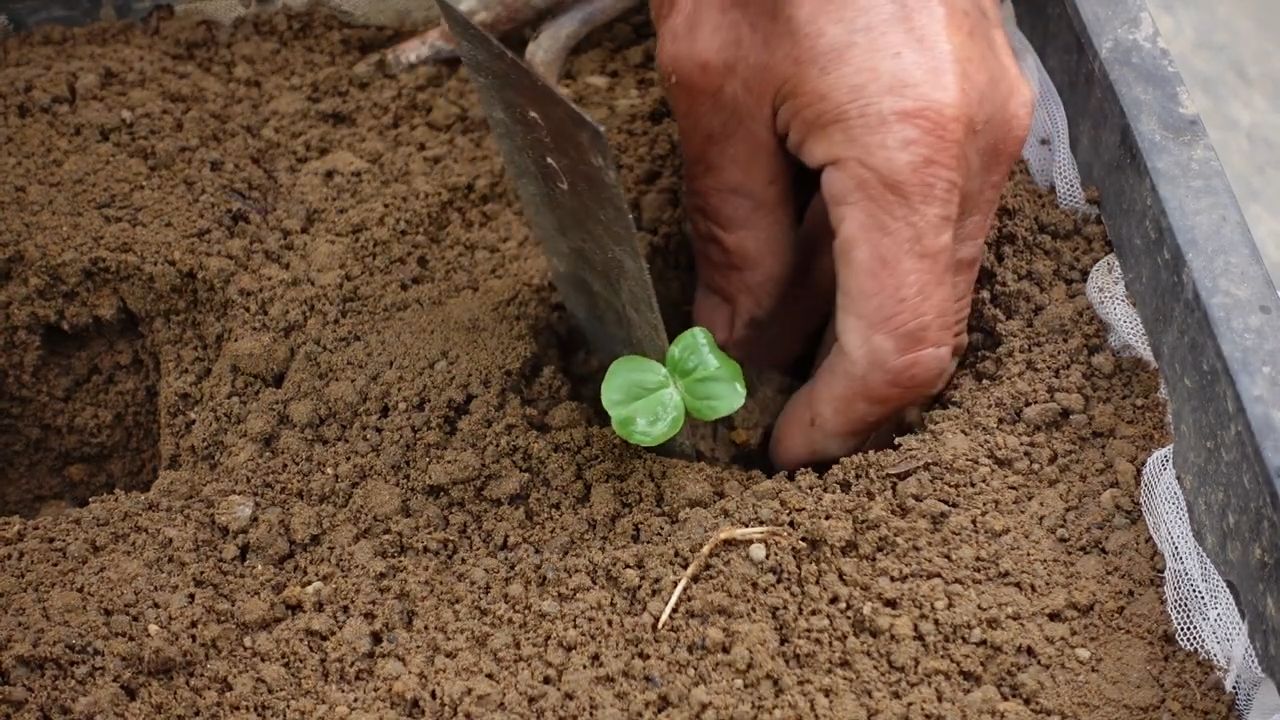
3. Aussaat: Fülle kleine Anzuchttöpfe oder eine Anzuchtschale mit Anzuchterde. Befeuchte die Erde leicht. Lege die Samen etwa 1 cm tief in die Erde und bedecke sie leicht mit Erde.
4. Feuchtigkeit und Wärme: Stelle die Töpfe an einen warmen, hellen Ort. Die ideale Keimtemperatur liegt zwischen 20 und 25 Grad Celsius. Halte die Erde feucht, aber nicht nass. Du kannst die Töpfe mit Frischhaltefolie abdecken, um die Luftfeuchtigkeit zu erhöhen. Vergiss aber nicht, die Folie regelmäßig zu lüften, um Schimmelbildung zu vermeiden.
5. Warten und beobachten: Die Keimung kann einige Wochen dauern. Hab Geduld und halte die Erde feucht. Sobald die Sämlinge groß genug sind, um sie zu handhaben (etwa 5-7 cm hoch), kannst du sie in größere Töpfe umpflanzen.
Hibiskus durch Stecklinge vermehren: Der schnelle Weg zur Blüte
Die Vermehrung durch Stecklinge ist eine schnellere Methode, um einen neuen Hibiskus zu bekommen. Hier zeige ich dir, wie es geht:
1. Stecklinge schneiden: Wähle einen gesunden, kräftigen Trieb von deinem Hibiskus. Schneide einen etwa 10-15 cm langen Steckling direkt unterhalb eines Blattknotens ab. Entferne die unteren Blätter, so dass nur noch die oberen 2-3 Blätter übrig bleiben. Das reduziert die Verdunstung und hilft dem Steckling, sich auf die Wurzelbildung zu konzentrieren.
2. Bewurzelungshormon (optional): Tauche das untere Ende des Stecklings in Bewurzelungshormon. Das fördert die Wurzelbildung und erhöht die Erfolgsrate.
3. Einpflanzen: Fülle einen Topf mit Blumenerde oder einer Mischung aus Blumenerde und Sand. Stecke den Steckling etwa 5 cm tief in die Erde.
4. Feuchtigkeit und Wärme: Gieße den Steckling vorsichtig an und stelle ihn an einen warmen, hellen Ort, aber nicht in die pralle Sonne. Decke den Topf mit einer Plastiktüte oder einem Glas ab, um die Luftfeuchtigkeit zu erhöhen. Lüfte die Abdeckung regelmäßig, um Schimmelbildung zu vermeiden.
5. Wurzelbildung: Nach einigen Wochen sollten sich Wurzeln bilden. Du kannst vorsichtig am Steckling ziehen, um zu prüfen, ob er fest im Boden sitzt. Wenn er Widerstand leistet, hat er Wurzeln gebildet.
6. Umpflanzen: Sobald der Steckling gut bewurzelt ist, kannst du ihn in einen größeren Topf umpflanzen.
Die richtige Pflege: Damit dein Hibiskus prächtig gedeiht
Sobald dein Hibiskus angewachsen ist, ist die richtige Pflege entscheidend für seine Gesundheit und Blütenpracht. Hier sind einige Tipps:
* Standort: Hibiskus liebt die Sonne! Stelle ihn an einen sonnigen Standort, wo er mindestens 6 Stunden Sonnenlicht pro Tag bekommt.
* Bewässerung: Gieße deinen Hibiskus regelmäßig, besonders während der Wachstumsperiode. Die Erde sollte immer leicht feucht sein, aber nicht nass. Vermeide Staunässe, da dies zu Wurzelfäule führen kann. Im Winter reduziere die Bewässerung.
* Düngung: Dünge deinen Hibiskus regelmäßig mit einem speziellen Hibiskusdünger oder einem ausgewogenen Blumendünger. Befolge die Anweisungen auf der Verpackung. Dünge während der Wachstumsperiode (Frühling und Sommer) alle 2-4 Wochen. Im Winter ist keine Düngung erforderlich.
* Schnitt: Schneide deinen Hibiskus regelmäßig, um ihn in Form zu halten und die Blütenbildung zu fördern. Entferne abgestorbene oder kranke Äste. Du kannst den Hibiskus auch nach der Blütezeit leicht zurückschneiden.
* Überwinterung: Hibiskus ist nicht winterhart. Wenn du ihn im Topf hast, kannst du ihn im Herbst ins Haus holen und an einen hellen, kühlen Ort stellen. Reduziere die Bewässerung und Dünung während der Wintermonate. Wenn du deinen Hibiskus im Garten hast, musst du ihn vor Frost schützen. Du kannst ihn mit Vlies oder Reisig abdecken.
* Schädlinge und Krankheiten: Achte auf Schädlinge wie Blattläuse, Spinnmilben oder Weiße Fliegen. Bei Befall kannst du die Pflanzen mit einem Insektizid oder einer Seifenlösung behandeln. Achte auch auf Krankheiten wie Wurzelfäule oder Pilzbefall. Vermeide Staunässe und sorge für eine gute Belüftung, um Krankheiten vorzubeugen.
Häufige Probleme und Lösungen: Was tun, wenn’s nicht klappt?
Auch bei bester Pflege können Probleme auftreten. Hier sind einige häufige Probleme und wie du sie lösen kannst:
* Gelbe Blätter: Gelbe Blätter können verschiedene Ursachen haben, wie z.B. Überwässerung, Nährstoffmangel oder Schädlingsbefall. Überprüfe die Bewässerung und dünge die Pflanze gegebenenfalls. Untersuche die Blätter auf Schädlinge.
* Blüten fallen ab: Das Abfallen von Blütenknospen kann durch Stress verursacht werden, z.B. durch Temperaturschwankungen, Wassermangel oder Nährstoffmangel. Sorge für einen stabilen Standort und eine regelmäßige Bewässerung und Düngung.
* Keine Blüten: Wenn dein Hibiskus nicht blüht, kann das an zu wenig Sonnenlicht, zu viel Stickstoff im Dünger oder einem falschen Schnitt liegen. Stelle die Pflanze an einen sonnigeren Standort, verwende einen Dünger mit weniger Stickstoff und schneide die Pflanze richtig.
* Schädlinge: Blattläuse, Spinnmilben und Weiße Fliegen können deinen Hibiskus befallen. Behandle die Pflanzen mit einem Insektiz
Conclusion
So, there you have it! Growing hibiscus at home, while it might seem daunting at first, is entirely achievable with a little know-how and the right approach. We’ve covered everything from selecting the perfect variety for your climate to nurturing your plant through its blooming season and beyond. The vibrant colors and exotic flair that hibiscus flowers bring to any garden or indoor space are well worth the effort.
But why should you embrace this DIY project? Simply put, growing your own hibiscus allows you to control the environment and care, resulting in healthier, more robust plants that produce an abundance of stunning blooms. You’ll avoid the potential pitfalls of store-bought plants that may have been treated with harsh chemicals or grown in less-than-ideal conditions. Plus, there’s an undeniable satisfaction in nurturing a plant from a small cutting or seedling to a thriving, flowering beauty.
Don’t be afraid to experiment with different varieties of hibiscus. Consider the ‘Cranberry Crush’ for its deep red hues, or the ‘President’ for its classic tropical look. If you’re feeling adventurous, try grafting different colored hibiscus onto a single rootstock for a truly unique and eye-catching display. For those in colder climates, consider growing hibiscus in containers that can be brought indoors during the winter months. This allows you to enjoy their beauty year-round. You can also explore different soil mixes to find what works best for your specific hibiscus variety and growing conditions. Some hibiscus thrive in slightly acidic soil, while others prefer a more neutral pH.
Remember, patience is key. Hibiscus plants may take some time to establish themselves and begin blooming profusely. Don’t get discouraged if you don’t see results immediately. With consistent care and attention, your hibiscus will reward you with a spectacular display of color.
We wholeheartedly encourage you to give growing hibiscus at home a try. It’s a rewarding and enriching experience that will bring beauty and joy to your life. And most importantly, don’t forget to share your experiences with us! We’d love to see photos of your hibiscus plants and hear about any tips or tricks you’ve discovered along the way. Your insights could help other aspiring hibiscus growers achieve success. Join our community of plant enthusiasts and let’s celebrate the beauty of hibiscus together!
Now, let’s address some frequently asked questions to further empower you on your hibiscus-growing journey.
Frequently Asked Questions (FAQ)
What is the best location for growing hibiscus?
Hibiscus plants thrive in sunny locations. Aim for at least 6 hours of direct sunlight per day. In hotter climates, some afternoon shade can be beneficial to prevent scorching of the leaves and flowers. When growing hibiscus indoors, place them near a south-facing window where they can receive ample sunlight. Rotate the plant regularly to ensure even growth on all sides. If natural light is insufficient, consider supplementing with grow lights.
How often should I water my hibiscus?
Watering frequency depends on several factors, including the climate, soil type, and size of the plant. Generally, hibiscus plants prefer consistently moist soil, but not waterlogged. Water deeply when the top inch of soil feels dry to the touch. During hot, dry weather, you may need to water daily. Reduce watering frequency during cooler months. Ensure that your pot has adequate drainage to prevent root rot. Overwatering is a common mistake that can lead to yellowing leaves and other problems.
What kind of fertilizer should I use for hibiscus?
Hibiscus plants are heavy feeders and benefit from regular fertilization. Use a balanced fertilizer with a slightly higher phosphorus content (the middle number on the fertilizer label) to promote blooming. Look for a fertilizer specifically formulated for hibiscus or flowering plants. Fertilize every 2-4 weeks during the growing season (spring and summer). Reduce or stop fertilizing during the dormant season (fall and winter). Always follow the instructions on the fertilizer label to avoid over-fertilizing, which can damage the plant.
How do I prune my hibiscus?
Pruning is essential for maintaining the shape and health of your hibiscus plant. Prune in late winter or early spring before new growth begins. Remove any dead, damaged, or crossing branches. You can also prune to shape the plant and encourage bushier growth. Pinch back the tips of new growth to promote branching. Avoid pruning too heavily, as this can reduce flowering. Regular light pruning is better than infrequent heavy pruning.
What are common pests and diseases that affect hibiscus?
Hibiscus plants can be susceptible to pests such as aphids, spider mites, whiteflies, and mealybugs. Regularly inspect your plants for signs of infestation. Treat infestations promptly with insecticidal soap, neem oil, or other appropriate pesticides. Diseases such as root rot and fungal leaf spots can also affect hibiscus. Prevent these problems by providing good drainage, proper air circulation, and avoiding overwatering. If you notice signs of disease, treat with a fungicide.
How do I propagate hibiscus?
Hibiscus can be propagated through stem cuttings. Take cuttings from healthy, non-flowering stems in spring or summer. Remove the lower leaves and dip the cut end in rooting hormone. Plant the cutting in a well-draining potting mix and keep it moist. Place the cutting in a warm, humid location. Roots should develop within a few weeks. Once the cutting has rooted, you can transplant it into a larger pot.
My hibiscus is not blooming. What could be the reason?
There are several reasons why your hibiscus may not be blooming. Insufficient sunlight is a common cause. Make sure your plant is receiving at least 6 hours of direct sunlight per day. Over-fertilizing with nitrogen can also inhibit blooming. Use a fertilizer with a higher phosphorus content to promote flowering. Improper watering, temperature stress, and pest infestations can also affect blooming. Address these issues to encourage your hibiscus to bloom.
Can I grow hibiscus indoors?
Yes, you can grow hibiscus indoors, especially in colder climates. Choose a variety that is well-suited for indoor growing. Provide plenty of sunlight, either through a south-facing window or with grow lights. Maintain a consistent temperature and humidity level. Water regularly and fertilize during the growing season. Repot the plant as needed.
What is the ideal soil for hibiscus?
Hibiscus plants prefer well-draining soil that is rich in organic matter. A mixture of potting soil, peat moss, and perlite is a good option. You can also add compost to improve drainage and fertility. Avoid using heavy clay soil, as it can retain too much moisture and lead to root rot. The ideal pH for hibiscus is slightly acidic to neutral (around 6.0 to 7.0).
How do I overwinter my hibiscus?
In colder climates, hibiscus plants need to be overwintered indoors. Before bringing your plant indoors, inspect it for pests and diseases. Prune the plant lightly to remove any dead or damaged growth. Place the plant in a cool, bright location. Reduce watering frequency during the winter months. Fertilize sparingly or not at all. In the spring, gradually acclimate the plant to outdoor conditions before placing it back in its permanent location.
Leave a Comment