
Growing Potatoes in a Sack: Imagine harvesting a bounty of delicious, homegrown potatoes from your own backyard, even if you only have a small patio or balcony! Forget sprawling gardens and back-breaking digging; this simple DIY trick lets you cultivate these versatile vegetables in a surprisingly compact space.
Potatoes have been a staple food for centuries, with their cultivation dating back to the Inca civilization in South America. They’ve nourished populations and fueled economies, and now, you can easily bring this historical food source right to your doorstep. But let’s face it, traditional potato farming can be intimidating. That’s where the magic of sack gardening comes in!
I know what you’re thinking: “Why should I grow potatoes in a sack?” Well, for starters, it’s incredibly space-saving, perfect for apartment dwellers or anyone with limited garden space. Plus, it’s a fantastic way to control the soil conditions and protect your precious potatoes from pests and diseases. This method also makes harvesting a breeze – no more digging around in the dirt! With this easy and effective method of growing potatoes in a sack, you can enjoy fresh, flavorful potatoes all season long. So, grab a sack, some soil, and get ready to embark on a rewarding gardening adventure!
Growing Potatoes in a Sack: A Bountiful Harvest in a Small Space!
Hey there, fellow gardening enthusiasts! Are you dreaming of fresh, homegrown potatoes but short on garden space? Well, I’ve got the perfect solution for you: growing potatoes in a sack! It’s a fun, easy, and surprisingly productive method that even beginners can master. I’ve been doing this for years, and trust me, the satisfaction of harvesting a sack full of spuds is unbeatable. Let’s dive in!
What You’ll Need
Before we get started, let’s gather our supplies. Here’s what you’ll need to grow your own potato bounty:
* A large, sturdy sack: Think burlap, heavy-duty plastic (like a feed sack), or even a strong, reusable shopping bag. The bigger, the better – aim for at least 20 gallons in capacity. I personally prefer burlap sacks because they allow for good drainage and airflow.
* Seed potatoes: These are potatoes specifically grown for planting. You can find them at your local garden center or online. Choose a variety you love to eat! I’m partial to Yukon Gold for their creamy texture and delicious flavor.
* Potting mix: A good quality potting mix is crucial for healthy potato growth. Avoid using garden soil, as it can be too heavy and compacted. I like to use a mix that’s well-draining and contains compost for added nutrients.
* Compost: This is “black gold” for your potatoes! Compost provides essential nutrients and helps retain moisture.
* Water: Potatoes need consistent moisture, so make sure you have a reliable water source.
* Fertilizer (optional): A balanced, slow-release fertilizer can give your potatoes an extra boost. I usually use an organic fertilizer formulated for vegetables.
* Scissors or a knife: For cutting the seed potatoes.
* A sunny spot: Potatoes need at least 6-8 hours of sunlight per day.
Preparing Your Seed Potatoes
This step is important for maximizing your potato yield. Here’s how to prepare your seed potatoes:
* Chitting (optional but recommended): Chitting encourages the seed potatoes to sprout before planting. This gives them a head start and results in earlier harvests. To chit your potatoes, place them in a cool, bright location (but not direct sunlight) for a few weeks. You’ll see small, green sprouts emerging from the “eyes” of the potato.
* Cutting (if necessary): If your seed potatoes are large (bigger than an egg), you can cut them into smaller pieces. Each piece should have at least 1-2 “eyes” or sprouts. Let the cut pieces dry for a day or two to allow the cut surfaces to callous over. This helps prevent rot. I usually cut mine into pieces about the size of a golf ball.
Planting Your Potatoes
Now for the fun part! Here’s how to plant your potatoes in the sack:
1. Prepare the sack: If you’re using a burlap sack, you might want to line it with a plastic bag (with drainage holes) to help retain moisture. This isn’t essential, but it can be helpful in drier climates.
2. Add the initial layer of soil: Fill the bottom of the sack with about 4-6 inches of potting mix and compost. Mix the two together well.
3. Plant the seed potatoes: Place the seed potato pieces (sprout-side up) on top of the soil, spacing them about 8-10 inches apart. If you’re using a smaller sack, you might only be able to fit one or two seed potatoes.
4. Cover the potatoes: Cover the seed potatoes with another 4-6 inches of potting mix and compost.
5. Water thoroughly: Water the soil well until it’s evenly moist.
The “Hilling” Process: The Key to More Potatoes!
This is where the magic happens! The “hilling” process encourages the potato plants to produce more tubers along their stems. Here’s how it works:
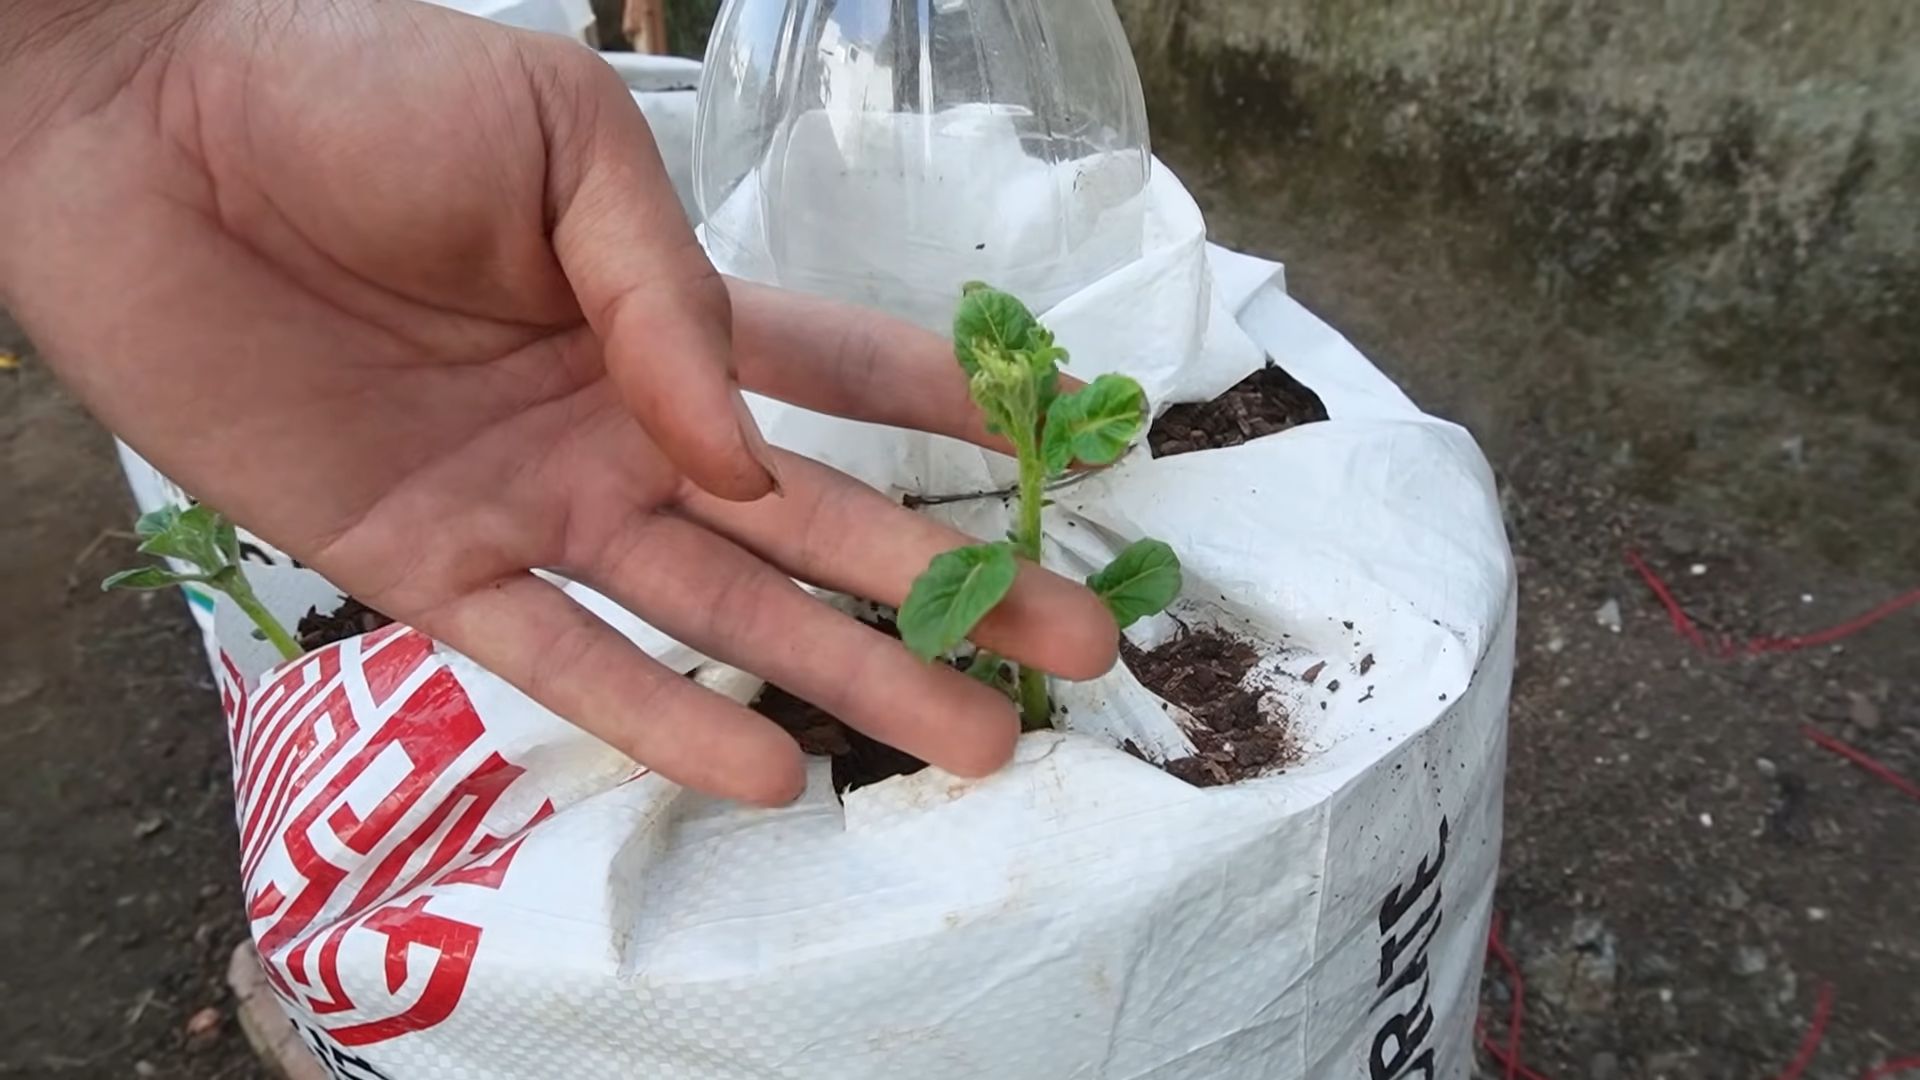
1. Wait for the sprouts to emerge: After a week or two, you’ll see green shoots emerging from the soil.
2. Add more soil: Once the shoots are about 6-8 inches tall, add another layer of potting mix and compost, covering the stems up to about halfway. Leave the top leaves exposed.
3. Repeat the process: Continue adding soil every few weeks as the plants grow taller, always covering the stems up to about halfway. This encourages the plants to produce more potatoes along the buried stems. I usually do this 3-4 times throughout the growing season.
4. Water regularly: Keep the soil consistently moist, but not waterlogged. Potatoes need plenty of water, especially during hot weather.
Caring for Your Potato Plants
Here are a few tips for keeping your potato plants healthy and productive:
* Sunlight: Make sure your sack is in a location that receives at least 6-8 hours of sunlight per day.
* Watering: Water regularly, especially during dry spells. Check the soil moisture by sticking your finger into the soil. If it feels dry an inch or two below the surface, it’s time to water.
* Fertilizing (optional): If you’re using fertilizer, follow the instructions on the package. I usually fertilize my potato plants every few weeks with a balanced, organic fertilizer.
* Pest control: Keep an eye out for pests like aphids, potato beetles, and flea beetles. If you spot any pests, you can try hand-picking them off the plants or using an organic insecticide.
* Disease prevention: Potatoes can be susceptible to diseases like blight. To prevent disease, make sure your plants have good air circulation and avoid overwatering.
Harvesting Your Potatoes
The moment you’ve been waiting for! Here’s how to harvest your potatoes:
1. When to harvest: You can start harvesting “new potatoes” (small, tender potatoes) a few weeks after the plants flower. To harvest new potatoes, carefully reach into the soil and pull out a few potatoes. The main harvest will be ready when the plants start to die back and the foliage turns yellow or brown.
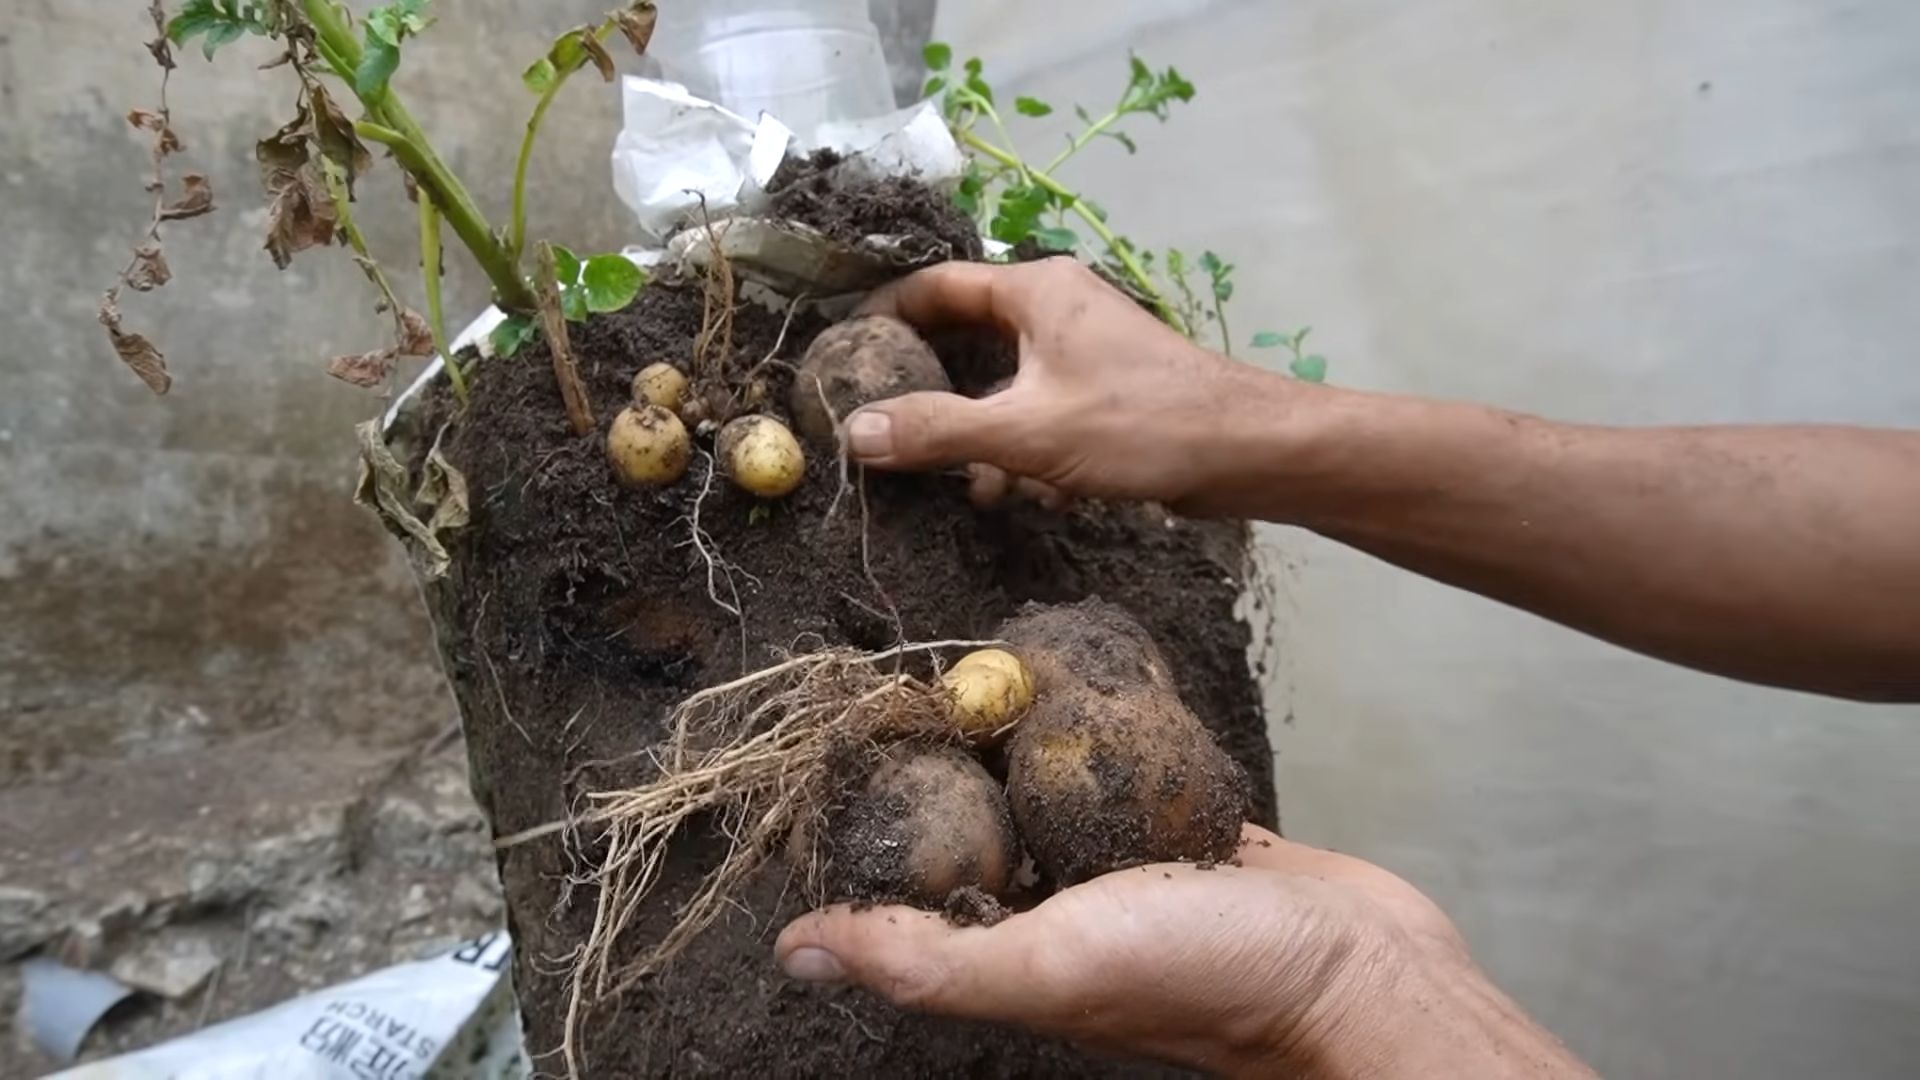
2. Harvesting the main crop: Once the plants have died back, it’s time to harvest the main crop. Simply tip the sack over and carefully sort through the soil to find your potatoes!
3. Curing the potatoes: After harvesting, cure the potatoes by spreading them out in a cool, dry, and dark place for a week or two. This allows the skins to harden and helps prevent rot.
4. Storing the potatoes: Store your cured potatoes in a cool, dark, and dry place. A root cellar is ideal, but a cool basement or garage will also work.
Troubleshooting
Here are a few common problems you might encounter when growing potatoes in a sack, and how to fix them:
* Yellowing leaves: This could be a sign of overwatering, underwatering, nutrient deficiency, or disease. Check the soil moisture and adjust your watering accordingly. If the soil is dry, water more frequently. If the soil is waterlogged, water less frequently. You can also try fertilizing your plants with a balanced fertilizer.
* Small potatoes: This could be due to a lack of sunlight, water, or nutrients. Make sure your sack is in a sunny location and that you’re watering and fertilizing your plants regularly.
* Rotting potatoes: This could be due to overwatering or poor drainage. Make sure your sack has good drainage holes and avoid overwatering.
* Pests: Keep an eye out for pests and take action to control them if necessary.
Tips and Tricks for Success
Here are a few extra tips and tricks to help you grow a bumper crop of potatoes in a sack:
* Choose the right variety: Some potato varieties are better suited for growing in containers than others. Look for varieties that are compact and early-maturing.
* Use a large sack: The bigger the sack, the more potatoes you’ll be able to grow.
* Use good quality potting mix: A good quality potting mix is essential for healthy potato growth.
* Water regularly: Potatoes need plenty of water, especially during hot weather.
* Fertilize regularly: Fertilizing your plants will help them produce more potatoes.
* Hill the plants regularly: Hilling the plants encourages them to produce more potatoes along their stems.
* Protect your plants from pests and diseases: Keep an eye out for pests and diseases and take action to control them if necessary.
* Don’t give up! Growing potatoes in a sack can be a bit challenging, but it’s also very rewarding. Don’t be discouraged if you don’t get a perfect harvest the first time. Just keep learning and experimenting, and you’ll be growing your own delicious potatoes in no time!
Growing potatoes in a sack
Conclusion
So, there you have it! Growing potatoes in a sack is not just a gardening trend; it’s a game-changer for anyone looking to maximize their yield, regardless of space constraints. We’ve walked you through the simple steps, highlighted the benefits, and hopefully, inspired you to ditch the traditional garden bed (at least for your potatoes!).
Why is this DIY trick a must-try? Because it offers a level of control and convenience that in-ground planting simply can’t match. Imagine harvesting a bountiful crop of fresh, homegrown potatoes from a single sack, right on your patio or balcony. No more back-breaking digging, no more worrying about soil pests, and no more wasted space. The vertical nature of sack gardening allows you to pack a significant amount of potato-producing power into a small footprint, making it ideal for urban gardeners or anyone with limited yard space. Plus, the ability to easily move the sack allows you to chase the sun or protect your plants from unexpected frost.
But the beauty of this method lies not only in its practicality but also in its adaptability. Feel free to experiment with different potato varieties to discover your favorites. Russets, Yukon Golds, red potatoes – they all thrive in sacks! You can also adjust the soil mix to suit your specific climate and growing conditions. Consider adding compost tea or organic fertilizers to boost growth and yield. For a fun twist, try companion planting by adding herbs like basil or thyme to the top of the sack to deter pests and attract beneficial insects.
Don’t be afraid to get creative! The sack is your canvas, and the potatoes are your masterpiece.
We’ve shared our secrets to successful sack potato growing, but the real magic happens when you put these tips into practice. The satisfaction of harvesting your own potatoes, knowing you nurtured them from seed to table, is truly unparalleled. It’s a rewarding experience that connects you to the earth and provides you with delicious, healthy food.
So, what are you waiting for? Grab a sack, some seed potatoes, and get ready to embark on a gardening adventure. We’re confident that you’ll be amazed by the results. And once you’ve harvested your first crop of sack-grown potatoes, we want to hear all about it! Share your experiences, your tips, and your photos with us. Let’s build a community of sack potato enthusiasts and inspire others to discover the joys of this simple yet effective gardening technique.
Growing potatoes in a sack is more than just a gardening method; it’s a sustainable, space-saving, and incredibly rewarding way to enjoy fresh, homegrown produce. Give it a try, and you might just find yourself hooked!
Frequently Asked Questions (FAQ)
What kind of sack should I use?
The ideal sack is a large, sturdy bag made of burlap, polypropylene, or even a heavy-duty trash bag. Burlap is a popular choice because it’s breathable and allows for good drainage. Polypropylene sacks are durable and readily available. If using a trash bag, make sure it’s thick and puncture-resistant, and be sure to poke drainage holes in the bottom. The sack should be at least 2-3 feet tall to accommodate the growing potato plants.
What kind of soil should I use?
A well-draining, nutrient-rich soil mix is essential for successful sack potato growing. A good starting point is a mix of equal parts compost, potting soil, and perlite or vermiculite. Compost provides essential nutrients, potting soil provides structure, and perlite or vermiculite improves drainage and aeration. Avoid using garden soil, as it can be too heavy and compact, hindering root growth. You can also add slow-release fertilizer to the soil mix to provide a steady supply of nutrients throughout the growing season.
How many seed potatoes should I plant in a sack?
Generally, you should plant 3-5 seed potatoes in a sack, depending on the size of the sack and the variety of potatoes. Space the seed potatoes evenly around the bottom of the sack, ensuring they have enough room to grow. If you’re using larger seed potatoes, you may want to cut them into smaller pieces, each with at least one “eye” (sprout). Allow the cut pieces to callous over for a day or two before planting to prevent rot.
How often should I water my sack potatoes?
Water your sack potatoes regularly, especially during hot and dry weather. The soil should be consistently moist but not waterlogged. Check the moisture level by sticking your finger into the soil. If the top inch or two feels dry, it’s time to water. Avoid overwatering, as this can lead to root rot. The frequency of watering will depend on the weather, the type of soil you’re using, and the size of the sack.
How much sunlight do sack potatoes need?
Potatoes need at least 6-8 hours of sunlight per day to thrive. Choose a location that receives plenty of direct sunlight. If you live in a hot climate, you may want to provide some afternoon shade to prevent the plants from overheating. You can also rotate the sack periodically to ensure that all sides of the plant receive adequate sunlight.
How do I “hill” the potatoes in a sack?
“Hilling” is the process of adding more soil to the sack as the potato plants grow. This encourages the plants to produce more potatoes along the buried stems. When the potato plants are about 6-8 inches tall, add a few inches of soil to the sack, covering the lower part of the stems. Repeat this process every few weeks as the plants continue to grow, until the sack is almost full.
When are the potatoes ready to harvest?
Potatoes are typically ready to harvest 2-3 months after planting, depending on the variety. You can start harvesting “new potatoes” (small, immature potatoes) a few weeks earlier. To harvest, simply reach into the sack and gently pull out the potatoes. You can also dump the entire sack onto a tarp and sort through the potatoes.
Can I reuse the soil from the sack?
Yes, you can reuse the soil from the sack, but it’s important to amend it with fresh compost and fertilizer before planting again. The previous crop of potatoes will have depleted some of the nutrients in the soil. You may also want to sterilize the soil to kill any potential pests or diseases. You can do this by baking the soil in the oven at 200 degrees Fahrenheit for 30 minutes.
What if my potato plants develop pests or diseases?
Monitor your potato plants regularly for signs of pests or diseases. Common potato pests include aphids, potato beetles, and flea beetles. Common potato diseases include blight and scab. If you notice any problems, take action immediately to prevent them from spreading. You can use organic pesticides or fungicides to control pests and diseases. You can also remove and destroy any infected plants.
Can I grow potatoes in a sack indoors?
While it’s possible to grow potatoes in a sack indoors, it’s more challenging than growing them outdoors. Potatoes need a lot of sunlight, which can be difficult to provide indoors. You’ll also need to ensure that the plants have adequate ventilation and drainage. If you do decide to grow potatoes indoors, use grow lights to supplement the natural sunlight and choose a well-ventilated location.

Leave a Comment