
Growing Red Cabbage might seem intimidating, but trust me, it’s a rewarding experience that brings vibrant color and delicious flavor right to your backyard! Have you ever wondered how those gorgeous, deep purple heads end up on grocery store shelves? Well, I’m here to tell you that you can cultivate your own stunning red cabbage with a few simple tricks and DIY techniques.
Cabbage, in general, has a rich history, dating back to ancient times. The Romans and Greeks prized it for its nutritional value and medicinal properties. Red cabbage, with its striking hue, adds a touch of elegance to any garden and a boost of antioxidants to your diet. But beyond its historical significance and health benefits, growing red cabbage yourself offers something truly special: the satisfaction of nurturing something from seed to table.
In today’s world, where we’re increasingly conscious of where our food comes from, knowing you’ve grown your own produce is incredibly empowering. Plus, let’s be honest, store-bought red cabbage can sometimes be a bit bland or even tough. By following these DIY tricks, you’ll learn how to cultivate tender, flavorful red cabbage that’s bursting with goodness. I’ll guide you through everything from soil preparation to pest control, ensuring you have a successful and enjoyable gardening journey. So, grab your gardening gloves, and let’s get started!

Growing Vibrant Red Cabbage: A DIY Guide for the Home Gardener
Hey there, fellow gardening enthusiasts! I’m so excited to share my experience and tips on growing beautiful, vibrant red cabbage right in your own backyard. It’s easier than you might think, and the reward of harvesting your own homegrown cabbage is incredibly satisfying. Plus, the color is just stunning! Let’s dive in.
Choosing the Right Variety and Starting Seeds
First things first, you need to pick the right red cabbage variety for your climate and growing season. Some popular choices include ‘Red Acre,’ ‘Ruby Perfection,’ and ‘Red Express.’ Do a little research to see which ones thrive in your area. I personally love ‘Ruby Perfection’ because it’s relatively early maturing and produces dense, flavorful heads.
* Consider your climate: Some varieties are more heat-tolerant than others.
* Check your growing season: Early maturing varieties are great for shorter seasons.
* Think about size: Do you want large heads for sauerkraut or smaller ones for salads?
Now, let’s get those seeds started! You can either direct sow them into the garden, but I prefer starting them indoors for a head start, especially if you have a shorter growing season.
Step-by-Step Seed Starting:
1. Gather your supplies: You’ll need seed starting trays or small pots, seed starting mix (not regular potting soil!), red cabbage seeds, a spray bottle, and a warm, sunny location or grow lights.
2. Fill the trays/pots: Moisten the seed starting mix and fill your chosen containers. Gently tap them to settle the soil.
3. Sow the seeds: Make a small indentation (about ¼ inch deep) in the center of each cell or pot. Place 2-3 seeds in each indentation. This increases your chances of germination.
4. Cover the seeds: Gently cover the seeds with more seed starting mix and lightly pat it down.
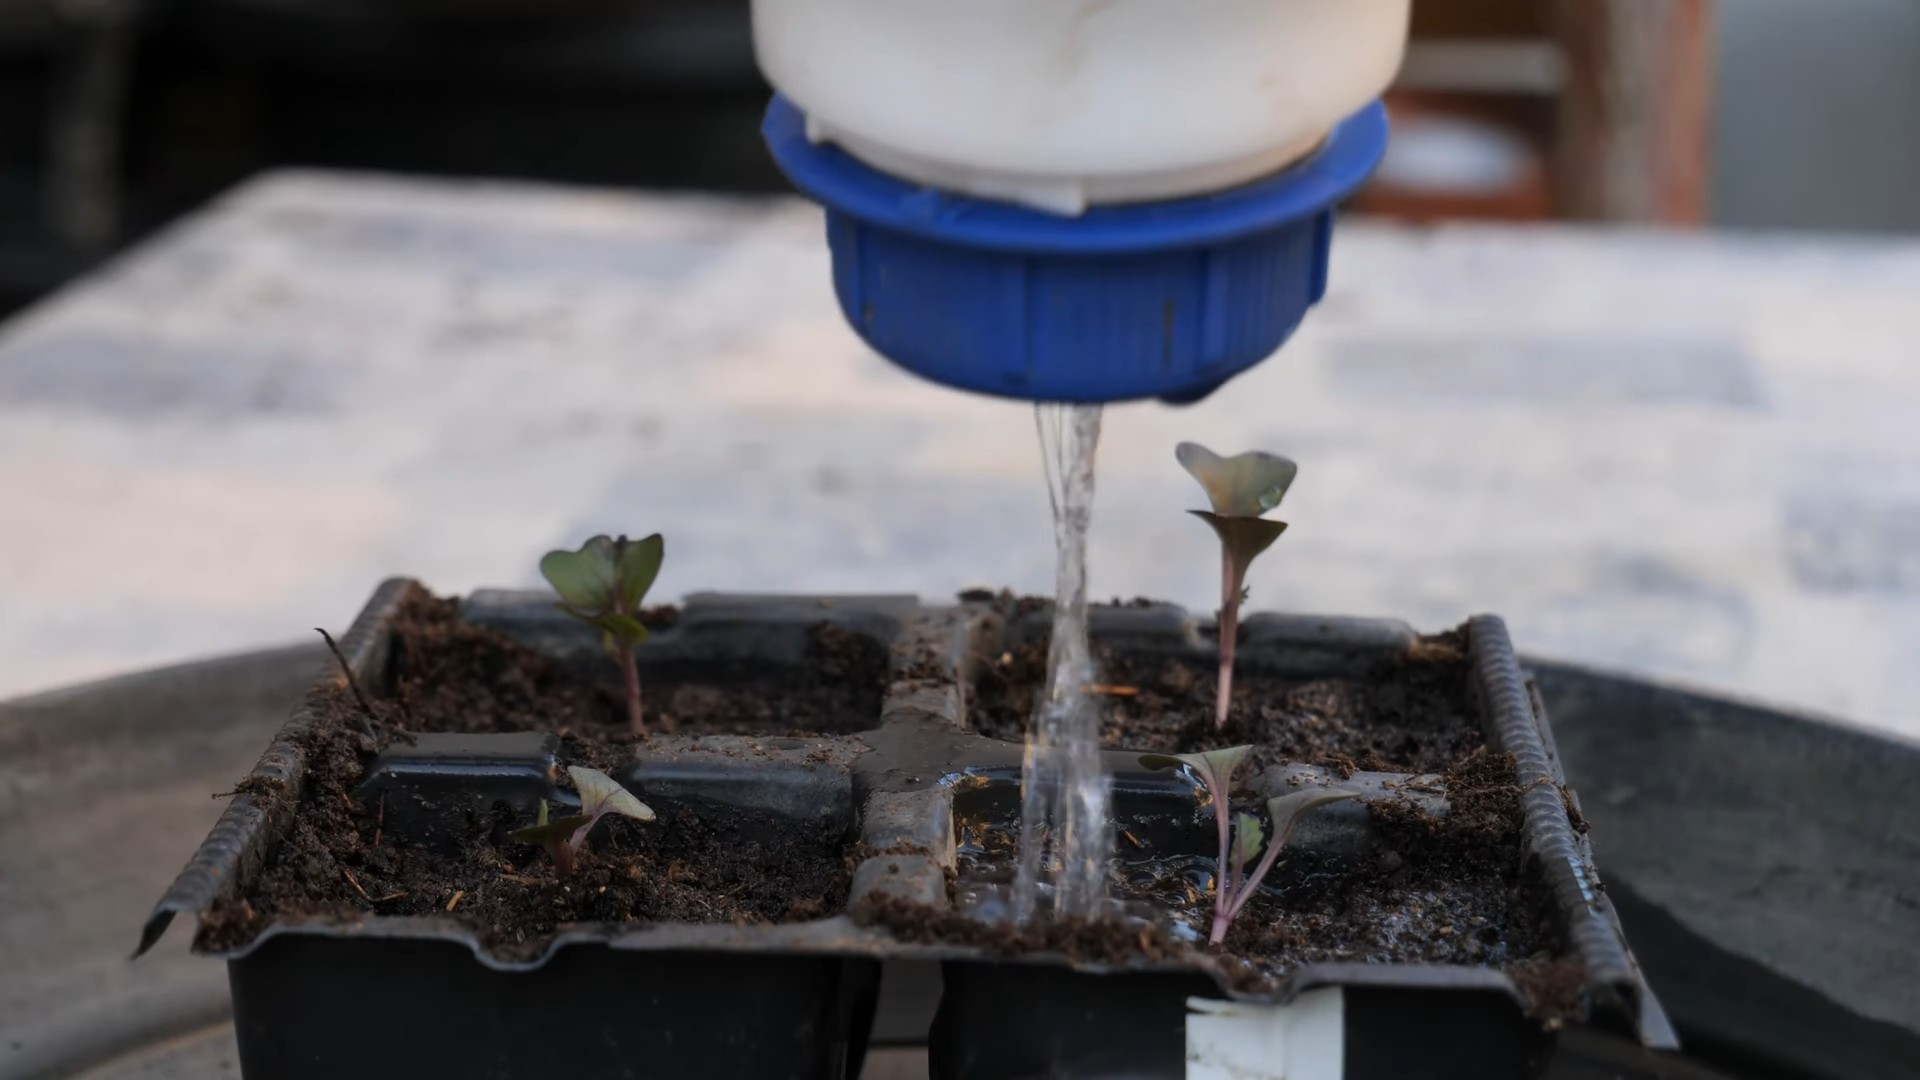
5. Water gently: Use a spray bottle to thoroughly moisten the soil. Avoid overwatering, which can lead to damping off (a fungal disease that kills seedlings).
6. Provide warmth and light: Place the trays or pots in a warm location (around 70-75°F) with plenty of sunlight or under grow lights. If using grow lights, keep them a few inches above the soil surface and provide 14-16 hours of light per day.
7. Keep the soil moist: Check the soil daily and mist with water as needed to keep it consistently moist but not soggy.
8. Thin the seedlings: Once the seedlings have their first true leaves (the second set of leaves), thin them to one strong seedling per cell or pot. Snip off the weaker seedlings at the soil line with scissors to avoid disturbing the roots of the remaining seedling.
9. Harden off the seedlings: About a week before you plan to transplant them outdoors, gradually acclimate the seedlings to outdoor conditions. Start by placing them outside in a sheltered location for an hour or two each day, gradually increasing the amount of time they spend outdoors. This helps them adjust to the sun, wind, and temperature changes.
Preparing the Garden Bed
Red cabbage needs a sunny spot with well-drained, fertile soil. Before transplanting your seedlings, it’s crucial to prepare the garden bed properly.
* Sunlight: Aim for at least 6 hours of direct sunlight per day.
* Soil: Red cabbage prefers slightly acidic soil with a pH between 6.0 and 7.0.
* Drainage: Ensure the soil drains well to prevent root rot.
Step-by-Step Bed Preparation:
1. Clear the area: Remove any weeds, rocks, or debris from the garden bed.
2. Amend the soil: Incorporate plenty of organic matter, such as compost, well-rotted manure, or leaf mold, into the soil. This will improve drainage, fertility, and water retention. I usually add a generous layer of compost (about 2-3 inches) and work it into the top 6-8 inches of soil.
3. Test the soil pH: Use a soil testing kit to check the pH. If the soil is too acidic (below 6.0), add lime to raise the pH. If it’s too alkaline (above 7.0), add sulfur to lower the pH. Follow the instructions on the soil testing kit and amendment packaging for application rates.
4. Fertilize: Apply a balanced fertilizer, such as 10-10-10, according to the package directions. This will provide the cabbage plants with the nutrients they need to grow strong and healthy.
5. Create planting holes: Dig holes that are slightly larger than the root balls of your seedlings, spacing them about 18-24 inches apart. This gives the cabbage plants enough room to grow and mature.
Transplanting and Ongoing Care
Once your seedlings are hardened off and the garden bed is prepared, it’s time to transplant!
Step-by-Step Transplanting:
1. Water the seedlings: Water the seedlings thoroughly a few hours before transplanting to help them adjust to the move.
2. Carefully remove the seedlings: Gently remove the seedlings from their trays or pots, being careful not to damage the roots. If the roots are tightly bound, gently loosen them with your fingers.
3. Place the seedlings in the holes: Place each seedling in a planting hole, ensuring that the top of the root ball is level with the surrounding soil.
4. Backfill with soil: Fill the holes with soil and gently firm it around the base of the plants.
5. Water thoroughly: Water the newly transplanted seedlings thoroughly to help them settle in.
6. Mulch: Apply a layer of mulch, such as straw, wood chips, or shredded leaves, around the plants. This will help retain moisture, suppress weeds, and regulate soil temperature.
Now that your red cabbage plants are in the ground, it’s important to provide them with ongoing care to ensure a successful harvest.
* Watering: Water regularly, especially during dry periods. Cabbage plants need consistent moisture to thrive. Aim for about 1 inch of water per week. I like to water deeply and less frequently, rather than shallowly and more often.
* Fertilizing: Side-dress the plants with a nitrogen-rich fertilizer every 3-4 weeks. This will help promote leafy growth and head development. I use fish emulsion or compost tea for a natural boost.
* Weeding: Keep the garden bed free of weeds, which can compete with the cabbage plants for nutrients and water. Hand-pull weeds regularly or use a hoe to cultivate the soil.
* Pest control: Keep an eye out for common cabbage pests, such as cabbage worms, cabbage loopers, and aphids. Inspect the plants regularly and take action if you see any signs of infestation. I prefer using organic pest control methods, such as hand-picking pests, spraying with insecticidal soap, or using Bacillus thuringiensis (Bt), a natural bacterium that kills caterpillars.
* Disease prevention: Prevent fungal diseases by providing good air circulation, avoiding overhead watering, and removing any infected leaves. If you notice any signs of disease, such as yellowing leaves or spots, treat the plants with a fungicide.
Harvesting Your Red Cabbage
The moment you’ve been waiting for! Red cabbage is typically ready to harvest 70-100 days after transplanting, depending on the variety.
* Check for firmness: The head should feel firm and dense when squeezed.
* Look for size: The head should be a good size for the variety you’re growing.
* Observe the color: The head should be a deep, vibrant red color.
Step-by-Step Harvesting:
1. Cut the head: Use a sharp knife to cut the head from the stem, leaving a few outer leaves attached.
2. Store the cabbage: Store the harvested cabbage in a cool, dry place, such as a refrigerator or root cellar. It can last for several weeks if stored properly.
Troubleshooting Common Problems
Even with the best care, you might encounter some problems while growing red cabbage. Here are a few common issues and how to address them:
* Cabbage worms: These green caterpillars can devour cabbage leaves. Hand-pick them off the plants or spray with Bt.
* Aphids: These tiny insects suck sap from the leaves, causing them to curl and distort. Spray with insecticidal soap or neem oil.
* Clubroot: This fungal disease causes swollen, distorted roots and stunted growth. Prevent clubroot by improving soil drainage, liming the soil to raise the pH, and rotating crops.
* Splitting heads: This can occur when the cabbage head grows too quickly due to excessive watering or fertilization. To prevent splitting, water regularly but avoid overwatering, and side-dress with fertilizer sparingly.
Enjoying Your
Conclusion
So, there you have it! Growing red cabbage at home, while it might seem daunting at first, is a deeply rewarding experience that connects you to your food in a way that simply buying it from the store never could. We’ve walked through the entire process, from selecting the right seeds and preparing your soil to nurturing your seedlings and harvesting your vibrant, ruby-hued heads.
But why is this DIY trick a must-try? Beyond the sheer satisfaction of cultivating your own food, growing red cabbage offers several compelling advantages. Firstly, you have complete control over the growing process. You can choose organic methods, avoiding harmful pesticides and herbicides, ensuring that your family consumes only the healthiest produce. Secondly, homegrown red cabbage boasts a flavor profile that far surpasses anything you’ll find in a supermarket. The freshness and vibrancy are simply unmatched, adding a delightful depth to your salads, slaws, and cooked dishes.
Furthermore, growing your own red cabbage is a fantastic way to reduce your carbon footprint. By eliminating the transportation and packaging associated with store-bought produce, you’re making a conscious choice to support a more sustainable lifestyle. And let’s not forget the cost savings! While there’s an initial investment in seeds and supplies, the long-term benefits of harvesting your own red cabbage far outweigh the expenses.
Ready to take your red cabbage cultivation to the next level? Consider these variations and suggestions:
* Experiment with different varieties: Explore different red cabbage cultivars, such as ‘Red Acre’ for its early maturity or ‘Ruby Perfection’ for its exceptional color and storage capabilities.
* Companion planting: Plant your red cabbage alongside beneficial companions like dill, chamomile, or rosemary to deter pests and attract pollinators.
* Ferment your harvest: Transform your abundant harvest into delicious and probiotic-rich sauerkraut or kimchi.
* Red Cabbage Juice: Juice your red cabbage for a nutrient-packed drink. Combine it with other fruits and vegetables for a delicious and healthy beverage.
* Red Cabbage Powder: Dehydrate your red cabbage and grind it into a powder for use as a natural food coloring or nutritional supplement.
Ultimately, the best way to discover the joys of growing red cabbage is to simply dive in and give it a try. Don’t be afraid to experiment, learn from your mistakes, and adapt the techniques to suit your specific climate and growing conditions. We are confident that you will find the process both enjoyable and rewarding.
We encourage you to embark on this exciting journey and share your experiences with us! Post photos of your thriving red cabbage plants, share your favorite recipes, and let us know what challenges you encountered and how you overcame them. Your insights will not only inspire others but also contribute to a vibrant community of home gardeners. Happy growing!
Frequently Asked Questions (FAQ)
What is the best time of year to plant red cabbage?
The ideal time to plant red cabbage depends on your climate. In general, red cabbage is a cool-season crop, meaning it thrives in temperatures between 60°F and 70°F (15°C and 21°C). For spring harvests, start seeds indoors 6-8 weeks before the last expected frost. Transplant seedlings outdoors 2-3 weeks before the last frost. For fall harvests, sow seeds directly into the garden in mid-summer, about 10-12 weeks before the first expected frost. If you live in a region with mild winters, you can even plant red cabbage in the fall for a winter or early spring harvest.
How much sunlight does red cabbage need?
Red cabbage requires at least 6 hours of direct sunlight per day to thrive. Choose a planting location that receives ample sunlight throughout the day. If you live in a particularly hot climate, some afternoon shade may be beneficial to prevent the leaves from scorching. Insufficient sunlight can result in smaller heads and less vibrant color.
What kind of soil is best for growing red cabbage?
Red cabbage prefers well-drained, fertile soil that is rich in organic matter. The ideal soil pH is between 6.0 and 7.0. Before planting, amend your soil with compost, aged manure, or other organic matter to improve drainage, fertility, and water retention. Avoid planting in heavy clay soil, as this can lead to root rot. If your soil is compacted, consider adding sand or perlite to improve drainage.
How often should I water red cabbage?
Red cabbage needs consistent moisture to develop large, healthy heads. Water deeply and regularly, especially during dry periods. Aim to keep the soil consistently moist but not waterlogged. Mulching around the plants can help retain moisture and suppress weeds. Check the soil moisture regularly by sticking your finger about an inch into the soil. If it feels dry, it’s time to water.
What are some common pests and diseases that affect red cabbage?
Red cabbage is susceptible to several pests and diseases, including cabbage worms, aphids, flea beetles, clubroot, and black rot. To prevent pest infestations, consider using row covers to protect your plants. Regularly inspect your plants for signs of pests and diseases, and take action promptly if you notice any problems. Organic pest control methods, such as insecticidal soap or neem oil, can be effective for controlling many common pests. Ensure good air circulation around your plants to minimize the risk of fungal diseases. Crop rotation can also help prevent soilborne diseases.
How do I harvest red cabbage?
Red cabbage is typically ready to harvest when the heads are firm and tightly packed. The size of the head will vary depending on the variety, but most red cabbage heads are ready to harvest when they reach about 6-8 inches in diameter. To harvest, use a sharp knife to cut the head from the stem, leaving a few outer leaves intact. After harvesting the main head, you may be able to harvest smaller side shoots that develop along the stem.
How do I store red cabbage?
Red cabbage can be stored for several weeks or even months if stored properly. To store red cabbage, remove any damaged or loose outer leaves. Wrap the head tightly in plastic wrap or place it in a plastic bag. Store the wrapped cabbage in the refrigerator crisper drawer. Red cabbage can also be stored in a root cellar or other cool, dark, and humid location.
Why is my red cabbage not turning red?
Several factors can contribute to red cabbage not developing its characteristic red color. Soil pH plays a crucial role; red cabbage needs slightly acidic soil (pH 6.0-7.0) to develop its vibrant color. If your soil is too alkaline, the cabbage may appear more purple or even green. Amend your soil with sulfur or peat moss to lower the pH. Insufficient sunlight can also affect the color. Ensure your plants receive at least 6 hours of direct sunlight per day. Finally, some varieties of red cabbage are naturally less intensely colored than others.
Can I grow red cabbage in containers?
Yes, you can successfully grow red cabbage in containers, provided you choose a large enough container (at least 12 inches in diameter) and use a well-draining potting mix. Ensure the container has drainage holes to prevent waterlogging. Container-grown red cabbage may require more frequent watering and fertilization than plants grown in the ground. Choose a sunny location for your container garden.
How can I use red cabbage in cooking?
Red cabbage is a versatile vegetable that can be used in a variety of dishes. It can be eaten raw in salads and slaws, or cooked in stir-fries, soups, and stews. Red cabbage is also a popular ingredient in sauerkraut and kimchi. Its vibrant color makes it a visually appealing addition to any meal. To prevent red cabbage from turning blue when cooked, add a splash of vinegar or lemon juice to the cooking water.

Leave a Comment