
Growing Turnips might seem like something your grandparents did, but trust me, these root vegetables are making a serious comeback! Forget those bland, watery turnips you might remember; with the right techniques, you can cultivate sweet, flavorful turnips right in your own backyard. For centuries, turnips have been a staple crop, providing sustenance and nutrition during harsh winters. From ancient Rome to medieval Europe, they were a vital part of the diet, and now, they’re ready to reclaim their place on our plates.
But why bother with growing turnips yourself? Well, for starters, store-bought turnips often lack the freshness and vibrant flavor of homegrown ones. Plus, growing turnips is surprisingly easy and rewarding, even if you’re a beginner gardener. I’m going to share some simple DIY tricks and hacks that will help you achieve a bountiful harvest, no matter the size of your garden. Imagine serving up a delicious turnip and potato mash, knowing you grew the star ingredient yourself! This article will guide you through everything from seed selection to pest control, ensuring you have the best possible chance of success. So, grab your gardening gloves, and let’s get started!
Growing Turnips: A Beginner’s Guide to a Bountiful Harvest
Hey there, fellow garden enthusiasts! I’m so excited to share my experiences with growing turnips. These root vegetables are surprisingly easy to cultivate, even if you’re a complete newbie like I was a few years ago. They’re packed with nutrients, versatile in the kitchen, and offer both delicious roots and edible greens. Let’s dive into how you can grow your own amazing turnips!
Choosing Your Turnip Variety
First things first, let’s talk about choosing the right turnip variety. There are tons of options out there, each with its own unique characteristics. Here are a few of my favorites:
* Purple Top White Globe: This is a classic, reliable variety that produces large, round roots with a mild flavor. It’s perfect for roasting or mashing.
* Tokyo Cross: If you’re looking for something fast-growing, Tokyo Cross is your best bet. It matures quickly and has a sweet, delicate flavor.
* Golden Ball: As the name suggests, this variety produces golden-yellow roots with a slightly nutty taste. It’s great for adding color to your dishes.
* Hakurei: This Japanese turnip is known for its smooth, white skin and crisp, sweet flesh. It’s delicious raw in salads or lightly sautéed.
Consider your climate, soil conditions, and personal preferences when making your selection. I usually plant a mix of varieties to keep things interesting!
Preparing Your Garden Bed
Turnips thrive in well-drained soil that’s rich in organic matter. Here’s how I prepare my garden bed for planting:
* Timing is Key: Turnips are a cool-season crop, so the best time to plant them is in early spring or late summer/early fall. This avoids the heat of summer, which can make the roots tough and bitter. I usually aim for planting about 4-6 weeks before the first expected frost in the fall, or as soon as the ground can be worked in the spring.
* Sunlight: Choose a spot in your garden that receives at least 6 hours of sunlight per day.
* Soil Preparation: Turnips prefer a slightly acidic soil pH between 6.0 and 6.8. I always test my soil before planting to make sure it’s within this range. You can purchase a soil testing kit at most garden centers.
* Amendments: If your soil is heavy clay or sandy, amend it with compost or well-rotted manure to improve drainage and fertility. I usually add a generous layer of compost to my garden bed before planting.
* Tilling: Till the soil to a depth of at least 8-10 inches to loosen it up and remove any rocks or debris. This will allow the turnip roots to grow freely.
* Leveling: Rake the soil smooth to create a level planting surface.
Planting Your Turnip Seeds
Now for the fun part – planting! Here’s my step-by-step guide:
1. Create Rows: Use a hoe or garden rake to create shallow rows in your prepared garden bed. Space the rows about 12-18 inches apart.
2. Sow Seeds: Sprinkle the turnip seeds evenly along the rows. Turnip seeds are tiny, so don’t worry about planting them too close together. I usually aim for about 1-2 inches between seeds.
3. Cover Seeds: Gently cover the seeds with about 1/2 inch of soil.
4. Water Thoroughly: Water the garden bed thoroughly after planting. This will help the seeds germinate and establish strong roots.
5. Mark Rows: Label your rows with the turnip variety and planting date. This will help you keep track of your plants and know when to expect your harvest.
Caring for Your Turnip Plants
Once your turnip seeds have germinated, it’s important to provide them with proper care to ensure a healthy and abundant harvest.
1. Thin Seedlings: When the seedlings are about 2-3 inches tall, thin them to about 4-6 inches apart. This will give the remaining plants enough room to grow and develop. I know it’s hard to thin out plants, but it’s essential for getting good-sized turnips. You can eat the thinned seedlings as microgreens!
2. Water Regularly: Turnips need consistent moisture to thrive. Water them regularly, especially during dry spells. Aim for about 1 inch of water per week. I usually water deeply once or twice a week, rather than shallowly every day.
3. Weed Control: Keep the garden bed free of weeds, which can compete with the turnip plants for nutrients and water. I like to hand-pull weeds regularly, or use a hoe to cultivate the soil around the plants.
4. Fertilizing: Turnips are not heavy feeders, but they will benefit from a light application of fertilizer. I usually use a balanced organic fertilizer, such as compost tea or fish emulsion, about 3-4 weeks after planting.
5. Pest Control: Turnips can be susceptible to certain pests, such as flea beetles and aphids. I usually inspect my plants regularly for signs of infestation. If I find any pests, I treat them with an organic insecticide, such as neem oil or insecticidal soap.
6. Row Covers: For extra protection against pests and frost, consider using row covers. These lightweight fabric covers can be placed over the plants to create a barrier against insects and cold weather.
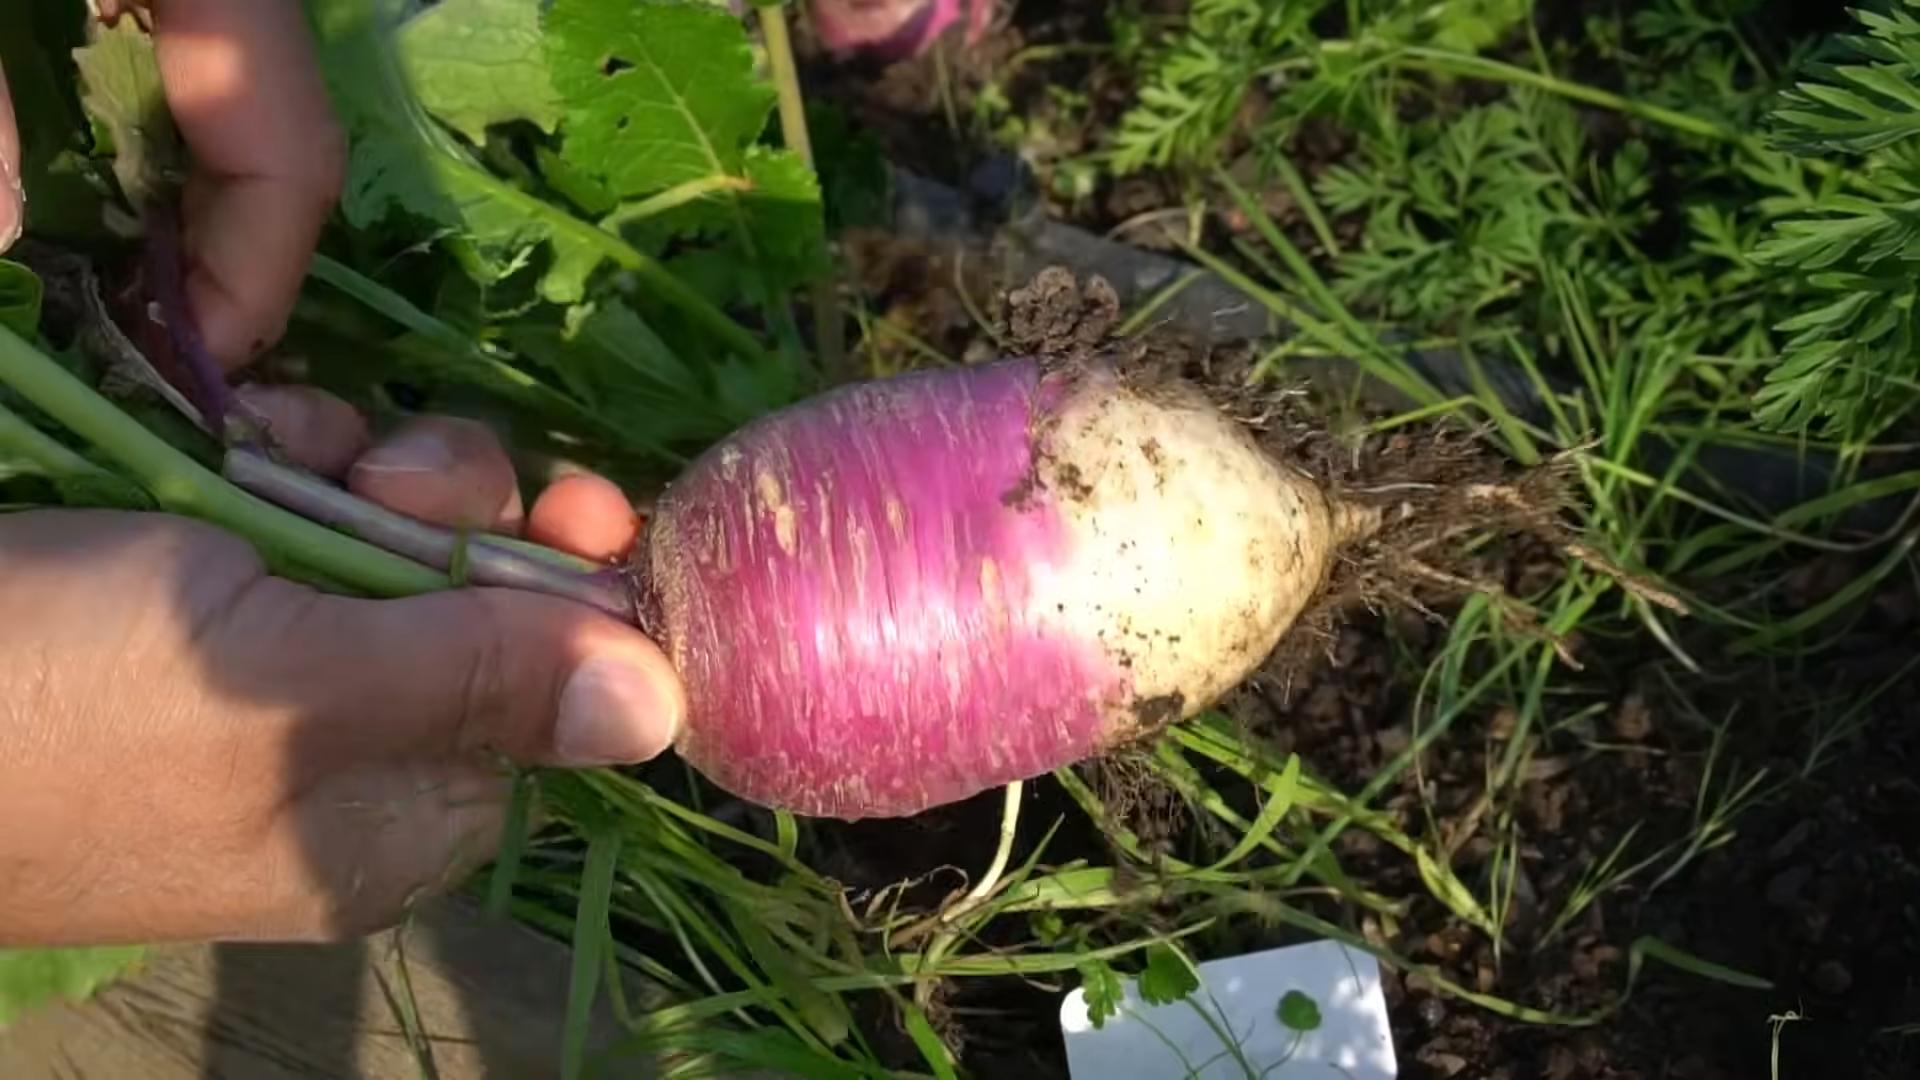
Harvesting Your Turnips
The moment you’ve been waiting for – harvest time! Turnips are typically ready to harvest about 50-60 days after planting, depending on the variety.
1. Check for Size: The size of the turnip roots will vary depending on the variety, but generally, you should harvest them when they are about 2-3 inches in diameter.
2. Loosen the Soil: Use a garden fork or trowel to loosen the soil around the turnip roots.
3. Pull Gently: Gently pull the turnips from the ground, being careful not to damage the roots.
4. Trim Greens: Trim the greens from the turnips, leaving about 1-2 inches of stem attached.
5. Wash and Store: Wash the turnips thoroughly and store them in a cool, dry place. Turnips can be stored in the refrigerator for several weeks.
Enjoying Your Turnip Harvest
Now that you’ve harvested your turnips, it’s time to enjoy them! Turnips are incredibly versatile and can be used in a variety of dishes.
* Roasting: Roasting turnips brings out their natural sweetness and creates a delicious caramelized flavor. Simply toss them with olive oil, salt, and pepper, and roast them in the oven until tender.
* Mashing: Mashed turnips are a healthy and flavorful alternative to mashed potatoes. Combine them with butter, milk, and seasonings for a creamy and comforting side dish.
* Sautéing: Sautéed turnips are a quick and easy way to add a nutritious vegetable to your meal. Slice them thinly and sauté them with garlic, onions, and other vegetables.
* Raw: Some turnip varieties, such as Hakurei, are delicious raw in salads or as a snack. Their crisp, sweet flesh is a refreshing treat.
* Turnip Greens: Don’t forget about the turnip greens! They are packed with vitamins and minerals and can be cooked like other leafy greens, such as spinach or kale. Sauté them with garlic and olive oil, or add them to soups and stews.
Troubleshooting Common Turnip Problems
Even with the best care, you may encounter some problems while growing turnips. Here are a few common issues and how to address them:
* Bitter Roots: Bitter turnip roots can be caused by hot weather, lack of water, or poor soil. To prevent this, plant turnips in the cool season, water them regularly, and amend your soil with compost.
* Root Maggots: Root maggots are small, white larvae that feed on the roots of turnips and other root vegetables. To prevent root maggots, use row covers to protect your plants, and rotate your crops each year.
* Flea Beetles: Flea beetles are tiny, jumping insects that can damage turnip leaves. To control flea beetles, use row covers, spray your plants with neem oil, or dust them with diatomaceous earth.
* Clubroot: Clubroot is a soilborne disease that causes swollen, distorted roots. To prevent clubroot, rotate your crops, maintain a soil pH above 7.0, and use disease-resistant varieties.
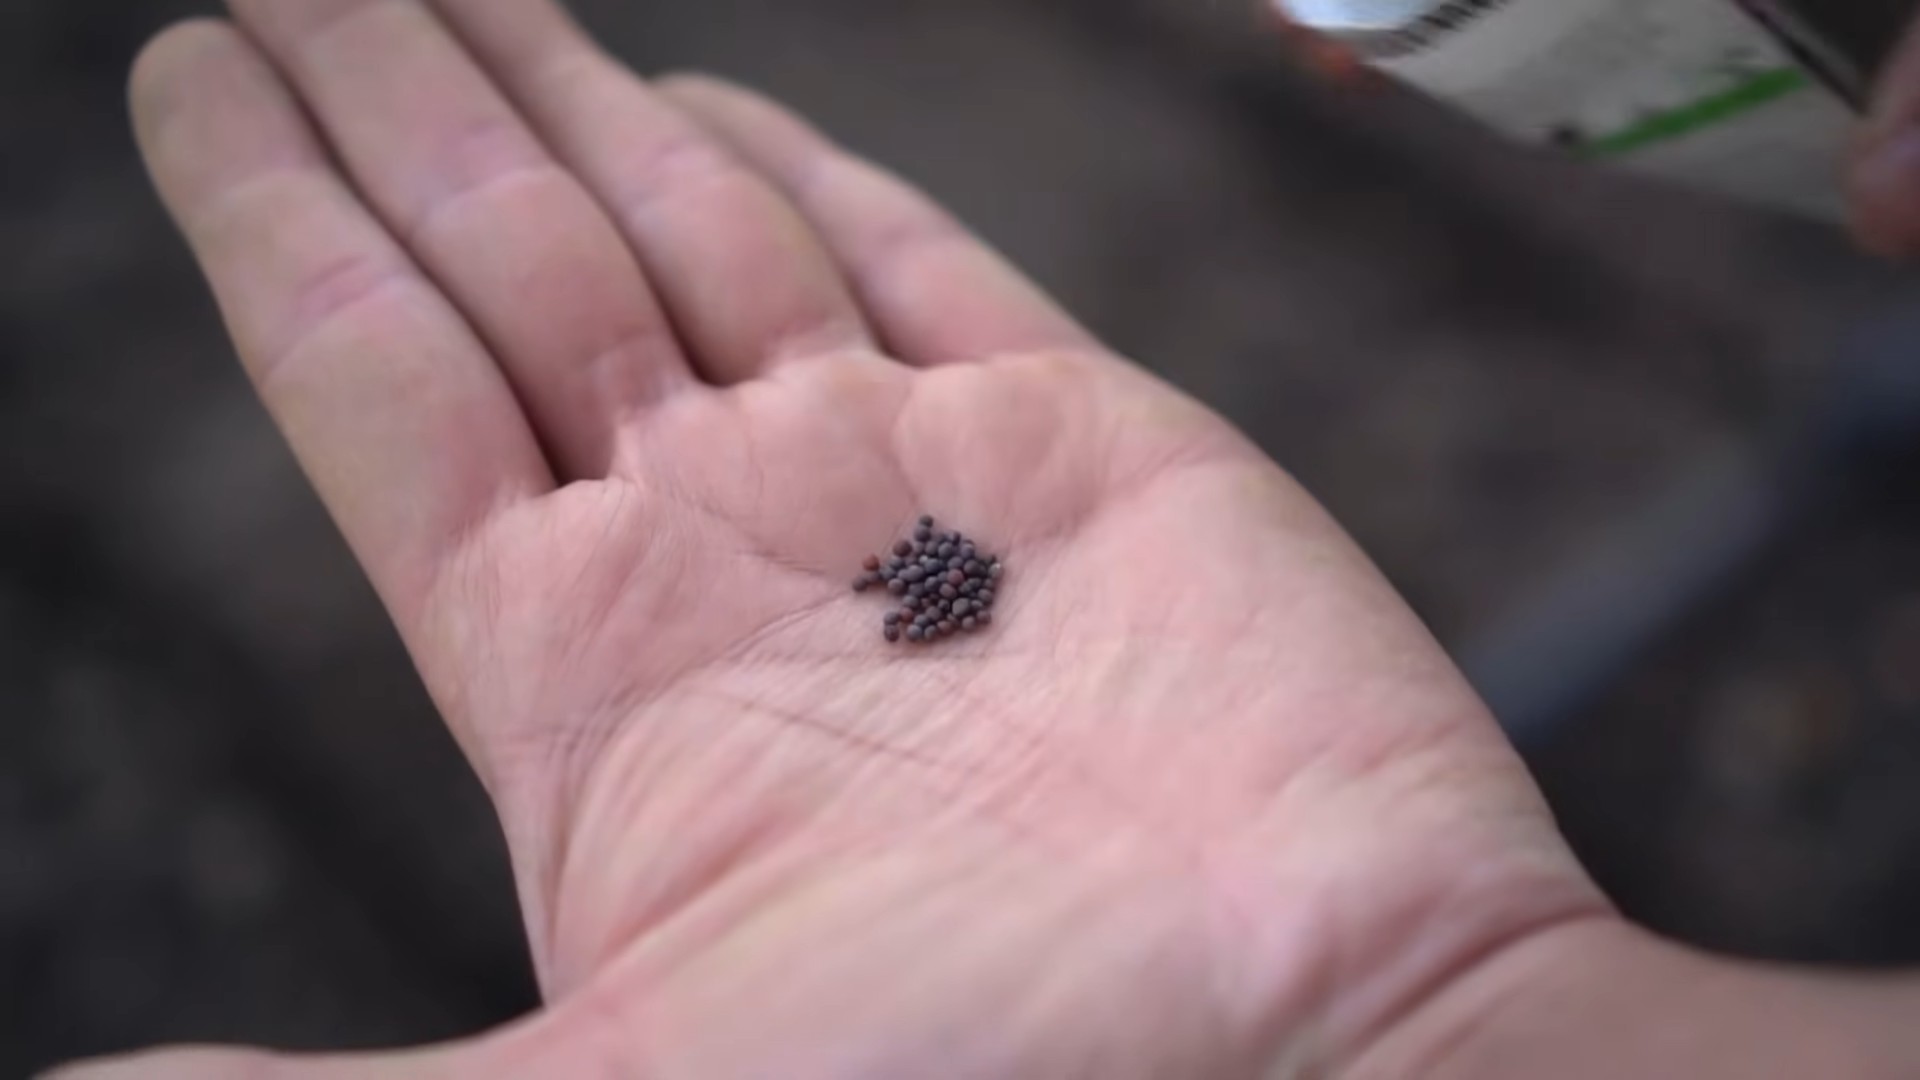
Saving Turnip Seeds
If you want to save seeds from your turnip plants for future planting, here’s how I do it:
1. Choose Healthy Plants: Select healthy, vigorous turnip plants that exhibit the characteristics you want to preserve.
2. Allow Plants to Bolt: Allow the
Conclusion
So, there you have it! Growing turnips at home is not only achievable, but it’s also incredibly rewarding. From the crisp, peppery greens to the sweet, earthy roots, you’ll be amazed at the versatility and flavor that homegrown turnips bring to your table. Forget those bland, store-bought turnips – once you’ve tasted the difference of a freshly harvested, organically grown turnip, you’ll never go back.
This DIY approach to growing turnips empowers you to control every aspect of the process, from soil quality to pest management, ensuring the healthiest and most flavorful crop possible. Plus, it’s a fantastic way to connect with nature, reduce your carbon footprint, and enjoy the satisfaction of nurturing something from seed to table.
But the benefits don’t stop there. Growing your own turnips allows for experimentation and customization. Want a spicier green? Try a different variety like ‘Purple Top White Globe’ for a classic flavor or ‘Tokyo Cross’ for a milder, sweeter taste. Feeling adventurous? Consider succession planting, sowing seeds every few weeks, to enjoy a continuous harvest throughout the growing season. You can also explore companion planting, pairing your turnips with other vegetables like beans or peas to improve soil health and deter pests.
Don’t be intimidated by the prospect of growing your own food. Turnips are surprisingly forgiving and adaptable, making them an excellent choice for beginner gardeners. With a little planning and effort, you can enjoy a bountiful harvest of these nutritious and delicious root vegetables.
We’ve covered the essential steps, from preparing the soil to harvesting your crop. Now it’s your turn to get your hands dirty and experience the joy of growing turnips firsthand. We encourage you to embrace this DIY project and discover the many benefits it offers.
And remember, gardening is a journey, not a destination. There will be successes and setbacks along the way, but each experience is an opportunity to learn and grow. So, don’t be afraid to experiment, adapt, and most importantly, have fun!
We’re confident that you’ll be delighted with the results of your efforts. Imagine the satisfaction of serving a meal featuring turnips you grew yourself, knowing that you’ve contributed to a healthier lifestyle and a more sustainable food system.
So, what are you waiting for? Grab your seeds, prepare your soil, and embark on your turnip-growing adventure today! We can’t wait to hear about your experiences. Share your tips, tricks, and triumphs in the comments below. Let’s build a community of turnip-loving gardeners and inspire others to embrace the joys of homegrown food. Happy gardening!
Frequently Asked Questions (FAQ)
What is the best time of year to plant turnips?
Turnips are a cool-season crop, meaning they thrive in cooler temperatures. The best time to plant them depends on your climate. In general, you can plant turnips in early spring (as soon as the ground can be worked) for a spring harvest, or in late summer/early fall for a fall/winter harvest. For a spring crop, sow seeds 4-6 weeks before the last expected frost. For a fall crop, sow seeds 6-8 weeks before the first expected frost. In warmer climates, you can even grow turnips throughout the winter.
How much sunlight do turnips need?
Turnips need at least 6 hours of sunlight per day to thrive. Choose a location in your garden that receives full sun for optimal growth. If you live in a particularly hot climate, some afternoon shade can be beneficial to prevent the leaves from scorching.
What kind of soil is best for growing turnips?
Turnips prefer well-drained, fertile soil with a pH between 6.0 and 6.8. Amend your soil with compost or other organic matter to improve drainage and fertility. Avoid heavy clay soils, as they can hinder root development. If you have clay soil, consider growing turnips in raised beds or containers.
How often should I water my turnips?
Turnips need consistent moisture to grow properly. Water deeply and regularly, especially during dry periods. Aim to keep the soil consistently moist, but not waterlogged. A good rule of thumb is to water when the top inch of soil feels dry to the touch. Mulching around your turnip plants can help retain moisture and suppress weeds.
How far apart should I plant turnip seeds?
Sow turnip seeds about ½ inch deep and 1 inch apart in rows that are 12-18 inches apart. Once the seedlings emerge, thin them to 3-4 inches apart to allow for proper root development. You can eat the thinned seedlings as microgreens.
When are turnips ready to harvest?
Turnips are typically ready to harvest 50-60 days after planting. You can harvest the greens at any time, but the roots are best harvested when they are 2-3 inches in diameter. To harvest, gently loosen the soil around the turnip and pull it up by the greens.
Are turnip greens edible?
Yes, turnip greens are absolutely edible and are a delicious and nutritious addition to any meal. They have a slightly peppery flavor and can be eaten raw in salads or cooked like spinach or kale. Harvest the greens when they are young and tender for the best flavor.
What are some common pests and diseases that affect turnips?
Some common pests that affect turnips include aphids, flea beetles, and root maggots. Common diseases include clubroot and powdery mildew. To prevent pest and disease problems, practice good garden hygiene, such as removing weeds and debris, and rotate your crops regularly. You can also use organic pest control methods, such as insecticidal soap or neem oil, to control pests.
Can I grow turnips in containers?
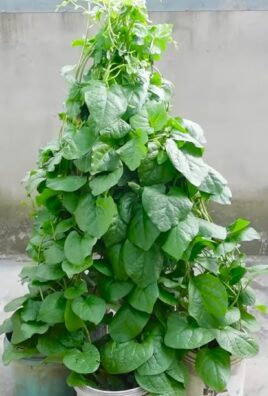
Yes, turnips can be grown in containers, making them a great option for gardeners with limited space. Choose a container that is at least 12 inches deep and wide to allow for proper root development. Use a well-draining potting mix and water regularly.
How do I store turnips after harvesting?
To store turnips, cut off the greens, leaving about an inch of stem. Wash the turnips and dry them thoroughly. Store them in a cool, dark, and humid place, such as a refrigerator or root cellar. They can last for several months when stored properly.
What are some ways to cook turnips?
Turnips can be cooked in a variety of ways, including boiling, roasting, steaming, and sautéing. They can be eaten mashed, roasted with other vegetables, or added to soups and stews. Turnip greens can be sautéed with garlic and olive oil, or added to salads or smoothies.
Can I save turnip seeds for next year?
Yes, you can save turnip seeds for next year. Allow a few turnip plants to bolt (flower) and produce seed pods. Once the seed pods are dry and brown, harvest them and extract the seeds. Store the seeds in a cool, dry place until next planting season.
Leave a Comment