
Hanging mint container gardening: sounds dreamy, doesn’t it? Imagine stepping onto your balcony or patio and being greeted by the refreshing aroma of fresh mint, ready to be plucked for your favorite tea, mojito, or culinary creation. But let’s be honest, the thought of gardening, especially in limited spaces, can sometimes feel daunting.
Mint, with its vibrant history stretching back to ancient Greece and Rome where it was revered for its medicinal and culinary properties, is a fantastic herb to cultivate. I think it’s a great choice for beginner gardeners. But, let’s face it, mint has a reputation for being a bit of a garden bully, spreading aggressively and taking over everything in its path. That’s where the magic of container gardening comes in, and even better, hanging container gardening!
This DIY guide is your secret weapon to enjoying a thriving mint harvest without the worry of it invading your entire garden. I’m going to show you simple, effective tricks and hacks to create your own stunning hanging mint container gardening setup. Not only will it add a touch of green elegance to your space, but it will also provide you with a constant supply of fresh mint, all while keeping its enthusiastic growth habits contained. Ready to ditch the store-bought mint and embrace the joy of homegrown goodness? Let’s get started!
DIY Hanging Mint Container Garden: A Refreshing Project!
Hey there, fellow plant enthusiasts! I’m so excited to share this super easy and rewarding DIY project with you: creating your own hanging mint container garden. Not only will you have fresh mint readily available for mojitos, teas, and culinary creations, but it’ll also add a touch of greenery and fragrance to your space. Plus, containing mint in a pot is crucial because, trust me, it can take over your entire garden if you let it! Let’s get started!
What You’ll Need
Before we dive in, let’s gather all the necessary materials. This will make the process smoother and more enjoyable.
* **Hanging Basket:** I recommend a basket that’s at least 10 inches in diameter. You can find these at most garden centers or even online. Make sure it has drainage holes!
* **Coco Liner or Burlap:** This will line the inside of your basket and prevent soil from falling out. Coco liners are readily available and work great.
* **Potting Soil:** Use a high-quality potting mix specifically designed for containers. This will provide good drainage and nutrients for your mint.
* **Mint Plants:** You can either start from seeds (which takes longer) or purchase established mint plants from a nursery. I usually opt for the latter for quicker results. Choose your favorite variety – spearmint, peppermint, chocolate mint, the possibilities are endless!
* **Scissors or Utility Knife:** For trimming the coco liner.
* **Gloves (Optional):** To keep your hands clean.
* **Watering Can or Hose:** For watering your newly planted mint.
* **Slow-Release Fertilizer (Optional):** To give your mint an extra boost.
* **Small Stones or Gravel (Optional):** To improve drainage at the bottom of the basket.
Preparing the Hanging Basket
This is a crucial step to ensure your mint thrives in its new home.
1. **Line the Basket:** Place the coco liner or burlap inside the hanging basket. Make sure it fits snugly and covers the entire inside surface. If the liner is too large, trim it with scissors or a utility knife, leaving about an inch or two of overhang. This overhang can be folded over the top edge of the basket later for a neater look.
2. **Add Drainage (Optional):** If you’re concerned about drainage, you can add a layer of small stones or gravel to the bottom of the basket before adding the soil. This will help prevent the roots from sitting in soggy soil, which can lead to root rot. I usually skip this step if my potting mix is well-draining, but it’s a good precaution to take, especially if you live in a rainy area.
Planting the Mint
Now for the fun part – getting those mint plants into their new home!
1. **Add Potting Soil:** Fill the lined basket with potting soil, leaving about an inch or two of space at the top. This will prevent the soil from overflowing when you water. Gently pat down the soil to remove any air pockets.
2. **Prepare the Mint Plants:** Gently remove the mint plants from their nursery pots. If the roots are tightly bound, gently loosen them with your fingers. This will encourage them to spread out and establish themselves in the new soil.
3. **Plant the Mint:** Dig small holes in the potting soil, spacing them evenly around the basket. The number of plants you use will depend on the size of your basket and the size of the plants. I usually plant 2-3 mint plants in a 10-inch basket. Place the mint plants in the holes, making sure the top of the root ball is level with the surrounding soil.
4. **Fill in with Soil:** Fill in the holes around the mint plants with potting soil, gently patting it down. Make sure the plants are securely planted and the soil is firm but not compacted.
5. **Water Thoroughly:** Water the newly planted mint thoroughly until water drains out of the drainage holes. This will help settle the soil and ensure the roots are properly hydrated.
Caring for Your Hanging Mint Garden
Proper care is essential to keep your mint thriving and producing those delicious leaves.
1. **Sunlight:** Mint prefers partial shade, especially during the hottest part of the day. Too much direct sunlight can scorch the leaves. I usually hang my mint basket in a spot that receives morning sun and afternoon shade.
2. **Watering:** Mint likes to be kept consistently moist, but not soggy. Water your hanging mint garden whenever the top inch of soil feels dry to the touch. During hot, dry weather, you may need to water it daily. Be sure to check the soil moisture regularly.
3. **Fertilizing:** Mint is a relatively light feeder, but it will benefit from occasional fertilization. You can use a slow-release fertilizer at planting time, or you can fertilize every few weeks with a liquid fertilizer diluted to half strength. I prefer using organic fertilizers, such as compost tea or fish emulsion.
4. **Pruning:** Regular pruning is essential to keep your mint plants bushy and productive. Pinch off the top leaves of the stems to encourage branching. You can also harvest leaves as needed for cooking or tea. Don’t be afraid to prune heavily – mint is very resilient and will bounce back quickly.
5. **Pest Control:** Mint is generally pest-resistant, but it can occasionally be affected by aphids or spider mites. If you notice any pests, you can try spraying them with insecticidal soap or neem oil. I always prefer to use natural pest control methods whenever possible.
6. **Overwintering:** In colder climates, mint can be overwintered indoors. Before the first frost, bring your hanging mint garden indoors and place it in a sunny location. Water it sparingly during the winter months, and fertilize it occasionally. You can also take cuttings from your mint plants and root them indoors to ensure you have a supply of fresh mint throughout the winter.
Troubleshooting
Even with the best care, you might encounter some challenges. Here are a few common issues and how to address them:
* **Yellowing Leaves:** This can be caused by overwatering, underwatering, or nutrient deficiencies. Check the soil moisture and adjust your watering accordingly. If the soil is consistently wet, allow it to dry out slightly before watering again. If the soil is dry, water thoroughly. You can also try fertilizing with a balanced fertilizer.
* **Leggy Growth:** This is usually caused by insufficient sunlight. Move your hanging mint garden to a sunnier location.
* **Pests:** As mentioned earlier, aphids and spider mites can sometimes be a problem. Treat them with insecticidal soap or neem oil.
* **Root Rot:** This is caused by overwatering and poor drainage. Make sure your hanging basket has drainage holes and that you’re not overwatering. If you suspect root rot, you can try repotting the mint in fresh potting soil.
Harvesting Your Mint
The best part of growing your own mint is, of course, harvesting it!
* **When to Harvest:** You can start harvesting mint leaves as soon as the plants are established. The best time to harvest is in the morning, after the dew has dried.
* **How to Harvest:** Simply pinch off the leaves or stems with your fingers or scissors. You can harvest as much or as little as you need.
* **Storing Mint:** Fresh mint leaves can be stored in the refrigerator for several days. Wrap them in a damp paper towel and place them in a plastic bag. You can also dry mint leaves for longer storage. To dry mint, hang the stems upside down in a cool, dry place until the leaves are brittle. Then, crumble the leaves and store them in an airtight container.
Enjoy Your Fresh Mint!
Now that you have your own hanging mint container garden, you can enjoy fresh mint whenever you want! Use it to make refreshing mojitos, flavorful teas, or delicious culinary creations. The possibilities are endless! I hope you found this guide helpful. Happy gardening!
Conclusion
So, there you have it! Creating your own hanging mint container garden is not just a fun DIY project; it’s a game-changer for anyone who loves fresh herbs and wants to maximize their space. We’ve walked through the simple steps, highlighting how easy it is to transform a few basic materials into a thriving vertical garden. But why is this a must-try?
First and foremost, the convenience is unparalleled. Imagine stepping outside your door and having a readily available supply of fragrant, flavorful mint for your teas, cocktails, salads, or desserts. No more last-minute trips to the grocery store or settling for dried herbs that lack the vibrant taste of fresh mint. This is about bringing the garden to you, making fresh ingredients an everyday luxury.
Beyond convenience, a hanging mint container garden is a fantastic way to add a touch of greenery and beauty to your home, even if you’re short on space. Balconies, patios, and even small indoor areas can be transformed into lush, aromatic havens with a few strategically placed hanging planters. It’s an instant aesthetic upgrade that also offers the therapeutic benefits of gardening.
And let’s not forget the cost savings! Buying fresh herbs from the store can quickly add up, especially if you’re a frequent user. With a one-time investment in a few supplies, you can enjoy a continuous supply of mint for months, if not years, to come. Plus, you’ll have the satisfaction of knowing that you grew it yourself, using sustainable practices and avoiding harmful pesticides.
Now, for a few variations to inspire your creativity:
* Tiered Hanging Baskets: Create a multi-tiered hanging garden by attaching several baskets at different heights. This adds visual interest and allows you to grow other herbs alongside your mint, such as parsley, thyme, or oregano.
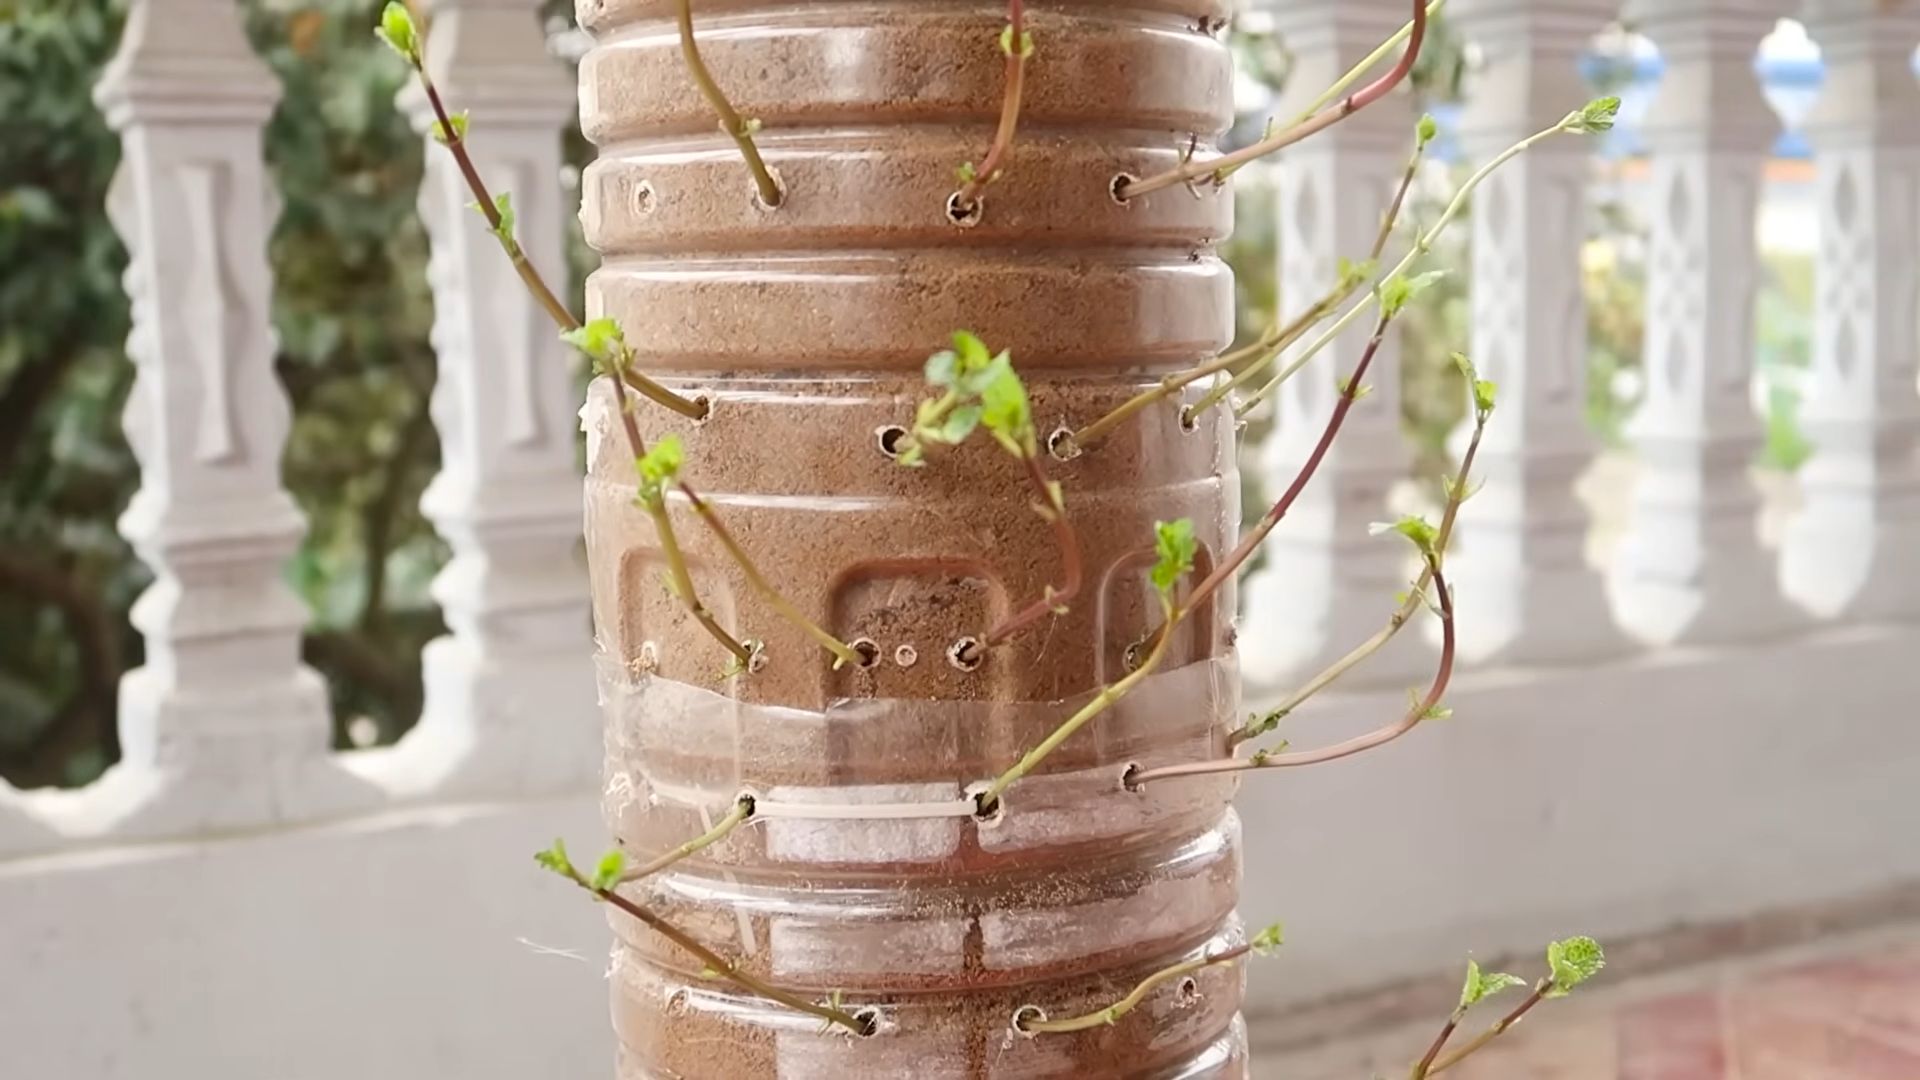
* Repurposed Materials: Get creative with your containers! Old buckets, tin cans, or even plastic bottles can be transformed into charming hanging planters with a little paint and some drainage holes.
* Mint Varieties: Don’t limit yourself to just one type of mint. Experiment with different varieties like spearmint, peppermint, chocolate mint, or apple mint to create a diverse and flavorful herb garden. Each variety offers a unique aroma and taste profile, adding depth and complexity to your culinary creations.
* Indoor Hanging Garden: If you live in a colder climate, consider bringing your hanging mint container garden indoors during the winter months. Place it near a sunny window or supplement with grow lights to ensure it continues to thrive.
* Self-Watering System: For those who tend to forget to water their plants, consider incorporating a self-watering system into your hanging planters. This can be as simple as adding a water reservoir at the bottom of the container or using a wicking system to draw water up from a lower level.
Ultimately, the beauty of this DIY project lies in its adaptability. You can customize it to suit your specific needs, preferences, and available resources. The possibilities are endless!
So, what are you waiting for? Gather your supplies, get your hands dirty, and embark on this rewarding gardening adventure. We’re confident that you’ll be amazed at how easy and enjoyable it is to create your own thriving hanging mint container garden.
And most importantly, we want to hear about your experience! Share your photos, tips, and variations in the comments below. Let’s create a community of mint-loving gardeners and inspire each other to grow our own fresh herbs. Happy gardening!
Frequently Asked Questions (FAQ)
What kind of container is best for a hanging mint garden?
The best containers for a hanging mint garden are those that are lightweight, durable, and have good drainage. Plastic hanging baskets are a popular choice because they are inexpensive and readily available. However, you can also use repurposed materials like old buckets, tin cans, or even plastic bottles, as long as you drill drainage holes in the bottom. Consider the size of the container as well; a larger container will hold more soil and require less frequent watering. Also, ensure the container is sturdy enough to support the weight of the soil and the mature mint plant.
How much sunlight does a hanging mint garden need?
Mint thrives in partial shade to full sun, but it prefers morning sun and afternoon shade, especially in hotter climates. Aim for at least 4-6 hours of sunlight per day. If you’re growing your mint indoors, place it near a sunny window or supplement with grow lights. Insufficient sunlight can lead to leggy growth and reduced flavor. Observe your mint plants closely and adjust their location as needed to ensure they are receiving the optimal amount of light.
What kind of soil should I use for my hanging mint garden?
Use a well-draining potting mix that is rich in organic matter. A mixture of peat moss, perlite, and compost is a good option. Avoid using garden soil, as it can be too heavy and compact, leading to poor drainage and root rot. The soil should be able to retain moisture but also allow excess water to drain away freely. You can also add a slow-release fertilizer to the soil to provide your mint plants with a steady supply of nutrients.
How often should I water my hanging mint garden?
Water your hanging mint garden regularly, especially during hot, dry weather. The soil should be kept consistently moist, but not soggy. Check the soil moisture by sticking your finger into the top inch of soil. If it feels dry, it’s time to water. Overwatering can lead to root rot, so be sure to allow the soil to dry out slightly between waterings. Hanging containers tend to dry out more quickly than in-ground gardens, so you may need to water them more frequently.
How do I prevent mint from becoming invasive in a container garden?
Mint is known for its invasive nature, but growing it in a container is the perfect way to control its spread. The container acts as a physical barrier, preventing the mint from sending out runners and taking over your garden. To further prevent it from spreading, prune your mint regularly and remove any runners that may escape the container. You can also line the inside of the container with a root barrier fabric to prevent the roots from growing through the drainage holes.
How do I harvest mint from my hanging garden?
Harvest mint by snipping off stems just above a leaf node. This will encourage the plant to branch out and produce more leaves. You can harvest mint throughout the growing season, as needed. For the best flavor, harvest mint in the morning, after the dew has dried. Avoid harvesting more than one-third of the plant at a time, as this can stress the plant and reduce its growth.
How do I fertilize my hanging mint garden?
Fertilize your hanging mint garden every 2-4 weeks with a balanced liquid fertilizer. Follow the instructions on the fertilizer label for proper dilution rates. You can also add compost or other organic matter to the soil to provide your mint plants with a slow-release source of nutrients. Avoid over-fertilizing, as this can lead to leggy growth and reduced flavor.
What pests and diseases affect mint, and how can I control them?
Mint is generally resistant to pests and diseases, but it can be susceptible to aphids, spider mites, and powdery mildew. To control aphids and spider mites, spray your mint plants with a strong stream of water or use an insecticidal soap. To prevent powdery mildew, ensure good air circulation around your plants and avoid overhead watering. If powdery mildew does occur, treat it with a fungicide. Regularly inspect your mint plants for signs of pests or diseases and take action promptly to prevent them from spreading.
Can I grow different varieties of mint in the same hanging container?
While it’s possible to grow different varieties of mint in the same hanging container, it’s generally not recommended. Mint varieties can cross-pollinate, which can result in offspring with unpredictable flavors and characteristics. Additionally, some mint varieties are more vigorous than others and may outcompete their neighbors. If you do decide to grow multiple varieties of mint in the same container, choose varieties that are similar in growth habit and vigor, and be prepared to prune them regularly to prevent them from crowding each other.
How do I overwinter my hanging mint garden?
In colder climates, you can overwinter your hanging mint garden by bringing it indoors before the first frost. Place it near a sunny window or supplement with grow lights. Water your mint plants less frequently during the winter months, as they will not be growing as actively. You can also prune your mint plants back to a few inches above the soil level to encourage new growth in the spring. In milder climates, you may be able to leave your hanging mint garden outdoors, but be sure to protect it from frost and freezing temperatures.

Leave a Comment