
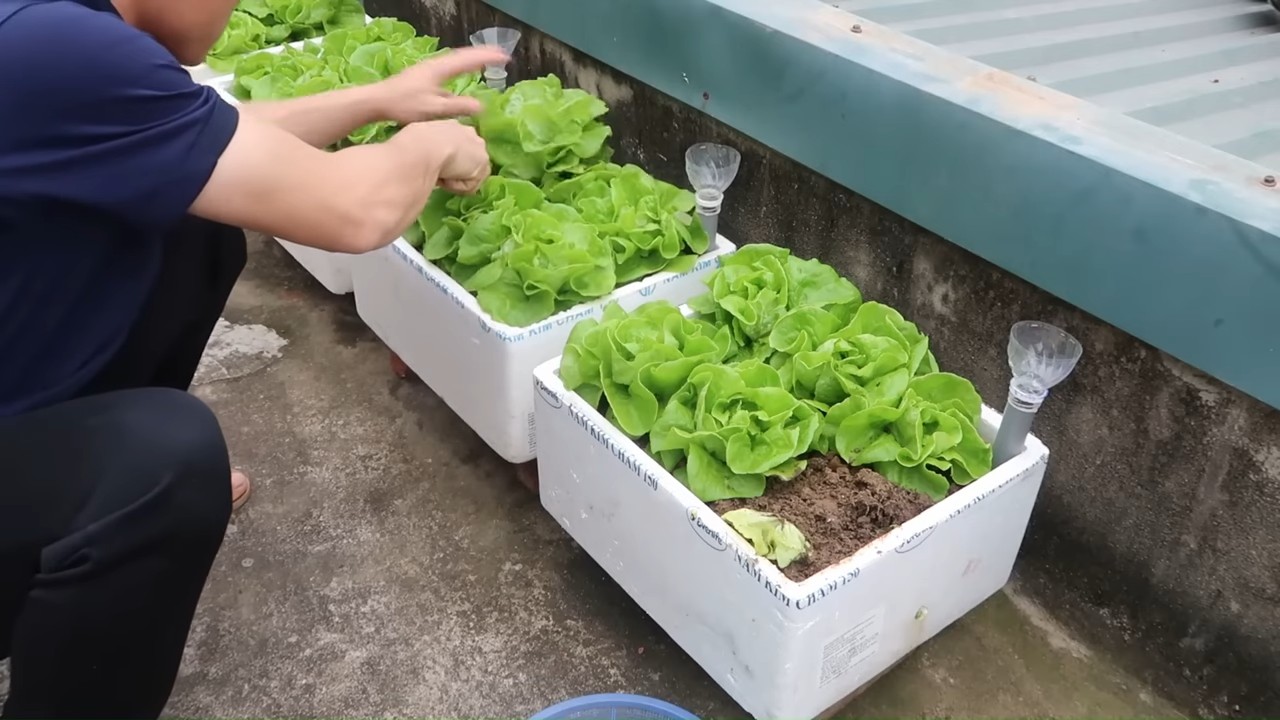
Hanging self-watering lettuce gardens: Imagine fresh, crisp lettuce just steps from your kitchen, ready to be harvested whenever you crave a salad. No more trips to the grocery store for wilted greens! This isn’t just a dream; it’s a reality you can easily create with a simple DIY project. For centuries, humans have cultivated gardens, finding solace and sustenance in nurturing plants. From the hanging gardens of Babylon to the humble window boxes of today, the desire to bring nature closer has always been strong.
But let’s face it, not everyone has the space or time for a traditional garden. That’s where the magic of a hanging self-watering lettuce garden comes in. It’s the perfect solution for apartment dwellers, busy professionals, or anyone looking to maximize their gardening efforts with minimal fuss. This DIY project is not only space-saving but also incredibly efficient, ensuring your lettuce receives consistent hydration, even when you’re away. I’m excited to share this easy and rewarding project with you, so you can enjoy fresh, homegrown lettuce all season long. Get ready to transform your space into a vibrant, edible oasis with your very own hanging self-watering lettuce garden!
DIY Hanging Self-Watering Lettuce Garden: A Bountiful Balcony Project
Hey there, fellow garden enthusiasts! I’m so excited to share this project with you. If you’re like me and crave fresh, homegrown lettuce but are short on space, this DIY hanging self-watering lettuce garden is the perfect solution. It’s surprisingly easy to build, looks fantastic, and provides a constant supply of delicious greens right at your fingertips. Let’s get started!
What You’ll Need: The Shopping List
Before we dive in, let’s gather all the necessary materials. This will save you time and frustration later.
* Two Plastic Buckets (5-gallon size recommended): Make sure one bucket can nest comfortably inside the other. They don’t need to be brand new; recycled buckets are perfect!
* Drill with Various Drill Bits: You’ll need a large drill bit (around 1 inch) and smaller bits for drainage and hanging.
* Utility Knife or Heavy-Duty Scissors: For cutting the fabric liner.
* Landscape Fabric or Burlap: This will line the inner bucket and prevent soil from washing into the water reservoir.
* PVC Pipe (1-2 inch diameter, about 12 inches long): This acts as a watering tube.
* PVC End Cap (to fit your PVC pipe): This will prevent soil from falling into the watering tube.
* Potting Mix: Choose a high-quality potting mix specifically formulated for vegetables.
* Lettuce Seedlings or Seeds: Select your favorite lettuce varieties! I personally love a mix of Romaine, Butterhead, and Red Leaf.
* Measuring Tape or Ruler: For accurate measurements.
* Permanent Marker: For marking drill points.
* Strong Rope or Chain: For hanging your garden. Make sure it’s weather-resistant and can support the weight of the filled buckets.
* S-Hooks (optional): For easy hanging and removal.
* Gloves: To protect your hands.
* Safety Glasses: Always a good idea when drilling!
Building the Self-Watering System: Step-by-Step Instructions
Okay, let’s get our hands dirty! This is where the magic happens.
1. Prepare the Inner Bucket (Planting Bucket):
* Drill Drainage Holes: Take the bucket that will be the inner bucket (the one that will hold the soil). Using a smaller drill bit (around 1/4 inch), drill several drainage holes in the bottom of the bucket. Space them evenly apart. I usually aim for about 6-8 holes.
* Drill Overflow Holes: Now, measure about 2-3 inches from the bottom of the *inner* bucket. Drill several more holes around the sides at this height. These are crucial! They’ll prevent the soil from becoming waterlogged and ensure proper drainage.
* Cut and Line with Landscape Fabric: Measure the inside of the inner bucket. Cut a piece of landscape fabric or burlap that’s large enough to line the entire inside, including the bottom and sides. You want it to extend a few inches over the top edge. This fabric will act as a barrier, preventing soil from washing into the water reservoir below. Secure the fabric with a few dabs of hot glue or simply fold it over the edge.
2. Prepare the Outer Bucket (Reservoir Bucket):
* Drill Hanging Holes: This bucket will hold the water reservoir. Decide where you want to hang your garden. Drill three or four evenly spaced holes near the top rim of the *outer* bucket. These holes will be used to attach the rope or chain for hanging. Make sure the holes are large enough to accommodate your chosen rope or chain.
* Drill Watering Tube Hole: Using the larger drill bit (around 1 inch), drill a hole in the side of the *outer* bucket, about 2-3 inches from the bottom. This hole will accommodate the PVC watering tube. The hole should be snug enough to hold the tube in place but not so tight that you can’t adjust it.
3. Assemble the Watering Tube:
* Insert the PVC Pipe: Slide the PVC pipe through the hole you drilled in the outer bucket. The pipe should extend a few inches into the bucket.
* Cap the End: Place the PVC end cap on the end of the pipe that’s *inside* the outer bucket. This will prevent soil from falling into the tube and clogging it.
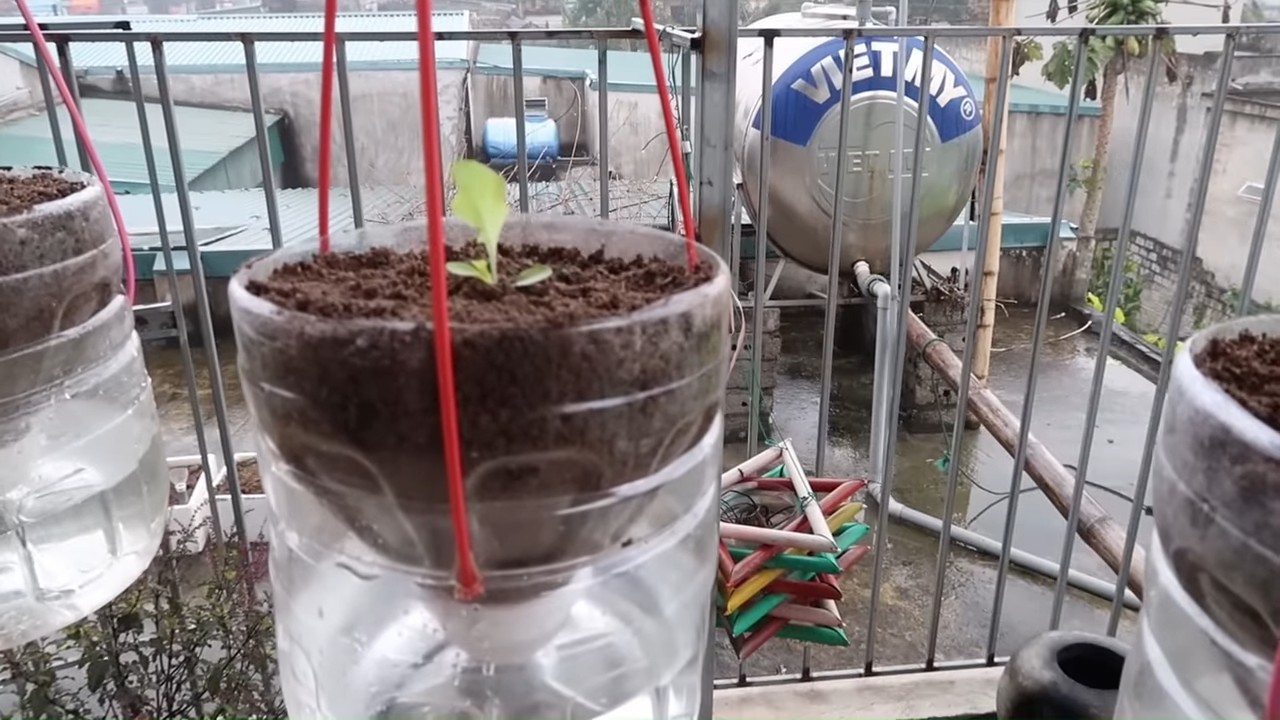
4. Nest the Buckets:
* Carefully place the inner bucket (the one with the drainage holes and landscape fabric) inside the outer bucket (the reservoir bucket). The bottom of the inner bucket should sit a few inches above the bottom of the outer bucket, creating the water reservoir. The overflow holes you drilled earlier should be positioned above the water line.
5. Add Potting Mix:
* Fill the inner bucket with your chosen potting mix, leaving about an inch or two of space at the top. Gently pat down the soil to remove any air pockets.
6. Plant Your Lettuce:
* Now for the fun part! If you’re using seedlings, carefully remove them from their containers and plant them in the potting mix, spacing them according to the instructions on the plant labels. If you’re using seeds, sow them according to the package directions.
* Water gently after planting to settle the soil.
7. Hang Your Garden:
* Thread the rope or chain through the hanging holes you drilled in the outer bucket. Secure the rope or chain with knots or S-hooks.
* Carefully hang your garden in a sunny location that receives at least 6 hours of sunlight per day.
8. Watering and Maintenance:
* Initial Watering: For the first watering, water from the top until you see water draining from the overflow holes. This will ensure the potting mix is thoroughly saturated.
* Refilling the Reservoir: After the initial watering, you’ll primarily water by filling the reservoir in the outer bucket. Simply pour water into the PVC watering tube until the water level reaches the overflow holes. Check the water level every few days, especially during hot weather, and refill as needed.
* Fertilizing: Feed your lettuce plants with a liquid fertilizer diluted to half strength every 2-3 weeks.
* Harvesting: Harvest your lettuce leaves as needed, starting with the outer leaves. This will encourage the plant to produce more leaves.
Troubleshooting Tips and Tricks
Even with the best-laid plans, sometimes things don’t go exactly as expected. Here are a few common issues and how to address them:
* Soil is Too Wet: If the soil is constantly soggy, even with the overflow holes, you may need to add more drainage holes or use a lighter, more well-draining potting mix.
* Soil is Too Dry: If the soil dries out quickly, even with a full reservoir, you may need to add more water-retentive materials to the potting mix, such as vermiculite or coconut coir.
* Lettuce is Wilting: Wilting can be caused by several factors, including underwatering, overwatering, or excessive heat. Check the soil moisture and adjust your watering schedule accordingly. If it’s extremely hot, consider moving your garden to a slightly shadier location.
* Pests: Keep an eye out for common lettuce pests, such as aphids and slugs. Treat infestations promptly with organic pest control methods, such as insecticidal soap or diatomaceous earth.
* Nutrient Deficiencies: Yellowing leaves can indicate a nutrient deficiency. Fertilize regularly with a balanced liquid fertilizer.
Choosing the Right Location
The success of your hanging lettuce garden depends heavily on choosing the right location. Here’s what to consider:
* Sunlight: Lettuce needs at least 6 hours of sunlight per day. Choose a location that receives plenty of direct sunlight.
* Protection from Wind: Strong winds can damage delicate lettuce leaves. Choose a location that is sheltered from strong winds.
* Accessibility: Make sure the location is easily accessible for watering and harvesting.
* Weight Considerations: Remember that a filled bucket of soil and water can be quite heavy. Ensure that your hanging structure is strong enough to support the weight.
Variations and Customizations
The beauty of DIY is that you can customize the project to suit your needs and preferences. Here are a few ideas:
* Vertical Garden Wall: Create a vertical garden wall by hanging multiple self-watering lettuce gardens at different heights.
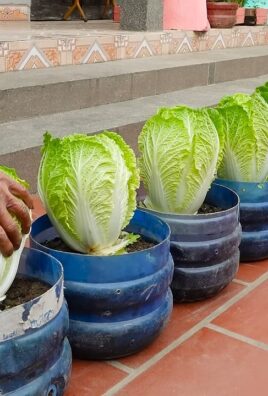
* Herb Garden: Instead of lettuce, plant a variety of herbs, such as basil, mint, and parsley.
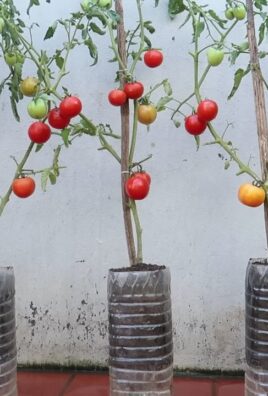
* Strawberry Garden: With a few modifications, you can adapt this project to grow strawberries.
* Decorative Touches: Paint the buckets, add decorative stones, or embellish the hanging ropes to create a more visually appealing garden.
I
Conclusion
So, there you have it! Creating your own hanging self-watering lettuce garden isn’t just a fun project; it’s a game-changer for anyone who loves fresh, homegrown greens but is short on space or time. We’ve walked you through the steps, highlighting how simple and cost-effective it can be to build a system that practically takes care of itself.
Why is this DIY trick a must-try? Because it offers a multitude of benefits. Imagine stepping outside your door and snipping off exactly the amount of crisp, flavorful lettuce you need for a salad, sandwich, or wrap. No more trips to the grocery store for wilted, overpriced greens. No more worrying about overwatering or underwatering – the self-watering system takes care of that for you. Plus, the vertical design maximizes space, making it perfect for balconies, patios, or even small indoor areas with sufficient sunlight.
But the advantages extend beyond convenience and cost savings. Growing your own lettuce allows you to control exactly what goes into it – no pesticides, herbicides, or other harmful chemicals. You’ll be enjoying the purest, most nutritious greens possible. And let’s not forget the sheer joy and satisfaction of nurturing something from seed to harvest. It’s a rewarding experience that connects you to nature and provides a sense of accomplishment.
Looking for variations? Absolutely! While we focused on lettuce, this system can be adapted for other leafy greens like spinach, kale, or even herbs like basil and parsley. Consider using different types of containers to create a more visually appealing display. You could also experiment with adding a small amount of slow-release fertilizer to the soil mix for an extra boost of nutrients. For those in colder climates, consider bringing your hanging garden indoors during the winter months and providing supplemental lighting. You can also add companion plants like marigolds to deter pests naturally.
We’ve shown you how to create a thriving hanging self-watering lettuce garden, and now it’s your turn to put these instructions into action. Don’t be intimidated – even if you’re a beginner gardener, this project is incredibly manageable. Gather your supplies, follow the steps, and get ready to enjoy a bounty of fresh, delicious lettuce right at your fingertips.
We are confident that you’ll love the results. The convenience, the cost savings, the health benefits, and the sheer satisfaction of growing your own food are all compelling reasons to give this DIY project a try.
We encourage you to embark on this gardening adventure and share your experiences with us! Post pictures of your hanging gardens, share your tips and tricks, and let us know how this project has transformed your access to fresh, healthy greens. Your feedback will not only inspire others but also help us refine and improve this guide for future gardeners. So, get your hands dirty, embrace the process, and enjoy the fruits (or rather, the leaves) of your labor! Happy gardening!
Frequently Asked Questions (FAQ)
What type of lettuce grows best in a hanging self-watering garden?
Loose-leaf lettuce varieties, such as Romaine, Butterhead, and Oakleaf, are generally the best choices for hanging gardens. These types of lettuce are relatively compact, easy to harvest, and tend to thrive in containers. Avoid head lettuce varieties like iceberg, which require more space and may not perform as well in a confined environment. Consider a mix of different lettuce varieties for a colorful and flavorful salad blend.
How often do I need to refill the water reservoir?
The frequency of refilling the water reservoir will depend on several factors, including the size of the reservoir, the type of lettuce you’re growing, the weather conditions, and the maturity of the plants. In general, you should check the water level every few days, especially during hot or dry periods. A good rule of thumb is to refill the reservoir when it’s about halfway empty. Over time, you’ll develop a better understanding of your garden’s specific watering needs.
What type of soil should I use for my hanging lettuce garden?
A well-draining potting mix is essential for a healthy hanging lettuce garden. Avoid using garden soil, which can be too heavy and compact, leading to poor drainage and root rot. A good potting mix will typically contain a blend of peat moss, perlite, and vermiculite. You can also add some compost to the mix for extra nutrients. Look for a potting mix specifically formulated for containers or raised beds.
How much sunlight does my hanging lettuce garden need?
Lettuce requires at least 4-6 hours of direct sunlight per day to thrive. If you’re growing your lettuce garden indoors, you may need to supplement with artificial lighting, such as grow lights. Place your hanging garden in a location that receives ample sunlight, such as a south-facing window or balcony. Be mindful of the intensity of the sunlight, especially during the hottest part of the day. If the leaves start to wilt or scorch, consider providing some shade.
How do I harvest lettuce from my hanging garden?
Harvesting lettuce from a hanging garden is easy and convenient. Simply snip off the outer leaves as needed, leaving the inner leaves to continue growing. This method, known as “cut-and-come-again,” allows you to harvest lettuce multiple times from the same plant. Avoid harvesting more than one-third of the plant at a time to ensure continued growth. Harvest in the morning when the leaves are crisp and hydrated.
How do I prevent pests from attacking my lettuce garden?
Several pests can attack lettuce, including aphids, slugs, and snails. To prevent pest infestations, start by inspecting your plants regularly for any signs of damage. Remove any pests you find by hand or with a strong spray of water. You can also use organic pest control methods, such as neem oil or insecticidal soap. Companion planting with herbs like basil or marigolds can also help deter pests. Ensure good air circulation around your plants to prevent fungal diseases.
Can I grow other plants besides lettuce in my hanging self-watering garden?
Yes, you can grow other leafy greens and herbs in your hanging self-watering garden. Spinach, kale, arugula, basil, parsley, and mint are all good options. Choose plants that have similar growing requirements as lettuce, such as well-draining soil, adequate sunlight, and consistent moisture. Be mindful of the size and growth habits of the plants you choose, as some may outcompete others for space and resources.
How do I clean and maintain my hanging self-watering garden?
Regular cleaning and maintenance are essential for a healthy and productive hanging garden. Remove any dead or decaying leaves from the plants and the soil surface. Clean the water reservoir regularly to prevent algae growth. Check the drainage holes to ensure they are not clogged. At the end of the growing season, empty the containers, remove the old soil, and clean the containers thoroughly before storing them for the winter. You can also sanitize the containers with a diluted bleach solution to prevent the spread of diseases.
What if my lettuce starts to bolt (go to seed)?
Bolting is a common problem with lettuce, especially during hot weather. When lettuce bolts, it becomes bitter and unpalatable. To prevent bolting, choose heat-tolerant lettuce varieties and provide shade during the hottest part of the day. Water your plants regularly to keep the soil cool and moist. If your lettuce starts to bolt, harvest it immediately to salvage as much as possible. You can also try planting lettuce in the fall or winter for a cooler growing season.
Is a hanging self-watering lettuce garden really worth the effort?
Absolutely! While there’s an initial investment of time and effort to set up the system, the long-term benefits far outweigh the costs. You’ll enjoy a constant supply of fresh, organic lettuce, save money on groceries, and reduce your environmental impact. Plus, the process of gardening is therapeutic and rewarding. A hanging self-watering lettuce garden is a sustainable and enjoyable way to grow your own food, even in limited spaces. The convenience and freshness are unparalleled, making it a worthwhile endeavor for any gardening enthusiast.
Leave a Comment