
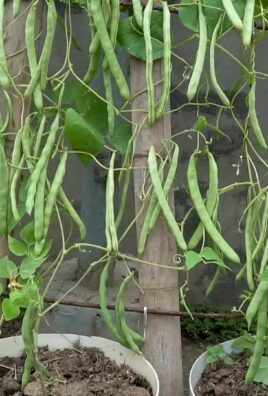
Harvest bean sprouts at home? Absolutely! Imagine the satisfaction of snipping fresh, crunchy bean sprouts grown right in your own kitchen. Forget those bland, pre-packaged sprouts from the grocery store. We’re diving into the wonderful world of DIY sprouting, and trust me, it’s easier than you think!
Sprouting, in general, has a rich history, dating back thousands of years. Ancient cultures, particularly in Asia, recognized the nutritional powerhouses hidden within these tiny germinated seeds. They were a vital source of vitamins and minerals, especially during long winters when fresh produce was scarce. Now, we can bring that ancient wisdom into our modern homes.
But why should you learn to harvest bean sprouts at home? Well, for starters, it’s incredibly cost-effective. A small bag of beans can yield a mountain of sprouts! Plus, you have complete control over the growing process, ensuring they’re free from pesticides and other unwanted chemicals. More importantly, it’s a fun and rewarding project that connects you with nature, even if you only have a windowsill to spare. Ready to ditch the store-bought sprouts and embark on this exciting journey with me? Let’s get sprouting!
Bohnensprossen selber ziehen: Eine einfache Anleitung für zu Hause
Hey Leute! Habt ihr Lust auf frische, knackige Bohnensprossen, ohne ständig zum Supermarkt rennen zu müssen? Dann seid ihr hier genau richtig! Ich zeige euch, wie ihr ganz einfach zu Hause eure eigenen Bohnensprossen ziehen könnt. Es ist super easy, kostengünstig und macht richtig Spaß! Außerdem wisst ihr genau, was drin ist – keine Zusatzstoffe, nur pure Natur. Los geht’s!
Was ihr braucht:
* Bohnen: Am besten eignen sich Mungbohnen, aber auch Adzukibohnen oder Linsen funktionieren super. Achtet darauf, dass die Bohnen unbehandelt und keimfähig sind. Bio-Qualität ist natürlich top!
* Ein Keimglas oder ein Sprossenturm: Ein Keimglas ist ein Glas mit einem luftdurchlässigen Deckel (oft ein Netz oder ein Sieb). Ein Sprossenturm besteht aus mehreren Etagen, in denen die Sprossen wachsen können. Beides funktioniert prima, wählt einfach, was euch besser gefällt. Ich persönlich mag das Keimglas, weil es so unkompliziert ist.
* Ein sauberes Tuch oder Küchenpapier: Zum Abdecken des Keimglases, falls ihr keinen passenden Deckel habt.
* Ein Gummiband: Um das Tuch am Keimglas zu befestigen.
* Wasser: Am besten gefiltert oder abgekochtes Wasser, um Verunreinigungen zu vermeiden.
* Ein dunkler, kühler Ort: Sprossen mögen es nicht zu hell. Ein Küchenschrank oder eine dunkle Ecke in der Küche sind ideal.
* Geduld: Sprossen brauchen ein paar Tage, um zu wachsen. Aber keine Sorge, es geht schneller als ihr denkt!
Schritt-für-Schritt-Anleitung:
1. Bohnen vorbereiten:
* Nehmt eure Bohnen und sortiert beschädigte oder verfärbte Exemplare aus. Nur die gesunden Bohnen sollen in euer Keimglas.
* Gebt die Bohnen in eine Schüssel und spült sie gründlich unter fließendem Wasser ab. So entfernt ihr Staub und Schmutz.
* Weicht die Bohnen in reichlich Wasser ein. Mungbohnen brauchen etwa 8-12 Stunden, Adzukibohnen und Linsen etwas weniger. Das Einweichen weckt die Bohnen auf und bereitet sie aufs Keimen vor. Ich lasse meine Bohnen meistens über Nacht einweichen.
* Nach dem Einweichen gießt ihr das Wasser ab und spült die Bohnen noch einmal gründlich ab.
2. Keimglas vorbereiten:
* Reinigt euer Keimglas oder euren Sprossenturm gründlich mit heißem Wasser und Spülmittel. Achtet darauf, dass alle Spülmittelreste entfernt sind.
* Gebt die eingeweichten Bohnen in das Keimglas. Achtet darauf, dass das Glas nicht zu voll ist, die Bohnen brauchen Platz zum Wachsen. Ich fülle das Glas meistens nur etwa zu einem Viertel.
* Falls ihr keinen passenden Deckel habt, bedeckt das Keimglas mit einem sauberen Tuch oder Küchenpapier und befestigt es mit einem Gummiband.
3. Keimen lassen:
* Stellt das Keimglas an einen dunklen, kühlen Ort. Vermeidet direkte Sonneneinstrahlung, da die Sprossen sonst bitter werden können.
* Spült die Bohnen mindestens zweimal täglich mit frischem Wasser. Gießt das Wasser durch den Deckel oder das Tuch ab. Achtet darauf, dass das Wasser gut abläuft, damit die Bohnen nicht im Wasser liegen. Das ist wichtig, um Schimmelbildung zu vermeiden.
* Stellt das Keimglas nach dem Spülen schräg auf, damit überschüssiges Wasser ablaufen kann. Ich stelle es meistens in eine Schüssel oder auf ein Abtropfgitter.
4. Wachsen lassen:
* Wiederholt das Spülen und Ablaufenlassen zweimal täglich. Ihr werdet sehen, wie die Bohnen langsam anfangen zu keimen und kleine Sprossen bilden.
* Je nach Temperatur und Bohnensorte dauert es etwa 3-5 Tage, bis die Sprossen erntereif sind.
* Achtet darauf, dass die Sprossen nicht zu lange wachsen, sonst werden sie faserig.
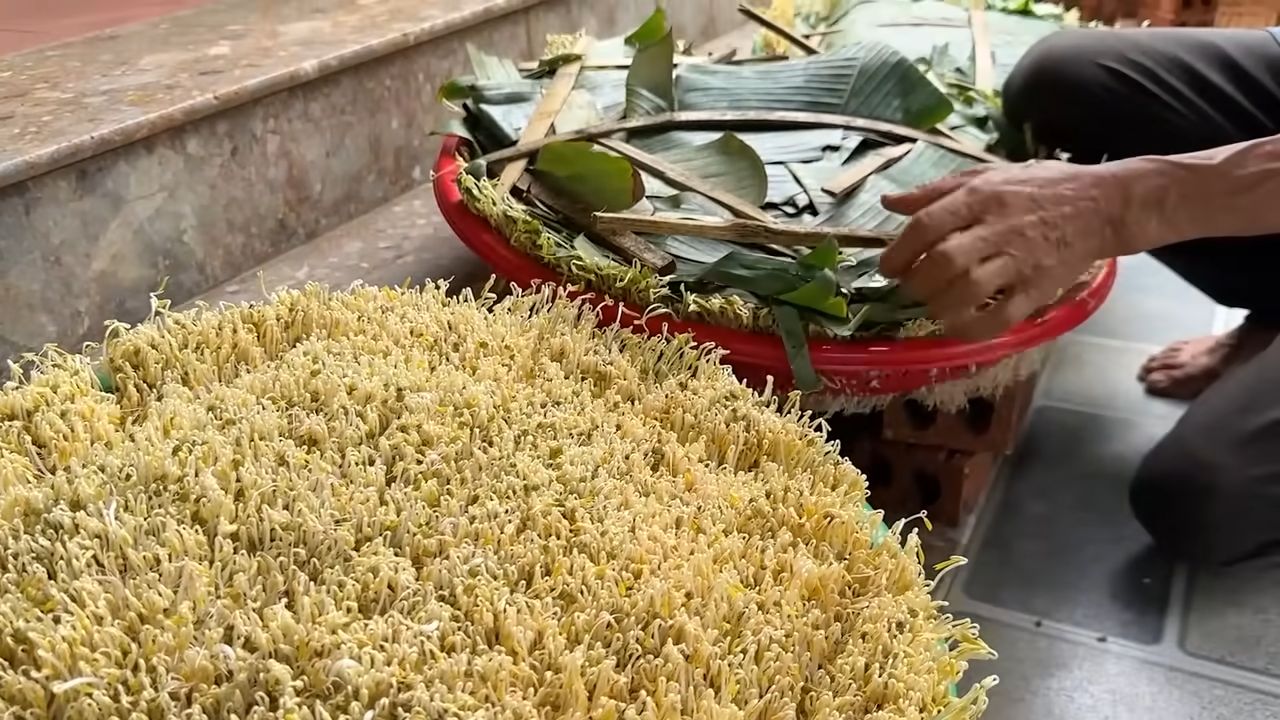
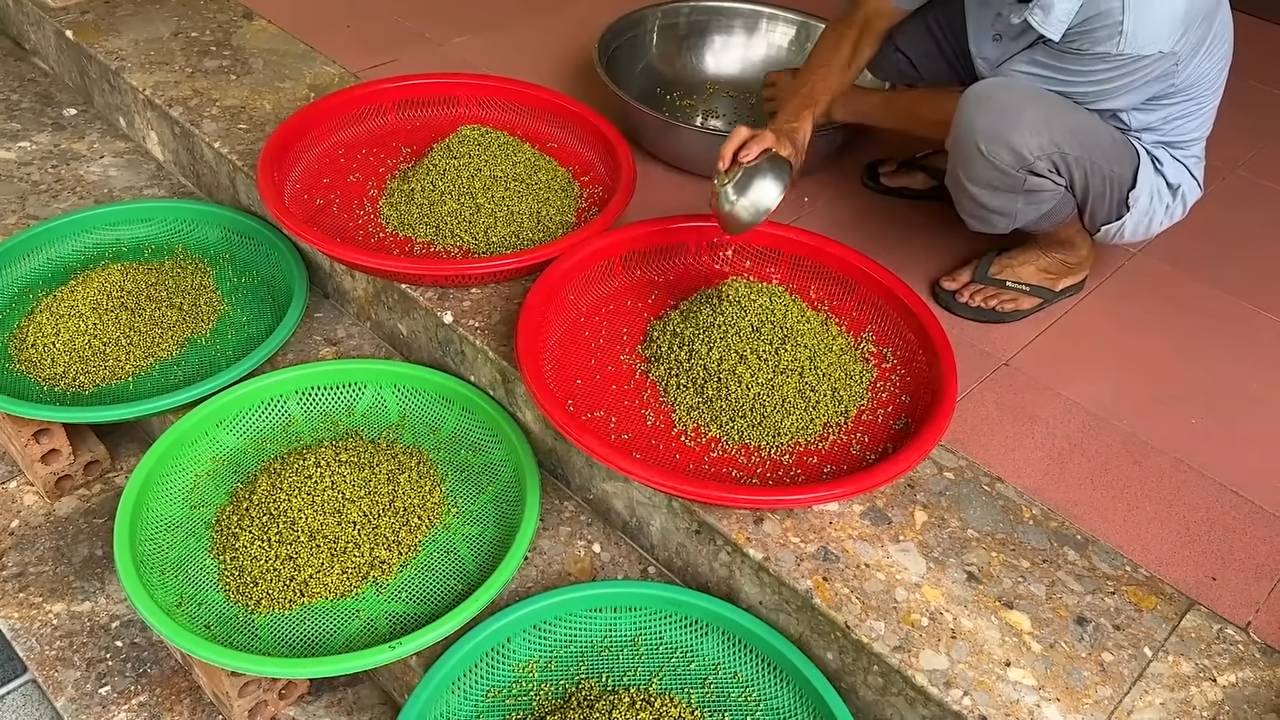
5. Ernten und genießen:
* Wenn die Sprossen die gewünschte Länge erreicht haben, könnt ihr sie ernten.
* Spült die Sprossen noch einmal gründlich ab, um eventuelle Schalenreste zu entfernen.
* Lasst die Sprossen gut abtropfen.
* Jetzt könnt ihr eure selbstgezogenen Bohnensprossen genießen! Sie schmecken super in Salaten, Suppen, Wok-Gerichten oder einfach pur als Snack.
Tipps und Tricks für perfekte Bohnensprossen:
* Hygiene ist wichtig: Achtet darauf, dass alle Utensilien sauber sind, um Schimmelbildung zu vermeiden.
* Die richtige Wassermenge: Die Bohnen sollten feucht, aber nicht nass sein. Zu viel Wasser fördert Schimmelbildung.
* Die richtige Temperatur: Die ideale Temperatur zum Keimen liegt zwischen 18 und 22 Grad Celsius.
* Regelmäßiges Spülen: Spült die Bohnen regelmäßig, um sie feucht zu halten und Schimmelbildung zu verhindern.
* Dunkelheit: Sprossen mögen es dunkel. Stellt das Keimglas an einen dunklen Ort, um die besten Ergebnisse zu erzielen.
* Abwechslung: Probiert verschiedene Bohnensorten aus, um euren Lieblingsgeschmack zu finden.
* Lagerung: Bewahrt die geernteten Sprossen im Kühlschrank auf. Sie halten sich dort etwa 3-5 Tage. Am besten in einem luftdichten Behälter.
Häufige Probleme und Lösungen:
* Schimmelbildung: Wenn sich Schimmel bildet, entsorgt die Sprossen sofort und reinigt das Keimglas gründlich. Achtet beim nächsten Mal auf bessere Hygiene und regelmäßiges Spülen.
* Keine Keimung: Wenn die Bohnen nicht keimen, kann es daran liegen, dass sie zu alt sind oder nicht keimfähig. Verwendet frische Bohnen und achtet auf die Qualität.
* Bitterer Geschmack: Wenn die Sprossen bitter schmecken, kann es daran liegen, dass sie zu viel Licht abbekommen haben. Stellt das Keimglas an einen dunkleren Ort.
Bohnensprossen in der Küche: Vielseitige Verwendungsmöglichkeiten
Bohnensprossen sind nicht nur lecker, sondern auch unglaublich vielseitig in der Küche einsetzbar. Hier sind ein paar Ideen, wie ihr eure selbstgezogenen Sprossen verwenden könnt:
* Salate: Gebt die Sprossen in eure Salate für einen frischen, knackigen Biss. Sie passen super zu Blattsalaten, Gurkensalat oder Karottensalat.
* Suppen: Verfeinert eure Suppen mit Bohnensprossen. Sie sind eine tolle Ergänzung zu asiatischen Nudelsuppen oder Gemüsesuppen.
* Wok-Gerichte: Bohnensprossen sind ein Muss in jedem Wok-Gericht. Sie geben dem Gericht eine knackige Textur und einen frischen Geschmack.
* Frühlingsrollen: Füllt eure Frühlingsrollen mit Bohnensprossen für eine extra Portion Frische.
* Sandwiches und Wraps: Belegt eure Sandwiches und Wraps mit Bohnensprossen für einen gesunden und leckeren Snack.
* Pur als Snack: Knabbert die Sprossen einfach pur als gesunden Snack zwischendurch.
Warum Bohnensprossen selber ziehen?
Es gibt viele gute Gründe, Bohnensprossen selber zu ziehen:
* Frische: Selbstgezogene Sprossen sind immer frisch und knackig.
* Geschmack: Sie schmecken einfach besser als gekaufte Sprossen.
* Kontrolle: Ihr wisst genau, was drin ist und könnt auf Zusatzstoffe verzichten.
* Nachhaltigkeit: Ihr spart Verpackungsmüll und unterstützt eine nachhaltige Lebensweise.
* Kostengünstig: Selbstgezogene Sprossen sind viel günstiger als gekaufte.
* Spaß: Es macht einfach Spaß, zu sehen, wie die kleinen Sprossen wachsen.
Also
Conclusion
So, there you have it! Mastering the art of harvesting bean sprouts at home is not just a fun project; it’s a gateway to fresher, more nutritious ingredients right at your fingertips. Forget those limp, pre-packaged sprouts from the grocery store. With minimal effort and a few simple supplies, you can cultivate a vibrant, crunchy bounty that elevates your salads, stir-fries, and sandwiches to a whole new level.
Why is this DIY trick a must-try? Because it empowers you to control the entire process, from seed selection to harvest time. You know exactly what you’re eating – no hidden preservatives, no questionable origins, just pure, wholesome goodness. Plus, it’s incredibly satisfying to watch those tiny seeds transform into a thriving crop, a testament to the magic of nature unfolding in your own kitchen.
But the benefits don’t stop there. Growing your own bean sprouts is also incredibly economical. A small bag of seeds can yield a surprisingly large harvest, saving you money on your grocery bill and reducing your reliance on commercially produced sprouts. And let’s not forget the environmental impact. By growing your own, you’re reducing your carbon footprint associated with transportation and packaging.
Ready to take your bean sprout game to the next level? Consider experimenting with different types of beans. Mung beans are the classic choice, but you can also try adzuki beans, lentil sprouts, or even radish sprouts for a peppery kick. Each variety offers a unique flavor and texture profile, allowing you to customize your sprouts to suit your taste preferences. You can also experiment with different sprouting methods. While the jar method is a great starting point, you might eventually want to explore using a multi-tiered sprouting tray for larger harvests.
Don’t be afraid to get creative! Add a touch of spice by including a few chili flakes in your sprouting jar, or infuse your sprouts with herbal notes by adding a sprig of rosemary or thyme. The possibilities are endless!
We wholeheartedly encourage you to embark on this rewarding journey of harvesting bean sprouts at home. It’s a simple, sustainable, and incredibly delicious way to enhance your culinary creations. And most importantly, it’s a fun and engaging activity that connects you with the natural world.
So, grab your seeds, your jar, and your enthusiasm, and get ready to experience the joy of homegrown bean sprouts. We’re confident that you’ll be amazed by the results.
Once you’ve tried it, we’d love to hear about your experience! Share your tips, tricks, and favorite bean sprout recipes in the comments below. Let’s build a community of sprout enthusiasts and inspire others to embrace the joys of homegrown goodness. Happy sprouting!
Frequently Asked Questions (FAQ)
What types of beans are best for sprouting?
Mung beans are the most popular and easiest to sprout, making them a great choice for beginners. However, you can also sprout adzuki beans, lentils, chickpeas, alfalfa seeds, radish seeds, and even broccoli seeds. Each type offers a unique flavor and texture. Just be sure to use seeds specifically intended for sprouting, as some commercially sold beans may be treated with chemicals that are not safe for consumption. Avoid sprouting kidney beans, as they contain toxins that are only destroyed through thorough cooking.
How long does it take to harvest bean sprouts?
The sprouting process typically takes between 3 to 7 days, depending on the type of bean, the temperature, and the humidity. Mung beans usually sprout within 3 to 5 days. You’ll know they’re ready to harvest when the sprouts are about 1-2 inches long and have developed small leaves. Keep in mind that warmer temperatures will speed up the process, while cooler temperatures will slow it down.
What is the best way to store harvested bean sprouts?
To store your harvested bean sprouts, rinse them thoroughly with cold water and drain them well. Pat them dry with a clean paper towel or salad spinner. Store them in an airtight container lined with a paper towel in the refrigerator. The paper towel will help absorb excess moisture and prevent the sprouts from becoming soggy. Properly stored bean sprouts can last for up to a week in the refrigerator.
How often should I rinse the bean sprouts during the sprouting process?
It’s crucial to rinse your bean sprouts at least twice a day, preferably three times, to prevent mold and bacteria growth. Rinsing helps to remove any accumulated waste products and keeps the sprouts hydrated. Use cool, clean water and ensure that you drain the sprouts thoroughly after each rinse.
What if my bean sprouts start to smell bad?
A foul odor is a sign of bacterial contamination or mold growth. If your bean sprouts smell bad, discard them immediately. It’s essential to maintain proper hygiene throughout the sprouting process to prevent contamination. Always use clean equipment, fresh water, and ensure adequate drainage.
Can I eat the bean sprout roots?
Yes, the roots of bean sprouts are perfectly edible and contain nutrients. They are a natural part of the sprout and do not need to be removed before consumption.
Are there any health benefits to eating bean sprouts?
Yes, bean sprouts are a nutritional powerhouse! They are low in calories and fat but rich in vitamins, minerals, and enzymes. They are a good source of vitamin C, vitamin K, folate, and fiber. Bean sprouts also contain antioxidants that help protect against cell damage. Eating bean sprouts can contribute to improved digestion, immune function, and overall health.
What can I do if my bean sprouts are not sprouting?
If your bean sprouts are not sprouting, there could be several reasons. First, ensure that you are using fresh, viable seeds specifically intended for sprouting. Old or damaged seeds may not germinate. Second, check the temperature. Bean sprouts thrive in a warm environment (around 70-75°F). If the temperature is too cold, the sprouting process may be delayed or inhibited. Third, make sure that the sprouts are getting enough moisture. They should be rinsed and drained regularly to prevent them from drying out. Finally, avoid exposing the sprouts to direct sunlight, as this can damage them.
Is it safe to eat raw bean sprouts?
While bean sprouts are often eaten raw, there is a small risk of bacterial contamination. To minimize this risk, purchase seeds from a reputable source, maintain strict hygiene during the sprouting process, and rinse the sprouts thoroughly before consumption. If you are concerned about food safety, you can lightly cook the bean sprouts before eating them.
Can I use tap water for sprouting?
It’s generally safe to use tap water for sprouting, provided that your tap water is potable and free from contaminants. However, if you are concerned about the quality of your tap water, you can use filtered or bottled water instead. Avoid using water that has been softened with salt, as the salt can inhibit sprouting.
Leave a Comment