
Harvest Malabar Spinach Easily and unlock a continuous supply of fresh, nutritious greens right from your backyard! Have you ever dreamt of a garden that keeps on giving? Imagine stepping outside and snipping off vibrant, leafy spinach whenever you need it for a salad, stir-fry, or soup. This isn’t just a dream; it’s an achievable reality with Malabar spinach, and I’m here to show you how to maximize your harvest.
Malabar spinach, also known as Basella alba, isn’t actually a true spinach, but a climbing vine with similar-tasting leaves. It’s been cultivated for centuries in Asia and Africa, prized for its heat tolerance and nutritional value. Think of it as spinach’s resilient cousin, thriving even when traditional spinach wilts under the summer sun.
Many gardeners struggle with getting the most out of their leafy greens. They plant, they water, they wait, and then… a single harvest. This DIY trick will help you extend your harvest season and prevent your Malabar spinach from bolting or becoming tough. By learning how to harvest Malabar spinach easily and strategically, you’ll not only enjoy a more abundant yield but also encourage continuous growth, ensuring a steady supply of delicious greens throughout the growing season. Let’s dive in and discover the secrets to a bountiful Malabar spinach harvest!
Harvesting Malabar Spinach Like a Pro: A DIY Guide
Hey there, fellow gardeners! Malabar spinach, also known as Ceylon spinach or vine spinach, is a fantastic addition to any garden. It’s heat-tolerant, delicious, and incredibly easy to grow. But knowing when and how to harvest it properly can make all the difference in maximizing your yield and keeping your plant healthy and productive. I’m going to walk you through the best methods I’ve learned over the years to harvest Malabar spinach, ensuring you get the most out of your leafy green friend.
Understanding Malabar Spinach Growth
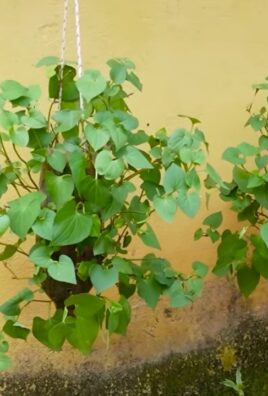
Before we dive into the harvesting process, let’s quickly touch on how Malabar spinach grows. This isn’t your typical spinach; it’s a climbing vine, which means it can get quite long if you let it. It thrives in warm weather and produces thick, succulent leaves that are perfect for salads, stir-fries, and soups.
* Growth Habit: It’s a vine, so provide it with a trellis or support structure.
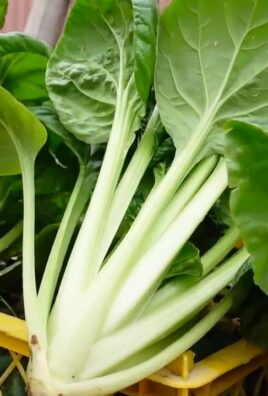
* Leaf Size: Leaves can vary in size, but generally, you’ll want to harvest them when they’re a good size for eating – usually around 4-6 inches long.
* Flowering: Malabar spinach will eventually flower, and while the flowers are edible, harvesting before flowering encourages more leaf production.
When to Harvest Your Malabar Spinach
Knowing when to harvest is crucial. You don’t want to pick too early and miss out on larger leaves, but you also don’t want to wait too long and end up with tough, bitter foliage.
* Timing is Key: Start harvesting when the plant is well-established, usually about 45-60 days after planting.
* Leaf Size Matters: Aim for leaves that are 4-6 inches in length. These are usually the most tender and flavorful.
* Regular Harvesting Encourages Growth: The more you harvest, the more the plant will produce. Think of it as a gentle nudge to keep those leaves coming!
* Avoid Over-Harvesting: Don’t strip the plant bare. Leave enough leaves for it to continue growing strong.
Tools You’ll Need
Thankfully, you don’t need a ton of fancy equipment for this. Here’s what I usually grab:
* Sharp Scissors or Pruning Shears: A clean cut is essential for healthy regrowth.
* Basket or Container: To collect your freshly harvested spinach.
* Gloves (Optional): Some people find the sap from Malabar spinach irritating, so gloves are a good idea if you have sensitive skin.
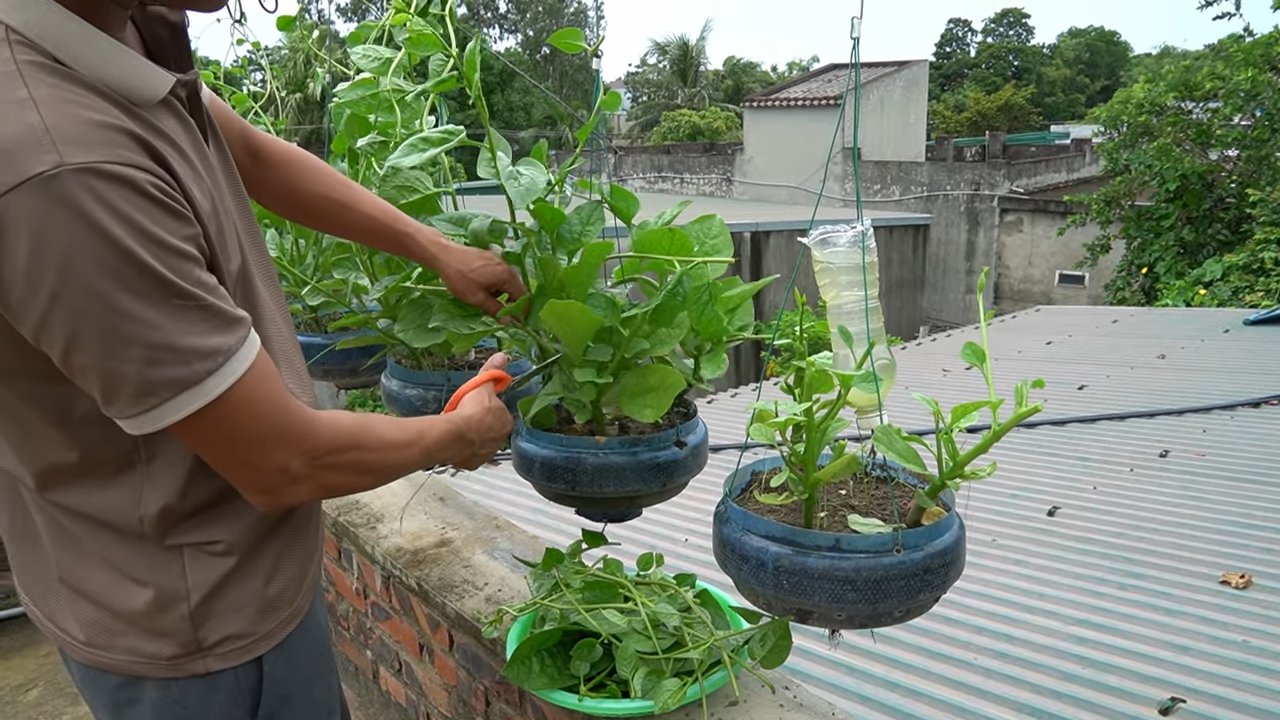
The Harvesting Process: Step-by-Step
Alright, let’s get down to the nitty-gritty. Here’s how I harvest my Malabar spinach:
1. Inspect Your Plant: Take a good look at your Malabar spinach vine. Identify the leaves that are ready for harvesting – those that are 4-6 inches long and look healthy and vibrant.
2. Choose Your Harvesting Method: There are two main ways to harvest Malabar spinach:
* Individual Leaf Harvesting: This involves picking individual leaves as needed. It’s great for small harvests and encourages continuous production.
* Stem Harvesting: This involves cutting off entire stems with multiple leaves. It’s ideal for larger harvests and can help control the plant’s size.
3. Harvesting Individual Leaves:
* Locate the Leaf: Find a mature leaf that you want to harvest.
* Make the Cut: Using your sharp scissors or pruning shears, cut the leaf stem (petiole) close to the main stem of the vine. Be careful not to damage the main stem.
* Repeat: Continue harvesting individual leaves as needed, focusing on the larger, more mature ones.
4. Harvesting Stems:
* Identify the Stem: Choose a stem that has several mature leaves on it.
* Make the Cut: Cut the stem a few inches above a leaf node (the point where a leaf or branch grows from the stem). This encourages new growth from that node.
* Don’t Overdo It: Avoid cutting off more than one-third of the plant at a time. This can stress the plant and reduce its overall productivity.
5. Handle with Care: Malabar spinach leaves are delicate, so handle them gently to avoid bruising.
6. Collect Your Harvest: Place the harvested leaves or stems in your basket or container.
7. Post-Harvest Care: After harvesting, give your Malabar spinach plant a good watering. This helps it recover and encourages new growth. You can also add a little compost or fertilizer to provide extra nutrients.
Tips for Maximizing Your Harvest
Here are a few extra tips I’ve picked up over the years to help you get the most out of your Malabar spinach:
* Water Regularly: Malabar spinach needs consistent moisture, especially during hot weather. Water deeply whenever the soil feels dry to the touch.
* Fertilize Sparingly: While Malabar spinach isn’t a heavy feeder, a little fertilizer can help boost growth. Use a balanced fertilizer or compost tea every few weeks.
* Pest Control: Keep an eye out for pests like aphids or spider mites. Treat them promptly with insecticidal soap or neem oil.
* Prune Regularly: Pruning helps keep the plant tidy and encourages bushier growth. Trim back any long, leggy stems.
* Provide Support: Since it’s a vine, make sure your Malabar spinach has adequate support to climb on. A trellis, fence, or even a sturdy stake will work.
* Succession Planting: To ensure a continuous harvest, consider planting Malabar spinach seeds every few weeks. This way, you’ll always have a fresh supply of leaves.
Storing Your Harvested Malabar Spinach
So, you’ve got a beautiful basket of freshly harvested Malabar spinach. Now what? Here’s how I like to store it:
* Rinse and Dry: Gently rinse the leaves under cool water to remove any dirt or debris. Pat them dry with a clean towel or spin them in a salad spinner.
* Storage Options:
* Refrigerator: Store the leaves in a plastic bag or container lined with a paper towel. This will help absorb excess moisture and keep the leaves fresh for up to a week.
* Freezer: For longer storage, blanch the leaves in boiling water for a minute or two, then plunge them into ice water. Drain well and freeze in freezer bags or containers. Frozen Malabar spinach is great for soups and stir-fries.
* Use Promptly: While Malabar spinach can be stored for a while, it’s best to use it as soon as possible for the best flavor and texture.
Culinary Uses for Malabar Spinach
Now for the fun part – eating your harvest! Malabar spinach is incredibly versatile and can be used in a variety of dishes.
* Salads: The young, tender leaves are delicious in salads.
* Stir-Fries: Add Malabar spinach to your favorite stir-fry recipes for a healthy and flavorful boost.
* Soups and Stews: Malabar spinach adds a lovely thickness and flavor to soups and stews.
* Smoothies: Blend it into your smoothies for an extra dose of vitamins and minerals.
* Sauteed: Sauté it with garlic and olive oil for a simple and delicious side dish.
* Indian Cuisine: It’s commonly used in Indian dishes like dal and saag.
Troubleshooting Common Issues
Even with the best care, you might encounter a few challenges when growing and harvesting Malabar spinach. Here are some common issues and how to address them:
* Slow Growth: If your Malabar spinach isn’t growing as quickly as you’d like, make sure it’s getting enough sunlight, water, and nutrients.
* Yellowing Leaves: Yellowing leaves can indicate a nutrient deficiency or overwatering. Adjust your watering schedule and consider adding some fertilizer.
* Pest Infestations: Keep an eye out for pests and treat them promptly.
* Tough Leaves: If the leaves are becoming tough and bitter, it could be due to hot weather or lack of water. Make sure to water regularly and provide some shade during the hottest part of the day.
Final Thoughts
Harvesting Malabar spinach is a rewarding experience that allows you to enjoy fresh, homegrown greens throughout the growing season. By following these tips and techniques, you’ll be well on your way to a bountiful harvest and a healthy, productive plant. Happy gardening!
Conclusion
So, there you have it! Harvesting Malabar spinach doesn’t have to be a chore. By implementing this simple DIY trick, you’ll not only maximize your yield but also ensure the continued health and productivity of your plant. This method, focusing on strategic pruning and consistent harvesting, allows the plant to focus its energy on producing new, tender leaves, giving you a continuous supply of this nutritious and delicious green.
Think of it this way: you’re not just harvesting; you’re actively shaping the growth of your Malabar spinach, encouraging it to become a leafy powerhouse. This approach is far more effective than simply snipping off leaves haphazardly, which can stress the plant and reduce its overall output.
Why is this DIY trick a must-try? Because it’s efficient, sustainable, and ultimately, more rewarding. You’ll be amazed at how much more spinach you can harvest with just a little bit of mindful attention. Plus, it’s incredibly satisfying to know you’re actively contributing to the health and vitality of your garden.
But don’t just take our word for it! We encourage you to experiment with variations on this technique. For example, if you live in a particularly hot climate, you might find that harvesting more frequently, even if it’s just a few leaves at a time, helps to prevent the plant from bolting (going to seed prematurely). Conversely, if you’re in a cooler region, you might be able to get away with less frequent, but more substantial, harvests.
Consider also the stage of growth. Younger plants might benefit from a more gentle approach, focusing on harvesting only the largest, most mature leaves. As the plant matures, you can become more aggressive with your pruning, encouraging bushier growth.
Another variation to consider is the use of your harvested Malabar spinach stems. Don’t throw them away! They can be used in stir-fries or soups, adding a slightly mucilaginous texture and a wealth of nutrients. Think of it as a zero-waste approach to gardening!
Ready to give it a try? We’re confident that you’ll see a significant improvement in your Malabar spinach harvest. Remember to start small, observe your plant closely, and adjust your technique as needed. The key is to find what works best for your specific plant and growing conditions.
We’re eager to hear about your experiences! Share your tips, tricks, and successes in the comments below. Let’s build a community of Malabar spinach enthusiasts and learn from each other. Did you find a particular pruning technique that worked exceptionally well? Did you discover a unique way to use the harvested stems? Let us know! Your insights could be invaluable to other gardeners.
So, grab your gardening shears, head out to your garden, and start harvesting! With this simple DIY trick, you’ll be enjoying a bountiful harvest of delicious and nutritious Malabar spinach in no time. Happy gardening!
Frequently Asked Questions (FAQ)
What exactly is Malabar spinach, and why should I grow it?
Malabar spinach (Basella alba or Basella rubra) isn’t actually a true spinach, but a leafy green vine that thrives in warm weather. It’s an excellent alternative to spinach in hot climates because it’s much more heat-tolerant. It’s also packed with vitamins and minerals, including vitamins A and C, iron, and calcium. Plus, it’s incredibly versatile in the kitchen, perfect for salads, stir-fries, soups, and more. Growing your own ensures you have a fresh, organic supply readily available.
How often should I harvest my Malabar spinach using this DIY trick?
The frequency of harvesting depends on several factors, including the age of the plant, the growing conditions, and your personal consumption needs. As a general rule, aim to harvest every 1-2 weeks. However, if your plant is growing rapidly, you may need to harvest more frequently. Conversely, if growth is slow, you can extend the interval between harvests. The key is to observe your plant closely and harvest when the leaves are a good size and the stems are still tender. Avoid letting the leaves become too large and tough, as they will lose their flavor and texture.
What’s the best way to store harvested Malabar spinach?
To keep your harvested Malabar spinach fresh for as long as possible, store it in the refrigerator. First, rinse the leaves thoroughly under cold water to remove any dirt or debris. Then, gently pat them dry with a clean towel or paper towels. Place the leaves in a plastic bag or container lined with a damp paper towel. This will help to maintain humidity and prevent the leaves from drying out. Store in the crisper drawer of your refrigerator for up to a week.
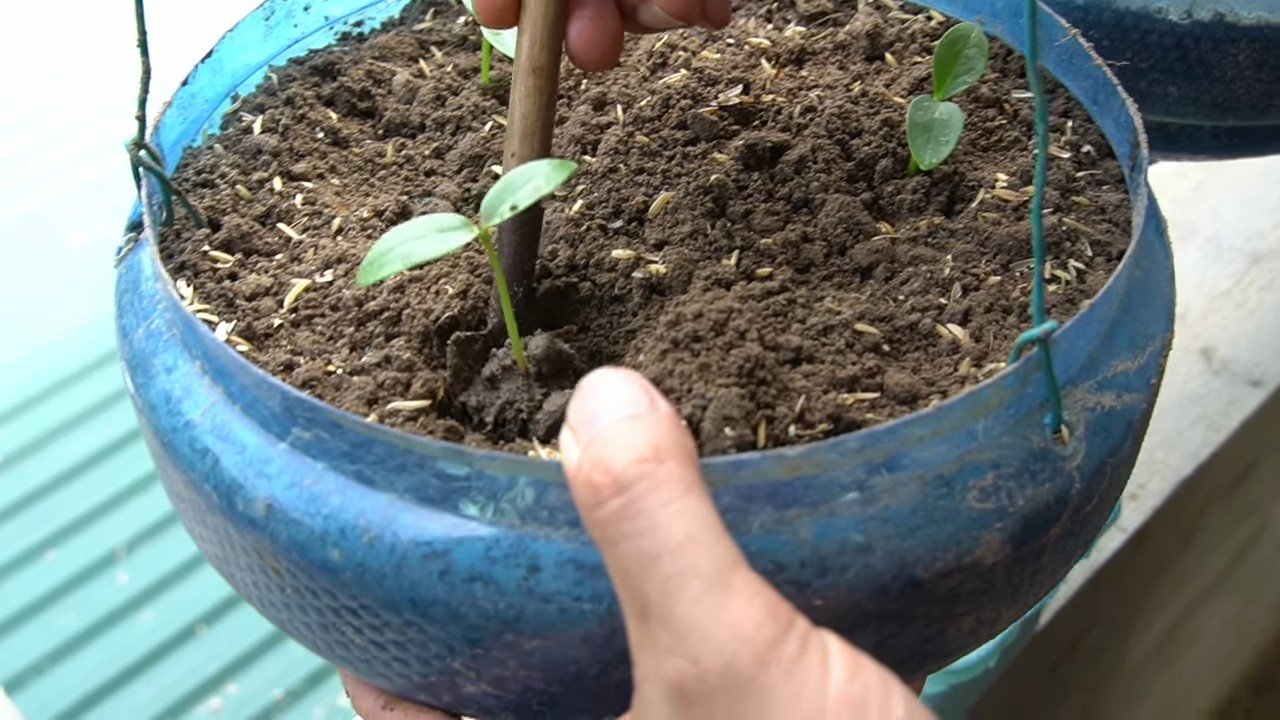
Can I propagate Malabar spinach from cuttings?
Yes, absolutely! Malabar spinach is very easy to propagate from cuttings. This is a great way to expand your garden or share your plants with friends and family. To propagate from cuttings, simply take a 4-6 inch cutting from a healthy stem. Remove the lower leaves, leaving only a few leaves at the top. Place the cutting in a glass of water, making sure that the nodes (the points where the leaves were removed) are submerged. Change the water every few days. Within a week or two, the cutting should develop roots. Once the roots are about an inch long, you can transplant the cutting into a pot or directly into your garden.
What are some common problems that affect Malabar spinach, and how can I prevent them?
While Malabar spinach is relatively pest-resistant, it can be susceptible to certain problems, such as aphids, spider mites, and fungal diseases. To prevent these problems, it’s important to provide your plant with proper care. Ensure that it receives adequate sunlight, water, and nutrients. Avoid overwatering, as this can create a favorable environment for fungal diseases. Regularly inspect your plant for signs of pests or diseases, and take action promptly if you notice any problems. You can use organic pest control methods, such as insecticidal soap or neem oil, to control aphids and spider mites. For fungal diseases, improve air circulation around the plant and avoid overhead watering.
Is Malabar spinach safe to eat raw?
Yes, Malabar spinach is generally safe to eat raw, especially when the leaves are young and tender. However, some people may find the texture slightly mucilaginous, similar to okra. If you’re not a fan of the texture, you can cook the leaves to reduce the mucilage. Cooking also enhances the flavor and makes the leaves more tender.
Can I grow Malabar spinach in a container?
Absolutely! Malabar spinach is well-suited to container gardening. Choose a large container with good drainage and fill it with a high-quality potting mix. Provide a trellis or other support for the vine to climb on. Water regularly and fertilize every few weeks with a balanced fertilizer. Place the container in a sunny location where it will receive at least 6 hours of sunlight per day.
How does this DIY harvesting trick help with pest control?
Regular harvesting and pruning, as described in this DIY trick, can indirectly aid in pest control. By removing older or damaged leaves, you’re eliminating potential hiding places for pests and reducing the risk of disease. A well-maintained plant is also generally more resilient and better able to withstand pest infestations. Furthermore, by regularly inspecting your plant during harvesting, you’re more likely to spot any problems early on and take action before they become severe.
What if my Malabar spinach plant starts to flower?
If your Malabar spinach plant starts to flower, it’s a sign that it’s reaching the end of its life cycle. While you can still harvest the leaves, they may become less tender and more bitter. To prolong the harvest, you can try pinching off the flowers as soon as they appear. This will encourage the plant to focus its energy on producing more leaves. However, eventually, the plant will stop producing new leaves and will need to be replaced. You can save the seeds from the flowers to grow new plants next season.
Can I use this harvesting method on other leafy greens?
While this specific DIY trick is tailored for Malabar spinach, the general principles of strategic pruning and consistent harvesting can be applied to other leafy greens as well. For example, you can use a similar approach with kale, chard, and lettuce. The key is to understand the growth habits of each plant and adjust your technique accordingly. For example, with kale, you can harvest the lower leaves as they mature, allowing the plant to continue producing new leaves from the top. With lettuce, you can harvest the outer leaves or cut the entire head at once. Experiment and see what works best for you and your plants.

Leave a Comment