
Home mushroom growing might sound like something reserved for seasoned horticulturalists, but I’m here to tell you it’s surprisingly accessible and incredibly rewarding! Forget those bland, store-bought fungi; imagine plucking fresh, flavorful mushrooms right from your own home. Sounds amazing, right?
Cultivating mushrooms has a rich history, dating back centuries in Eastern cultures where they were prized for both their culinary and medicinal properties. From ancient Chinese emperors seeking longevity to modern-day foodies craving unique flavors, mushrooms have always held a special place in our hearts (and stomachs!).
But why should you consider home mushroom growing? Well, for starters, it’s a fantastic way to reduce your grocery bill and enjoy organic, pesticide-free produce. Plus, it’s a fascinating hobby that connects you with nature in a whole new way. In this article, I’m going to share some simple, DIY tricks and hacks that will have you harvesting your own delicious mushrooms in no time. Whether you’re a complete beginner or have a bit of a green thumb, I’ll guide you through the process step-by-step, making it easy and fun. Get ready to unlock the secrets of the fungal kingdom and transform your home into a mushroom paradise!
Grow Your Own Gourmet Mushrooms at Home: A Beginner’s Guide
Hey there, fellow fungi fanatics! Ever dreamt of harvesting your own delicious mushrooms right in your kitchen? Well, dream no more! I’m going to walk you through a simple and rewarding method for growing oyster mushrooms at home. It’s easier than you think, and the taste of homegrown mushrooms is simply unbeatable.
What You’ll Need: The Mushroom Growing Shopping List
Before we dive in, let’s gather our supplies. Don’t worry, you probably have some of these items already!
* Oyster Mushroom Spawn: This is the heart of our operation! You can find it online or at a local gardening supply store. Make sure it’s a reputable source to ensure healthy spawn.
* Straw: This will be our growing medium. Wheat straw is ideal, but other types of straw can work too. Just make sure it’s clean and free of mold.
* Large Heat-Resistant Bags: These will hold our straw and spawn mixture. Oven bags or specialized mushroom growing bags are perfect.
* Large Pot or Container: Big enough to submerge your straw in water.
* Bleach: For sanitizing the straw.
* Spray Bottle: For misting the mushrooms as they grow.
* Gloves: To keep things sterile and protect your hands.
* Thermometer: To monitor the water temperature during pasteurization.
* Well-Ventilated Area: A cool, humid space with indirect light is ideal for fruiting. A basement, garage, or even a spare closet can work.
* Optional:
* Lime (Calcium Hydroxide): To adjust the pH of the water during pasteurization.
* Humidity Tent: A plastic bag or container to help maintain humidity around the growing mushrooms.
Phase 1: Preparing the Straw (Pasteurization)
This is arguably the most crucial step. We need to eliminate competing organisms in the straw so our oyster mushrooms can thrive. We’re not sterilizing, just pasteurizing, which means killing off the bad stuff while leaving some beneficial microbes behind.
1. Chop the Straw: Using scissors or a knife, chop the straw into smaller pieces, about 2-3 inches long. This will make it easier to pack into the bags and for the mycelium (the mushroom’s root system) to colonize.
2. Prepare the Pasteurization Bath: Fill your large pot or container with water. Add a splash of bleach (about 1 tablespoon per gallon of water) to help sanitize the water. If you’re using lime, add it now according to the package instructions. The goal is to raise the pH slightly to inhibit unwanted mold growth.
3. Submerge the Straw: Pack the chopped straw into the pot, making sure it’s completely submerged in the water. You might need to weigh it down with a brick or a heavy plate to keep it from floating.
4. Heat the Water: Place the pot on a stove or heat source and bring the water temperature to 160-180°F (71-82°C). Use your thermometer to monitor the temperature closely.
5. Maintain the Temperature: Hold the water temperature at 160-180°F (71-82°C) for 60-90 minutes. This is crucial for effective pasteurization. Stir the straw occasionally to ensure even heating.
6. Drain and Cool: Carefully drain the hot water from the pot. Let the straw cool down completely. This can take several hours, or even overnight. You want it to be cool enough to handle comfortably. I usually let it sit in a colander to drain excess water. The straw should be damp, not soaking wet.
Phase 2: Inoculation (Mixing Straw and Spawn)
Now for the fun part – introducing the mushroom spawn to the prepared straw!
1. Sanitize Your Work Area: Clean your work surface with a disinfectant wipe or spray. This will help prevent contamination.
2. Prepare the Bags: Open your heat-resistant bags and set them aside.
3. Mix Straw and Spawn: Put on your gloves. Take a handful of the cooled, pasteurized straw and place it in the bag. Then, sprinkle a generous amount of oyster mushroom spawn over the straw. Repeat this process, layering straw and spawn, until the bag is about two-thirds full.
4. Pack the Bag: Gently pack the straw and spawn mixture down in the bag. You don’t want to compress it too tightly, but you want to ensure good contact between the straw and the spawn.
5. Seal the Bag: Fold over the top of the bag and secure it with tape or a rubber band. You can also use a heat sealer if you have one.
6. Create Air Exchange Holes: This is important for gas exchange. Use a clean needle or a small knife to poke several small holes (about 1/4 inch in diameter) in the bag. Space them evenly around the bag.
Phase 3: Incubation (Mycelium Colonization)
This is where the magic happens! The mycelium will start to grow and spread throughout the straw.
1. Find a Dark, Warm Place: Place the inoculated bags in a dark, warm place with a temperature of around 65-75°F (18-24°C). A closet, basement, or even under a bed can work well.
2. Monitor Colonization: Check the bags regularly for signs of mycelium growth. You should see white, fuzzy growth spreading throughout the straw. This process typically takes 2-4 weeks.
3. Be Patient: Don’t disturb the bags too much during this time. Just let the mycelium do its thing!
4. Look for Full Colonization: The straw is fully colonized when it’s almost completely covered in white mycelium. It should look like a solid block of white.
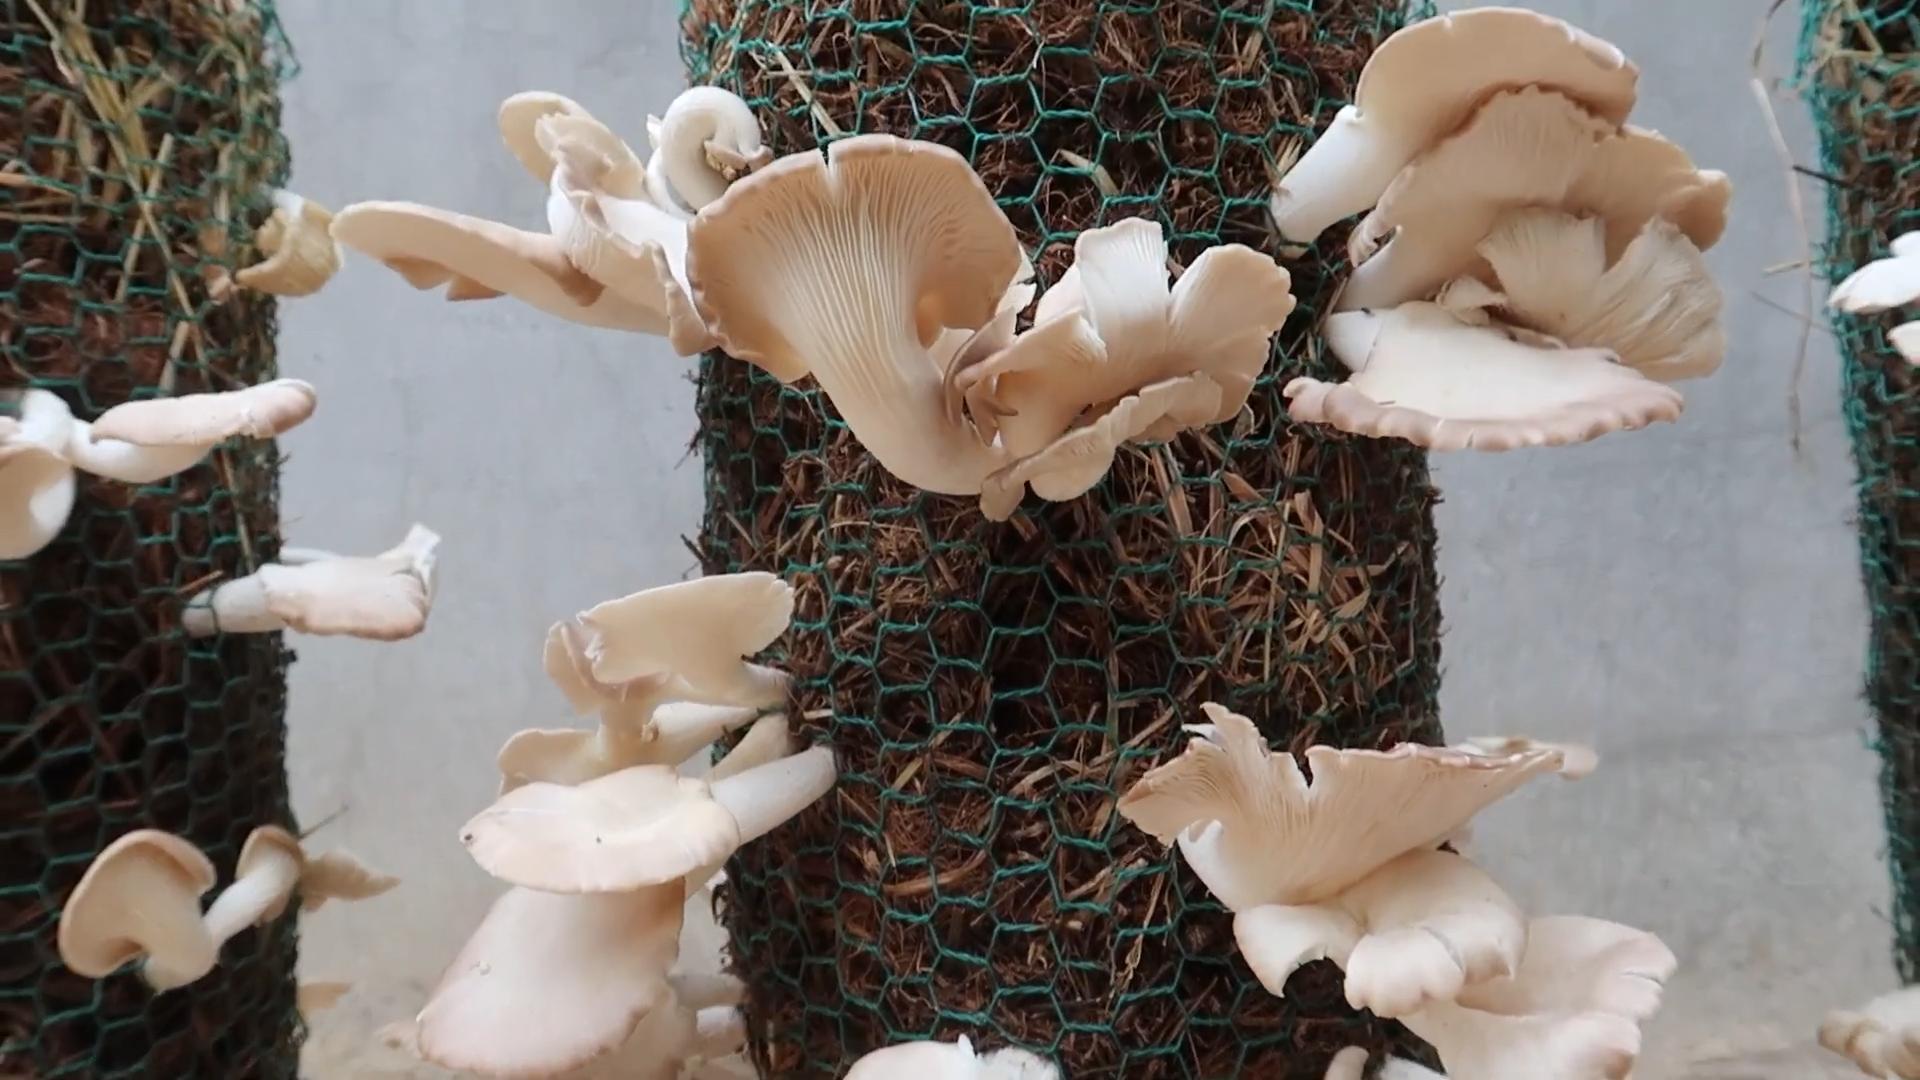
Phase 4: Fruiting (Mushroom Growth)
Time to get those mushrooms growing!
1. Move to a Well-Ventilated Area: Once the bags are fully colonized, move them to a well-ventilated area with indirect light. A basement, garage, or even a spare room can work.
2. Increase Humidity: Oyster mushrooms need high humidity to fruit properly. You can increase humidity by:
* Misting: Mist the bags several times a day with water.
* Humidity Tent: Place the bags inside a large plastic bag or container to create a humidity tent. Make sure to leave some ventilation holes.
* Humidifier: Use a humidifier to increase the humidity in the room.
3. Cut Slits in the Bag: Use a clean knife to cut slits in the bag where you want the mushrooms to grow. These slits will provide an opening for the mushrooms to emerge.
4. Maintain Conditions: Continue to mist the bags regularly and maintain high humidity. The ideal temperature for fruiting is around 60-70°F (15-21°C).
5. Watch for Pinning: After a few days, you should start to see small mushroom “pins” forming around the slits. These are the baby mushrooms!
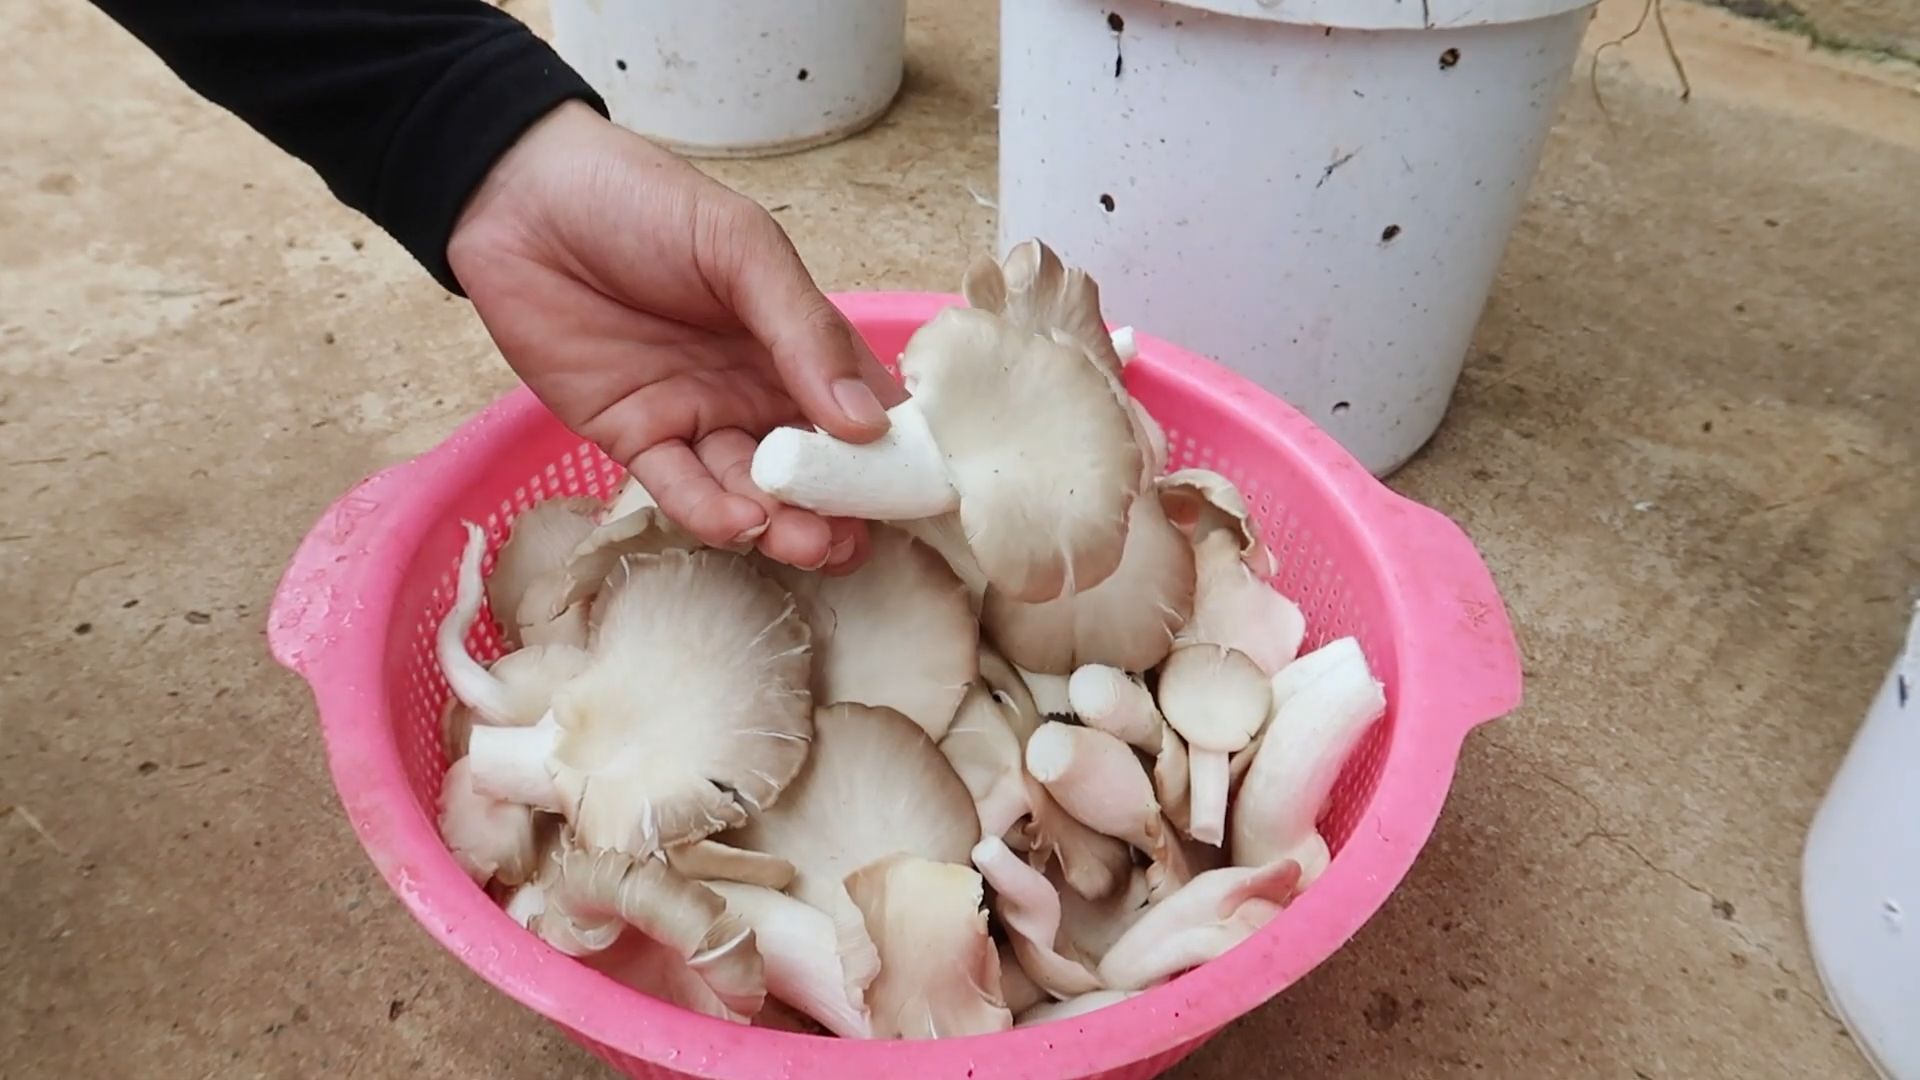
6. Harvest Your Mushrooms: The mushrooms will grow rapidly. Harvest them when the caps are fully formed but before they start to release spores (you’ll see a powdery substance). To harvest, simply twist or cut the mushrooms off the straw.
Phase 5: Subsequent Flushes (More Mushrooms!)
Oyster mushrooms can produce multiple flushes (harvests) from the same bag.
1. Soak the Bag: After harvesting the first flush, soak the bag in cold water for 12-24 hours. This will rehydrate the straw and encourage another flush of mushrooms.
2. Drain and Return: Drain the water and return the bag to the fruiting area.
3. Repeat: Continue to mist the bag and maintain high humidity. You should get another flush of mushrooms in a week or two.
4. Enjoy Your Harvests: You can typically get 2-3 flushes of mushrooms from each bag. After that, the straw will be depleted of nutrients.
Troubleshooting: Common Problems and Solutions
* Mold Growth: If you see mold growing on the straw, it means the pasteurization wasn’t effective enough. You can try to salvage the bag by removing the moldy areas and spraying the remaining straw with a diluted bleach solution. However, it’s often best to start over with fresh straw and a more thorough pasteurization process.
* Slow Colonization: Slow colonization can be caused by low temperatures, poor spawn quality, or contamination. Make sure the temperature is within the ideal range (65-75°F) and that you’re using high-quality spawn.
* No Pinning: If
Conclusion
So, there you have it! Embarking on the journey of home mushroom growing is not just a fun project; it’s a rewarding experience that connects you directly to the source of your food. Forget those bland, mass-produced mushrooms from the supermarket. Imagine the satisfaction of harvesting your own plump, flavorful fungi, bursting with freshness and grown with your own two hands. This DIY trick is a must-try for anyone who appreciates fresh, organic produce, enjoys a hands-on project, and wants to add a touch of culinary magic to their kitchen.
The beauty of home mushroom growing lies in its adaptability. While we’ve outlined a simple and effective method, feel free to experiment and personalize your approach. Consider trying different substrates like coffee grounds or straw, depending on the type of mushroom you’re cultivating. For a visual treat, explore growing mushrooms in repurposed containers like old buckets or even decorative logs. You can also adjust the humidity levels and temperature to optimize the growth of specific mushroom varieties.
Don’t be afraid to get creative with your mushroom selection! While oyster mushrooms are a great starting point due to their ease of cultivation, the world of edible fungi is vast and exciting. Once you’ve mastered the basics, venture into growing shiitake, lion’s mane, or even more exotic varieties. Each type offers a unique flavor profile and texture, adding a new dimension to your culinary creations.
Beyond the delicious rewards, home mushroom growing is also an environmentally friendly practice. By utilizing recycled materials and reducing your reliance on commercially grown mushrooms, you’re contributing to a more sustainable food system. It’s a win-win situation for your taste buds and the planet!
We wholeheartedly encourage you to give this DIY trick a try. It’s easier than you might think, and the results are incredibly gratifying. Whether you’re a seasoned gardener or a complete beginner, home mushroom growing is an accessible and enjoyable hobby that will transform the way you think about food.
Once you’ve harvested your first batch of homegrown mushrooms, we’d love to hear about your experience! Share your tips, tricks, and photos in the comments below. Let’s build a community of home mushroom growers and inspire others to join the fun. Happy growing!
Frequently Asked Questions (FAQ)
What are the easiest types of mushrooms to grow at home for beginners?
Oyster mushrooms are generally considered the easiest to grow for beginners due to their rapid growth, tolerance of various substrates, and relatively simple cultivation requirements. They are also quite forgiving of minor environmental fluctuations. Shiitake mushrooms are another good option, although they require a bit more patience as they take longer to fruit.
What kind of substrate should I use for growing mushrooms at home?
The ideal substrate depends on the type of mushroom you’re growing. Oyster mushrooms thrive on a variety of substrates, including straw, coffee grounds, and even cardboard. Shiitake mushrooms typically require hardwood logs or sawdust. Always ensure your substrate is properly pasteurized or sterilized to eliminate competing organisms.
How do I maintain the proper humidity levels for my mushroom grow?
Maintaining adequate humidity is crucial for successful mushroom cultivation. You can achieve this by misting your growing area regularly with water, using a humidity tent or chamber, or placing a tray of water near your mushrooms. Aim for a humidity level of around 80-90% for most varieties. A hygrometer can help you monitor the humidity levels accurately.
How long does it take to grow mushrooms at home?
The time it takes to grow mushrooms varies depending on the species and growing conditions. Oyster mushrooms can often be harvested within a few weeks of inoculation, while shiitake mushrooms may take several months to fruit. Patience is key!
What are the signs that my mushroom grow is contaminated?
Contamination is a common challenge in mushroom cultivation. Look out for signs such as unusual colors (green, black, or pink mold), foul odors, or slimy textures on your substrate. If you suspect contamination, it’s best to remove the affected area or discard the entire grow to prevent the spread of contamination to other areas.
Can I grow mushrooms indoors without any special equipment?
Yes, you can grow mushrooms indoors without expensive equipment. A simple setup can involve a plastic tub or container, a spray bottle for misting, and a well-ventilated area with indirect light. While specialized equipment like grow tents and humidifiers can enhance your results, they are not essential for beginners.
How do I harvest my mushrooms properly?
Harvest mushrooms when the caps are fully developed but before they start to release spores. Gently twist or cut the mushrooms at the base of the stem. Avoid pulling them out, as this can damage the mycelium and prevent future flushes.
How often can I harvest mushrooms from the same substrate?
You can typically harvest multiple flushes of mushrooms from the same substrate. After each harvest, allow the substrate to rest and rehydrate. You may need to mist it more frequently to encourage new growth. The number of flushes you can get will depend on the type of mushroom and the quality of your substrate.
Are there any safety precautions I should take when growing mushrooms at home?
Always wash your hands thoroughly before and after handling your mushroom grow. Use sterile techniques when preparing your substrate and inoculating your mushrooms to minimize the risk of contamination. Ensure proper ventilation in your growing area to prevent the buildup of carbon dioxide. And most importantly, only consume mushrooms that you have positively identified as edible. If you are unsure about the identity of a mushroom, do not eat it.
What do I do with my spent mushroom substrate?
Spent mushroom substrate is a valuable resource that can be used in a variety of ways. It makes an excellent soil amendment for your garden, adding nutrients and improving soil structure. You can also compost it or use it as mulch. Alternatively, you can dispose of it in your green waste bin.
Is home mushroom growing a sustainable practice?
Yes, home mushroom growing can be a very sustainable practice. By using recycled materials as substrate, reducing your reliance on commercially grown mushrooms, and composting your spent substrate, you can minimize your environmental impact and contribute to a more sustainable food system. Plus, you get delicious, fresh mushrooms!
Leave a Comment