
Kitchen shelf bean garden: Ever dreamt of fresh, homegrown beans gracing your dinner table, even if you don’t have a sprawling backyard? I know I have! The idea of cultivating a mini-farm right inside my home always seemed like a distant fantasy, until I discovered the magic of indoor bean gardening.
For centuries, cultures around the globe have cherished beans, not only as a dietary staple but also as symbols of prosperity and growth. From ancient civilizations in the Americas to traditional Asian farming practices, beans have held a significant place in our history. Now, we can bring that rich heritage into our modern homes with a simple, yet rewarding DIY project.
Let’s face it, buying fresh produce can be expensive, and sometimes the quality just isn’t there. Plus, there’s something incredibly satisfying about nurturing your own food from seed to table. That’s where this DIY kitchen shelf bean garden comes in. I’m going to show you how to create a thriving bean patch right on your kitchen shelf, providing you with a constant supply of delicious, organic beans. This is not just a fun project; it’s a step towards self-sufficiency and a greener lifestyle. So, grab your gardening gloves, and let’s get started on building your very own kitchen shelf bean garden!
Transform Your Kitchen Shelf into a Thriving Bean Garden!
Hey there, fellow plant enthusiasts! Ever dreamed of having fresh, homegrown beans right at your fingertips? Well, I’m here to tell you it’s totally achievable, even if you don’t have a sprawling backyard. We’re going to turn a simple kitchen shelf into a mini bean garden! This project is surprisingly easy, rewarding, and adds a touch of green to your indoor space. Let’s get started!
What You’ll Need:
Before we dive in, let’s gather our supplies. Here’s a list of everything you’ll need to create your indoor bean paradise:
* A sturdy kitchen shelf: Choose a shelf that can handle the weight of multiple pots filled with soil and plants. Consider the amount of light it receives as well.
* Bean seeds: I recommend bush bean varieties for this project, as they tend to be more compact and manageable indoors. Look for varieties like ‘Blue Lake Bush’, ‘Contender’, or ‘Provider’.
* Pots or containers: Select pots that are at least 6-8 inches deep to give your bean plants enough room to develop healthy root systems. Make sure they have drainage holes!
* Potting mix: Use a high-quality potting mix specifically formulated for vegetables. Avoid using garden soil, as it can be too heavy and compact for container gardening.
* Watering can or spray bottle: For keeping your bean plants hydrated.
* Plant labels: To keep track of which bean variety is planted in each pot (optional, but helpful!).
* Small trowel or gardening spoon: For planting your seeds.
* Grow lights (optional, but recommended): If your shelf doesn’t receive enough natural light, grow lights will ensure your bean plants thrive.
* Small trellis or stakes (optional): Some bush bean varieties might benefit from a little support as they grow.
* Measuring tape or ruler: To ensure proper spacing between pots.
Preparing Your Shelf and Pots:
Okay, now that we have all our supplies, let’s get our shelf and pots ready for planting!
1. Clean your shelf: Wipe down your kitchen shelf to remove any dust or debris. This will help create a clean and inviting environment for your bean plants.
2. Arrange your pots: Decide how you want to arrange your pots on the shelf. Consider the size of your pots and the amount of space you have available. I like to leave a few inches between each pot to allow for good air circulation. Use your measuring tape to ensure even spacing.
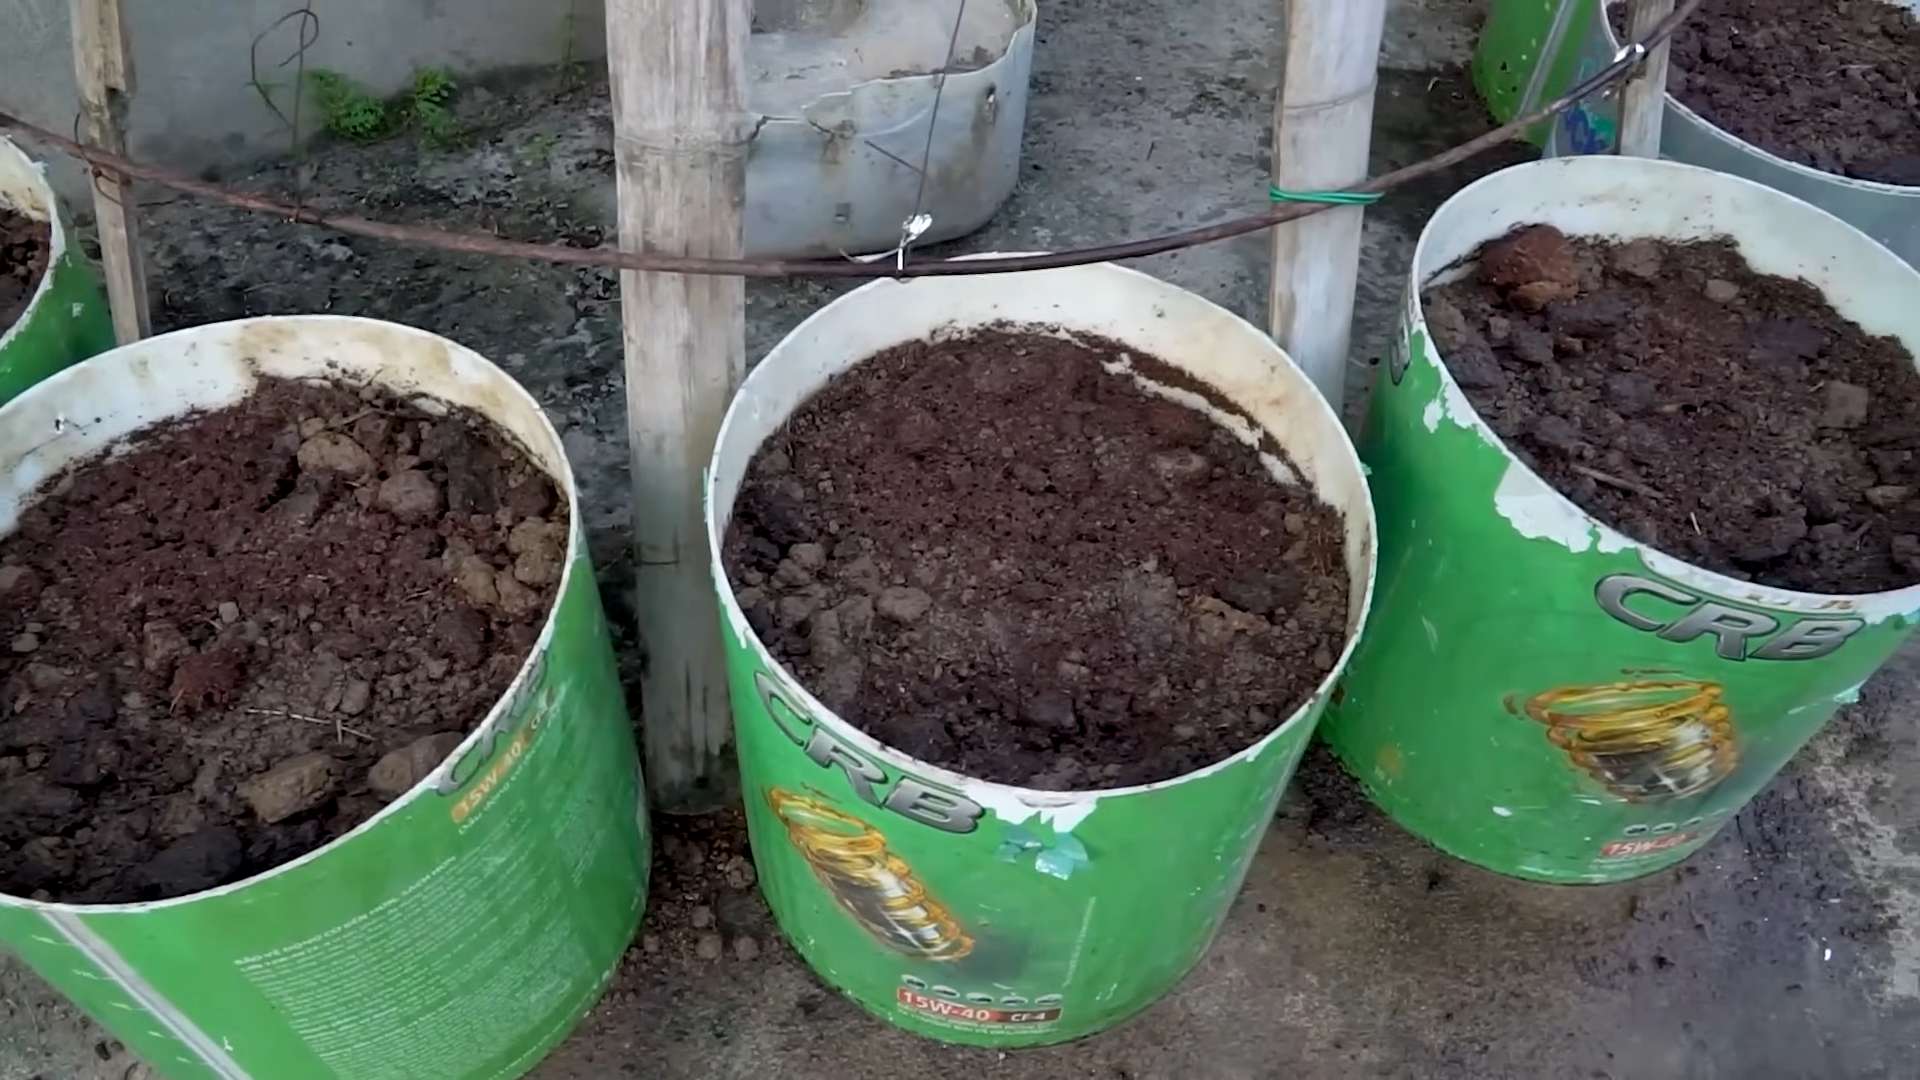
3. Fill your pots with potting mix: Fill each pot with potting mix, leaving about an inch of space at the top. Gently tap the pot to settle the soil. Don’t pack the soil too tightly, as this can hinder drainage.
4. Water the potting mix: Before planting your seeds, thoroughly water the potting mix in each pot. This will help ensure that the seeds have adequate moisture to germinate. Let the excess water drain out of the drainage holes.
Planting Your Bean Seeds:
Now for the fun part – planting the bean seeds!
1. Read the seed packet: Before you start planting, carefully read the instructions on your bean seed packet. This will tell you the recommended planting depth and spacing for your specific bean variety.
2. Create planting holes: Using your finger or a small trowel, create planting holes in the potting mix according to the instructions on the seed packet. Typically, bean seeds should be planted about 1 inch deep.
3. Plant the seeds: Place one or two bean seeds in each planting hole. Planting two seeds per hole increases the chances of germination. If both seeds sprout, you can thin them out later by removing the weaker seedling.
4. Cover the seeds: Gently cover the seeds with potting mix. Lightly pat down the soil to ensure good contact between the seeds and the soil.
5. Label your pots: If you’re planting multiple bean varieties, label each pot with the name of the variety. This will help you keep track of which beans are growing in each pot.
6. Water gently: After planting, gently water the pots again to moisten the soil. Avoid overwatering, as this can cause the seeds to rot.
Providing Light and Support:
Light and support are crucial for healthy bean plant growth.
1. Provide adequate light: Bean plants need at least 6-8 hours of sunlight per day. If your kitchen shelf doesn’t receive enough natural light, supplement with grow lights. Position the grow lights a few inches above the plants and adjust the height as the plants grow. I use LED grow lights because they are energy-efficient and don’t produce too much heat.
2. Consider support: As your bean plants grow, they may need some support to prevent them from falling over. You can use small trellises, stakes, or even chopsticks to provide support. Gently tie the stems of the bean plants to the support structure using soft twine or plant ties.
Watering and Fertilizing:
Proper watering and fertilization are essential for healthy bean plant growth and abundant harvests.
1. Water regularly: Water your bean plants regularly, keeping the soil consistently moist but not waterlogged. Check the soil moisture by sticking your finger into the soil. If the top inch of soil feels dry, it’s time to water. Water deeply, allowing the excess water to drain out of the drainage holes.
2. Avoid overwatering: Overwatering can lead to root rot, which can kill your bean plants. Make sure your pots have good drainage and avoid letting the plants sit in standing water.
3. Fertilize regularly: Bean plants are heavy feeders and benefit from regular fertilization. Use a balanced liquid fertilizer specifically formulated for vegetables. Follow the instructions on the fertilizer label for application rates and frequency. I like to fertilize my bean plants every two weeks.
Dealing with Pests and Diseases:
Even indoors, your bean plants can be susceptible to pests and diseases. Here’s how to deal with them:
1. Inspect your plants regularly: Regularly inspect your bean plants for signs of pests or diseases. Look for things like aphids, spider mites, whiteflies, or powdery mildew.
2. Treat pests promptly: If you find any pests, treat them promptly with an appropriate insecticide or insecticidal soap. Follow the instructions on the product label carefully. I prefer to use organic pest control methods whenever possible.
3. Prevent diseases: To prevent diseases, ensure good air circulation around your bean plants and avoid overwatering. If you notice any signs of disease, such as powdery mildew, treat it with a fungicide.
Harvesting Your Beans:
The best part – harvesting your homegrown beans!
1. Know when to harvest: Bean plants typically start producing beans about 50-60 days after planting. Harvest your beans when they are young and tender, before the seeds inside the pods become too large.
2. Harvest regularly: Harvest your beans regularly to encourage continued production. The more you harvest, the more beans your plants will produce.
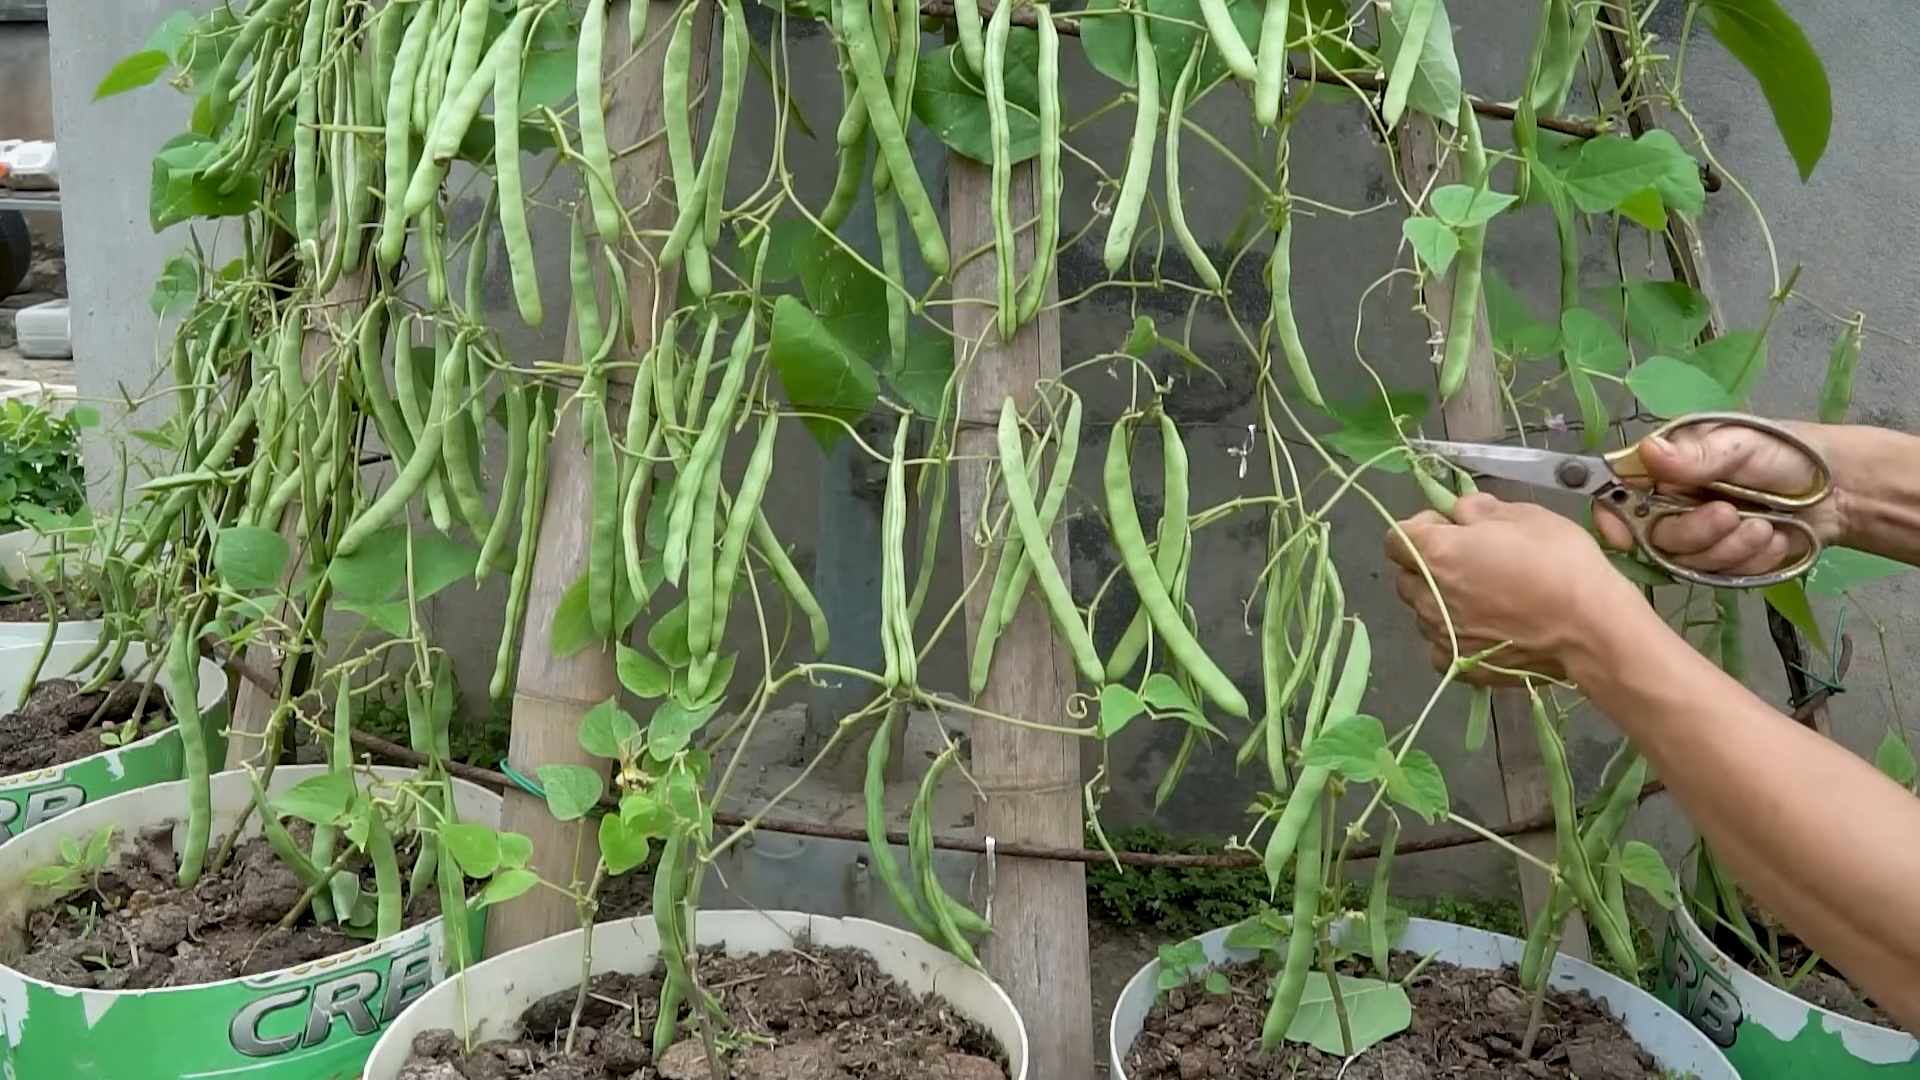
3. Pick the beans carefully: To harvest your beans, gently snap them off the plant. Avoid pulling or tearing the plants, as this can damage them.
4. Enjoy your harvest: Enjoy your fresh, homegrown beans in salads, soups, stews, or as a side dish. You can also freeze or can your beans for later use.
Troubleshooting:
Sometimes, things don’t go exactly as planned. Here are some common problems you might encounter and how to fix them:
* Seeds not germinating: If your bean seeds aren’t germinating, make sure the soil is moist and the temperature is warm enough. Bean seeds typically germinate best at temperatures between 65-75°F. You can also try soaking the seeds in water for 24 hours before planting to improve germination rates.
* Yellowing leaves: Yellowing leaves can be a sign of overwatering, underwatering, or nutrient deficiency. Check the soil moisture and adjust your watering accordingly. If the soil is consistently moist, you may be overwatering. If the soil is dry, you may be underwatering. If the leaves are yellowing all over, it could be a sign of nutrient deficiency. Fertilize your plants with a balanced liquid fertilizer.
* Leggy growth: Leggy growth, where the plants are tall and spindly with few leaves, is usually a sign of insufficient light. Move your plants to a sunnier location or supplement with grow lights.
* Lack of flowers or beans: If your bean plants are growing well but not producing flowers or beans, it could be due to a lack of pollination. While bean plants are self-pollinating, you can help the process along by gently shaking the plants to release pollen. You can also use a small paintbrush to transfer pollen from one flower to another.
Choosing the Right Bean Variety:
Selecting the right bean variety is crucial for success in your indoor bean garden. As I mentioned earlier, bush bean varieties are generally the best choice for
Conclusion
So, there you have it! Transforming a simple kitchen shelf into a thriving bean garden is not just a fun project, it’s a game-changer for fresh, accessible produce right at your fingertips. Forget those sad, wilted beans from the grocery store. Imagine plucking crisp, vibrant green beans just moments before adding them to your salad or stir-fry. The difference in flavor and texture is truly remarkable.
This DIY kitchen shelf bean garden is a must-try for several compelling reasons. First, it’s incredibly space-efficient, making it perfect for apartment dwellers or anyone with limited outdoor gardening space. Second, it provides a continuous supply of fresh beans, reducing your reliance on store-bought produce and minimizing food waste. Third, it’s a fantastic way to connect with nature and experience the joy of growing your own food, even indoors. Finally, it’s a surprisingly simple and rewarding project that anyone can undertake, regardless of their gardening experience.
But the beauty of this project lies in its adaptability. Feel free to experiment with different bean varieties. Bush beans are particularly well-suited for container gardening, but you could also try pole beans if you have the vertical space to support them. Consider adding companion plants like marigolds or basil to deter pests and enhance the flavor of your beans. You can also adjust the lighting and watering schedule to suit your specific environment and bean variety.
Don’t be afraid to get creative with your container choices, too. While plastic pots are a practical option, you could also use repurposed containers like old buckets, wooden crates, or even fabric grow bags. Just make sure your containers have adequate drainage to prevent waterlogging.
We’ve focused on green beans, but why stop there? You could easily adapt this method to grow other types of beans, such as snap peas, lima beans, or even dried beans. Just be sure to research the specific growing requirements of each variety before you get started.
The key to success with your kitchen shelf bean garden is consistent care and attention. Regularly check the soil moisture, provide adequate lighting, and fertilize your plants as needed. With a little bit of effort, you’ll be rewarded with a bountiful harvest of delicious, homegrown beans.
We are confident that you’ll find this DIY project both enjoyable and rewarding. It’s a fantastic way to bring a touch of nature into your home, enjoy fresh, healthy produce, and learn more about the fascinating world of gardening.
So, what are you waiting for? Gather your supplies, clear off a kitchen shelf, and get ready to embark on your own bean-growing adventure! We can’t wait to hear about your experiences. Share your photos, tips, and tricks in the comments below. Let’s build a community of indoor bean gardeners and inspire others to grow their own food! Let us know what kind of kitchen shelf bean garden you created!
Frequently Asked Questions (FAQ)
What type of beans are best for a kitchen shelf garden?
Bush beans are generally the best choice for indoor container gardening due to their compact size and growth habit. They don’t require trellising and are well-suited for growing in pots or containers on a kitchen shelf. Some popular bush bean varieties include Blue Lake Bush, Contender, and Provider. However, if you have the space and are willing to provide support, you can also grow pole beans indoors. Just be sure to provide a trellis or other structure for them to climb.
How much light do my bean plants need?
Bean plants need at least 6-8 hours of direct sunlight per day to thrive. If you don’t have a sunny window that provides enough light, you’ll need to supplement with artificial lighting. Grow lights are an excellent option for indoor gardening. Look for full-spectrum LED grow lights that provide a balanced spectrum of light for optimal plant growth. Position the lights about 6-12 inches above the plants and adjust as they grow.
What kind of soil should I use for my bean plants?
Use a well-draining potting mix specifically formulated for container gardening. Avoid using garden soil, as it can become compacted and doesn’t drain well in containers. A good potting mix will provide adequate drainage, aeration, and nutrients for your bean plants. You can also amend your potting mix with compost or other organic matter to improve its fertility and water-holding capacity.
How often should I water my bean plants?
Water your bean plants regularly, keeping the soil consistently moist but not waterlogged. Check the soil moisture by sticking your finger about an inch into the soil. If it feels dry, it’s time to water. Water deeply, allowing the water to drain out of the bottom of the container. Avoid overwatering, as this can lead to root rot. The frequency of watering will depend on factors such as the size of your container, the type of potting mix you’re using, and the temperature and humidity of your environment.
Do I need to fertilize my bean plants?
Yes, bean plants benefit from regular fertilization, especially during the growing season. Use a balanced fertilizer specifically formulated for vegetables. Follow the instructions on the fertilizer label for application rates and frequency. You can also use organic fertilizers such as compost tea or fish emulsion. Avoid over-fertilizing, as this can damage your plants.
How do I prevent pests and diseases in my kitchen shelf bean garden?
To prevent pests and diseases, start with healthy plants and use a clean potting mix. Regularly inspect your plants for signs of pests or diseases. If you find any, take action immediately. You can use insecticidal soap or neem oil to control pests. For diseases, remove affected leaves and improve air circulation around your plants. Avoid overwatering, as this can create a favorable environment for fungal diseases.
How long does it take for bean plants to produce beans?
The time it takes for bean plants to produce beans depends on the variety and growing conditions. Generally, bush beans will start producing beans in about 50-60 days, while pole beans may take a bit longer. You can start harvesting beans when they are about the size you want and the pods are firm and crisp. Harvest regularly to encourage continued production.
Can I grow beans indoors year-round?
Yes, you can grow beans indoors year-round if you provide adequate light, water, and nutrients. However, you may need to adjust your growing practices depending on the season. During the winter months, you may need to supplement with artificial lighting and reduce watering frequency.
What if my bean plants are not producing beans?
There are several reasons why your bean plants may not be producing beans. Some common causes include insufficient light, lack of pollination, nutrient deficiencies, and pests or diseases. Make sure your plants are getting enough light, fertilize them regularly, and protect them from pests and diseases. You can also try hand-pollinating the flowers by gently shaking the plants or using a small brush to transfer pollen from one flower to another.
How do I harvest my beans?
Harvest your beans when the pods are firm, crisp, and the size you want. Gently snap the beans off the plant, being careful not to damage the stems. Harvest regularly to encourage continued production. Overripe beans will become tough and stringy.
Leave a Comment