
Neglected bean patch success stories are more common than you might think! Let’s be honest, life gets busy, and sometimes our gardens suffer. You meant to weed, you swore you’d fertilize, but suddenly weeks have flown by, and your bean patch looks… well, less than thriving. But don’t despair! This DIY guide is your lifeline to rescuing that seemingly lost cause and turning it into a bountiful harvest.
For centuries, beans have been a staple crop, providing sustenance and nourishment across cultures. From the ancient Incas who revered beans as symbols of life to the humble backyard gardener, the desire to cultivate these legumes has been a constant. But even with the best intentions, things can go awry. Maybe you’re a beginner gardener, or perhaps you’re just juggling too many responsibilities. Whatever the reason, a neglected bean patch success is within your reach!
This article is packed with simple, effective DIY tricks and hacks to revive your bean plants. We’ll cover everything from identifying common problems to implementing easy solutions that will have your beans climbing and producing in no time. I’ll show you how to assess the damage, amend the soil, tackle pests and diseases, and provide the support your beans need to flourish. So, grab your gardening gloves, and let’s transform that neglected patch into a thriving bean bonanza!
Verwandle deinen vernachlässigten Bohnengarten in eine reiche Ernte!
Hey Leute! Habt ihr auch manchmal das Gefühl, dass euer Garten ein Eigenleben führt? Ich kenne das nur zu gut! Dieses Jahr habe ich meine Bohnenpflanzen ein bisschen… vernachlässigt. Aber keine Panik! Ich habe ein paar Tricks auf Lager, mit denen wir selbst den trostlosesten Bohnengarten wieder zum Leben erwecken können. Lasst uns gemeinsam loslegen und aus dem Chaos eine reiche Ernte zaubern!
Was wir brauchen:
* Gartenhandschuhe (unverzichtbar!)
* Gartenschere oder Messer
* Gießkanne oder Gartenschlauch
* Organischer Dünger (Kompost, Wurmhumus oder ein spezieller Bohnendünger)
* Mulchmaterial (Stroh, Holzhackschnitzel, Grasschnitt)
* Unkrautjäter oder Hacke
* Pflanzenstützen (falls die Bohnen sich nicht mehr selbst halten können)
* Geduld und positive Energie!
Die Analyse: Was ist schiefgelaufen?
Bevor wir loslegen, ist es wichtig, den Schaden zu begutachten. Warum sehen die Bohnen so traurig aus? Hier sind ein paar häufige Gründe:
* Wassermangel: Bohnen brauchen regelmäßige Bewässerung, besonders während der Blütezeit und der Hülsenbildung.
* Nährstoffmangel: Der Boden könnte ausgelaugt sein und den Bohnen nicht genügend Nährstoffe bieten.
* Unkraut: Unkraut konkurriert mit den Bohnen um Wasser, Nährstoffe und Licht.
* Schädlinge oder Krankheiten: Blattläuse, Bohnenkäfer oder Pilzkrankheiten können die Pflanzen schwächen.
* Mangelnde Unterstützung: Kletterbohnen brauchen eine Rankhilfe, um richtig zu wachsen und zu gedeihen.
* Zu wenig Sonne: Bohnen brauchen mindestens 6 Stunden Sonne pro Tag.
Phase 1: Die Rettungsaktion – Aufräumen und Stärken
1. Unkraut entfernen: Das ist der erste und wichtigste Schritt! Unkraut raubt den Bohnen die Lebensgrundlage. Zieht das Unkraut vorsichtig mit der Hand aus oder verwendet eine Hacke. Achtet darauf, die Wurzeln der Bohnen nicht zu beschädigen. Ich persönlich liebe es, das Unkraut nach dem Regen zu entfernen, da es dann leichter geht.
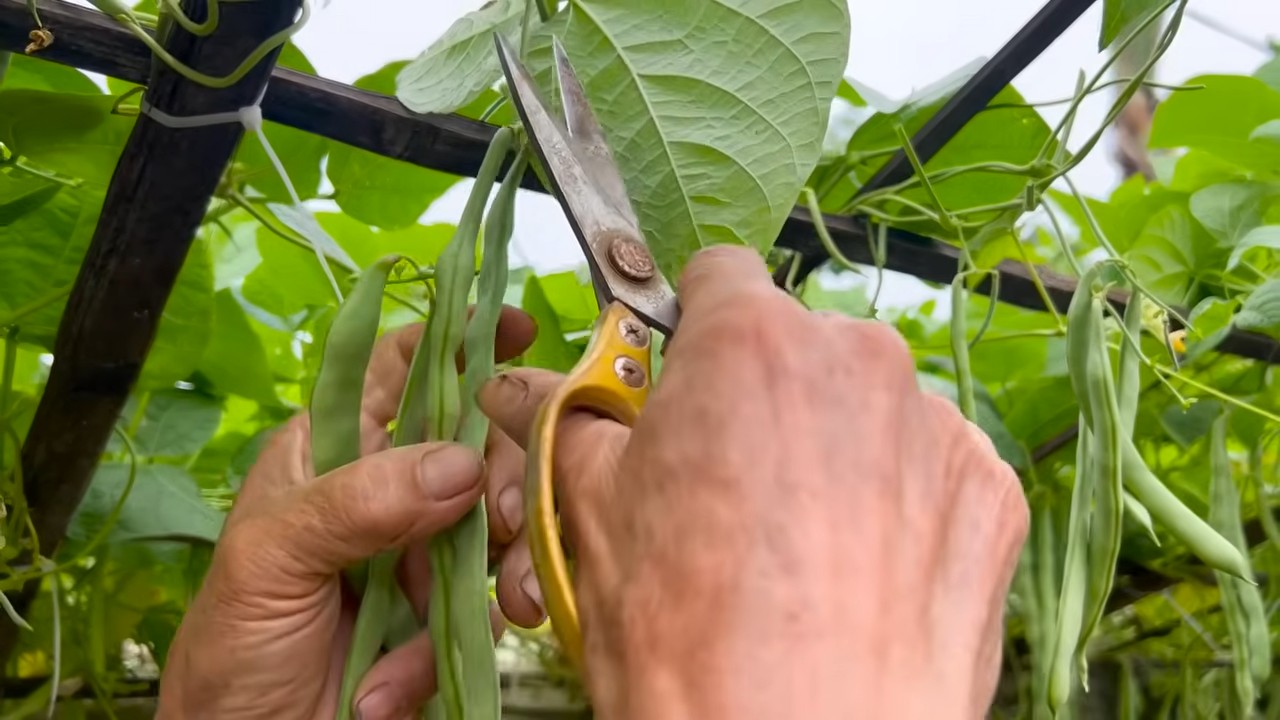
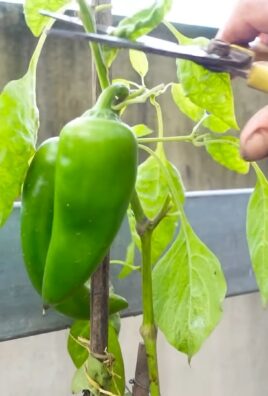
2. Beschädigte Blätter und Triebe entfernen: Schneidet gelbe, braune oder von Schädlingen befallene Blätter und Triebe mit einer sauberen Gartenschere ab. Das hilft den Pflanzen, ihre Energie auf die gesunden Teile zu konzentrieren. Achtet darauf, saubere Schnitte zu machen, um Infektionen zu vermeiden.
3. Boden lockern: Lockert den Boden um die Bohnenpflanzen vorsichtig mit einer kleinen Hacke oder einem Grubber auf. Das verbessert die Belüftung und die Wasseraufnahme. Seid dabei vorsichtig, um die Wurzeln nicht zu beschädigen.
4. Bewässerung: Gießt die Bohnen gründlich, aber vermeidet Staunässe. Der Boden sollte feucht, aber nicht nass sein. Am besten gießt man früh morgens oder spät abends, um Verdunstung zu vermeiden. Ich überprüfe immer mit dem Finger, ob der Boden trocken ist, bevor ich gieße.
5. Düngung: Gebt den Bohnen einen Nährstoffschub! Verwendet einen organischen Dünger wie Kompost, Wurmhumus oder einen speziellen Bohnendünger. Befolgt die Anweisungen auf der Verpackung. Ich mische den Dünger gerne leicht in die oberste Bodenschicht ein.
6. Mulchen: Tragt eine Schicht Mulch um die Bohnenpflanzen auf. Mulch hilft, die Feuchtigkeit im Boden zu halten, Unkraut zu unterdrücken und den Boden zu kühlen. Stroh, Holzhackschnitzel oder Grasschnitt eignen sich gut als Mulchmaterial.
Phase 2: Unterstützung und Schutz
1. Pflanzenstützen anbringen: Wenn eure Bohnen Kletterbohnen sind und keine ausreichende Rankhilfe haben, ist es jetzt an der Zeit, ihnen eine zu geben. Ihr könnt Bambusstäbe, Rankgitter oder sogar alte Äste verwenden. Achtet darauf, dass die Stützen stabil sind und den Bohnen genügend Halt bieten. Ich habe schon alte Leitern als Rankhilfe verwendet – sieht super aus!
2. Schädlingsbekämpfung: Untersucht die Bohnen auf Schädlinge wie Blattläuse oder Bohnenkäfer. Bei einem leichten Befall könnt ihr die Schädlinge einfach mit einem Wasserstrahl abspritzen. Bei einem stärkeren Befall könnt ihr ein biologisches Insektizid verwenden. Achtet darauf, die Anweisungen auf der Verpackung genau zu befolgen. Ich verwende gerne eine Mischung aus Wasser und etwas Spülmittel, um Blattläuse zu bekämpfen.
3. Krankheitsprävention: Achtet auf Anzeichen von Pilzkrankheiten wie Mehltau oder Rost. Entfernt befallene Blätter sofort und sorgt für eine gute Belüftung der Pflanzen. Vermeidet es, die Blätter beim Gießen zu benetzen. Bei Bedarf könnt ihr ein biologisches Fungizid verwenden.
Phase 3: Geduld und Pflege – Der Weg zur Ernte
1. Regelmäßige Bewässerung: Achtet darauf, die Bohnen regelmäßig zu gießen, besonders während der Blütezeit und der Hülsenbildung. Der Boden sollte immer leicht feucht sein.
2. Regelmäßige Düngung: Gebt den Bohnen alle paar Wochen eine kleine Dosis Dünger, um sie mit ausreichend Nährstoffen zu versorgen.
3. Unkrautkontrolle: Haltet den Bereich um die Bohnen frei von Unkraut.
4. Beobachtung: Beobachtet die Bohnen regelmäßig auf Schädlinge, Krankheiten oder andere Probleme. Je früher ihr Probleme erkennt, desto einfacher ist es, sie zu beheben.
5. Ernte: Sobald die Bohnenhülsen reif sind, könnt ihr sie ernten. Erntet die Bohnen regelmäßig, um die Produktion neuer Hülsen anzuregen. Die beste Zeit zum Ernten ist am frühen Morgen, wenn die Hülsen noch kühl und knackig sind.
Zusätzliche Tipps für eine erfolgreiche Bohnenernte:
* Fruchtfolge: Baut Bohnen nicht jedes Jahr am selben Standort an. Eine Fruchtfolge hilft, den Boden gesund zu halten und Schädlinge und Krankheiten zu vermeiden.
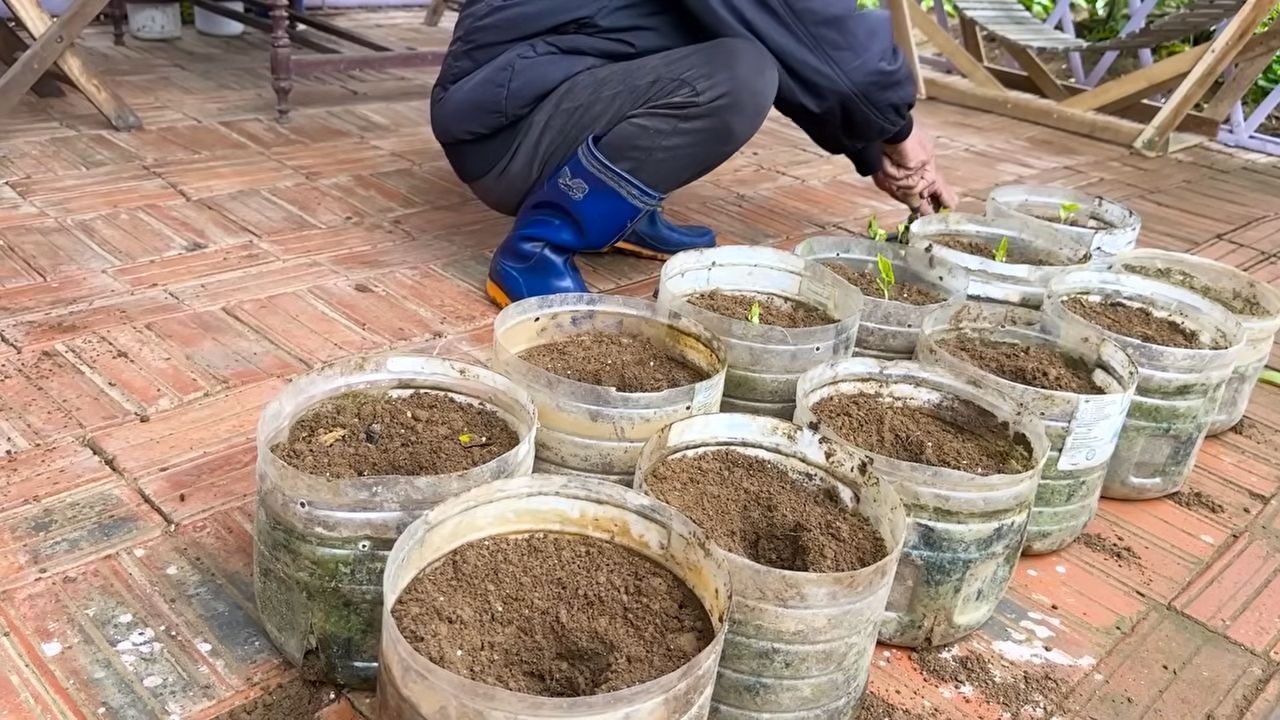
* Bodenverbesserung: Verbessert den Boden vor dem Pflanzen mit Kompost oder anderem organischen Material.
* Sortenwahl: Wählt Bohnensorten, die für euer Klima und eure Bodenbedingungen geeignet sind.
* Sonnenschein: Stellt sicher, dass die Bohnen mindestens 6 Stunden Sonne pro Tag bekommen.
* Geduld: Habt Geduld! Es kann einige Wochen dauern, bis die Bohnen wieder gesund und produktiv sind.
Was tun, wenn es wirklich schlimm aussieht?
Manchmal ist die Vernachlässigung so groß, dass eine Rettung schwierig wird. Wenn die Bohnen stark von Schädlingen befallen sind, schwer krank sind oder einfach nicht mehr wachsen wollen, kann es sinnvoll sein, sie zu entfernen und neu zu pflanzen. Aber gebt nicht auf! Auch wenn es dieses Jahr nicht klappt, könnt ihr aus euren Fehlern lernen und es nächstes Jahr besser machen.
Ich hoffe, diese Tipps helfen euch dabei, euren vernachlässigten Bohnengarten wieder zum Leben zu erwecken! Mit ein bisschen Mühe und Geduld könnt ihr eine reiche Ernte genießen. Viel Erfolg und lasst es euch schmecken!
Conclusion
So, there you have it! Transforming a neglected bean patch into a thriving garden is not only achievable, but surprisingly rewarding. This DIY trick, born out of necessity and a touch of desperation, has proven to be a game-changer for revitalizing even the most forlorn bean plants. We’ve shown you how a little ingenuity and targeted care can breathe new life into your struggling bean crop, yielding a bountiful harvest you might have thought impossible.
The beauty of this method lies in its simplicity and adaptability. While we focused on the core techniques of soil amendment, targeted watering, and strategic support, remember that you can tailor this approach to your specific needs and resources. Experiment with different types of organic fertilizers to find what works best for your soil. Consider companion planting with herbs like basil or marigolds to deter pests naturally. If you’re dealing with particularly stubborn weeds, a layer of organic mulch can provide an extra barrier.
Don’t be afraid to get creative! Perhaps you’ll discover a unique variation that works even better in your climate or with your specific bean variety. The key is to observe your plants closely, listen to what they’re telling you, and adjust your approach accordingly. Remember, gardening is a journey of learning and discovery.
This DIY trick isn’t just about saving a neglected bean patch; it’s about empowering you to take control of your garden and cultivate a deeper connection with the natural world. It’s about proving that even when things seem hopeless, a little effort and ingenuity can yield incredible results. It’s about experiencing the satisfaction of nurturing life from the soil and reaping the rewards of your hard work.
We wholeheartedly encourage you to try this DIY trick on your own neglected bean patch. Whether you’re a seasoned gardener or a complete beginner, we believe you’ll be amazed at the transformation you can achieve. And more importantly, we want to hear about your experience! Share your successes, your challenges, and your own unique variations in the comments below. Let’s build a community of gardeners who are passionate about revitalizing neglected plants and sharing their knowledge with others. Together, we can transform neglected spaces into thriving gardens, one bean patch at a time. Let us know if this **DIY trick** worked for you!
Frequently Asked Questions (FAQ)
Q: My bean plants are completely yellow and look dead. Is there any hope?
A: While severely yellowed and seemingly dead bean plants might seem beyond saving, don’t give up entirely! The extent of the damage will determine the outcome. If there’s still some green tissue visible, especially near the base of the plant, there’s a chance for recovery. Follow the steps outlined in the article, paying particular attention to soil amendment and watering. Be patient, as it may take several weeks to see significant improvement. If the plants are completely brown and brittle, they are likely beyond saving, but you can still improve the soil for future plantings.
Q: What kind of fertilizer should I use to revive my bean plants?
A: Organic fertilizers are generally best for reviving neglected bean plants. Options like compost tea, fish emulsion, or well-rotted manure provide a gentle and balanced source of nutrients. Avoid using synthetic fertilizers, as they can be too harsh and potentially burn the roots of stressed plants. When applying fertilizer, always follow the instructions on the product label and avoid over-fertilizing, which can be just as harmful as under-fertilizing. A balanced fertilizer with an NPK ratio close to 5-10-5 is a good starting point.
Q: How often should I water my revived bean plants?
A: The watering frequency will depend on your climate, soil type, and the age of your plants. As a general rule, water deeply and less frequently, allowing the soil to dry out slightly between waterings. Overwatering can lead to root rot, which can further weaken already stressed plants. Check the soil moisture by sticking your finger about an inch into the soil. If it feels dry, it’s time to water. During hot, dry weather, you may need to water more frequently.
Q: My bean plants are covered in pests. What should I do?
A: Pests can be a major problem for neglected bean plants. Start by identifying the specific pests you’re dealing with. Common bean pests include aphids, bean beetles, and spider mites. Once you know what you’re fighting, you can choose the appropriate treatment. Organic options include insecticidal soap, neem oil, and diatomaceous earth. You can also try attracting beneficial insects like ladybugs and lacewings, which prey on common bean pests. Regularly inspect your plants for pests and take action as soon as you notice them.
Q: How long will it take to see results after using this DIY trick?
A: The time it takes to see results will vary depending on the severity of the neglect and the overall health of your plants. In general, you should start to see some improvement within a week or two. New growth should appear, and the leaves should start to regain their color. However, it may take several weeks or even months for your bean plants to fully recover and produce a bountiful harvest. Be patient and consistent with your care, and you’ll eventually see the fruits (or beans!) of your labor.
Q: Can I use this trick on other types of plants besides beans?
A: While this DIY trick is specifically tailored for neglected bean patches, the underlying principles can be applied to other types of plants as well. The key elements – soil amendment, targeted watering, and strategic support – are beneficial for most plants that are struggling due to neglect. However, you may need to adjust the specific techniques based on the needs of the particular plant. For example, different plants have different nutrient requirements and watering preferences.
Q: What if my bean plants don’t recover despite my best efforts?
A: Sometimes, despite our best efforts, plants simply don’t recover. If you’ve tried everything and your bean plants are still struggling, it may be time to accept that they’re beyond saving. Don’t be discouraged! Gardening is a learning process, and even experienced gardeners face setbacks. Use this experience as an opportunity to learn from your mistakes and improve your gardening skills. You can always start over with new seeds or seedlings and apply what you’ve learned to create a healthier and more productive garden. Remember to amend the soil thoroughly before planting again to give your new plants the best possible start.
Q: How can I prevent my bean patch from becoming neglected in the first place?
A: Prevention is always better than cure! To prevent your bean patch from becoming neglected, establish a regular gardening routine. This includes regular watering, fertilizing, weeding, and pest control. Monitor your plants closely for signs of stress or disease and take action promptly. Consider using a gardening journal to track your progress and identify any potential problems. By staying on top of things, you can ensure that your bean patch remains healthy and productive throughout the growing season.


Leave a Comment