
Recycled bottle bell peppers: who knew turning trash into treasure could be so delicious? I’m always on the lookout for ways to make my garden more sustainable and productive, and this DIY trick is a game-changer. Forget expensive greenhouses or complicated setups – we’re going back to basics with a little help from our recycling bins!
The concept of using repurposed materials in gardening isn’t new. For centuries, resourceful gardeners have found innovative ways to extend growing seasons and protect their plants. Think of the old Victorian cloches made from glass jars, or the ancient practice of using stones to retain heat in arid climates. We’re simply carrying on that tradition, but with a modern, eco-friendly twist.
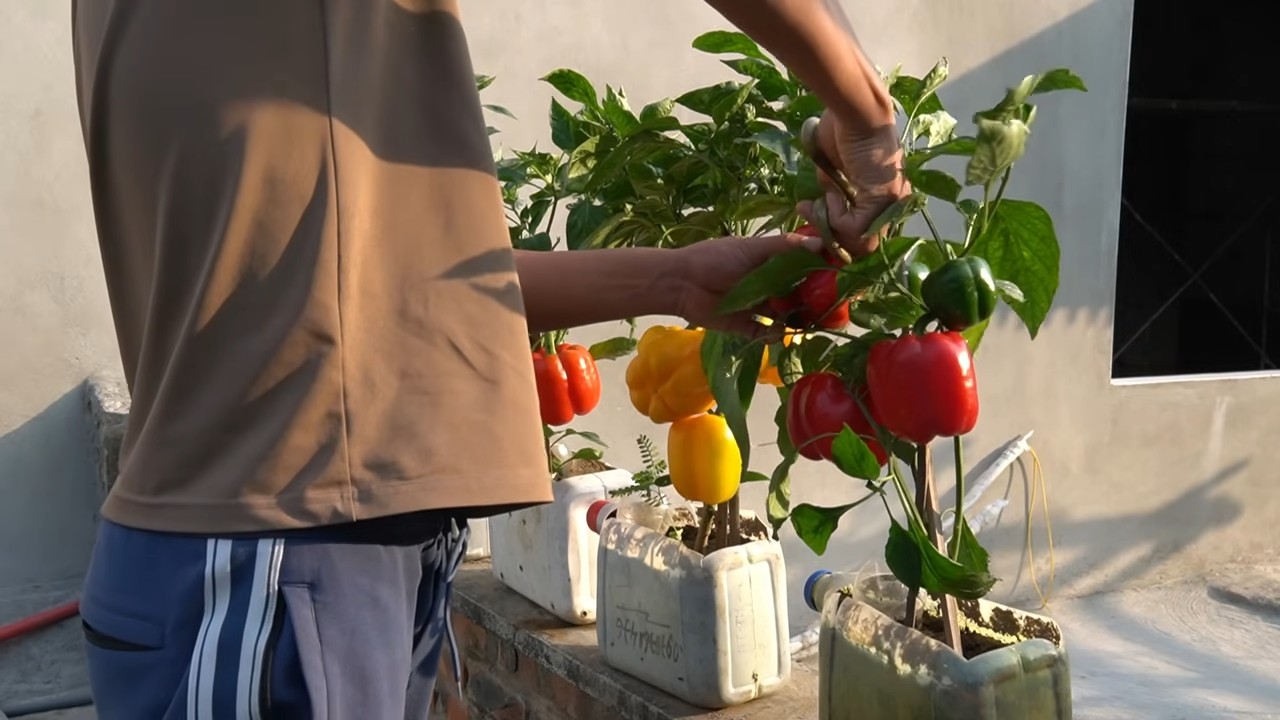
Why should you try growing recycled bottle bell peppers? Well, for starters, it’s incredibly budget-friendly! But more importantly, it offers a fantastic microclimate for your peppers, shielding them from harsh winds, unexpected frosts, and even pesky pests. Imagine harvesting plump, juicy bell peppers weeks earlier than your neighbors, all thanks to a simple plastic bottle. Plus, it’s a fantastic way to reduce your environmental footprint and give those bottles a second life. Let’s dive in and learn how to create your own mini pepper paradises!
DIY Delight: Turning Plastic Bottles into Thriving Bell Pepper Planters
Hey there, fellow gardening enthusiasts! I’m so excited to share this super cool and eco-friendly project with you. We’re going to transform those discarded plastic bottles into fantastic planters perfect for growing bell peppers. Not only are we giving these bottles a new life, but we’re also creating a sustainable and budget-friendly way to enjoy fresh, homegrown peppers. Let’s get started!
What You’ll Need: The Essential Supplies
Before we dive in, let’s gather all the necessary materials. Trust me, having everything ready will make the process much smoother.
* Plastic Bottles: The stars of our show! I recommend using bottles that are at least 2 liters in size. Soda bottles, juice bottles, or even large water bottles will work great. The more, the merrier, especially if you’re planning a whole pepper patch!
* Scissors or Utility Knife: For cutting the plastic bottles. Be careful and always cut away from yourself. A sharp utility knife might be easier for thicker bottles, but scissors work just fine for thinner ones.
* Potting Soil: A good quality potting mix is crucial for healthy pepper plants. Look for a mix that’s well-draining and contains essential nutrients.
* Bell Pepper Seeds or Seedlings: You can start from seeds or buy small seedlings from your local garden center. Seedlings will give you a head start, but starting from seeds is incredibly rewarding.
* Drill or Nail and Hammer: To create drainage holes in the bottom of the bottles. Proper drainage is essential to prevent root rot.
* Watering Can or Hose: To keep your pepper plants hydrated.
* Optional: Spray Paint: If you want to add a pop of color and personalize your planters, grab some spray paint suitable for plastic.
* Optional: Landscape Fabric or Gravel: To improve drainage and prevent soil from washing out of the drainage holes.
Preparing the Bottles: The Foundation of Our Planters
This is where we transform those ordinary plastic bottles into something special.
1. Clean the Bottles: Thoroughly wash the bottles with soap and water to remove any residue. Rinse them well and let them dry completely. This will ensure that the potting soil adheres properly and prevent any unwanted contaminants from affecting your plants.
2. Cut the Bottles: Decide how tall you want your planters to be. I usually cut the bottles about two-thirds of the way up. You can use scissors or a utility knife for this. If using a utility knife, be extra careful!
* Marking the Cut Line: Use a marker to draw a line around the bottle where you want to cut. This will help you create a clean and even cut.
* Cutting Technique: If using scissors, start by poking a small hole with the tip of the scissors and then carefully cut along the marked line. If using a utility knife, place the bottle on a stable surface and carefully slice along the line.
3. Create Drainage Holes: This is super important! Without drainage holes, your pepper plants will drown.
* Using a Drill: If you have a drill, use a drill bit suitable for plastic to create several holes in the bottom of each bottle.
* Using a Nail and Hammer: If you don’t have a drill, you can use a nail and hammer. Place the bottle on a piece of wood or other protective surface and carefully hammer the nail through the bottom of the bottle to create several holes.
4. Optional: Painting the Bottles: If you want to add some flair to your planters, now’s the time to get creative with spray paint!
* Choose Your Colors: Pick colors that complement your garden or create a fun and vibrant display.
* Spray Painting Technique: Apply several thin coats of spray paint, allowing each coat to dry completely before applying the next. This will prevent drips and ensure a smooth, even finish. Remember to spray in a well-ventilated area.
* Let it Dry: Allow the painted bottles to dry completely before moving on to the next step.
Planting Your Peppers: Bringing Life to Our Creations
Now for the fun part – planting our bell peppers!
1. Add Drainage Material (Optional): To further improve drainage, you can add a layer of landscape fabric or gravel to the bottom of each bottle. This will help prevent the soil from washing out of the drainage holes and ensure that your pepper plants have well-draining soil.
* Landscape Fabric: Cut a piece of landscape fabric slightly larger than the bottom of the bottle and place it inside.
* Gravel: Add a layer of gravel about an inch thick to the bottom of the bottle.
2. Fill with Potting Soil: Fill each bottle with potting soil, leaving about an inch of space at the top. Gently pat down the soil to remove any air pockets.
3. Plant Your Seeds or Seedlings:
* Planting Seeds: Follow the instructions on your seed packet for planting depth and spacing. Generally, you’ll want to plant the seeds about ¼ inch deep. Water gently after planting.
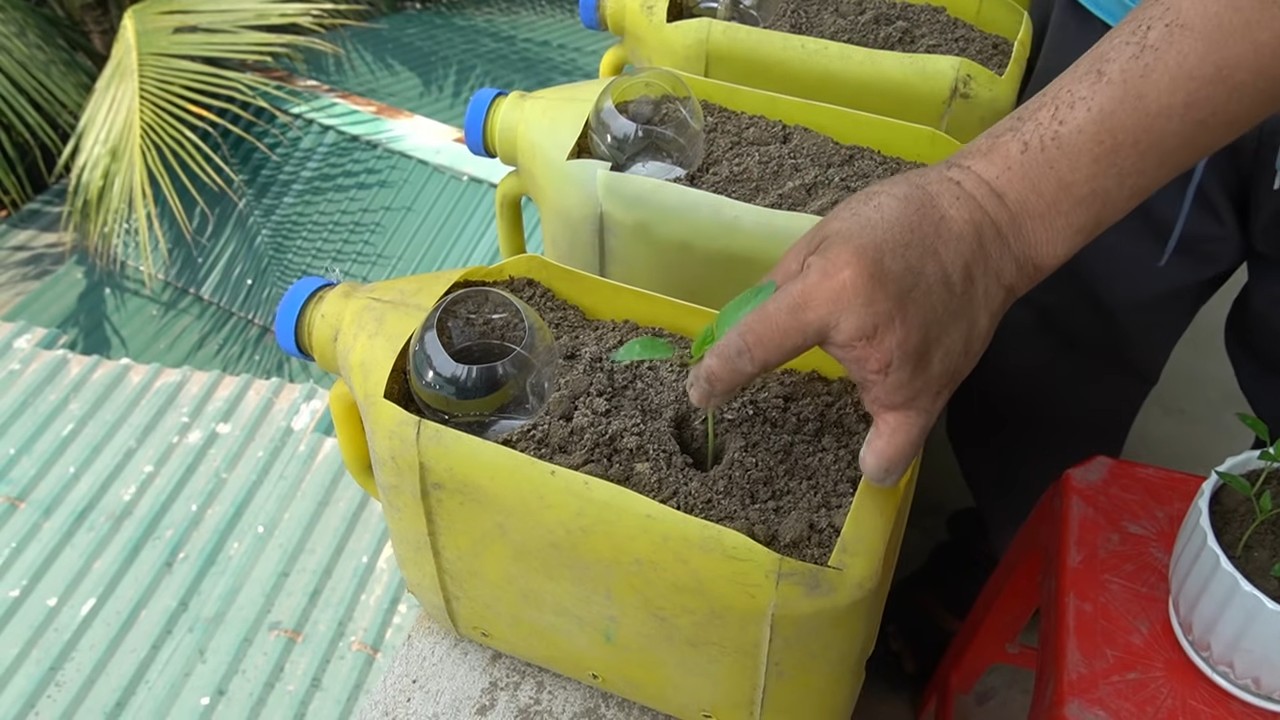
* Planting Seedlings: Carefully remove the seedlings from their containers. Gently loosen the roots and place the seedling in the center of the bottle. Fill in around the seedling with potting soil, making sure the top of the root ball is level with the soil surface. Water thoroughly after planting.
4. Water Thoroughly: Water your newly planted peppers thoroughly, making sure the soil is evenly moist.
5. Choose a Sunny Location: Bell peppers need at least 6-8 hours of sunlight per day, so choose a sunny spot for your planters.
Caring for Your Pepper Plants: Nurturing Your Garden
Now that your pepper plants are in their new homes, it’s important to provide them with the care they need to thrive.
1. Watering: Water your pepper plants regularly, especially during hot, dry weather. Check the soil moisture by sticking your finger into the soil. If the top inch of soil feels dry, it’s time to water. Avoid overwatering, as this can lead to root rot.
2. Fertilizing: Feed your pepper plants with a balanced fertilizer every 2-3 weeks. Follow the instructions on the fertilizer package for application rates.
3. Support: As your pepper plants grow, they may need support to prevent them from falling over. You can use stakes or cages to provide support.
4. Pruning: Prune your pepper plants to encourage bushier growth and more fruit production. Remove any suckers (small shoots that grow from the base of the plant) and any yellowing or dead leaves.
5. Pest Control: Keep an eye out for pests such as aphids, whiteflies, and spider mites. If you notice any pests, treat them with an appropriate insecticide or insecticidal soap.
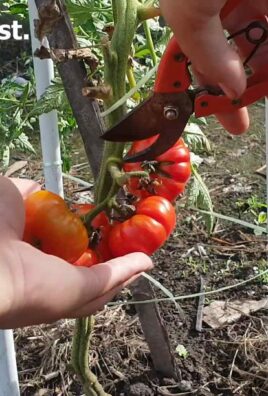
6. Harvesting: Your bell peppers will be ready to harvest when they are fully colored and firm to the touch. Use scissors or a knife to cut the peppers from the plant, leaving a small stem attached.
Troubleshooting: Addressing Common Issues
Even with the best care, you might encounter some challenges along the way. Here are a few common issues and how to address them:
* Yellowing Leaves: This could be a sign of overwatering, underwatering, or nutrient deficiency. Check the soil moisture and adjust your watering schedule accordingly. Fertilize your plants with a balanced fertilizer to provide them with the nutrients they need.
* Blossom End Rot: This is a condition where the bottom of the pepper turns black and rotten. It’s usually caused by a calcium deficiency. Add calcium to the soil by mixing in bone meal or crushed eggshells.
* Pest Infestations: As mentioned earlier, keep an eye out for pests and treat them promptly.
* Slow Growth: This could be due to insufficient sunlight, poor soil, or lack of nutrients. Make sure your plants are getting enough sunlight and fertilize them regularly.
Enjoying Your Harvest: The Fruits (or Vegetables!) of Your Labor
After all your hard work, it’s time to enjoy the delicious bell peppers you’ve grown yourself! Use them in your favorite recipes, share them with friends and family, or simply savor the taste of fresh, homegrown produce.
I hope you found this DIY project helpful and inspiring. Remember, gardening is a journey, so don’t be afraid to experiment and learn along the way. Happy gardening!
Conclusion
So, there you have it! Transforming discarded plastic bottles into miniature greenhouses for your bell peppers is not just a clever upcycling project; it’s a game-changer for your gardening efforts. This simple, cost-effective DIY trick offers a multitude of benefits, from protecting your delicate seedlings from harsh weather and pests to creating a warmer, more humid environment that encourages rapid growth. Forget expensive cloches or complicated greenhouse setups – this method is accessible to everyone, regardless of their gardening experience or budget.
Why is this a must-try? Because it works! You’ll witness firsthand the resilience of your bell pepper plants as they thrive under the protective dome of their recycled bottle homes. The increased warmth and humidity will translate into stronger stems, healthier leaves, and ultimately, a more abundant harvest of vibrant, delicious bell peppers. Plus, you’ll be contributing to a more sustainable lifestyle by giving those plastic bottles a new lease on life, diverting them from landfills and turning them into valuable gardening tools.
But the beauty of this DIY trick lies in its adaptability. Feel free to experiment with different sizes of plastic bottles to accommodate your growing bell pepper plants. For larger varieties, consider using two-liter bottles or even larger containers. You can also adjust the ventilation by creating more or larger holes in the bottle, depending on the climate and the specific needs of your plants.
Consider adding a layer of mulch around the base of the bell pepper plant inside the bottle to help retain moisture and suppress weeds. You might also want to experiment with different types of soil or fertilizers to optimize growth. For those in particularly cold climates, wrapping the bottles with bubble wrap can provide an extra layer of insulation during frosty nights.
Don’t be afraid to get creative and personalize this technique to suit your own gardening style and environment. The possibilities are endless!
We are confident that once you try this DIY trick, you’ll be amazed by the results. It’s a simple, effective, and environmentally friendly way to give your bell pepper plants the best possible start in life.
So, grab those empty plastic bottles, gather your bell pepper seedlings, and get ready to witness the magic of upcycling in action. We encourage you to try this **recycled bottle bell peppers** method and share your experiences with us! Post pictures of your bottle greenhouses and tell us about your successes (and any challenges you encounter) in the comments below. Let’s build a community of resourceful gardeners who are passionate about growing their own food and protecting our planet. Happy gardening!
FAQ
Frequently Asked Questions About Using Recycled Bottles for Bell Peppers
1. What type of plastic bottles are best for this DIY trick?
The best type of plastic bottles to use are clear, transparent bottles. This allows maximum sunlight to reach the bell pepper plant. Avoid using colored or opaque bottles, as they will block sunlight and hinder growth. Soda bottles, water bottles, and juice bottles all work well. Make sure to thoroughly clean the bottles before using them to remove any residue that could harm your plants. Remove the labels completely to maximize light penetration.
2. How do I prepare the plastic bottles for use as mini-greenhouses?
Preparing the bottles is a simple process. First, thoroughly wash and dry the bottles. Then, cut off the bottom of the bottle using a sharp knife or scissors. Be careful when cutting the plastic. The amount you cut off will depend on the size of your bell pepper seedling. You want to create a dome that covers the plant but still allows for some air circulation. You can also poke a few small holes in the sides of the bottle for ventilation, especially if you live in a humid climate. These holes will help prevent the buildup of excessive moisture, which can lead to fungal diseases.
3. When is the best time to use this DIY trick for bell peppers?
The best time to use this method is when you are transplanting your bell pepper seedlings outdoors. This is typically in the spring, after the last frost. The plastic bottles will protect the young plants from cold snaps, strong winds, and pests. You can also use this method to start seeds directly in the garden, providing a warm and protected environment for germination. Remove the bottles once the weather has warmed up consistently and the plants have grown large enough to withstand the elements.
4. How do I water my bell pepper plants when they are covered with plastic bottles?
Watering your bell pepper plants under the bottle covers is easy. You can simply pour water around the base of the plant, allowing it to seep into the soil. Alternatively, you can remove the bottle temporarily to water the plant directly. Be careful not to overwater, as the bottles can trap moisture and lead to root rot. Check the soil moisture regularly and water only when the top inch of soil feels dry.
5. What if the plastic bottles get too hot inside?
Overheating can be a concern, especially in hot climates. To prevent this, make sure to provide adequate ventilation. Increase the size or number of holes in the bottle to allow for better airflow. You can also temporarily remove the bottles during the hottest part of the day. Another option is to shade the bottles with a light cloth or netting to reduce the amount of direct sunlight. Monitor the temperature inside the bottles regularly and adjust the ventilation as needed.
6. Can I reuse the plastic bottles for multiple seasons?
Yes, you can definitely reuse the plastic bottles for multiple seasons. After each season, thoroughly clean the bottles with soap and water to remove any dirt or debris. Store them in a dry place until you are ready to use them again. Inspect the bottles for any cracks or damage before reusing them. If the plastic has become brittle or damaged, it’s best to replace them with new bottles.
7. Will this DIY trick protect my bell pepper plants from pests?
Yes, the plastic bottles provide a physical barrier that can help protect your bell pepper plants from many common pests, such as slugs, snails, and cutworms. However, it’s important to monitor your plants regularly for any signs of infestation. If you notice any pests inside the bottles, you can remove them manually or use organic pest control methods.
8. Can I use this method for other types of plants besides bell peppers?
Absolutely! This DIY trick can be used for a variety of other plants, including tomatoes, eggplants, cucumbers, and herbs. It’s particularly beneficial for protecting young seedlings from harsh weather and pests. Just make sure to choose a bottle size that is appropriate for the size of the plant.
9. How long should I keep the plastic bottles on my bell pepper plants?
The length of time you keep the bottles on your bell pepper plants will depend on the weather conditions and the size of the plants. Generally, you can remove the bottles once the weather has warmed up consistently and the plants have grown large enough to withstand the elements. This is typically a few weeks after transplanting. However, if you experience a sudden cold snap, you can always put the bottles back on temporarily to protect your plants.
10. What are the benefits of using this recycled bottle method compared to other gardening techniques?
This **recycled bottle bell peppers** method offers several advantages over other gardening techniques. It’s a cost-effective and environmentally friendly way to protect your plants. It provides a warmer, more humid environment that promotes faster growth. It also helps to protect your plants from pests and diseases. And it’s a great way to upcycle plastic bottles and reduce waste.
Leave a Comment