
Regrow Green Onions From Scraps: Imagine never having to buy green onions again! Sounds too good to be true? Well, get ready to be amazed because I’m about to share a super simple, incredibly rewarding DIY trick that will keep your kitchen stocked with fresh green onions, all while saving you money and reducing food waste.
The practice of propagating vegetables, like regrowing green onions, has roots in ancient farming techniques. For centuries, resourceful gardeners have sought ways to maximize their yields and minimize waste. It’s a testament to human ingenuity and our deep connection to the earth. While our ancestors may not have had fancy hydroponic systems, they understood the fundamental principles of plant regeneration.
In today’s fast-paced world, where convenience often trumps sustainability, it’s easy to overlook simple ways to be more eco-conscious. That’s where this DIY trick comes in. Learning to regrow green onions from scraps is not just a fun project; it’s a small step towards a more sustainable lifestyle. Plus, who doesn’t love the satisfaction of growing their own food, even if it’s just a little bit? This hack is perfect for apartment dwellers, beginner gardeners, or anyone looking to add a touch of green to their lives. So, grab those leftover green onion roots, and let’s get started on this easy and rewarding gardening adventure!
Regrowing Green Onions From Scraps: A Gardener’s Delight!
Hey there, fellow green thumb enthusiasts! Are you tired of constantly buying green onions at the grocery store, only to use a small portion and watch the rest wilt away in your fridge? Well, I’ve got a fantastic, super-easy DIY hack for you: regrowing green onions from scraps! It’s a sustainable, cost-effective, and frankly, pretty darn cool way to have a constant supply of fresh green onions right at your fingertips. Trust me, once you start, you’ll never look at a bunch of green onions the same way again.
Here’s the lowdown on how to make this magic happen:
What You’ll Need
Before we dive in, let’s gather our supplies. The beauty of this project is that you probably already have most of what you need!
* Green Onion Scraps: This is the star of the show! You’ll need the white bulb end of your green onions, with about 1-2 inches of the green stalks still attached. Don’t throw those ends away after chopping!
* A Glass or Jar: Any small glass or jar will do. Think a recycled jam jar, a drinking glass, or even a small vase.
* Water: Tap water is perfectly fine.
* Optional: Small Pot and Potting Soil: If you want to transition your regrown green onions to soil for a more permanent setup, you’ll need a small pot and some good quality potting soil.
* Scissors or a Knife: For trimming the green onions later on.
* Sunlight: A sunny windowsill or a well-lit area is crucial for growth.
The Water Propagation Method: Step-by-Step
This is the easiest and most common method for regrowing green onions. It’s perfect for beginners and requires minimal effort.
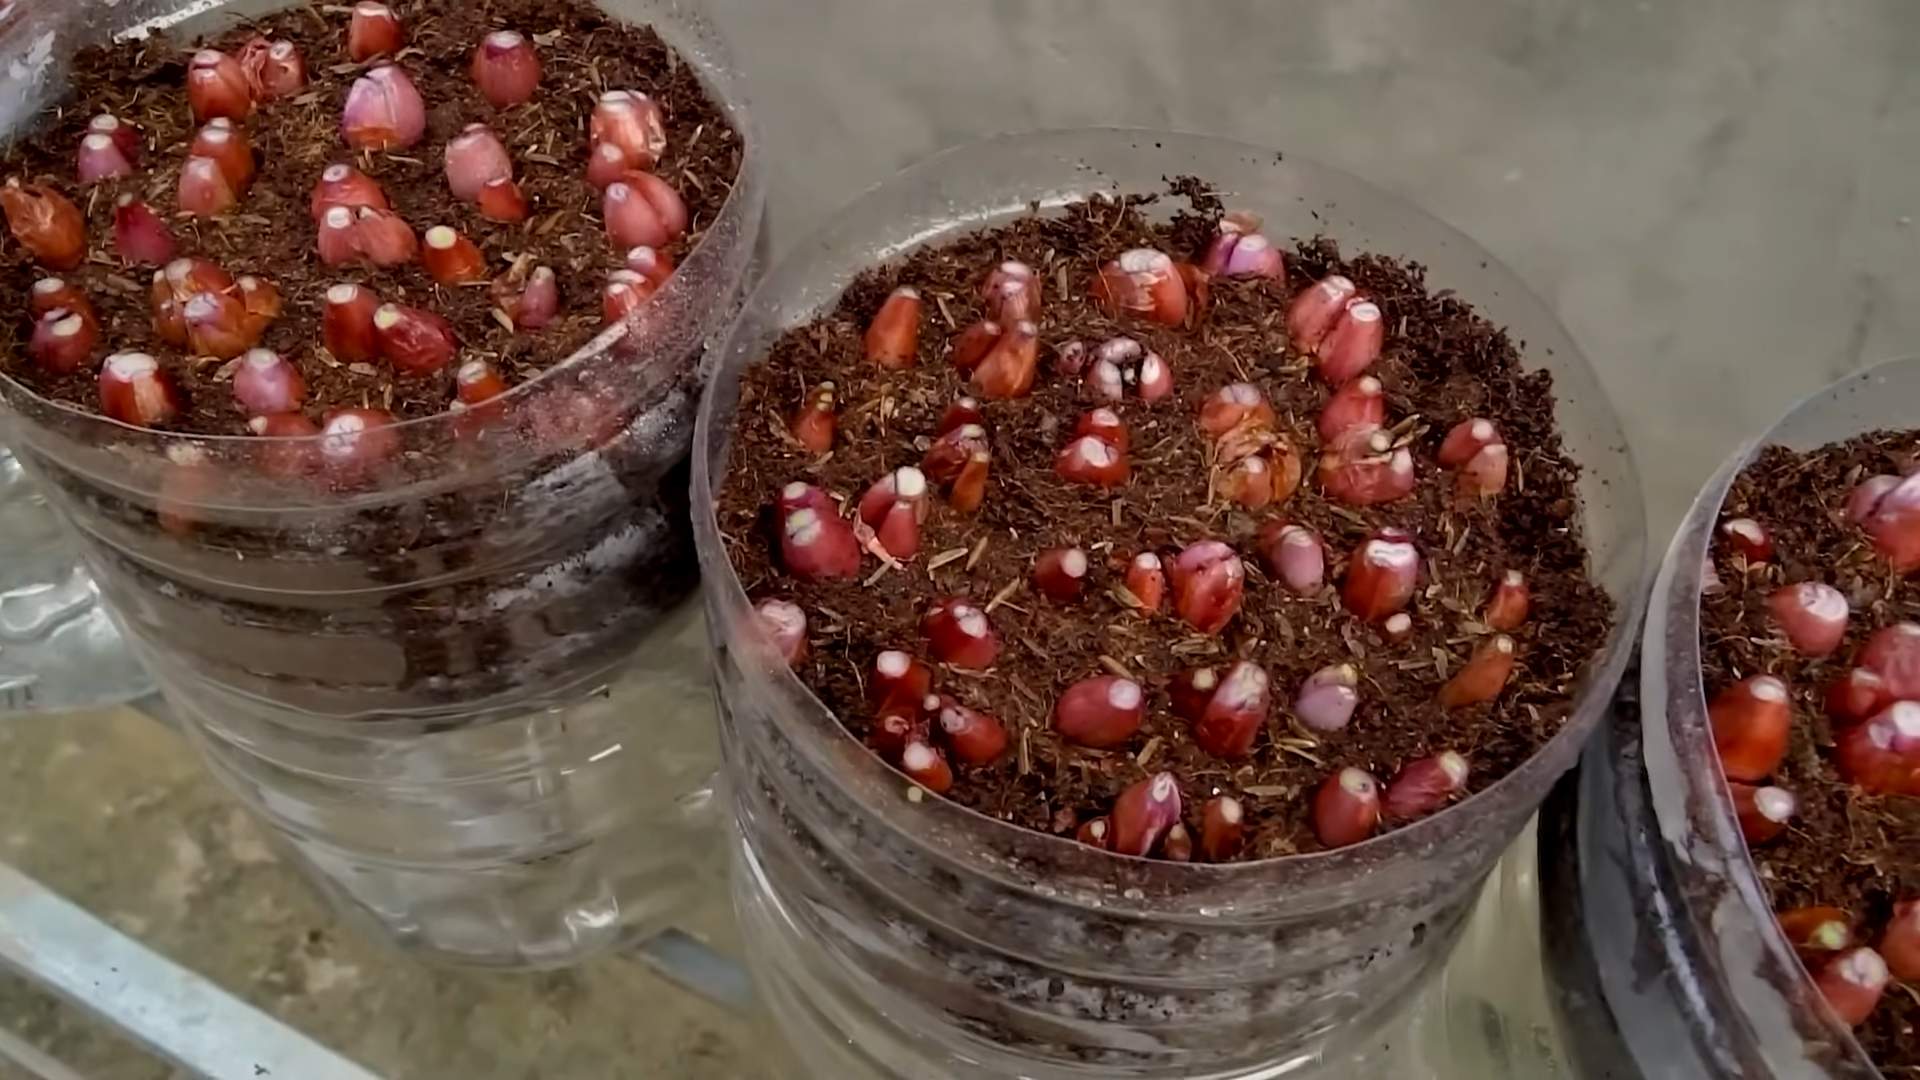
1. Prepare Your Green Onion Scraps: Take your green onion scraps and gently remove any outer layers that look slimy or damaged. You want to expose the fresh, white part of the bulb. Don’t worry about being too perfect; just get rid of anything that looks like it’s starting to decompose.
2. Place Scraps in Water: Fill your glass or jar with enough water to cover the white bulb of the green onion scraps, but not so much that the green stalks are submerged. You want the roots (or where the roots *will* be) to be in the water, but the green part should be above the waterline.
3. Find a Sunny Spot: Place your glass of green onion scraps on a sunny windowsill or in a well-lit area. Green onions need sunlight to grow, so make sure they get at least 6 hours of light per day. A south-facing window is ideal, but an east or west-facing window will also work.
4. Change the Water Regularly: This is important! Change the water every 1-2 days to prevent bacteria growth and keep the water fresh. This will also help to provide the green onions with the nutrients they need to grow.
5. Observe and Enjoy: Within a few days, you should start to see new green shoots emerging from the top of the green onion scraps, and roots growing from the bottom. It’s so rewarding to watch them grow!
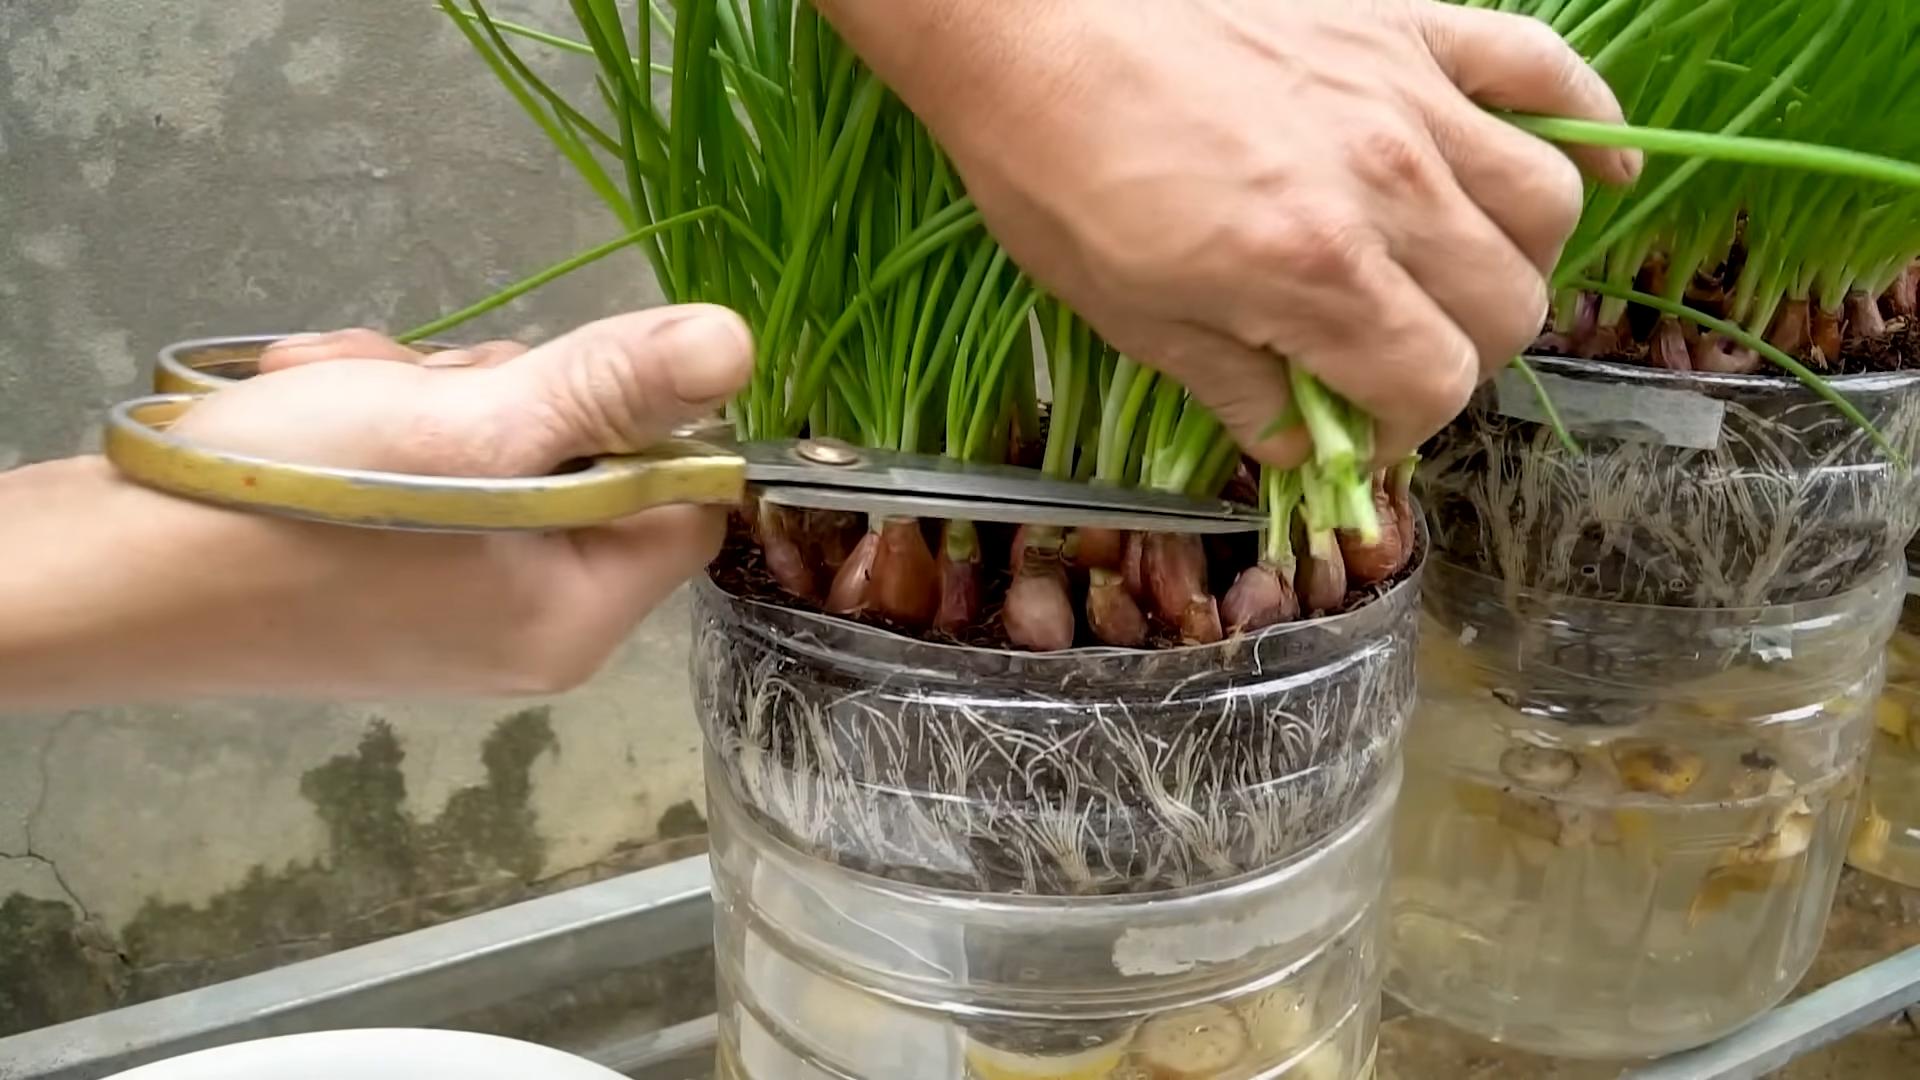
6. Harvest Your Green Onions: Once the green stalks have grown to a decent length (usually a few inches), you can start harvesting them! Use scissors or a knife to cut off the amount you need, leaving about an inch or two of the green stalk attached to the bulb. The green onions will continue to grow back, providing you with a continuous supply.
Transitioning to Soil: For a More Permanent Home
While the water propagation method is great for getting started, you can also transition your regrown green onions to soil for a more permanent and potentially more productive setup. Here’s how:
1. Wait for Root Development: Before transplanting, make sure your green onion scraps have developed a good root system in the water. You want to see several roots that are at least an inch or two long.
2. Prepare Your Pot: Choose a small pot with drainage holes. Fill it with good quality potting soil, leaving about an inch of space at the top.
3. Carefully Transplant: Gently remove the green onion scraps from the water. Dig a small hole in the potting soil and carefully place the bulb and roots into the hole. Make sure the top of the bulb is just below the surface of the soil.
4. Water Thoroughly: Water the soil thoroughly after transplanting, making sure the water drains out of the drainage holes.
5. Find a Sunny Spot: Just like with the water propagation method, your potted green onions need plenty of sunlight. Place them on a sunny windowsill or in a well-lit area.
6. Water Regularly: Water your potted green onions regularly, keeping the soil moist but not soggy. Allow the top inch of soil to dry out between waterings.
7. Fertilize Occasionally: To encourage healthy growth, you can fertilize your green onions every few weeks with a diluted liquid fertilizer. Follow the instructions on the fertilizer packaging.
8. Harvest and Enjoy: You can harvest your green onions from the soil just like you would from the water. Cut off the amount you need, leaving about an inch or two of the green stalk attached to the bulb. The green onions will continue to grow back, providing you with a continuous supply.
Troubleshooting Tips
Even with the best intentions, sometimes things don’t go exactly as planned. Here are a few common issues you might encounter and how to fix them:
* Green Onions Aren’t Growing: Make sure your green onions are getting enough sunlight. If they’re not, try moving them to a sunnier location. Also, make sure you’re changing the water regularly. Stale water can inhibit growth. If you’ve transitioned to soil, ensure the soil isn’t too dry or too wet.
* Green Onions Are Turning Yellow: Yellowing can be a sign of overwatering or underwatering. Adjust your watering schedule accordingly. It could also indicate a lack of nutrients. Try fertilizing your green onions with a diluted liquid fertilizer.
* Green Onions Are Slimy or Rotting: This is usually caused by bacteria growth. Make sure you’re changing the water regularly and removing any outer layers of the bulb that look slimy or damaged. If you’re growing in soil, ensure the pot has good drainage to prevent the roots from rotting.
* Pests: While green onions are relatively pest-resistant, they can occasionally be affected by aphids or other small insects. If you notice any pests, try spraying them with a mixture of water and dish soap.
Tips for Success
Here are a few extra tips to help you get the most out of your green onion regrowing adventure:
* Start with Healthy Scraps: The healthier the green onion scraps you start with, the better your chances of success. Choose scraps that are firm and have a good amount of green stalk attached.
* Experiment with Different Varieties: There are many different varieties of green onions, so feel free to experiment and see which ones grow best for you.
* Don’t Be Afraid to Trim: Trimming the green stalks regularly will encourage them to grow back thicker and stronger.
* Rotate Your Crops: If you’re growing green onions in soil, it’s a good idea to rotate your crops every few months to prevent nutrient depletion.
* Have Fun! Regrowing green onions is a fun and rewarding project. Don’t be afraid to experiment and learn as you go.
Why I Love This Hack
Honestly, this is one of my favorite little gardening hacks. It’s so simple, yet so satisfying. Not only does it save me money on groceries, but it also reduces waste and provides me with a constant supply of fresh, flavorful green onions. Plus, it’s just plain fun to watch them grow! I love adding freshly snipped green onions to everything from salads and soups to tacos and stir-fries. The possibilities are endless!
So, what are you waiting for? Grab those green onion scraps and get growing! You’ll be amazed at how easy it is to have a never-ending supply of fresh green onions right in your own home. Happy gardening!
Conclusion
So, there you have it! Regrowing green onions from scraps isn’t just a fun little project; it’s a game-changer for your kitchen and your wallet. Imagine never having to buy green onions again, always having a fresh supply ready to snip and sprinkle onto your favorite dishes. This simple DIY trick transforms kitchen waste into a continuous source of flavor, reducing food waste and saving you money in the long run. It’s a win-win!
But the benefits extend beyond mere convenience and cost savings. Growing your own green onions, even in a small glass of water on your windowsill, connects you to the food you eat. It’s a tangible reminder of the natural processes that bring nourishment to our tables. Plus, it’s incredibly satisfying to watch those little green shoots emerge and flourish.
Why is this a must-try? Because it’s easy, sustainable, and rewarding. It requires minimal effort and resources, yet yields a surprisingly abundant harvest. It’s a fantastic way to introduce children to gardening and the wonders of plant life. And let’s be honest, who doesn’t love the feeling of resourcefulness and self-sufficiency?
Looking for variations? Absolutely! While water propagation is the simplest method, you can also transplant your regrown green onions into soil for even more robust growth. Use a well-draining potting mix and place the pot in a sunny location. You can also experiment with different types of containers, from repurposed jars to decorative planters. Try adding a diluted liquid fertilizer every few weeks to boost growth. Another fun variation is to try regrowing other members of the allium family, such as scallions or leeks, using the same technique. While the results may vary slightly, the process is just as engaging and rewarding.
Don’t be afraid to experiment with different locations in your home to find the sweet spot for your green onions. Some prefer bright, indirect sunlight, while others thrive in slightly shadier conditions. Pay attention to the water level and change it regularly to prevent bacterial growth. And remember, patience is key! While you’ll typically see new growth within a few days, it may take a week or two for your green onions to reach a usable size.
We wholeheartedly encourage you to give this DIY trick a try. It’s a small change that can make a big difference in your kitchen and your lifestyle. Once you experience the joy of harvesting your own fresh green onions, you’ll be hooked!
So, grab those green onion scraps, find a glass of water, and get ready to embark on a journey of culinary self-sufficiency. We’re confident that you’ll be amazed by the results.
And now, we want to hear from you! Have you tried regrowing green onions from scraps before? What tips and tricks have you discovered? Share your experiences, photos, and questions in the comments below. Let’s create a community of green onion enthusiasts and inspire others to embrace this simple yet powerful DIY project. We can’t wait to see what you create! Let’s all start regrowing green onions today!
Frequently Asked Questions (FAQ)
How long does it take to regrow green onions from scraps?
Typically, you’ll start to see new growth within a few days, usually 2-3 days. However, it may take a week or two for the green onions to reach a usable size. The speed of growth depends on factors such as sunlight, water quality, and temperature. Warmer temperatures generally promote faster growth. Be patient, and you’ll be rewarded with fresh green onions in no time!
What part of the green onion do I need to regrow it?
You need the white part of the green onion, including the roots. Cut off the green tops, leaving about 2 inches of the white base with the roots attached. This is the portion that will sprout new growth. Make sure the roots are healthy and intact for the best results.
Can I regrow green onions in soil instead of water?
Yes, absolutely! While water propagation is a great starting point, transplanting your regrown green onions into soil can lead to even more robust growth. Once the roots have developed in water (usually after a week or two), carefully transplant them into a pot filled with well-draining potting mix. Ensure the base of the green onion is buried just below the soil surface. Place the pot in a sunny location and water regularly.
How often should I change the water when regrowing green onions in water?
It’s recommended to change the water every 1-2 days. This helps prevent bacterial growth and keeps the water fresh, which is essential for healthy root development. Stagnant water can lead to rot and hinder growth.
What kind of sunlight do regrowing green onions need?
Regrowing green onions thrive in bright, indirect sunlight. Avoid placing them in direct sunlight, especially during the hottest part of the day, as this can scorch the leaves. A windowsill that receives morning sun or filtered sunlight is ideal. If you don’t have access to natural light, you can supplement with a grow light.
Can I use tap water to regrow green onions?
While tap water is generally safe to use, it’s best to let it sit out for a few hours before using it to allow chlorine and other chemicals to dissipate. Alternatively, you can use filtered water or rainwater.
How many times can I regrow green onions from the same scraps?
You can typically regrow green onions from the same scraps multiple times, usually 2-3 times. However, the subsequent growths may be less vigorous than the initial growth. After a few cycles, the green onion may lose its ability to regrow effectively. At that point, it’s best to start with fresh scraps.
What if my regrowing green onions start to turn yellow or brown?
Yellowing or browning leaves can indicate a few different issues. It could be due to overwatering, underwatering, lack of sunlight, or nutrient deficiency. Check the water level and ensure the roots are not sitting in stagnant water. Adjust the amount of sunlight the green onions are receiving. If the problem persists, try adding a diluted liquid fertilizer to the water or soil.
Can I eat the regrown green onions?
Yes, absolutely! The regrown green onions are perfectly safe to eat. Simply snip off the green tops as needed and use them in your favorite recipes. They will have the same flavor and texture as store-bought green onions.
Is regrowing green onions a good way to save money?
Yes, regrowing green onions is an excellent way to save money. By regrowing them from scraps, you can significantly reduce your grocery bill and avoid having to purchase green onions regularly. Over time, the savings can add up considerably. Plus, it’s a sustainable practice that reduces food waste.
Can I regrow other vegetables using this method?
While the technique works exceptionally well for green onions, you can also try it with other vegetables, such as celery, lettuce, and bok choy. The success rate may vary depending on the vegetable, but it’s worth experimenting to see what you can regrow from scraps.
What are the benefits of regrowing green onions?
The benefits are numerous! It saves money, reduces food waste, provides a continuous supply of fresh green onions, connects you to your food, and is a fun and educational activity for all ages. It’s a simple yet impactful way to embrace a more sustainable lifestyle.