
Rooftop kale gardening: it might sound like something only a seasoned green thumb can achieve, but trust me, it’s more accessible than you think! Imagine stepping onto your rooftop and harvesting fresh, vibrant kale, ready to be tossed into a salad or blended into a healthy smoothie. No more trips to the grocery store for wilted greens – just pure, homegrown goodness right at your fingertips.
For centuries, urban dwellers have sought ways to connect with nature, and rooftop gardening is a modern iteration of that desire. From the hanging gardens of Babylon to the community gardens that sprouted during wartime, the urge to cultivate our own food in limited spaces is deeply ingrained. Today, with concerns about food security and the environmental impact of long-distance transportation, rooftop kale gardening offers a sustainable and rewarding solution.
But why kale, and why on your roof? Well, kale is a nutritional powerhouse, packed with vitamins and antioxidants. And your rooftop? It’s often an underutilized space just begging for some green life! This DIY guide will provide you with simple, step-by-step instructions and clever hacks to transform your rooftop into a thriving kale oasis. I’ll show you how to choose the right containers, prepare the perfect soil, and protect your precious kale from the elements. Get ready to embrace the joy of urban farming and enjoy the delicious rewards of your own rooftop kale garden!
Dein eigener Dachgarten mit Grünkohl: Eine Schritt-für-Schritt Anleitung
Hey Leute! Habt ihr auch genug von teurem Grünkohl aus dem Supermarkt? Oder wollt ihr einfach nur euren grünen Daumen auf dem Dach ausleben? Dann seid ihr hier genau richtig! Ich zeige euch, wie ihr euren eigenen Dachgarten mit Grünkohl anlegen könnt. Es ist einfacher, als ihr denkt, und das Ergebnis ist superfrischer, selbst angebauter Grünkohl direkt vor eurer Haustür. Los geht’s!
Was du brauchst: Die Materialliste
Bevor wir loslegen, brauchen wir natürlich ein paar Dinge. Keine Sorge, die meisten davon sind leicht zu besorgen:
* **Geeignete Pflanzgefäße:** Das können große Töpfe, Pflanzkästen oder sogar umfunktionierte Behälter sein. Wichtig ist, dass sie Abzugslöcher haben, damit das Wasser ablaufen kann.
* **Hochwertige Pflanzerde:** Hier solltet ihr nicht sparen. Gute Erde ist das A und O für gesundes Grünkohlwachstum. Achtet auf eine Mischung, die gut drainiert und reich an Nährstoffen ist.
* **Grünkohlsamen oder Jungpflanzen:** Ihr könnt entweder Grünkohl aus Samen ziehen oder direkt Jungpflanzen kaufen. Beides hat seine Vor- und Nachteile.
* **Dünger:** Grünkohl ist ein Starkzehrer und braucht regelmäßige Düngergaben. Ich empfehle einen organischen Dünger, der langsam freigesetzt wird.
* **Gießkanne oder Gartenschlauch:** Zum Bewässern eurer Pflanzen.
* **Schaufel oder Kelle:** Zum Umtopfen und Einpflanzen.
* **Handschuhe:** Zum Schutz eurer Hände.
* **Eventuell: Schneckenschutz:** Schnecken lieben Grünkohl! Wenn ihr in einer Gegend wohnt, in der es viele Schnecken gibt, solltet ihr euch einen Schneckenschutz besorgen.
* **Eventuell: Windschutz:** Auf dem Dach kann es windig sein. Ein Windschutz kann eure Pflanzen vor Schäden schützen.
* **Eventuell: Rankhilfe:** Einige Grünkohlsorten werden sehr hoch und brauchen eine Rankhilfe.
Die Vorbereitung: Dein Dachgarten-Check
Bevor wir die Erde in die Töpfe schaufeln, müssen wir sicherstellen, dass euer Dach für einen Garten geeignet ist.
* **Tragfähigkeit prüfen:** Das ist das Wichtigste! Ein Dachgarten kann ganz schön schwer werden, besonders wenn die Erde nass ist. Fragt im Zweifelsfall einen Statiker, ob euer Dach das Gewicht tragen kann.
* **Abdichtung überprüfen:** Das Dach muss natürlich dicht sein, damit kein Wasser eindringt. Überprüft die Abdichtung sorgfältig und lasst eventuelle Schäden reparieren.
* **Zugang zum Wasser:** Ihr braucht eine Möglichkeit, eure Pflanzen zu bewässern. Ein Wasserhahn in der Nähe ist ideal. Ansonsten müsst ihr das Wasser hochtragen.
* **Sonneneinstrahlung:** Grünkohl braucht viel Sonne, mindestens sechs Stunden pro Tag. Achtet darauf, dass euer Dach genügend Sonne abbekommt.
* **Windverhältnisse:** Auf dem Dach kann es windig sein. Überlegt euch, ob ihr einen Windschutz braucht, um eure Pflanzen zu schützen.
* **Sicherheit:** Achtet auf eure Sicherheit! Tragt festes Schuhwerk und arbeitet vorsichtig.
Grünkohl aus Samen ziehen: Der lange Weg zum Erfolg
Wenn ihr Grünkohl aus Samen ziehen wollt, müsst ihr etwas mehr Zeit und Geduld investieren. Aber es lohnt sich!
1. **Aussaat:** Die Aussaat erfolgt am besten im Frühjahr (März/April) in Anzuchtschalen oder kleinen Töpfen. Füllt die Anzuchtschalen mit Anzuchterde und drückt die Samen leicht an.
2. **Bewässerung:** Haltet die Erde feucht, aber nicht nass. Am besten besprüht ihr die Erde mit einer Sprühflasche.
3. **Standort:** Stellt die Anzuchtschalen an einen hellen und warmen Ort. Eine Temperatur von 18-20 Grad Celsius ist ideal.
4. **Keimung:** Nach etwa einer Woche sollten die Samen keimen.
5. **Pikieren:** Sobald die Keimlinge groß genug sind (etwa 5 cm hoch), könnt ihr sie pikieren. Das bedeutet, dass ihr sie in größere Töpfe umpflanzt.
6. **Abhärten:** Bevor ihr die Jungpflanzen ins Freie pflanzt, müsst ihr sie abhärten. Das bedeutet, dass ihr sie langsam an die Außentemperaturen gewöhnt. Stellt sie tagsüber für ein paar Stunden ins Freie und holt sie abends wieder rein.
7. **Auspflanzen:** Nach den Eisheiligen (Mitte Mai) könnt ihr die Jungpflanzen ins Freie pflanzen.
Grünkohl pflanzen: Der schnelle Weg zum Erfolg
Wenn ihr es eilig habt, könnt ihr auch direkt Jungpflanzen kaufen. Das spart Zeit und Mühe.
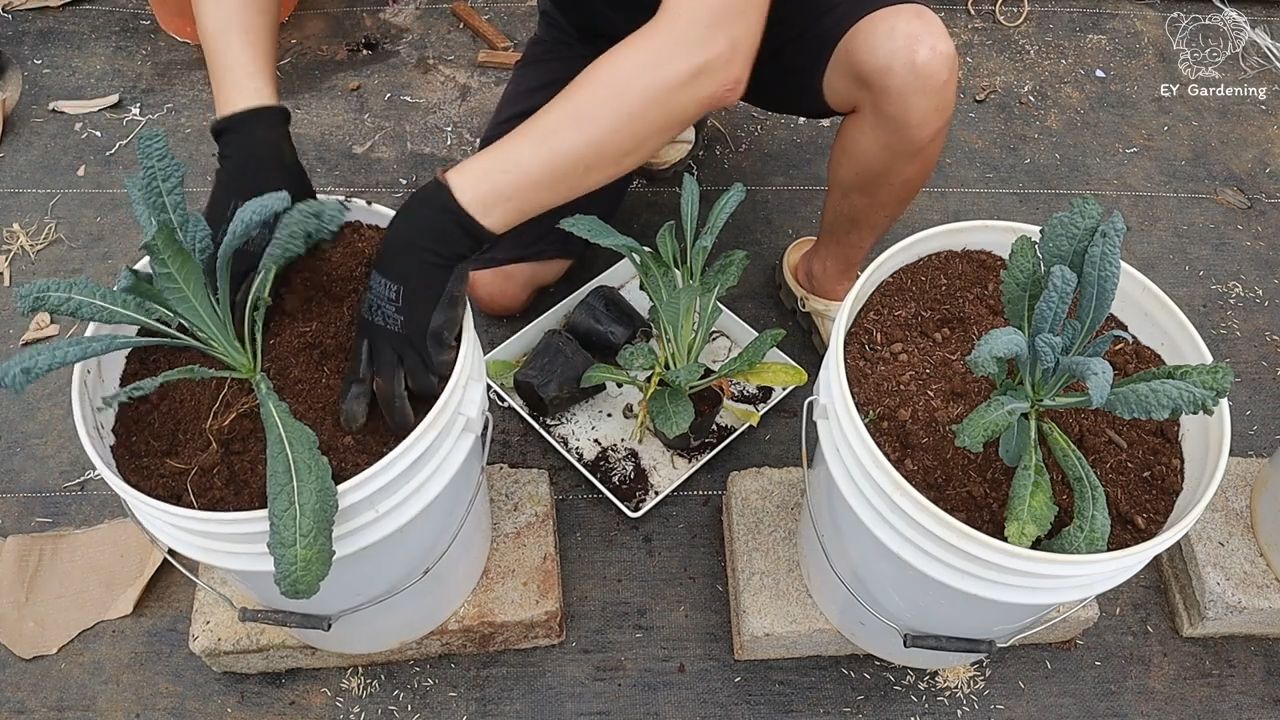
1. **Pflanzgefäße vorbereiten:** Füllt eure Pflanzgefäße mit Pflanzerde. Lasst oben etwa 5 cm Platz.
2. **Pflanzen aussetzen:** Macht ein Loch in die Erde, das groß genug für den Wurzelballen der Jungpflanze ist. Setzt die Pflanze ein und füllt das Loch mit Erde auf. Drückt die Erde leicht an.
3. **Bewässerung:** Gießt die Pflanzen gründlich an.
4. **Standort:** Stellt die Pflanzgefäße an einen sonnigen Ort.
Die Pflege: Damit dein Grünkohl prächtig gedeiht
Grünkohl ist relativ pflegeleicht, aber ein paar Dinge solltet ihr beachten:
* **Bewässerung:** Grünkohl braucht regelmäßig Wasser, besonders in heißen und trockenen Perioden. Achtet darauf, dass die Erde immer feucht ist, aber nicht nass.
* **Düngung:** Grünkohl ist ein Starkzehrer und braucht regelmäßige Düngergaben. Düngt alle zwei Wochen mit einem organischen Dünger.
* **Schneckenbekämpfung:** Schnecken lieben Grünkohl! Kontrolliert eure Pflanzen regelmäßig auf Schnecken und entfernt sie. Ihr könnt auch Schneckenkorn oder Schneckenzäune verwenden.
* **Krankheiten und Schädlinge:** Grünkohl kann von verschiedenen Krankheiten und Schädlingen befallen werden. Kontrolliert eure Pflanzen regelmäßig und behandelt sie bei Bedarf mit einem geeigneten Mittel.
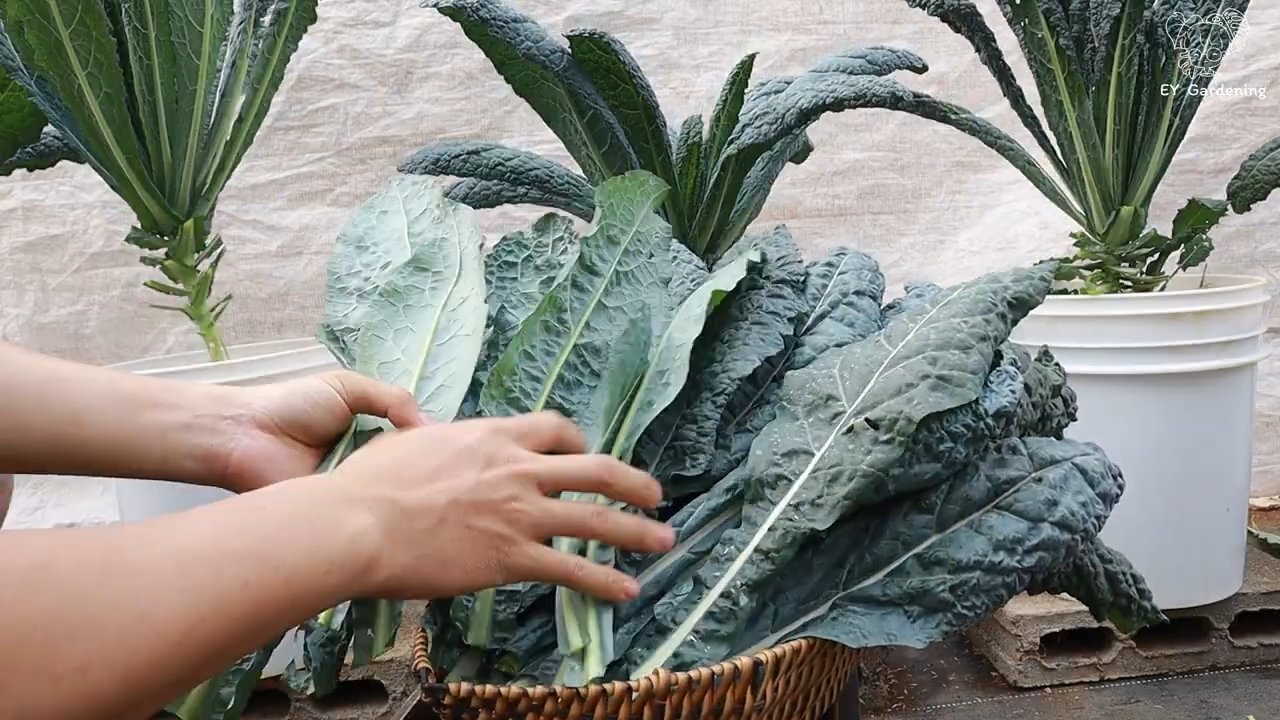
* **Ernte:** Grünkohl kann geerntet werden, sobald die Blätter groß genug sind. Erntet die äußeren Blätter zuerst. Die inneren Blätter wachsen dann nach. Grünkohl schmeckt am besten, wenn er Frost abbekommen hat.
Spezielle Tipps für den Dachgarten
Ein Dachgarten ist etwas Besonderes und erfordert ein paar zusätzliche Überlegungen:
* **Gewicht:** Achtet auf das Gewicht der Pflanzgefäße. Verwendet leichte Materialien wie Kunststoff oder Fiberglas.
* **Wind:** Auf dem Dach kann es windig sein. Verwendet robuste Pflanzgefäße und sichert sie gegebenenfalls.
* **Sonneneinstrahlung:** Auf dem Dach kann die Sonneneinstrahlung sehr intensiv sein. Achtet darauf, dass eure Pflanzen genügend Wasser bekommen und schützt sie gegebenenfalls vor der Mittagssonne.
* **Bewässerung:** Auf dem Dach kann das Wasser schnell verdunsten. Verwendet eine Tropfbewässerung oder gießt eure Pflanzen regelmäßig.
* **Dachabdichtung:** Achtet darauf, dass die Dachabdichtung nicht beschädigt wird. Verwendet Untersetzer unter den Pflanzgefäßen und reinigt das Dach regelmäßig.
Grünkohl ernten: Die Belohnung für deine Mühe
Nach all der Arbeit kommt endlich die Belohnung: die Ernte!
1. **Erntezeitpunkt:** Grünkohl kann geerntet werden, sobald die Blätter groß genug sind. Erntet die äußeren Blätter zuerst. Die inneren Blätter wachsen dann nach. Grünkohl schmeckt am besten, wenn er Frost abbekommen hat.
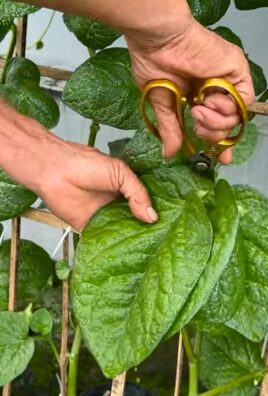
2. **Erntemethode:** Schneidet die Blätter mit einem scharfen Messer oder einer Schere ab.
3. **Lagerung:** Grünkohl kann im Kühlschrank für einige Tage gelagert werden. Am besten wickelt ihr ihn in ein feuchtes Tuch.
4. **Verwendung:** Grünkohl ist vielseitig verwendbar. Ihr könnt ihn kochen, dünsten, braten oder roh in Salaten verwenden.
Leckere Grünkohl-Rezepte: Inspiration für deine
Conclusion
So, there you have it! Transforming your rooftop into a thriving kale garden isn’t just a whimsical dream; it’s an achievable reality with a little planning and effort. We’ve explored the key steps, from assessing your rooftop’s suitability to selecting the right containers and providing the essential care that kale craves. But why should you embark on this green adventure?
Firstly, consider the unparalleled freshness and flavor you’ll gain. Store-bought kale simply can’t compare to the vibrant, crisp leaves you harvest directly from your own rooftop oasis. Imagine the satisfaction of knowing exactly where your food comes from and that it’s free from harmful pesticides. This is especially important for health-conscious individuals and families seeking to maximize the nutritional benefits of their diet.
Secondly, rooftop gardening is an incredibly rewarding experience. It connects you with nature, provides a therapeutic outlet, and adds a touch of beauty to your urban environment. Watching your kale plants flourish, from tiny seedlings to leafy greens, is a testament to your hard work and dedication. Plus, it’s a fantastic conversation starter and a unique way to impress your friends and neighbors.
Thirdly, growing your own kale is a sustainable choice. You’re reducing your carbon footprint by minimizing transportation costs and packaging waste. You’re also contributing to a greener city by increasing biodiversity and absorbing carbon dioxide. In a world increasingly concerned about environmental issues, rooftop kale gardening is a small but significant step towards a more sustainable lifestyle.
But the benefits don’t stop there. Consider the potential cost savings. While there’s an initial investment in containers, soil, and seeds, you’ll quickly recoup those costs by reducing your grocery bills. And with proper care, your kale plants can provide a continuous harvest throughout the growing season.
Now, let’s talk about variations. Feel free to experiment with different varieties of kale. Curly kale, Lacinato kale (also known as dinosaur kale), and Red Russian kale all offer unique flavors and textures. You can also companion plant your kale with other vegetables and herbs, such as marigolds (to deter pests) or onions (to improve flavor). Consider adding a small trellis for climbing varieties, or even incorporating a simple irrigation system to automate watering.
Don’t be afraid to get creative with your container selection. Repurpose old buckets, wooden crates, or even tires to create unique and eco-friendly planters. Just make sure they have adequate drainage holes. You can also add decorative elements, such as pebbles, shells, or small sculptures, to personalize your rooftop garden.
We understand that starting a new gardening project can be daunting, but we encourage you to take the plunge. Start small, learn as you go, and don’t be afraid to make mistakes. Gardening is a journey, not a destination.
So, grab your gardening gloves, gather your supplies, and get ready to transform your rooftop into a kale-filled paradise. We’re confident that you’ll be amazed by the results. And most importantly, we want to hear about your experience! Share your photos, tips, and challenges in the comments below. Let’s create a community of rooftop kale gardeners and inspire others to embrace this rewarding and sustainable practice. Let us know how your **rooftop kale gardening** journey goes!
Frequently Asked Questions (FAQ)
1. Is my rooftop suitable for a kale garden?
The most important factors are sunlight, weight capacity, and accessibility. Kale needs at least 6 hours of direct sunlight per day. Check with a structural engineer or building professional to ensure your rooftop can handle the weight of soil, containers, and water, especially after heavy rain. Easy access for watering and harvesting is also crucial. If you have limited sunlight, consider using grow lights to supplement natural light. If weight is a concern, explore lightweight potting mixes and container options.
2. What type of soil should I use for rooftop kale gardening?
Avoid using garden soil directly in containers, as it can become compacted and poorly drained. Instead, opt for a high-quality potting mix specifically designed for container gardening. Look for a mix that contains peat moss, perlite, and vermiculite for good drainage and aeration. You can also amend the potting mix with compost or aged manure to provide additional nutrients. Consider using a soil testing kit to determine the pH level and nutrient content of your soil. Kale prefers a slightly acidic to neutral pH (6.0-7.0).
3. How often should I water my rooftop kale garden?
Watering frequency depends on the weather, the size of your containers, and the type of soil you’re using. Generally, you should water your kale plants when the top inch of soil feels dry to the touch. Water deeply until water drains out of the bottom of the container. Avoid overwatering, as this can lead to root rot. During hot, dry weather, you may need to water daily. Consider using a moisture meter to accurately assess the soil moisture level.
4. What are the common pests and diseases that affect kale, and how can I prevent them?
Common pests include aphids, cabbage worms, and flea beetles. Diseases include black rot and clubroot. To prevent pests, inspect your plants regularly and remove any pests by hand. You can also use insecticidal soap or neem oil. To prevent diseases, ensure good air circulation, avoid overwatering, and practice crop rotation. Consider using row covers to protect your plants from pests and diseases.
5. When is the best time to harvest kale?
You can start harvesting kale leaves when they are about 4-6 inches long. Harvest the outer leaves first, leaving the inner leaves to continue growing. Avoid harvesting more than one-third of the plant at a time. Kale is most flavorful after a light frost. You can harvest kale throughout the growing season, and even into the winter in mild climates.
6. Can I grow kale in the winter on my rooftop?
Yes, you can grow kale in the winter, especially in milder climates. Kale is a cold-hardy vegetable that can tolerate temperatures as low as 20°F (-7°C). To protect your kale plants from frost and snow, you can cover them with row covers, blankets, or plastic sheeting. You can also move your containers to a sheltered location, such as a greenhouse or garage.
7. How do I fertilize my rooftop kale garden?
Kale is a heavy feeder, so it needs regular fertilization. You can use a balanced organic fertilizer, such as compost tea or fish emulsion. Apply fertilizer every 2-3 weeks during the growing season. Avoid over-fertilizing, as this can lead to excessive leaf growth and reduced flavor.
8. What are some creative ways to use my homegrown kale?
The possibilities are endless! You can use kale in salads, smoothies, soups, stews, stir-fries, and even baked chips. Kale is also a great addition to omelets, frittatas, and quiches. Experiment with different recipes and find your favorite ways to enjoy your homegrown kale. You can also blanch and freeze kale for later use.
9. How can I make my rooftop kale garden more aesthetically pleasing?
Incorporate colorful flowers and herbs to attract pollinators and add visual interest. Use decorative containers and arrange them in an appealing way. Add a small seating area where you can relax and enjoy your garden. Consider adding a water feature, such as a small fountain or birdbath.
10. What if I don’t have a green thumb? Can I still succeed at rooftop kale gardening?
Absolutely! Rooftop kale gardening is easier than you might think. Start with a small number of plants and learn as you go. Don’t be afraid to ask for help from experienced gardeners or consult online resources. The most important thing is to be patient, persistent, and willing to learn from your mistakes. Even if you don’t have a green thumb, you can still enjoy the satisfaction of growing your own fresh, healthy kale. Remember, even experienced gardeners face challenges. The key is to learn from them and keep trying. And don’t forget to share your experiences with the community!
Leave a Comment