
Growing Garlic at Home can feel like a magical experience, transforming a single clove into a bountiful harvest of pungent bulbs! Have you ever dreamed of snipping fresh garlic scapes for a vibrant pesto or roasting your own homegrown garlic to spread on crusty bread? This isn’t just a culinary fantasy; it’s an achievable reality, even if you’re a complete beginner.
For centuries, garlic has been revered not only for its culinary prowess but also for its medicinal properties. From ancient Egyptians using it to boost stamina to cultures worldwide employing it as a natural remedy, garlic boasts a rich and fascinating history. But beyond its historical significance, growing garlic at home offers a practical solution to a common problem: bland, store-bought garlic that lacks the robust flavor we crave.
Let’s face it, supermarket garlic can sometimes be disappointing. It might be imported, treated with chemicals, or simply old and lacking in potency. That’s where the beauty of DIY comes in! I’m here to share some simple, effective tricks and hacks that will empower you to cultivate your own thriving garlic patch, no matter the size of your garden or balcony. Imagine the satisfaction of harvesting plump, flavorful garlic bulbs that you nurtured from start to finish. Get ready to ditch the dull store-bought stuff and embrace the joy of homegrown garlic!
Growing Garlic at Home: A DIY Guide for Beginners
Okay, garlic lovers, let’s get down to business! I’m going to walk you through the surprisingly simple process of growing your own garlic at home. Trust me, there’s nothing quite like the taste of freshly harvested, homegrown garlic. Plus, it’s incredibly rewarding!
Choosing Your Garlic
Before we even think about planting, we need to talk about garlic selection. Not all garlic is created equal, and what you plant will directly impact what you harvest.
* Hardneck vs. Softneck: This is the big one. Hardneck garlic is generally more flavorful and cold-hardy, making it ideal for colder climates. It produces a flower stalk called a scape, which you can harvest and eat (they’re delicious!). Softneck garlic is better suited for warmer climates and is what you typically see braided. It doesn’t produce a scape and has a longer storage life.
* Variety Matters: Within hardneck and softneck, there are tons of varieties! Do some research to find varieties that thrive in your specific region. Local nurseries are a great resource for this.
* Source Your Garlic Wisely: Don’t just grab a bulb from the grocery store. While it *might* work, it’s often treated with chemicals to prevent sprouting, and you don’t know its origin or disease resistance. Instead, buy “seed garlic” from a reputable source. This ensures you’re getting healthy, disease-free bulbs specifically meant for planting.
Preparing for Planting
Alright, you’ve got your garlic. Now let’s get ready to plant!
* Timing is Key: Garlic is typically planted in the fall, about 4-6 weeks before the ground freezes. This allows the cloves to establish roots before winter sets in. In warmer climates, you can plant in late winter or early spring.
* Sunlight: Garlic needs at least 6 hours of sunlight per day. Choose a location in your garden that gets plenty of sunshine.
* Soil: Garlic prefers well-drained, fertile soil. Amend your soil with compost or well-rotted manure before planting to improve drainage and nutrient content. Avoid heavy clay soil, as it can lead to rot.
* Testing the Soil: Ideally, you want a soil pH between 6.0 and 7.0. You can easily test your soil pH with a home testing kit, available at most garden centers. If your soil is too acidic, you can amend it with lime.
Planting Your Garlic
This is where the magic happens!
1. Separate the Cloves: Gently separate the cloves from the bulb a day or two before planting. Leave the papery skin on each clove intact. Don’t separate them too early, as they can dry out.
2. Prepare the Planting Bed: Loosen the soil to a depth of about 6-8 inches. Create rows that are about 6-8 inches apart.
3. Plant the Cloves: Plant each clove pointy-side up, about 2-3 inches deep. Space the cloves about 4-6 inches apart within the rows.
4. Cover with Soil: Gently cover the cloves with soil and lightly tamp it down.
5. Water Thoroughly: Water the planting bed well after planting. This helps settle the soil and encourages root growth.
6. Mulch: Apply a thick layer of mulch (straw, shredded leaves, or wood chips) over the planting bed. This helps retain moisture, suppress weeds, and protect the cloves from extreme temperatures.
Caring for Your Garlic
Now that your garlic is planted, it’s time to nurture it!
* Watering: Garlic needs consistent moisture, especially in the spring when it’s actively growing. Water deeply whenever the soil feels dry to the touch. Avoid overwatering, as this can lead to rot.
* Weeding: Keep the planting bed free of weeds. Weeds compete with garlic for nutrients and water. Hand-pull weeds carefully to avoid disturbing the garlic roots.
* Fertilizing: Garlic is a heavy feeder. In the spring, side-dress your garlic with a nitrogen-rich fertilizer, such as blood meal or fish emulsion. Follow the instructions on the fertilizer package.
* Scape Removal (Hardneck Garlic): If you’re growing hardneck garlic, you’ll notice a flower stalk (scape) emerging in the spring. Cut off the scapes when they curl once or twice. This redirects the plant’s energy into bulb development. Scapes are delicious and can be used in pesto, stir-fries, or grilled.
* Pest and Disease Control: Garlic is generally pest-resistant, but keep an eye out for common garden pests like aphids or thrips. Treat infestations with insecticidal soap or neem oil. Prevent fungal diseases by ensuring good air circulation and avoiding overwatering.
Harvesting Your Garlic
The moment we’ve all been waiting for!
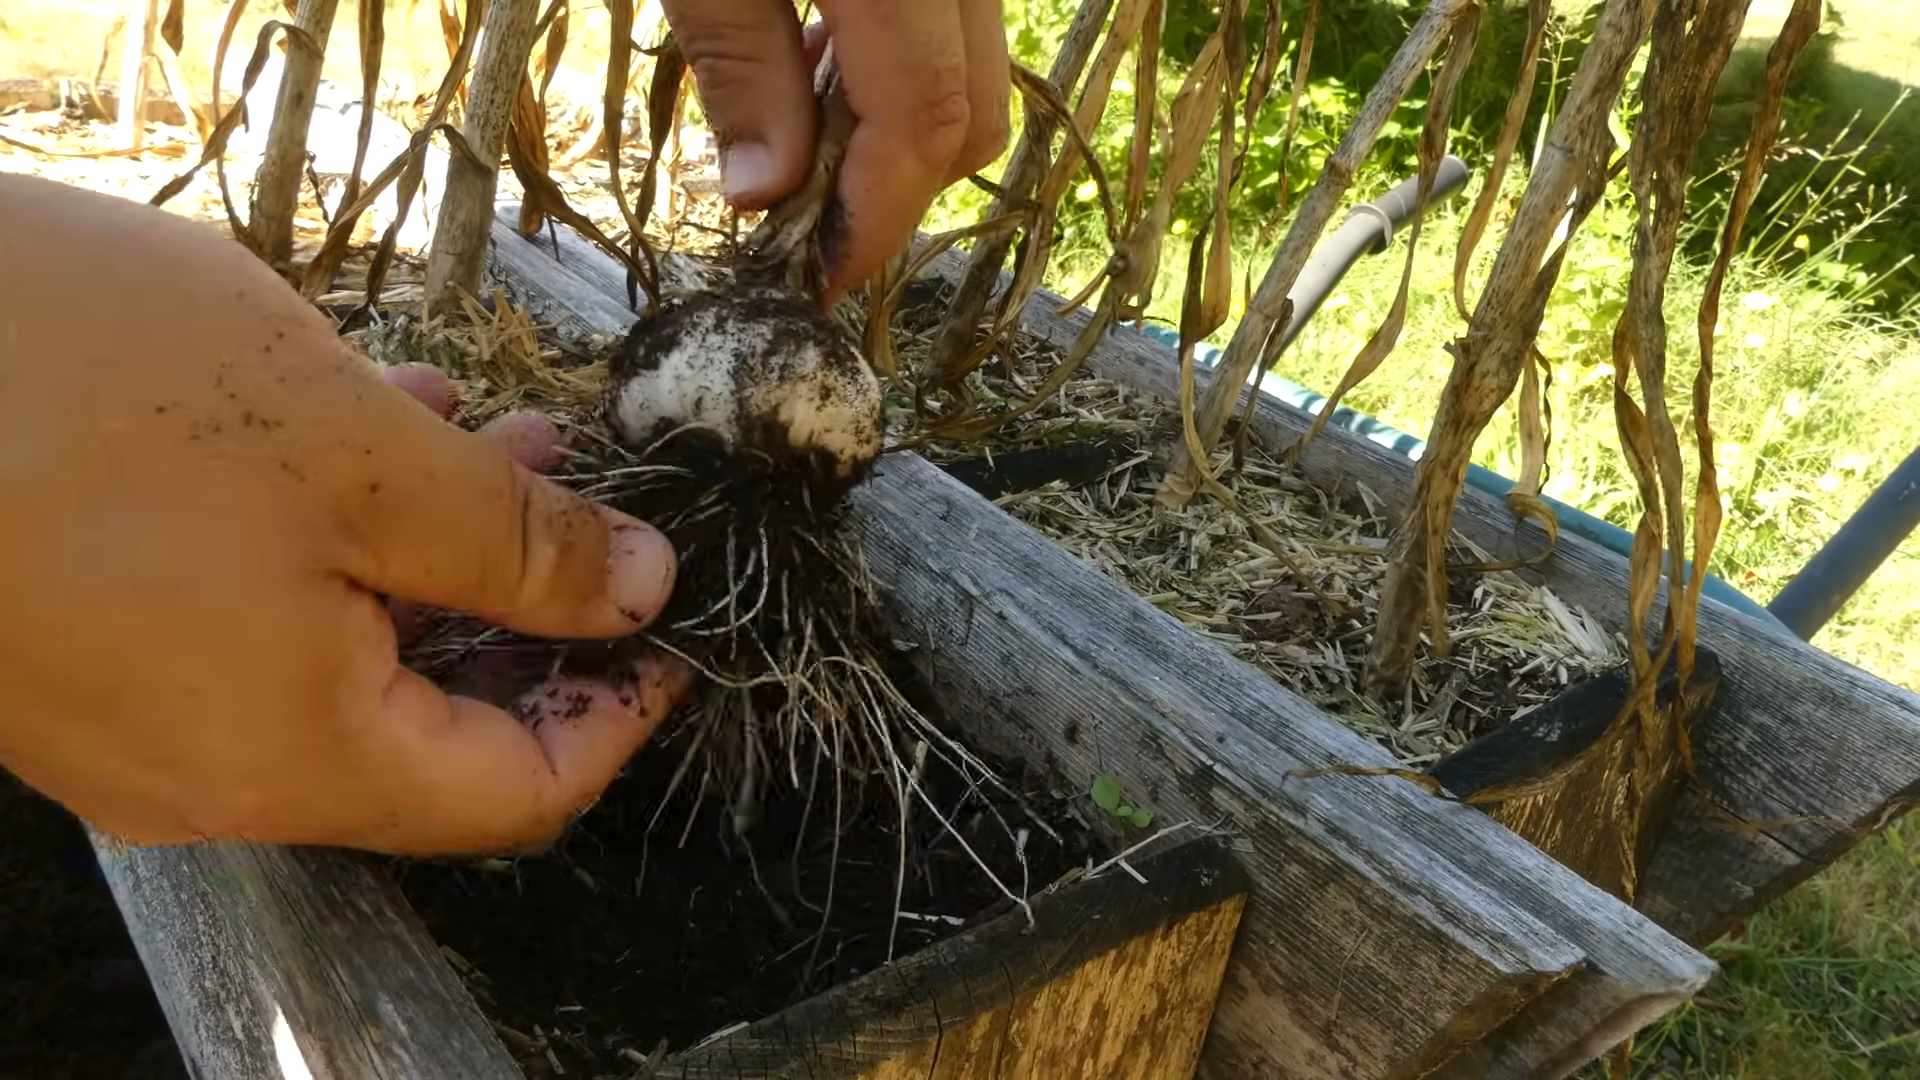
* When to Harvest: Garlic is typically ready to harvest in mid-summer, when the lower leaves start to turn yellow and brown. Don’t wait until all the leaves are brown, as the bulbs will start to break apart.
* How to Harvest: Gently loosen the soil around the garlic bulbs with a garden fork or trowel. Carefully lift the bulbs out of the ground, being careful not to damage them.
* Cleaning: Brush off any excess soil from the bulbs. Don’t wash them, as this can promote rot.
Curing and Storing Your Garlic
Proper curing and storage are essential for extending the shelf life of your garlic.
1. Curing: Tie the garlic plants together in bundles of 4-6 bulbs. Hang the bundles in a well-ventilated, dry, and shaded area for 2-4 weeks. The garlic is cured when the necks are dry and the outer skins are papery.
2. Trimming: Once the garlic is cured, trim the roots and stalks. Leave about 1-2 inches of stalk above the bulb.
3. Storing: Store the cured garlic in a cool, dry, and dark place. A temperature between 60-70°F (15-21°C) is ideal. Don’t store garlic in the refrigerator, as it will sprout. Softneck garlic can be braided and hung for storage. Hardneck garlic typically doesn’t store as long as softneck garlic.
4. Checking for Rot: Regularly check your stored garlic for signs of rot or mold. Discard any bulbs that are damaged.
Troubleshooting
Even with the best planning, things can sometimes go wrong. Here are a few common problems and how to address them:
* Small Bulbs: This could be due to several factors, including poor soil, insufficient sunlight, or overcrowding. Make sure your garlic is planted in fertile soil, gets plenty of sunlight, and is spaced properly.
* Rotting Bulbs: Overwatering or poorly drained soil can lead to rot. Ensure your soil is well-drained and avoid overwatering.
* Pests: Keep an eye out for common garden pests and treat infestations promptly.
* Disease: Prevent fungal diseases by ensuring good air circulation and avoiding overwatering.
Enjoying Your Homegrown Garlic
Congratulations! You’ve successfully grown your own garlic. Now it’s time to enjoy the fruits (or rather, bulbs) of your labor. Use your homegrown garlic in all your favorite recipes. It’s especially delicious roasted, added to soups and stews, or used to make garlic bread. You can also save some of your best bulbs to plant next year, continuing the cycle.
Growing garlic is a rewarding experience that anyone can do. With a little planning and effort, you can enjoy the taste of fresh, homegrown garlic all year long. Happy gardening!
Conclusion
So, there you have it! Growing garlic at home isn’t just a gardening project; it’s a gateway to fresher, more flavorful meals and a deeper connection to the food you consume. We’ve walked you through the simple steps, from selecting the right garlic variety to harvesting your own pungent bulbs. The beauty of this DIY endeavor lies not only in its simplicity but also in the incredible reward of enjoying homegrown garlic, bursting with an intensity you simply can’t find in store-bought options.
Why is this a must-try? Because the difference is palpable. Imagine the robust aroma filling your kitchen as you sauté your own garlic, knowing it came directly from your garden. Think of the satisfaction of gifting friends and family with a jar of homemade garlic confit, crafted with love and your own homegrown ingredients. Beyond the culinary benefits, growing garlic is an incredibly rewarding experience. It’s a low-maintenance crop that offers a high return, both in terms of yield and personal satisfaction.
But don’t stop there! Experiment with different varieties of garlic to discover your favorite flavor profiles. Try planting garlic in containers if you have limited garden space. Consider companion planting with other vegetables to deter pests and improve soil health. Get creative with your harvest! Roast whole heads of garlic for a sweet and savory spread, infuse olive oil with garlic for a flavorful drizzle, or pickle garlic scapes for a tangy treat.
We encourage you to embrace the joy of growing garlic at home. It’s a simple, sustainable, and incredibly rewarding experience that will elevate your cooking and connect you to the natural world. Don’t be intimidated – even if you’re a beginner gardener, you can successfully grow garlic.
Now it’s your turn! Grab some garlic cloves, prepare your soil, and embark on this exciting gardening adventure. We’re confident that you’ll be amazed by the results. And most importantly, we want to hear about your experience! Share your tips, tricks, and triumphs in the comments below. Let’s build a community of garlic growers and inspire others to discover the magic of homegrown flavor. Let us know what variety of garlic you are growing at home. What challenges did you face and how did you overcome them? Your insights could be invaluable to other aspiring garlic gardeners. Happy growing!
Frequently Asked Questions (FAQs)
Q: What is the best time of year to plant garlic?
A: The ideal time to plant garlic is in the fall, typically 4-6 weeks before the ground freezes. This allows the garlic cloves to establish roots before winter sets in. In colder climates, this is usually around October or November. In milder climates, you can plant as late as December. Spring planting is possible, but the bulbs may not be as large.
Q: What kind of soil is best for growing garlic?
A: Garlic thrives in well-drained, fertile soil that is rich in organic matter. Amend your soil with compost or well-rotted manure before planting to improve drainage and nutrient content. A slightly acidic to neutral soil pH (around 6.0-7.0) is ideal. Avoid heavy clay soils, as they can retain too much moisture and lead to rot.
Q: How deep and how far apart should I plant garlic cloves?
A: Plant garlic cloves about 2 inches deep, with the pointed end facing up. Space the cloves 4-6 inches apart within rows, and space the rows 6-12 inches apart. This allows enough room for the bulbs to develop properly.
Q: How much sunlight does garlic need?
A: Garlic needs at least 6 hours of direct sunlight per day to thrive. Choose a planting location that receives full sun for optimal growth.
Q: How often should I water garlic?
A: Water garlic regularly, especially during dry periods. Keep the soil consistently moist, but avoid overwatering, which can lead to rot. Water deeply when the top inch of soil feels dry to the touch. Reduce watering as the bulbs mature and the leaves begin to yellow.
Q: How do I know when my garlic is ready to harvest?
A: Garlic is typically ready to harvest in late spring or early summer, about 8-9 months after planting. The leaves will begin to turn yellow and brown, and the stalks may start to fall over. To check for readiness, carefully dig up a bulb and examine it. The bulb should be plump and well-formed, with papery skin.
Q: How do I cure garlic after harvesting?
A: Curing garlic is essential for long-term storage. After harvesting, gently brush off any excess soil and allow the bulbs to dry in a well-ventilated, shaded area for 2-3 weeks. You can braid the stalks together and hang them, or spread the bulbs out on screens or racks. The garlic is cured when the necks are dry and tight, and the outer skins are papery.
Q: Can I eat the garlic scapes?
A: Yes! Garlic scapes are the curly flower stalks that grow from hardneck garlic varieties. They are delicious and can be used in a variety of culinary applications. Harvest the scapes when they are still tender and curly, before they begin to straighten out. Use them in pesto, stir-fries, soups, or as a flavorful addition to any dish.
Q: What are some common pests and diseases that affect garlic?
A: Common pests that affect garlic include onion maggots, nematodes, and thrips. Diseases include white rot, bulb rot, and downy mildew. Practice good garden hygiene, such as removing plant debris and rotating crops, to prevent pest and disease problems. You can also use organic pest control methods, such as insecticidal soap or neem oil.
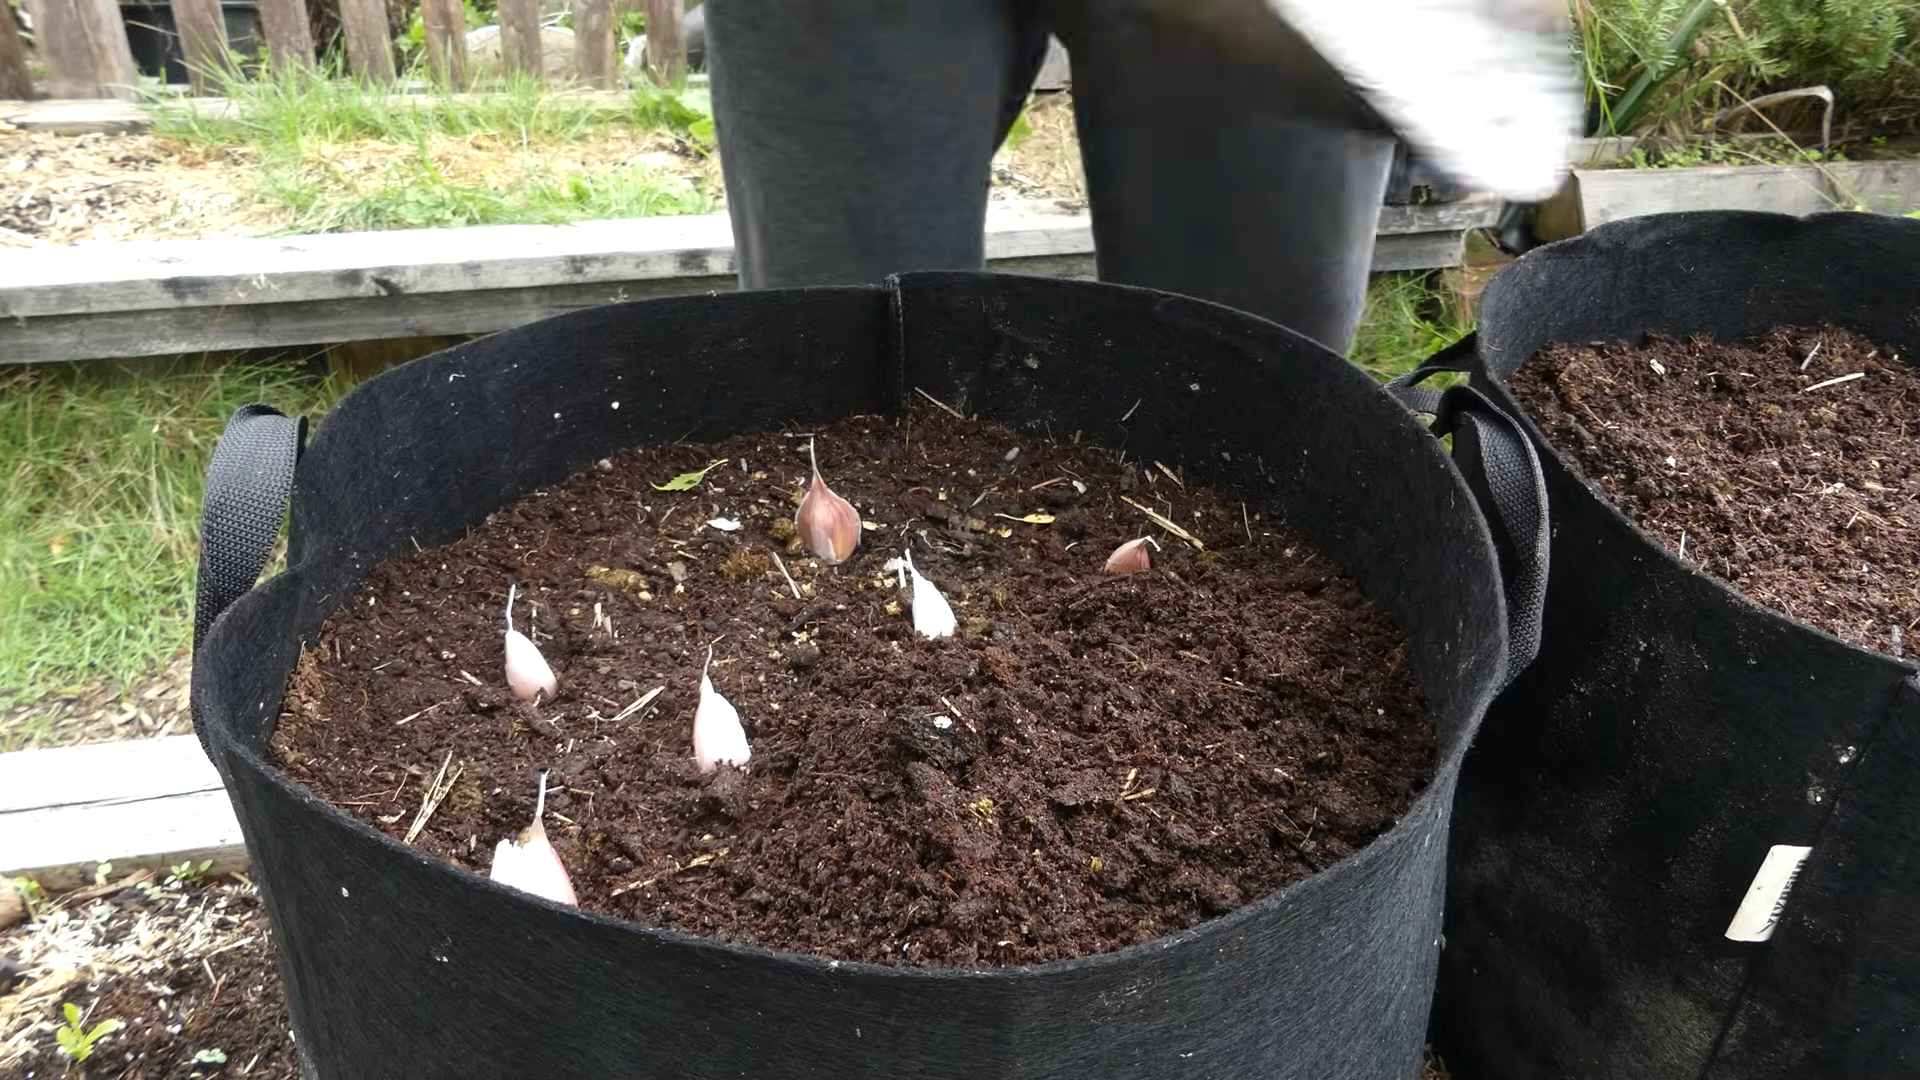
Q: Can I grow garlic in containers?
A: Yes, you can grow garlic in containers if you have limited garden space. Choose a large container (at least 12 inches in diameter) with good drainage. Use a well-draining potting mix and plant the garlic cloves as you would in the ground. Water regularly and fertilize with a balanced fertilizer.
Q: What are the different types of garlic?
A: There are two main types of garlic: hardneck and softneck. Hardneck garlic produces a flower stalk (scape) and is generally more flavorful and cold-hardy. Softneck garlic does not produce a scape and is better suited for braiding and long-term storage. Within these two categories, there are numerous varieties with different flavor profiles and characteristics. Experiment to find your favorites!
Q: How do I store garlic after it’s cured?
A: Store cured garlic in a cool, dry, and well-ventilated place. A temperature between 60-70°F (15-21°C) is ideal. You can store garlic in mesh bags, baskets, or loosely in a cardboard box. Avoid storing garlic in the refrigerator, as it can sprout and become bitter. Properly cured and stored garlic can last for several months.
Q: Can I use store-bought garlic to grow my own?
A: While you *can* try planting store-bought garlic, it’s generally not recommended. Store-bought garlic may have been treated with chemicals to prevent sprouting, and it may not be adapted to your local climate. It’s best to purchase garlic seed from a reputable source to ensure you’re planting a healthy and suitable variety.
Q: What is the best way to fertilize garlic?
A: Garlic benefits from regular fertilization. In the fall, when planting, incorporate compost or well-rotted manure into the soil. In the spring, side-dress with a nitrogen-rich fertilizer, such as blood meal or fish emulsion. Avoid over-fertilizing, as this can lead to excessive foliage growth and smaller bulbs.
Q: My garlic is growing, but the bulbs are small. What could be the problem?
A: Several factors can contribute to small garlic bulbs. These include: insufficient sunlight, poor soil fertility, inadequate watering, overcrowding, and planting too late in the season. Make sure your garlic is receiving at least 6 hours of sunlight per day, amend the soil with compost, water regularly, space the cloves properly, and plant in the fall.
Leave a Comment