
Sponge Cleaning Hacks: Are you tired of your kitchen sponge smelling funky and looking like a breeding ground for bacteria? I know I was! For generations, sponges have been our go-to cleaning companions, diligently wiping up spills and scrubbing away grime. From ancient sea sponges used by the Greeks and Romans for bathing to the modern synthetic sponges we rely on today, their absorbent nature has made them indispensable. But let’s face it, they can quickly become a haven for germs if not properly cared for.
That’s why I’m so excited to share these game-changing sponge cleaning hacks that will not only extend the life of your sponges but also keep your home sparkling clean and healthy. We all know that replacing sponges frequently can be costly and wasteful. These simple, effective DIY tricks will help you sanitize, deodorize, and even revive your tired sponges, saving you money and reducing your environmental impact. Get ready to say goodbye to stinky sponges and hello to a cleaner, fresher home with these easy-to-follow tips!

DIY Sponge Cleaning Hacks: Extend the Life of Your Kitchen Companion!
Hey everyone! Let’s be honest, sponges are the unsung heroes of our kitchens. They tackle everything from greasy pans to sticky countertops. But they also get pretty gross, pretty fast. Instead of constantly tossing them out, let’s explore some super effective DIY cleaning hacks to keep your sponges fresh, sanitized, and ready for action! I’m going to share my favorite methods, so you can save money and reduce waste.
Why Clean Your Sponges?
Before we dive in, let’s quickly touch on why cleaning your sponges is so important. Sponges are breeding grounds for bacteria, mold, and mildew. All those tiny holes and crevices trap food particles, creating the perfect environment for these nasties to thrive. Using a dirty sponge can actually spread germs around your kitchen instead of cleaning it! Regular cleaning is key to keeping your kitchen healthy and your sponges working their best.
Hack #1: The Microwave Method (Quick & Easy)
This is my go-to method when I need a quick and easy sponge refresh. It’s super simple and surprisingly effective.
What you’ll need:
* Your dirty sponge
* Microwave-safe bowl
* Water
Step-by-step instructions:
1. Prepare the sponge: Thoroughly rinse your sponge under running water to remove any large food particles. Squeeze out excess water, but leave it damp.
2. Soak the sponge: Place the damp sponge in the microwave-safe bowl. Add about 1 cup of water to the bowl, ensuring the sponge is fully submerged. You can add a tablespoon of white vinegar or lemon juice to the water for extra cleaning power and deodorizing.
3. Microwave it: Microwave the sponge on high for 2 minutes. Important: Keep a close eye on the sponge while it’s microwaving. It might bubble or expand.
4. Let it cool: Carefully remove the bowl from the microwave. The water and sponge will be very hot! Let it cool down for a few minutes before handling.
5. Rinse and squeeze: Once the sponge is cool enough to handle, rinse it thoroughly under running water. Squeeze out any excess water. Your sponge should now be significantly cleaner and sanitized!
Important Considerations:
* Metal: Make sure your sponge doesn’t have any metal parts, as this could cause sparks in the microwave.
* Smell: If your sponge has a particularly strong odor, you might need to repeat the process or try a different cleaning method.
* Frequency: I recommend microwaving your sponge every 1-2 days for optimal hygiene.
Hack #2: The Dishwasher Delight (Effortless Cleaning)
If you’re already running the dishwasher, why not toss your sponge in for a thorough cleaning? This is a super convenient way to sanitize your sponges without any extra effort.
What you’ll need:
* Your dirty sponge
* Dishwasher
Step-by-step instructions:
1. Rinse the sponge: As with the microwave method, start by rinsing your sponge under running water to remove any large food particles.
2. Place in dishwasher: Place the sponge in the top rack of your dishwasher. Make sure it’s secured so it doesn’t fall onto the heating element. I usually wedge it between some dishes or utensils.
3. Run the dishwasher: Run your dishwasher as usual, using your regular detergent.
4. Dry the sponge: Once the dishwasher cycle is complete, remove the sponge and let it air dry completely.
Important Considerations:
* Detergent: Avoid using detergents with bleach, as this can damage the sponge.
* Temperature: Choose a hot water cycle for the best sanitizing results.
* Frequency: I usually throw my sponges in the dishwasher every 2-3 days.
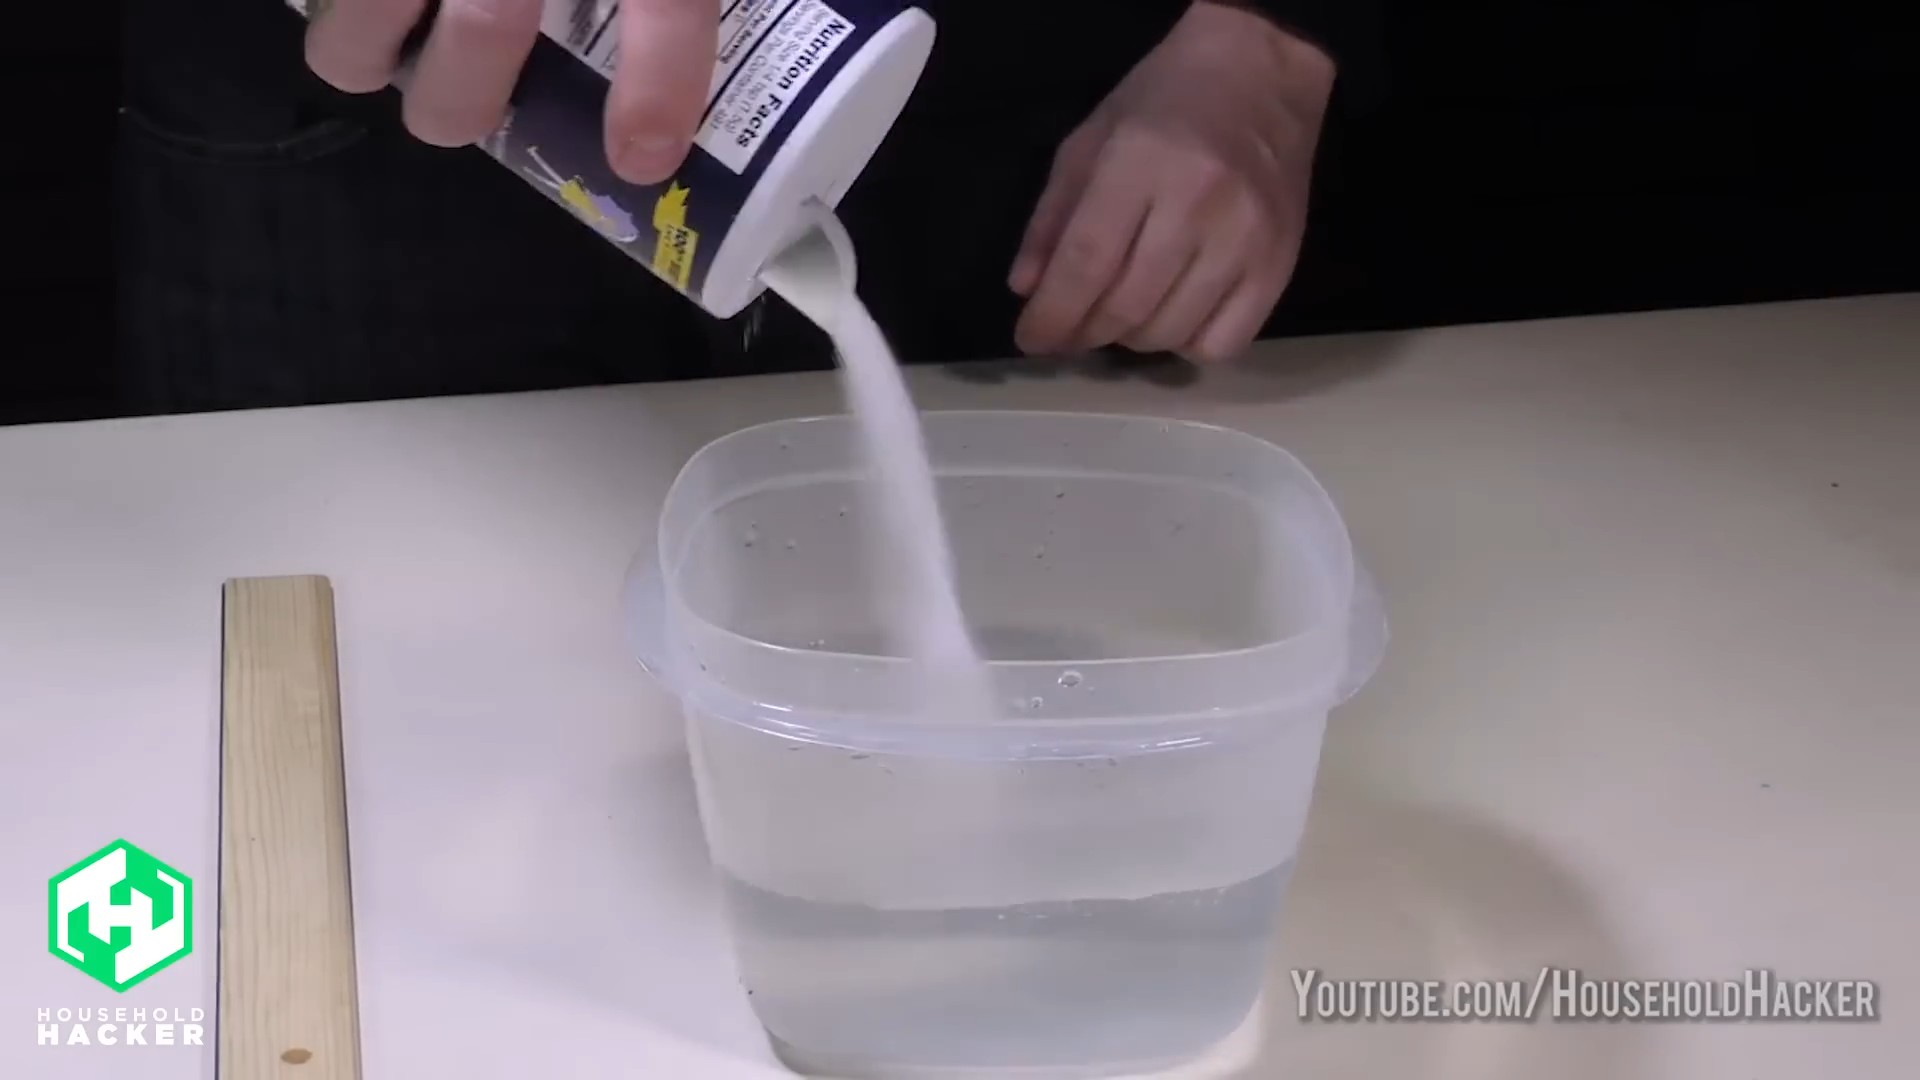
Hack #3: The Vinegar Soak (Deep Cleaning Power)
For a more intensive cleaning, a vinegar soak is a fantastic option. Vinegar is a natural disinfectant and deodorizer, making it perfect for tackling stubborn stains and odors.
What you’ll need:
* Your dirty sponge
* White vinegar
* Water
* Bowl or container
Step-by-step instructions:
1. Rinse the sponge: Again, start by rinsing your sponge under running water to remove any loose debris.
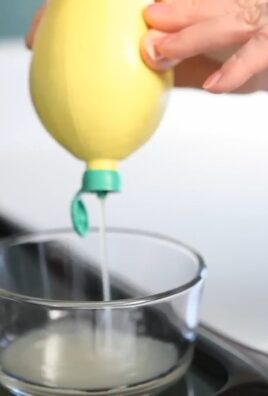
2. Prepare the vinegar solution: In a bowl or container, mix equal parts white vinegar and water. I usually use about 1 cup of each.
3. Soak the sponge: Submerge the sponge in the vinegar solution, making sure it’s completely covered.
4. Let it soak: Let the sponge soak for at least 5 minutes, but ideally for several hours or even overnight for a really deep clean.
5. Rinse and squeeze: After soaking, rinse the sponge thoroughly under running water. Squeeze out any excess water.
6. Optional: For extra deodorizing, you can sprinkle some baking soda on the sponge after rinsing and let it sit for a few minutes before rinsing again.
Important Considerations:
* Vinegar smell: The vinegar smell will dissipate as the sponge dries. If you’re sensitive to the smell, you can add a few drops of essential oil (like lemon or tea tree) to the vinegar solution.
* Stubborn stains: For particularly stubborn stains, you can try scrubbing the sponge with a paste made of baking soda and water after soaking it in vinegar.
* Frequency: I recommend doing a vinegar soak once a week for a deep clean.
Hack #4: The Bleach Bath (For Extreme Cases Only!)
Warning: Bleach is a powerful disinfectant, but it should be used with caution. Always wear gloves and eye protection when working with bleach, and make sure to ventilate the area well. This method is best reserved for sponges that are heavily soiled or have a strong odor that other methods haven’t been able to remove.
What you’ll need:
* Your dirty sponge
* Bleach (unscented)
* Water
* Gloves
* Bowl or container
Step-by-step instructions:
1. Rinse the sponge: As always, start by rinsing your sponge under running water.
2. Prepare the bleach solution: In a bowl or container, mix 1 teaspoon of bleach with 1 gallon of water. Important: Do not use more bleach than recommended, as this can damage the sponge and be harmful.
3. Soak the sponge: Submerge the sponge in the bleach solution, making sure it’s completely covered.
4. Let it soak: Let the sponge soak for 5 minutes. Important: Do not soak the sponge for longer than 5 minutes, as this can weaken the fibers.
5. Rinse and squeeze: After soaking, rinse the sponge *extremely* thoroughly under running water until all traces of bleach are gone. Squeeze out any excess water.
6. Air dry: Let the sponge air dry completely.
Important Considerations:
* Safety: Always wear gloves and eye protection when working with bleach.
* Ventilation: Make sure the area is well-ventilated.
* Rinsing: Rinse the sponge *extremely* thoroughly to remove all traces of bleach.
* Frequency: Use this method sparingly, as bleach can damage the sponge and is not environmentally friendly.
Hack #5: The Freezing Frenzy (Odor Elimination)
This hack is less about cleaning and more about eliminating odors. Freezing your sponge can help kill odor-causing bacteria.
What you’ll need:
* Your dirty sponge
* Freezer-safe bag or container
Step-by-step instructions:
1. Rinse the sponge: Rinse your sponge under running water.
2. Place in freezer bag: Place the damp sponge in a freezer-safe bag or container.
3. Freeze: Place the bag or container in the freezer for at least 24 hours.
4. Thaw and use: Thaw the sponge before using.
Important Considerations:
* Odor reduction: This method is primarily effective for reducing odors, not necessarily for deep cleaning.
* Complementary method: I often use this in conjunction with one of the other cleaning methods for a more thorough refresh.
Extending the Life of Your Sponges: Pro Tips
Beyond these cleaning hacks, here are a few extra tips to help extend the life of your sponges:
* Rinse after each use: This is the most basic but most important step. Rinse your sponge thoroughly under running water after each use to remove food particles and prevent them from accumulating.
* Squeeze out excess water: After rinsing, squeeze
Conclusion
So, there you have it! Mastering these sponge cleaning hacks isn’t just about saving a few bucks; it’s about creating a healthier, more hygienic home environment. We’ve explored simple yet incredibly effective methods to banish bacteria, eliminate odors, and extend the life of your humble kitchen sponge. From the microwave zap to the vinegar soak and the bleach bath, each technique offers a powerful way to keep your sponges fresh and ready for action.
But why is this so important? Think about it: your sponge is the unsung hero of your kitchen, tackling everything from greasy pans to sticky countertops. But with every wipe, it’s also picking up food particles, bacteria, and grime. A dirty sponge isn’t just unpleasant; it can actually spread germs and contribute to foodborne illnesses. That’s why regular cleaning is absolutely essential.
These sponge cleaning hacks are a game-changer. They’re quick, easy, and use ingredients you likely already have in your pantry. No need for expensive cleaning solutions or complicated procedures. Just a few minutes of your time can make a world of difference.
Ready to take your sponge cleaning to the next level? Consider these variations:
* Essential Oil Boost: Add a few drops of your favorite essential oil (like lemon, tea tree, or eucalyptus) to your vinegar or bleach solution for an extra dose of freshness and antimicrobial power.
* Dishwasher Delight: If you have a dishwasher, toss your sponge in the top rack for a thorough cleaning and sanitization. Just be sure to choose a hot water cycle and skip the drying cycle to prevent melting.
* Sun’s Out, Germs Out: After cleaning, let your sponge air dry in direct sunlight. The UV rays can help kill any remaining bacteria.
We’re confident that these sponge cleaning hacks will transform your cleaning routine and leave you with a sparkling clean kitchen. But don’t just take our word for it – try them out for yourself! Experiment with different methods and find what works best for you.
We’re eager to hear about your experiences! Share your results, tips, and tricks in the comments below. Did you discover a new way to clean your sponge? Did one method work better than another? Your feedback will help other readers discover the best ways to keep their sponges clean and their homes healthy. Let’s create a community of clean sponge enthusiasts!
Don’t let a dirty sponge compromise your health and hygiene. Embrace these simple yet effective sponge cleaning hacks and enjoy a cleaner, fresher kitchen today.
Frequently Asked Questions (FAQ)
How often should I clean my kitchen sponge?
Ideally, you should clean your kitchen sponge every day, or at least every other day. Daily cleaning helps prevent the buildup of bacteria and odors. If you use your sponge frequently for particularly messy tasks, such as cleaning up raw meat juices, you should clean it immediately afterward. A quick rinse after each use is also helpful, but it’s not a substitute for thorough cleaning.
Which cleaning method is the most effective for sponges?
The most effective cleaning method depends on your preferences and the resources you have available. However, studies have shown that microwaving a wet sponge for two minutes can kill a significant amount of bacteria. Soaking the sponge in a bleach solution (1 part bleach to 9 parts water) is also highly effective. The dishwasher is another great option, especially if you run it on a hot water cycle. Experiment with different methods to see which one works best for you.
Is it safe to microwave a sponge?
Yes, it is generally safe to microwave a sponge, but there are a few precautions to take. First, make sure the sponge is thoroughly wet before microwaving it. A dry sponge can catch fire. Second, microwave the sponge for no more than two minutes. Third, let the sponge cool down before handling it, as it will be very hot. Finally, be aware that microwaving a sponge can release unpleasant odors, so make sure your kitchen is well-ventilated.
Can I use vinegar to clean my sponge?
Yes, vinegar is an excellent natural cleaner and disinfectant. To clean your sponge with vinegar, soak it in a solution of equal parts white vinegar and water for about five minutes. Then, rinse the sponge thoroughly with clean water and squeeze out the excess liquid. Vinegar is effective at killing bacteria and removing odors.
How do I get rid of bad smells in my sponge?
Bad smells in a sponge are usually caused by bacteria and trapped food particles. To get rid of the smell, try soaking the sponge in a solution of baking soda and water (1 tablespoon of baking soda per cup of water) for several hours or overnight. You can also try soaking it in a vinegar solution. Make sure to rinse the sponge thoroughly after soaking it. Regular cleaning and allowing the sponge to dry completely between uses can also help prevent bad smells.
When should I replace my kitchen sponge?
Even with regular cleaning, kitchen sponges eventually wear out and become less effective. You should replace your sponge every two to three weeks, or sooner if it starts to fall apart, develops a persistent odor, or becomes visibly dirty. It’s also a good idea to replace your sponge after cleaning up raw meat juices or other potentially hazardous materials.
Can I clean my sponge in the washing machine?
While you can technically clean your sponge in the washing machine, it’s not the most effective method. The washing machine may not get hot enough to kill all the bacteria, and the detergent may not be strong enough to remove all the grime. It’s better to use one of the other cleaning methods mentioned above, such as microwaving, soaking in bleach, or using the dishwasher.
Are there any alternatives to kitchen sponges?
Yes, there are several alternatives to kitchen sponges that are more sustainable and hygienic. Some popular options include:
* Dishcloths: Dishcloths can be washed and reused multiple times, making them a more environmentally friendly option.
* Silicone Sponges: Silicone sponges are non-porous, which means they don’t harbor as much bacteria as traditional sponges. They are also easy to clean and can be sanitized in the dishwasher.
* Wooden Dish Brushes: Wooden dish brushes are durable and long-lasting. They can be used to scrub dishes and other surfaces, and the bristles can be replaced when they wear out.
* Loofah Sponges: Natural loofah sponges are biodegradable and can be composted after use.
Can I use these sponge cleaning hacks on other types of sponges?
Yes, most of these sponge cleaning hacks can be used on other types of sponges, such as bathroom sponges or car washing sponges. However, you may need to adjust the cleaning method depending on the type of sponge and the materials it’s made of. For example, you may not want to microwave a sponge that contains metal or other materials that could be damaged by heat. Always test a small, inconspicuous area first before cleaning the entire sponge.
What are the benefits of using clean sponges?
Using clean sponges offers several benefits, including:
* Improved Hygiene: Clean sponges help prevent the spread of bacteria and germs, reducing the risk of foodborne illnesses and other infections.
* Better Cleaning Performance: Clean sponges are more effective at removing dirt and grime than dirty sponges.
* Extended Sponge Life: Regular cleaning can help extend the life of your sponges, saving you money in the long run.
* Reduced Odors: Clean sponges don’t harbor bad smells, making your kitchen a more pleasant place to be.
* Healthier Home Environment: By keeping your sponges clean, you’re creating a healthier and more hygienic home environment for yourself and your family.

Leave a Comment