
Stainless steel cleaning oil: the secret weapon in your fight against fingerprints, smudges, and that dull, lifeless look on your appliances! Let’s face it, stainless steel is gorgeous when it’s gleaming, but keeping it that way can feel like a never-ending battle. I’ve been there, scrubbing away with harsh chemicals, only to be left with streaks and a lingering chemical smell. But what if I told you there’s a better way? A natural, effective, and even *enjoyable* way to restore your stainless steel to its former glory?
For generations, people have sought out natural solutions for household cleaning. Think about it – our grandmothers didn’t have a cabinet full of specialized cleaners! They relied on simple, readily available ingredients. This DIY stainless steel cleaning oil trick is a modern take on that time-tested wisdom. It’s about harnessing the power of natural oils to not only clean but also protect and enhance the beauty of your stainless steel surfaces.
Why do you need this DIY trick? Because store-bought stainless steel cleaners can be expensive, full of harsh chemicals, and often don’t even deliver the promised results. This homemade solution is cost-effective, environmentally friendly, and incredibly easy to make. Plus, it’s a fantastic way to reduce your reliance on commercial products and take control of what you’re bringing into your home. Get ready to say goodbye to frustrating streaks and hello to a sparkling, fingerprint-free kitchen!
DIY Stainless Steel Cleaning Oil: Shine Like New!
Hey everyone! Are you tired of looking at dull, smudged stainless steel appliances? I know I was! Fingerprints, water spots, and general grime can really take away from the sleek look of your kitchen. But don’t worry, I’ve got a fantastic DIY solution that will have your stainless steel gleaming in no time. And the best part? It uses ingredients you probably already have in your pantry!
This DIY stainless steel cleaning oil is super effective, easy to make, and much more affordable than those fancy store-bought cleaners. Plus, you know exactly what’s going into it, avoiding harsh chemicals. Let’s get started!
What You’ll Need
Before we dive in, let’s gather our supplies. Here’s a list of everything you’ll need to create this amazing cleaning oil:
* Olive Oil: This is the base of our cleaner. It provides a protective layer and helps to polish the stainless steel.
* White Vinegar: Vinegar is a fantastic natural cleaner and degreaser. It helps to cut through grime and remove water spots.
* Essential Oil (Optional): This is purely for fragrance. I like to use lemon or orange essential oil for a fresh, clean scent, but you can use whatever you prefer. Tea tree oil also has antibacterial properties.
* Spray Bottle: A clean, empty spray bottle is essential for easy application.
* Microfiber Cloths: These are the best for cleaning stainless steel because they won’t scratch the surface and they leave a streak-free shine.
* Small Bowl or Measuring Cup: For mixing the ingredients.
* Funnel (Optional): Makes pouring the mixture into the spray bottle easier.
Mixing the Cleaning Oil
This is the easiest part! Just follow these simple steps:
1. Combine the Ingredients: In your small bowl or measuring cup, combine 1/4 cup of olive oil and 1/4 cup of white vinegar.
2. Add Essential Oil (Optional): If you’re using essential oil, add 5-10 drops to the mixture. Start with less and add more if you want a stronger scent.
3. Mix Well: Stir the ingredients together thoroughly until they are well combined. The mixture might look a little separated at first, but keep stirring!
4. Pour into Spray Bottle: Using a funnel (if you have one), carefully pour the mixture into your clean spray bottle.
5. Shake Well Before Each Use: Since the oil and vinegar might separate over time, it’s important to shake the bottle well before each use to ensure the ingredients are properly mixed.
Cleaning Your Stainless Steel
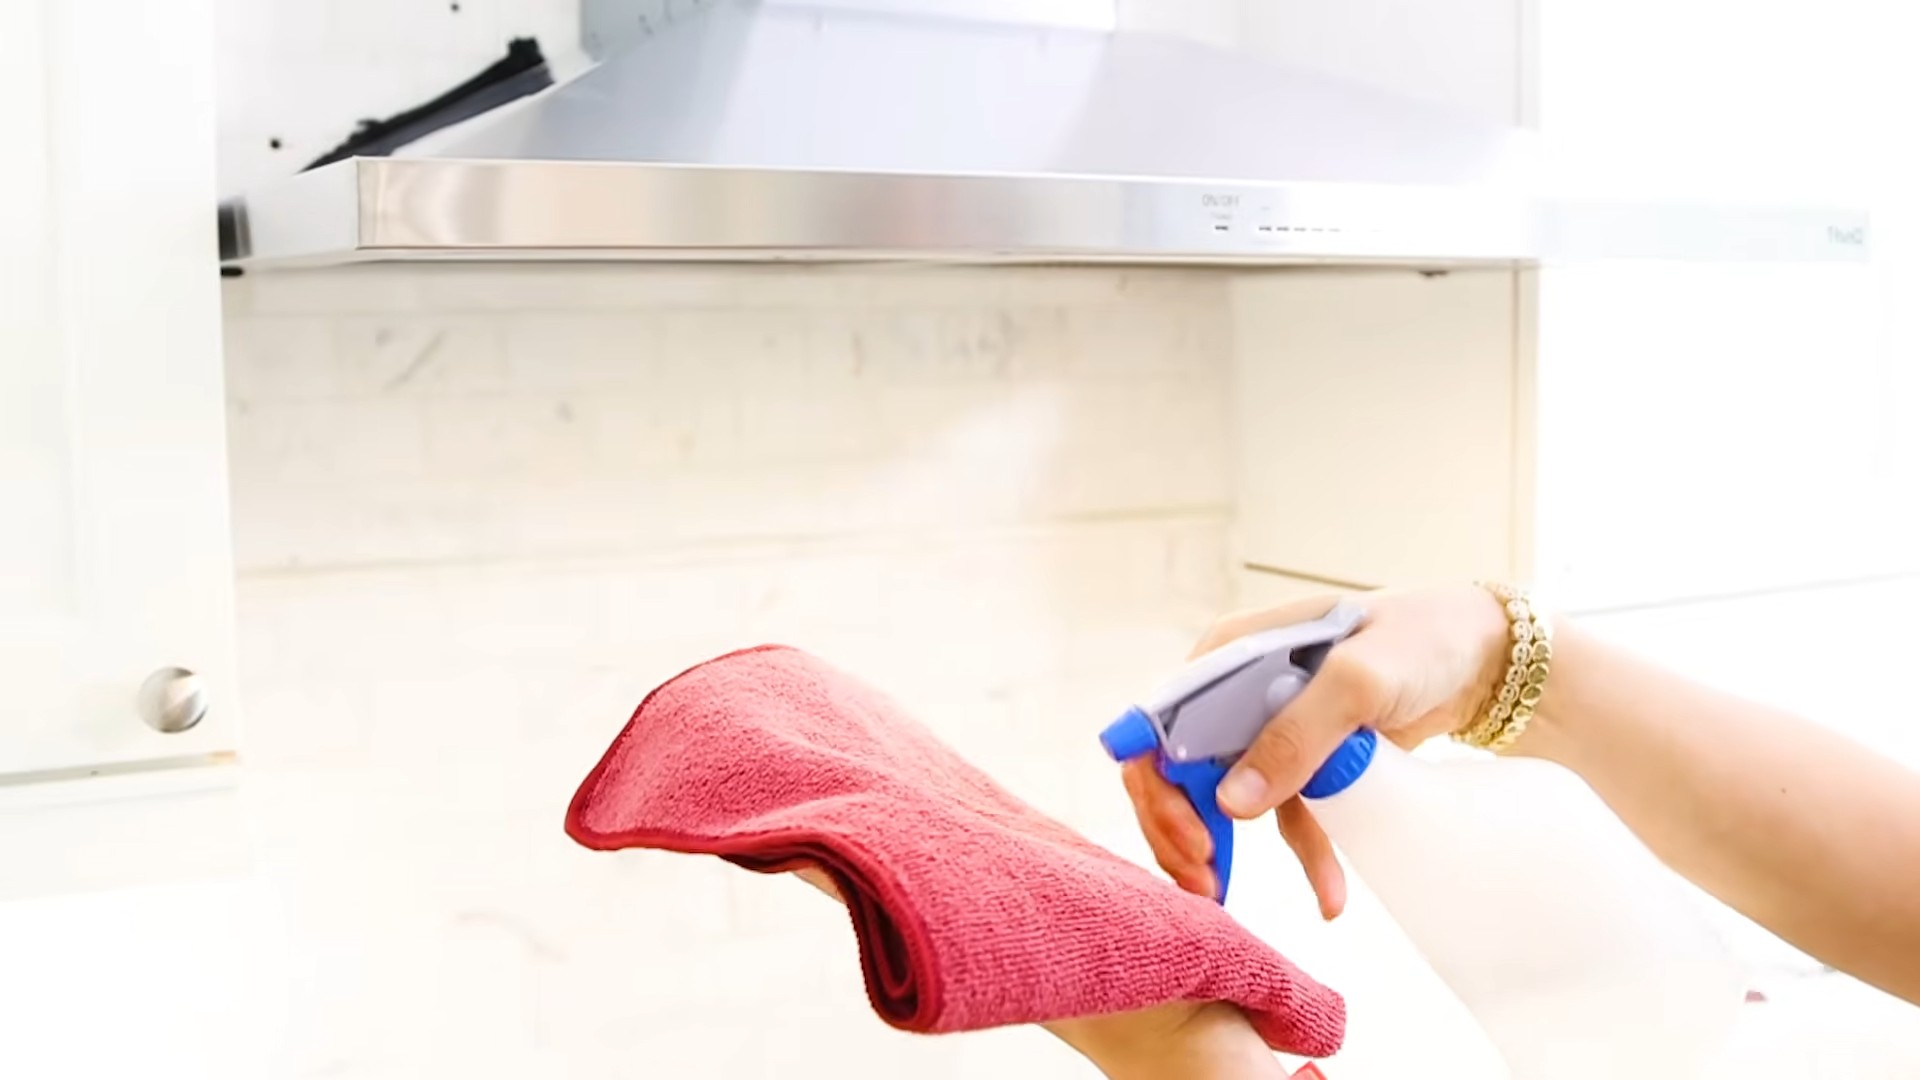
Now for the fun part – making your stainless steel shine! Here’s how to use your DIY cleaning oil:
1. Spray Lightly: Lightly spray the cleaning oil onto the surface of your stainless steel appliance. You don’t need to saturate the surface; a light mist is enough.
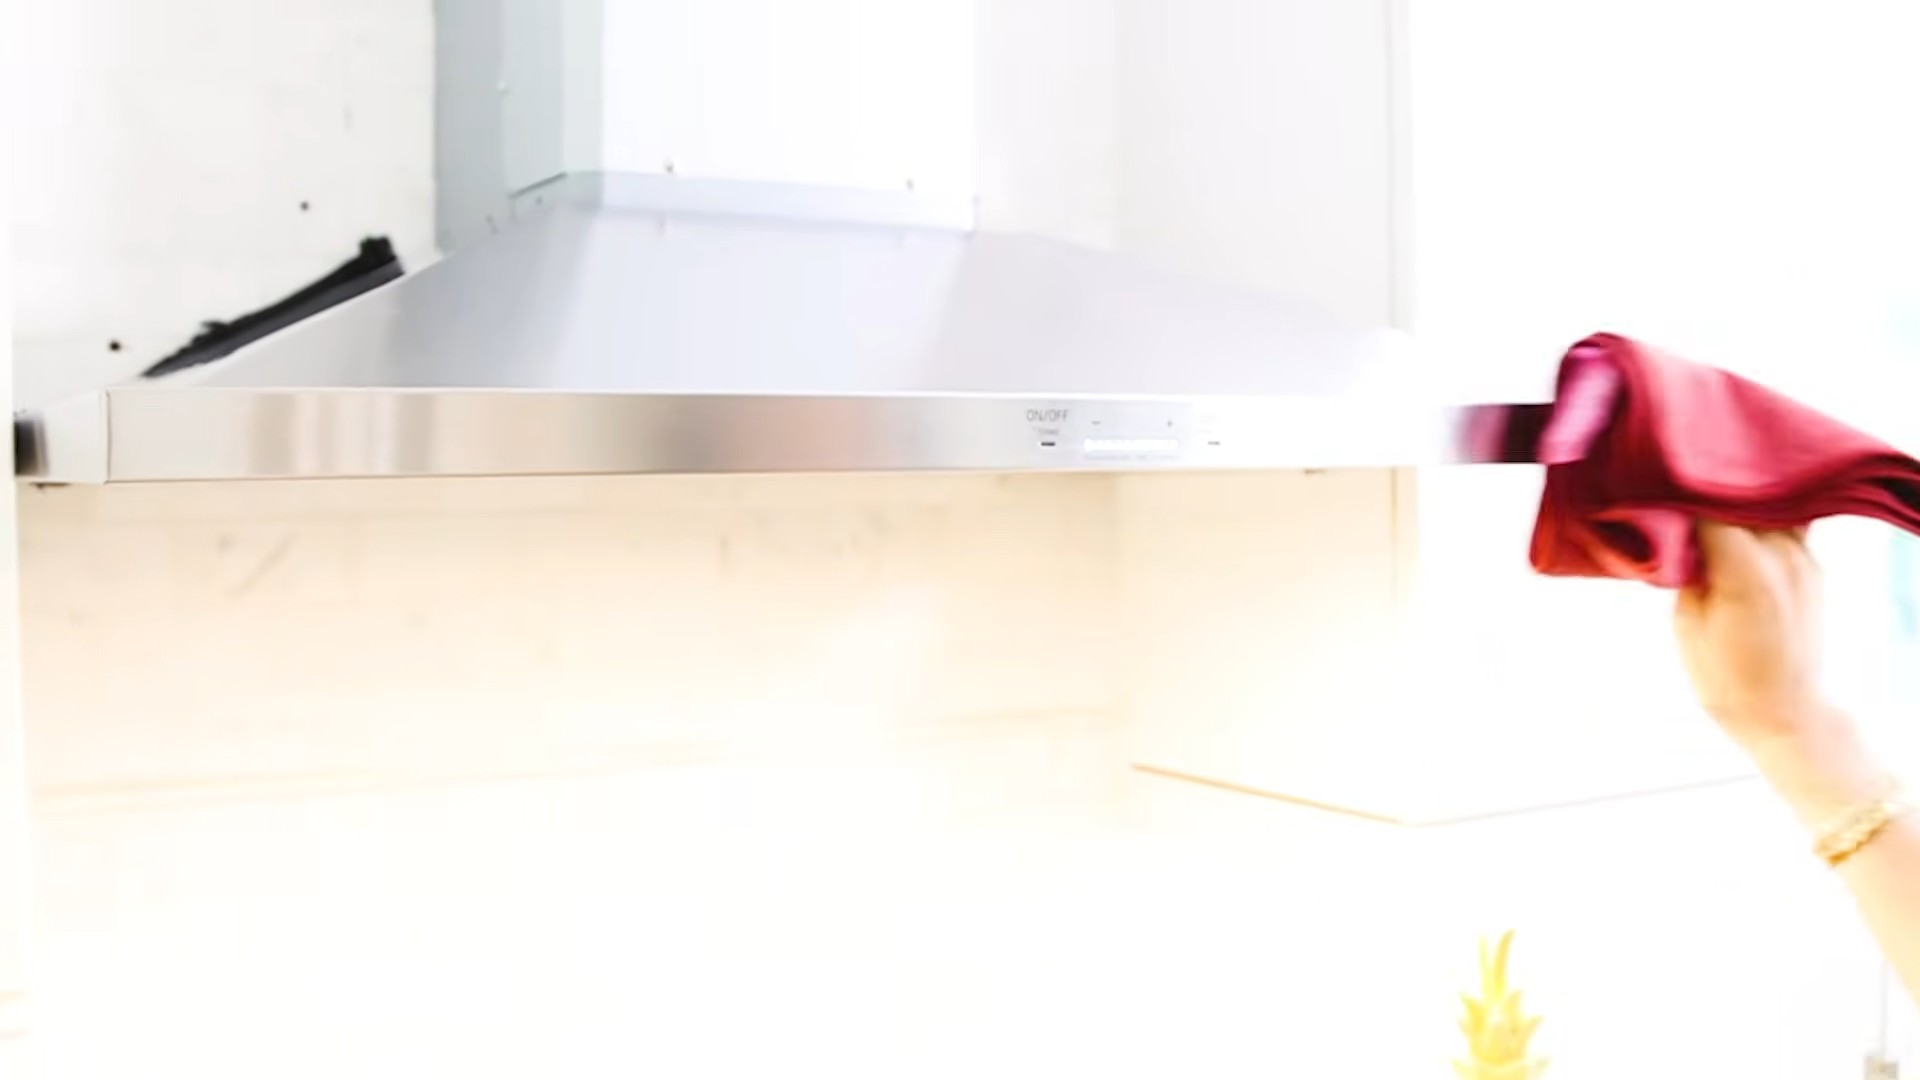
2. Wipe with the Grain: Using a clean microfiber cloth, wipe the surface in the direction of the grain. This is important because wiping against the grain can leave streaks.
3. Buff to a Shine: After wiping with the cleaning oil, use a clean, dry microfiber cloth to buff the surface to a shine. This will remove any excess oil and leave your stainless steel looking sparkling clean.
4. Repeat if Necessary: For stubborn stains or grime, you may need to repeat the process. Just spray, wipe, and buff until the surface is clean and shiny.
Tackling Different Types of Stains
Sometimes, you’ll encounter different types of stains that require a little extra attention. Here are some tips for dealing with common stainless steel stains:
* Fingerprints: Fingerprints are probably the most common culprit. The cleaning oil works great for removing them. Just spray, wipe, and buff!
* Water Spots: Water spots can be tricky, especially if they’ve been there for a while. The vinegar in the cleaning oil helps to dissolve them. You might need to apply a little extra pressure when wiping.
* Grease Splatters: Grease splatters can be tough to remove. For heavy grease, you might want to pre-treat the area with a degreaser before using the cleaning oil. Alternatively, you can let the cleaning oil sit on the grease for a few minutes before wiping.
* Burnt-On Food: For burnt-on food, try making a paste of baking soda and water. Apply the paste to the affected area, let it sit for a few minutes, and then gently scrub with a non-abrasive sponge. Rinse with water and then use the cleaning oil to polish the surface.
Tips and Tricks for the Best Results
Here are a few extra tips and tricks to help you get the best results with your DIY stainless steel cleaning oil:
* Always Wipe with the Grain: I can’t stress this enough! Wiping against the grain will leave streaks.
* Use Clean Microfiber Cloths: Dirty cloths will just spread the grime around. Make sure your cloths are clean and dry.
* Don’t Over-Saturate: A little bit of cleaning oil goes a long way. Over-saturating the surface can leave a greasy residue.
* Test in an Inconspicuous Area: Before cleaning your entire appliance, test the cleaning oil in a small, hidden area to make sure it doesn’t damage the finish.
* Regular Cleaning: The more often you clean your stainless steel, the easier it will be to maintain its shine. Try to wipe down your appliances at least once a week.
* Avoid Abrasive Cleaners: Abrasive cleaners can scratch the surface of your stainless steel. Stick to gentle cleaners and microfiber cloths.
* Consider a Second Buff: For an extra-shiny finish, buff the surface a second time with a fresh, dry microfiber cloth.
* Storage: Store your cleaning oil in a cool, dark place. This will help to preserve the quality of the ingredients.
* Label Your Bottle: Don’t forget to label your spray bottle so you know what’s inside!
Why This Works: The Science Behind the Shine
You might be wondering why this simple mixture works so well. Here’s a little bit of the science behind it:
* Olive Oil: Olive oil is a natural lubricant and polish. It helps to create a protective layer on the surface of the stainless steel, preventing fingerprints and water spots from adhering. It also adds a beautiful shine.
* White Vinegar: White vinegar is a mild acid that helps to dissolve dirt, grime, and water spots. It’s also a natural degreaser, making it effective at removing grease splatters.
* Essential Oil: While essential oil is primarily for fragrance, some essential oils, like lemon and tea tree oil, also have antibacterial and antifungal properties.
Troubleshooting
Even with the best instructions, sometimes things don’t go exactly as planned. Here are some common issues you might encounter and how to fix them:
* Streaks: If you’re seeing streaks, make sure you’re wiping with the grain and using a clean, dry microfiber cloth. You might also be using too much cleaning oil. Try using less and buffing the surface more thoroughly.
* Greasy Residue: If you’re leaving a greasy residue, you’re probably using too much olive oil. Try reducing the amount of olive oil in your mixture or buffing the surface more vigorously.
* Dull Finish: If your stainless steel still looks dull after cleaning, it might be heavily soiled. Try pre-treating the surface with a degreaser or baking soda paste before using the cleaning oil.
* Cloudy Appearance: A cloudy appearance can be caused by hard water deposits. Try adding a little more vinegar to your cleaning oil to help dissolve the deposits.
Beyond Appliances: Other Uses for Your Cleaning Oil
This DIY cleaning oil isn’t just for appliances! You can also use it to clean other stainless steel surfaces in your home, such as:
* Sinks: Stainless steel sinks can get grimy quickly. This cleaning oil will help to keep them sparkling clean.
* Pots and Pans: Use it to polish the exterior of your stainless steel pots and pans.
* Faucets: Keep your stainless steel faucets looking shiny and new.
* Backsplashes: Clean and polish your stainless steel backsplashes.
* Elevator Doors: Yes, you can even use it on stainless steel elevator doors!
Safety Precautions
While this DIY cleaning oil is made with natural ingredients, it’s still important to take a few safety precautions:
* Keep Out of Reach of Children: Store the cleaning oil in a safe place where children can’t access it.
* Avoid Contact with Eyes: If the cleaning oil gets in your eyes, rinse thoroughly with water.
* Test on a Small Area First
Conclusion
So, there you have it! Creating your own stainless steel cleaning oil is not just a cost-effective alternative to store-bought products; it’s a superior solution that delivers a streak-free shine while protecting your valuable appliances and surfaces. We’ve walked you through the simple process, highlighting the benefits of using natural ingredients and the satisfaction of crafting a cleaning product tailored to your specific needs.
Why is this DIY trick a must-try? Because it empowers you to take control of your cleaning routine. You know exactly what’s going into your cleaning oil, avoiding harsh chemicals and potentially harmful additives often found in commercial products. The blend of oil and essential oils not only cleans but also conditions the stainless steel, preventing future smudges and fingerprints from adhering as easily. Plus, the subtle aroma of your chosen essential oils will leave your kitchen smelling fresh and inviting, a welcome change from the chemical scent of many conventional cleaners.
But the beauty of this DIY stainless steel cleaning oil lies in its versatility. Feel free to experiment with different essential oil combinations to find your perfect scent profile. Lavender and lemon offer a calming and refreshing aroma, while tea tree and eucalyptus provide antibacterial properties. For a more intense cleaning boost, consider adding a few drops of white vinegar to the mixture, but always test it on an inconspicuous area first to ensure it doesn’t damage the finish. You can also adjust the ratio of oil to essential oils to suit your preferences. If you prefer a lighter scent, simply reduce the number of essential oil drops.
Beyond appliances, this cleaning oil works wonders on stainless steel sinks, cookware, and even outdoor grills. Its gentle formula effectively removes grease, grime, and water spots without scratching or dulling the surface. Remember to always apply the oil sparingly and buff it in with a clean, microfiber cloth for optimal results.
We are confident that once you try this DIY stainless steel cleaning oil, you’ll never go back to store-bought alternatives. It’s a simple, effective, and environmentally friendly way to keep your stainless steel looking its best.
Now, we encourage you to give it a try! Gather your ingredients, follow the steps outlined in this article, and experience the satisfaction of creating your own high-quality cleaning product. And most importantly, share your experience with us! We’d love to hear about your favorite essential oil combinations, any variations you’ve tried, and the results you’ve achieved. Leave a comment below, share your photos on social media, and let’s build a community of DIY cleaning enthusiasts! Your feedback will not only help us improve this recipe but also inspire others to embrace the power of homemade cleaning solutions. Let’s ditch the harsh chemicals and embrace a cleaner, greener, and more effective way to care for our stainless steel surfaces.
Frequently Asked Questions (FAQ)
What type of oil is best for making stainless steel cleaning oil?
The best oils for making stainless steel cleaning oil are mineral oil, olive oil, and coconut oil (fractionated). Mineral oil is a popular choice because it’s inexpensive, readily available, and provides a good shine. Olive oil is a natural alternative that also works well, but be sure to use a light olive oil to avoid a greasy residue. Fractionated coconut oil is another excellent option as it remains liquid at room temperature and is easily absorbed. Avoid using heavy oils like vegetable oil, as they can leave a sticky film.
Can I use other essential oils besides the ones mentioned in the article?
Absolutely! The beauty of DIY cleaning products is the ability to customize them to your preferences. While we suggested lavender, lemon, tea tree, and eucalyptus, you can experiment with other essential oils that you enjoy. Some other good options include orange, grapefruit, peppermint, and rosemary. Just be sure to use pure essential oils and avoid fragrance oils, which don’t offer the same cleaning or aromatherapy benefits. Always test a small area first to ensure the essential oil doesn’t react negatively with your stainless steel.
How often should I use this stainless steel cleaning oil?
The frequency of use depends on how often your stainless steel surfaces get dirty. For high-traffic areas like kitchen appliances, you may want to use the cleaning oil once or twice a week. For less frequently used items, such as stainless steel cookware stored in cabinets, you can clean them less often. A good rule of thumb is to clean your stainless steel whenever you notice smudges, fingerprints, or water spots.
Will this cleaning oil remove rust from stainless steel?
While this cleaning oil can help prevent rust by creating a protective barrier, it’s not specifically designed to remove existing rust. For rust removal, you may need to use a specialized stainless steel rust remover or a mixture of baking soda and water. After removing the rust, you can then use the cleaning oil to protect the surface and prevent future rust formation.
Can I use this cleaning oil on brushed stainless steel?
Yes, this cleaning oil is safe to use on brushed stainless steel. However, it’s important to follow the grain of the metal when applying and buffing the oil. This will help prevent streaks and ensure an even shine. Use a soft microfiber cloth and avoid applying too much pressure.
How should I store the stainless steel cleaning oil?
Store your homemade stainless steel cleaning oil in an airtight container, preferably a dark glass bottle. This will help protect the essential oils from light and air, which can degrade their quality. Keep the bottle in a cool, dry place away from direct sunlight. The cleaning oil should last for several months if stored properly.
Is this cleaning oil safe for use around children and pets?
While the ingredients in this cleaning oil are generally considered safe, it’s always a good idea to exercise caution when using any cleaning product around children and pets. Keep the bottle out of their reach and avoid spraying the oil directly onto surfaces that they may come into contact with. If you’re concerned about potential allergies or sensitivities, you can consult with your veterinarian or pediatrician before using the cleaning oil.
What if I don’t have essential oils? Can I still make the cleaning oil?
Yes, you can still make the cleaning oil without essential oils. The oil itself will still provide a cleaning and protective effect. However, the essential oils add antibacterial properties and a pleasant scent. If you don’t have essential oils, you can simply use the oil of your choice on its own.
How do I prevent streaks when using this cleaning oil?
Streaks are often caused by using too much oil or not buffing it in properly. To prevent streaks, apply the oil sparingly and use a clean, dry microfiber cloth to buff it in thoroughly. Make sure to follow the grain of the stainless steel when buffing. If you still see streaks, try using a slightly damp microfiber cloth to remove any excess oil.
Can I use this cleaning oil on other metal surfaces besides stainless steel?
While this cleaning oil is specifically formulated for stainless steel, it may also work on other metal surfaces like chrome or aluminum. However, it’s always best to test it on an inconspicuous area first to ensure it doesn’t damage the finish. Avoid using it on delicate or coated metal surfaces.


Leave a Comment