
Start watermelons early at home and taste summer sooner! Imagine biting into a juicy, sweet watermelon you nurtured from a tiny seed, weeks before anyone else in the neighborhood. That’s the magic we’re unlocking today with this simple, yet incredibly effective DIY trick. For centuries, gardeners have sought ways to extend growing seasons, and the humble watermelon, a fruit with roots stretching back to ancient Africa, is no exception.
Historically, watermelons were prized not just for their refreshing taste, but also for their ability to store water, a vital resource in arid climates. Now, you might not be facing a desert in your backyard, but getting a head start on the growing season is crucial, especially in regions with shorter summers. This DIY hack is a game-changer because it allows you to bypass the unpredictable spring weather and give your watermelon seedlings a strong, healthy foundation indoors.
I know what you’re thinking: “Watermelons are tricky!” And you’re right, they can be. But with this easy-to-follow guide, even beginner gardeners can successfully start watermelons early at home and enjoy a bountiful harvest. We’ll walk you through each step, from choosing the right containers to providing the perfect growing conditions, ensuring your watermelon plants thrive and reward you with delicious, homegrown fruit. So, grab your seeds, and let’s get started on this exciting gardening adventure!
Wassermelonen-Vorzucht: So startest du frühzeitig zu Hause!
Hey Leute! Wer liebt Wassermelonen genauso wie ich? Es gibt doch nichts Besseres als eine saftige, süße Wassermelone an einem heißen Sommertag. Aber um in den vollen Genuss zu kommen, besonders in Regionen mit kürzeren Sommern, ist es oft notwendig, die kleinen Pflänzchen vorzuziehen. Keine Sorge, das ist gar nicht so schwer, wie es klingt! Ich zeige euch, wie ihr eure eigenen Wassermelonen-Babys zu Hause vorziehen könnt, damit ihr eine reiche Ernte einfahren könnt.
Warum Wassermelonen vorziehen?
Bevor wir loslegen, kurz ein paar Worte, warum das Vorziehen überhaupt Sinn macht:
* Verlängerung der Wachstumsperiode: Wassermelonen brauchen eine lange, warme Wachstumsperiode. Durch das Vorziehen können wir ihnen einen Vorsprung verschaffen und sicherstellen, dass sie genügend Zeit haben, um zu reifen.
* Schutz vor ungünstigen Bedingungen: Junge Wassermelonenpflanzen sind empfindlich gegenüber Frost und kalten Temperaturen. Durch das Vorziehen im Haus können wir sie vor diesen Gefahren schützen.
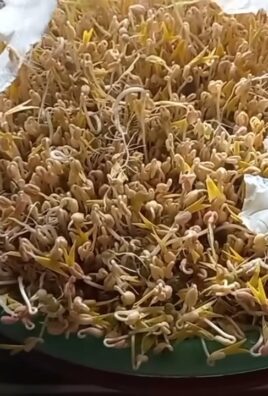
* Höhere Erfolgsrate: Die Keimung von Wassermelonensamen im Freien kann unberechenbar sein. Durch das Vorziehen im Haus haben wir mehr Kontrolle über die Bedingungen und erhöhen die Wahrscheinlichkeit, dass die Samen keimen und gesunde Pflanzen entstehen.
Was du brauchst: Die Materialliste
Bevor wir mit dem Vorziehen beginnen, solltest du sicherstellen, dass du alles Notwendige zur Hand hast. Hier ist eine Liste der Materialien, die du benötigst:
* Wassermelonensamen: Wähle eine Sorte, die für deine Region geeignet ist. Achte auf die Reifezeit, die auf der Samenpackung angegeben ist.
* Anzuchttöpfe oder -schalen: Ich empfehle biologisch abbaubare Töpfe, da diese direkt in den Garten gepflanzt werden können, ohne die Wurzeln zu stören. Alternativ kannst du auch Plastiktöpfe verwenden, aber achte darauf, dass sie Drainagelöcher haben.
* Anzuchterde: Verwende spezielle Anzuchterde, die locker und nährstoffarm ist. Normale Blumenerde ist oft zu reichhaltig für junge Keimlinge.
* Mini-Gewächshaus oder Plastikfolie: Um die Luftfeuchtigkeit zu erhöhen und die Keimung zu beschleunigen.
* Sprühflasche: Zum Befeuchten der Erde.
* Wärmematte (optional): Wassermelonen keimen am besten bei warmen Temperaturen. Eine Wärmematte kann helfen, die Erde warm zu halten.
* Pflanzenlampe (optional): Wenn du nicht genügend Sonnenlicht hast, kann eine Pflanzenlampe helfen, die Keimlinge mit ausreichend Licht zu versorgen.
* Etiketten und Stift: Um die verschiedenen Sorten zu kennzeichnen.
Schritt-für-Schritt-Anleitung: So ziehst du deine Wassermelonen vor
Jetzt geht’s ans Eingemachte! Hier ist eine detaillierte Anleitung, wie du deine Wassermelonen erfolgreich vorziehen kannst:
1. Vorbereitung der Anzuchttöpfe
1. Töpfe befüllen: Fülle die Anzuchttöpfe oder -schalen mit Anzuchterde. Lass etwa 1-2 cm Platz bis zum Rand.
2. Erde befeuchten: Befeuchte die Erde mit einer Sprühflasche, bis sie gleichmäßig feucht, aber nicht nass ist.
2. Aussaat der Samen
1. Samen vorbereiten (optional): Um die Keimung zu beschleunigen, kannst du die Samen vor der Aussaat für 24 Stunden in lauwarmem Wasser einweichen.
2. Samen aussäen: Lege in jeden Topf 2-3 Samen. Drücke sie etwa 1-2 cm tief in die Erde.
3. Mit Erde bedecken: Bedecke die Samen mit einer dünnen Schicht Anzuchterde.
4. Erde erneut befeuchten: Befeuchte die Erde erneut mit der Sprühflasche.
3. Schaffung optimaler Keimbedingungen
1. Mini-Gewächshaus oder Plastikfolie: Stelle die Anzuchttöpfe in ein Mini-Gewächshaus oder bedecke sie mit Plastikfolie, um die Luftfeuchtigkeit zu erhöhen.
2. Warmer Standort: Stelle das Mini-Gewächshaus oder die abgedeckten Töpfe an einen warmen Ort. Die ideale Keimtemperatur liegt zwischen 25 und 30 Grad Celsius. Eine Wärmematte kann hier sehr hilfreich sein.
3. Regelmäßige Kontrolle: Kontrolliere die Erde täglich und befeuchte sie bei Bedarf mit der Sprühflasche. Achte darauf, dass die Erde nicht austrocknet, aber auch nicht zu nass ist.
4. Nach der Keimung: Pflege der Keimlinge
1. Lüften: Sobald die ersten Keimlinge erscheinen, solltest du das Mini-Gewächshaus oder die Plastikfolie regelmäßig lüften, um Schimmelbildung zu vermeiden.
2. Helles Licht: Stelle die Keimlinge an einen hellen Ort. Wenn du nicht genügend Sonnenlicht hast, verwende eine Pflanzenlampe. Die Keimlinge benötigen mindestens 12 Stunden Licht pro Tag.
3. Vereinzeln: Wenn mehrere Samen in einem Topf gekeimt sind, solltest du die schwächsten Keimlinge entfernen, damit die stärksten Pflanzen genügend Platz und Nährstoffe haben. Schneide die schwächeren Keimlinge direkt über der Erde ab, um die Wurzeln der verbleibenden Pflanze nicht zu beschädigen.
4. Gießen: Gieße die Keimlinge regelmäßig, aber vermeide Staunässe. Die Erde sollte immer leicht feucht sein.
5. Düngen (optional): Nach etwa zwei Wochen kannst du die Keimlinge mit einem verdünnten Flüssigdünger für Gemüsepflanzen düngen.
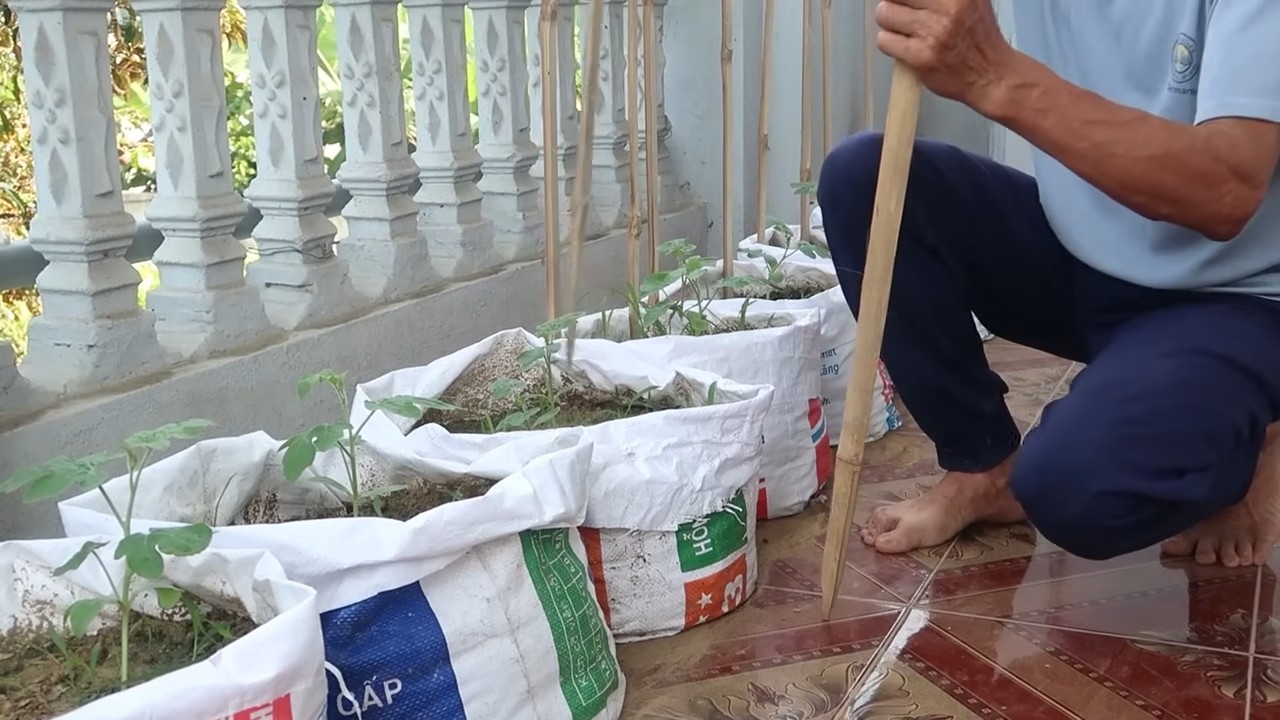
5. Abhärten der Pflanzen
1. Vorbereitung auf das Auspflanzen: Bevor du die Wassermelonenpflanzen in den Garten pflanzt, musst du sie abhärten. Das bedeutet, dass du sie langsam an die Bedingungen im Freien gewöhnst.
2. Abhärten: Beginne etwa eine Woche vor dem geplanten Auspflanztermin, die Pflanzen tagsüber für einige Stunden ins Freie zu stellen. Steigere die Zeit im Freien jeden Tag, bis die Pflanzen den ganzen Tag draußen verbringen können. Schütze die Pflanzen vor direkter Sonneneinstrahlung und starkem Wind.
3. Nachts ins Haus holen: Hole die Pflanzen nachts wieder ins Haus, solange die Nachttemperaturen noch unter 10 Grad Celsius liegen.
Auspflanzen der Wassermelonen
1. Der richtige Zeitpunkt: Pflanze die Wassermelonen erst aus, wenn keine Frostgefahr mehr besteht und die Bodentemperaturen mindestens 15 Grad Celsius betragen.
2. Der richtige Standort: Wähle einen sonnigen Standort mit gut durchlässigem Boden. Wassermelonen brauchen viel Sonne und Wärme, um gut zu wachsen.
3. Boden vorbereiten: Bereite den Boden vor, indem du ihn lockerst und mit Kompost oder anderem organischen Material anreicherst.
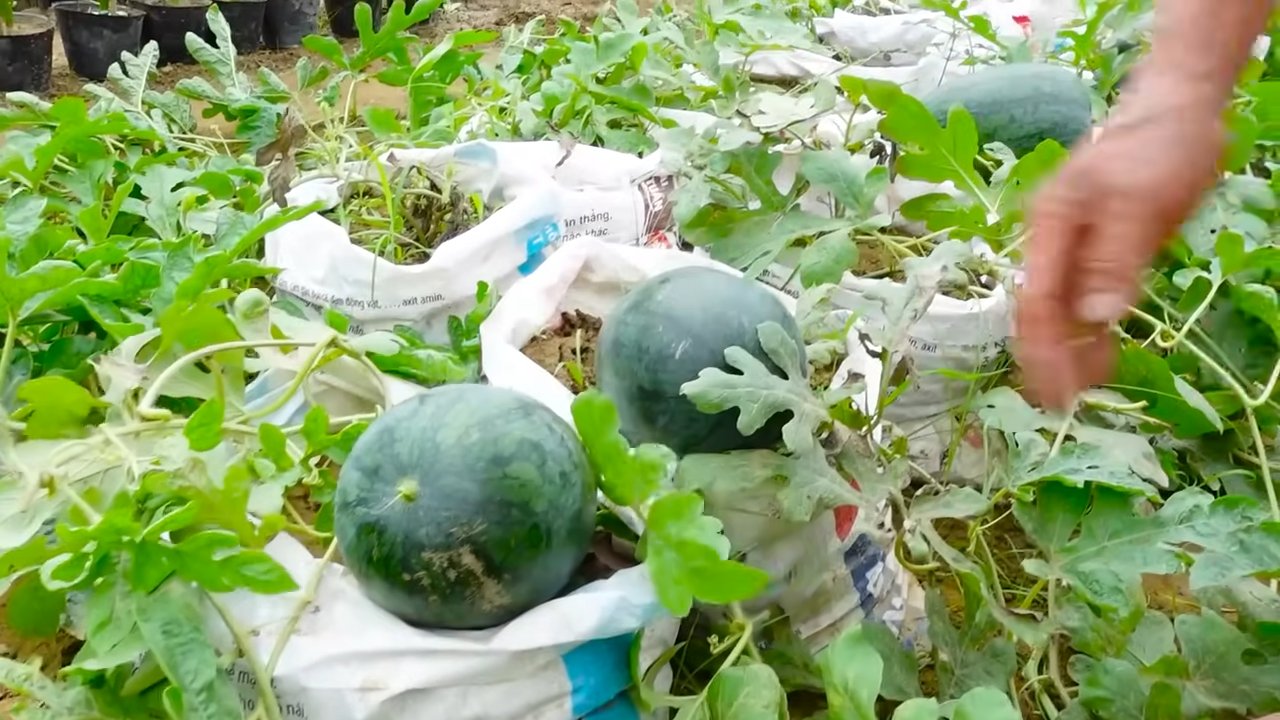
4. Pflanzen aussetzen: Setze die Wassermelonenpflanzen in einem Abstand von etwa 1 Meter zueinander aus.
5. Angießen: Gieße die Pflanzen nach dem Auspflanzen gründlich an.
6. Mulchen: Mulche den Boden um die Pflanzen herum, um die Feuchtigkeit zu halten und Unkrautwachstum zu unterdrücken.
Zusätzliche Tipps für eine erfolgreiche Wassermelonenernte
* Regelmäßiges Gießen: Wassermelonen brauchen viel Wasser, besonders während der Fruchtbildung. Gieße die Pflanzen regelmäßig, besonders bei trockenem Wetter.
* Düngen: Dünge die Pflanzen regelmäßig mit einem Dünger für Gemüsepflanzen.
* Schutz vor Schädlingen und Krankheiten: Kontrolliere die Pflanzen regelmäßig auf Schädlinge und Krankheiten. Bei Bedarf kannst du biologische Schädlingsbekämpfungsmittel oder Fungizide einsetzen.
* Rankhilfe: Wassermelonen können sehr groß werden. Eine Rankhilfe kann helfen, die Früchte
Conclusion
So, there you have it! Starting watermelon seeds early at home isn’t just a gardening hack; it’s a game-changer for anyone dreaming of vine-ripened, juicy watermelon slices gracing their summer tables. We’ve walked through the simple steps, highlighting how easy and rewarding it can be to nurture these sun-loving fruits from tiny seeds to robust seedlings, all within the controlled environment of your own home.
Why is this a must-try? Because it gives you a significant head start on the growing season, especially crucial in regions with shorter summers. By the time the last frost has passed and the soil warms up, your watermelon seedlings will be strong and ready to thrive, giving them a distinct advantage over direct-sown seeds. This translates to earlier harvests, bigger watermelons, and a greater chance of success overall. Imagine biting into a sweet, refreshing watermelon that you nurtured from seed, knowing you beat the odds and extended your growing season. That’s the power of starting watermelons early at home.
But the benefits don’t stop there. Starting your own seedlings allows you to choose from a wider variety of watermelon cultivars. You’re no longer limited to what’s available at your local garden center. Explore heirloom varieties, experiment with different colors and sizes, and discover the unique flavors that truly excite your palate.
Consider these variations to personalize your watermelon-starting journey:
* Experiment with different soil mixes: While a standard seed-starting mix works well, you can also try adding compost or perlite to improve drainage and aeration.
* Use different containers: Peat pots, biodegradable pots, or even repurposed yogurt containers can all be used to start your watermelon seeds. Just make sure they have drainage holes.
* Try different watermelon varieties: From the classic ‘Sugar Baby’ to the unique ‘Yellow Crimson,’ there’s a watermelon variety out there for everyone. Research different varieties and choose the ones that best suit your taste and growing conditions.
* Consider using a heat mat: If your home is particularly cool, a heat mat can help to speed up germination.
We strongly encourage you to give this DIY trick a try. It’s a simple, cost-effective way to improve your watermelon harvest and enjoy the satisfaction of growing your own food from seed. Don’t be intimidated – even if you’re a beginner gardener, you can successfully start watermelon seeds early at home.
We’re confident that you’ll be amazed by the results. And once you’ve experienced the joy of harvesting your own homegrown watermelons, you’ll never go back to buying them from the store.
So, grab your seeds, gather your supplies, and get ready to embark on a rewarding gardening adventure. We can’t wait to hear about your experiences! Share your photos, tips, and stories in the comments below. Let’s build a community of watermelon enthusiasts and help each other grow the best watermelons possible. Happy gardening!
FAQ
Why should I start watermelon seeds indoors instead of directly sowing them in the garden?
Starting watermelon seeds indoors gives you a significant head start, especially in regions with shorter growing seasons. Watermelons require a long, warm growing period to mature fully. By starting them indoors 4-6 weeks before the last expected frost, you can ensure that your seedlings are strong and healthy when they’re transplanted into the garden, leading to earlier harvests and larger, more flavorful watermelons. Direct sowing is possible in warmer climates with long summers, but even then, starting indoors provides a competitive advantage.
What is the ideal temperature for watermelon seed germination?
Watermelon seeds germinate best in warm temperatures, ideally between 70°F and 90°F (21°C and 32°C). You can use a heat mat to maintain a consistent temperature, especially if your home is cooler. Once the seeds have germinated, you can lower the temperature slightly, but keep it above 65°F (18°C).
What type of soil should I use for starting watermelon seeds?
Use a well-draining seed-starting mix. Avoid using garden soil, as it can be too heavy and may contain pathogens that can harm your seedlings. A good seed-starting mix will be light and airy, allowing for proper root development. You can also add perlite or vermiculite to improve drainage.
How often should I water my watermelon seedlings?
Keep the soil consistently moist, but not waterlogged. Water when the top inch of soil feels dry to the touch. Avoid overwatering, as this can lead to root rot. Use a gentle watering can or spray bottle to avoid disturbing the seedlings.
How much light do watermelon seedlings need?
Watermelon seedlings need plenty of light to grow strong and healthy. Place them in a sunny window that receives at least 6-8 hours of direct sunlight per day. If you don’t have a sunny window, you can use grow lights. Keep the lights a few inches above the seedlings and adjust as they grow.
When should I transplant my watermelon seedlings into the garden?
Transplant your watermelon seedlings into the garden after the last expected frost, when the soil has warmed up to at least 60°F (16°C). Harden off the seedlings for a week before transplanting by gradually exposing them to outdoor conditions. Choose a sunny location with well-drained soil.
How do I harden off my watermelon seedlings?
Hardening off is the process of gradually acclimating your seedlings to outdoor conditions. Start by placing them in a sheltered location outdoors for a few hours each day, gradually increasing the amount of time they spend outside. Protect them from direct sunlight and strong winds. After a week, they should be ready to be transplanted into the garden.
What are some common problems when starting watermelon seeds indoors?
Some common problems include damping off (a fungal disease that causes seedlings to collapse), leggy seedlings (caused by insufficient light), and overwatering. To prevent these problems, use a sterile seed-starting mix, provide plenty of light, and water carefully.
Can I use biodegradable pots for starting watermelon seeds?
Yes, biodegradable pots are a great option for starting watermelon seeds. They can be planted directly into the garden, which minimizes root disturbance. However, make sure to tear off the top of the pot before planting to allow the roots to spread easily.
What are some good watermelon varieties to grow?
There are many different watermelon varieties to choose from, each with its own unique characteristics. Some popular varieties include ‘Sugar Baby’ (a small, sweet watermelon), ‘Crimson Sweet’ (a classic red watermelon), ‘Yellow Crimson’ (a yellow-fleshed watermelon), and ‘Moon and Stars’ (an heirloom variety with distinctive markings). Choose a variety that is well-suited to your climate and growing conditions.
How do I prevent pests and diseases from affecting my watermelon seedlings?
Keep your seedlings healthy by providing them with proper care. Avoid overwatering, provide plenty of light, and ensure good air circulation. You can also use organic pest control methods, such as insecticidal soap or neem oil, to control pests.
How long does it take for watermelons to mature?
The time it takes for watermelons to mature varies depending on the variety, but it typically takes 70-90 days from planting. Starting watermelons early at home can significantly reduce the time to harvest.
What are the signs that a watermelon is ripe?
There are several signs that a watermelon is ripe. The tendril closest to the fruit will turn brown and dry, the bottom of the watermelon (where it rests on the ground) will turn yellow, and the watermelon will sound hollow when you thump it.
Leave a Comment