
Sweet Honeydew Melon Growing – ever dreamt of biting into a perfectly ripe, juicy honeydew melon that you grew yourself? I know I have! There’s something incredibly satisfying about nurturing a plant from seed to delicious fruit, and honeydew melons are no exception. For centuries, melons have been cultivated across various cultures, prized for their sweetness and refreshing qualities. From ancient Egypt to the royal gardens of Europe, melons have held a special place in culinary history.
But let’s be honest, the thought of growing your own honeydew can seem a little daunting. Maybe you’ve tried before and ended up with small, bland melons, or perhaps you’re just not sure where to start. That’s where this DIY guide comes in! I’m going to share some simple yet effective tricks and hacks that will help you achieve sweet honeydew melon growing success, even if you’re a beginner gardener.
Why do you need these tricks? Because store-bought melons often lack the intense flavor and sweetness of homegrown varieties. Plus, growing your own allows you to control the quality of your food and enjoy the satisfaction of harvesting something you’ve nurtured from start to finish. So, get ready to roll up your sleeves and discover the secrets to growing the sweetest, most delicious honeydew melons you’ve ever tasted!
Süße Honigmelonen selbst anbauen: Ein umfassender DIY-Leitfaden
Hallo liebe Gartenfreunde! Ich freue mich riesig, euch heute in die Welt des Honigmelonen-Anbaus mitzunehmen. Es gibt kaum etwas Befriedigenderes, als eine saftige, selbst gezogene Honigmelone zu genießen. Und glaubt mir, es ist gar nicht so schwer, wie man vielleicht denkt! Mit ein bisschen Geduld und den richtigen Tipps könnt auch ihr bald eure eigenen süßen Honigmelonen ernten.
Was du für den Honigmelonen-Anbau brauchst:
* Honigmelonen-Samen: Wähle eine Sorte, die für dein Klima geeignet ist. Es gibt viele verschiedene Sorten, also informiere dich vorher!
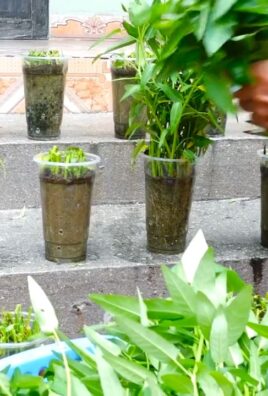
* Anzuchttöpfe oder -schalen: Für die Voranzucht im Haus.
* Anzuchterde: Spezielle Erde für die Anzucht, die nährstoffarm ist.
* Gartenerde: Gute, nährstoffreiche Gartenerde für das Beet oder den Kübel.
* Kompost oder organischer Dünger: Um den Boden anzureichern.
* Gießkanne oder Schlauch: Zum Bewässern.
* Mulchmaterial: Stroh, Holzhackschnitzel oder ähnliches, um den Boden feucht zu halten und Unkraut zu unterdrücken.
* Pflanzstäbe oder Rankgitter (optional): Für Sorten, die zum Klettern neigen.
* Geduld und Liebe: Das Wichtigste überhaupt!
Die Vorbereitung: Der Grundstein für eine reiche Ernte
Bevor wir loslegen, ist es wichtig, den Boden vorzubereiten. Honigmelonen sind Starkzehrer und brauchen einen nährstoffreichen, gut durchlässigen Boden.
1. Boden vorbereiten: Lockere den Boden gründlich auf und entferne Unkraut. Arbeite reichlich Kompost oder organischen Dünger ein. Das sorgt für eine gute Nährstoffversorgung.
2. Standort wählen: Honigmelonen lieben die Sonne! Wähle einen sonnigen Standort, der mindestens 6-8 Stunden Sonne pro Tag bekommt.
3. Boden-pH-Wert prüfen: Honigmelonen bevorzugen einen leicht sauren bis neutralen pH-Wert (6,0-7,0). Du kannst den pH-Wert mit einem Bodentest überprüfen und gegebenenfalls anpassen.
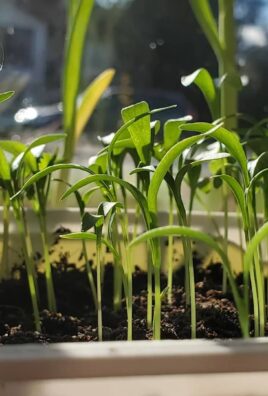
Die Anzucht: Der Start ins Melonen-Glück
Die Anzucht im Haus ist besonders in kühleren Regionen empfehlenswert, um den Pflanzen einen Vorsprung zu verschaffen.
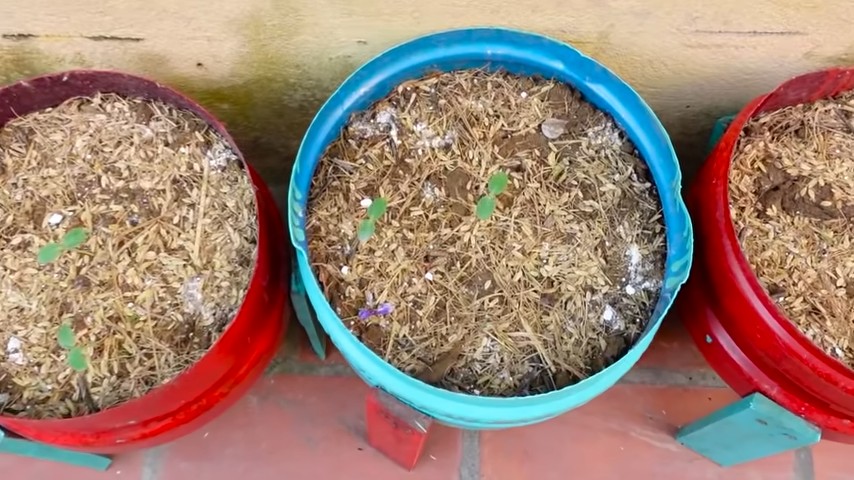
1. Aussaat: Fülle die Anzuchttöpfe mit Anzuchterde. Lege pro Topf 2-3 Samen etwa 2 cm tief in die Erde.
2. Bewässerung: Befeuchte die Erde vorsichtig mit einer Sprühflasche oder Gießkanne. Die Erde sollte feucht, aber nicht nass sein.
3. Standort: Stelle die Töpfe an einen warmen, hellen Ort. Eine Temperatur von 20-25°C ist ideal für die Keimung.
4. Keimung: Die Samen keimen in der Regel innerhalb von 7-14 Tagen.
5. Pikieren: Sobald die Sämlinge 2-3 echte Blätter haben, kannst du sie pikieren. Das bedeutet, du setzt die stärksten Sämlinge in größere Töpfe um. Achte darauf, die Wurzeln nicht zu beschädigen.
Das Auspflanzen: Raus in die Freiheit!
Sobald keine Frostgefahr mehr besteht (in der Regel Mitte Mai), können die Jungpflanzen ins Freie gepflanzt werden.
1. Abhärten: Bevor du die Pflanzen ins Freie setzt, solltest du sie einige Tage lang abhärten. Stelle sie tagsüber für einige Stunden nach draußen und hole sie abends wieder rein. Das hilft ihnen, sich an die neuen Bedingungen zu gewöhnen.
2. Pflanzabstand: Pflanze die Honigmelonen mit einem Abstand von etwa 60-90 cm zueinander.
3. Pflanzen: Hebe ein Loch aus, das groß genug ist, um den Wurzelballen aufzunehmen. Setze die Pflanze vorsichtig ein und fülle das Loch mit Erde. Drücke die Erde leicht an.
4. Bewässerung: Gieße die Pflanzen nach dem Einpflanzen gründlich.
5. Mulchen: Bringe eine Schicht Mulchmaterial um die Pflanzen herum aus. Das hilft, den Boden feucht zu halten und Unkraut zu unterdrücken.
Die Pflege: Damit die Melonen prächtig gedeihen
Die richtige Pflege ist entscheidend für eine reiche Ernte.
1. Bewässerung: Honigmelonen brauchen regelmäßig Wasser, besonders während der Fruchtbildung. Gieße am besten morgens, damit die Blätter über Tag abtrocknen können. Vermeide Staunässe.
2. Düngung: Dünge die Pflanzen regelmäßig mit einem organischen Dünger oder Kompost. Achte darauf, dass der Dünger reich an Kalium ist, da dies die Fruchtbildung fördert.
3. Ausgeizen: Entferne regelmäßig Seitentriebe, um die Energie der Pflanze auf die Fruchtbildung zu konzentrieren.
4. Rankhilfe (optional): Wenn du eine kletternde Sorte anbaust, solltest du ihr eine Rankhilfe zur Verfügung stellen.
5. Schutz vor Schädlingen: Kontrolliere die Pflanzen regelmäßig auf Schädlinge wie Blattläuse oder Schnecken. Bei Bedarf kannst du biologische Schädlingsbekämpfungsmittel einsetzen.
Die Ernte: Der Lohn der Mühe
Die Erntezeit ist der Höhepunkt des Honigmelonen-Anbaus.
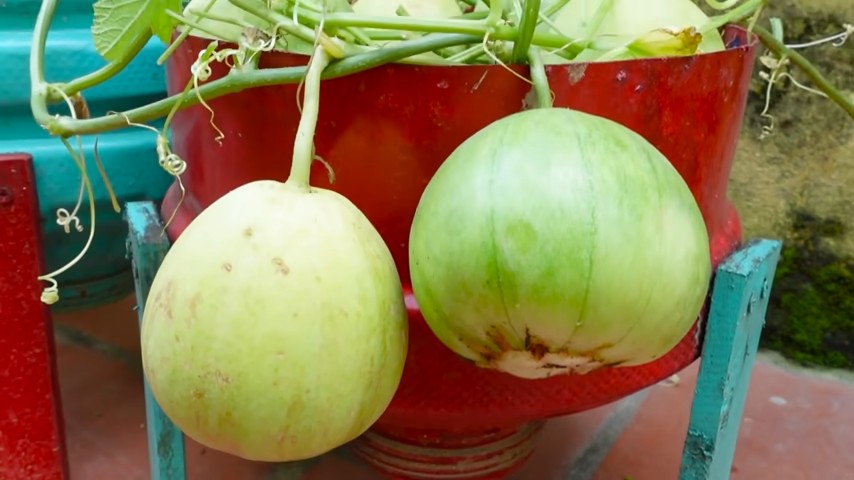
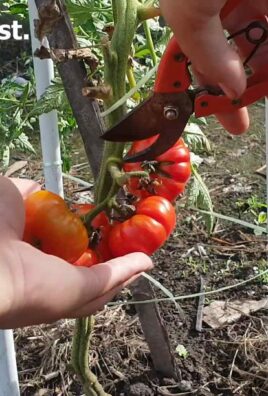
1. Reife erkennen: Eine reife Honigmelone duftet aromatisch und gibt bei leichtem Druck auf die Schale etwas nach. Die Schale sollte sich leicht von der Pflanze lösen lassen.
2. Ernten: Schneide die Melone mit einem scharfen Messer oder einer Gartenschere ab.
3. Genießen: Lass dir die selbst gezogene Honigmelone schmecken! Sie ist pur ein Genuss, aber auch in Salaten oder Smoothies ein echter Hingucker.
Zusätzliche Tipps für eine erfolgreiche Ernte:
* Bienenfreundliche Pflanzen: Pflanze in der Nähe deiner Honigmelonen bienenfreundliche Pflanzen, um die Bestäubung zu fördern.
* Fruchtansatz fördern: Du kannst den Fruchtansatz fördern, indem du die weiblichen Blüten von Hand bestäubst.
* Schutz vor starkem Regen: Bei starkem Regen solltest du die Pflanzen abdecken, um Fäulnis zu vermeiden.
* Regelmäßige Kontrolle: Kontrolliere die Pflanzen regelmäßig auf Krankheiten und Schädlinge.
* Nicht aufgeben: Auch wenn es mal nicht so läuft wie geplant, lass dich nicht entmutigen! Der Honigmelonen-Anbau ist ein Lernprozess.
Häufige Probleme und Lösungen:
* Keine Fruchtbildung: Möglicherweise ist die Bestäubung nicht ausreichend. Pflanze bienenfreundliche Pflanzen oder bestäube die Blüten von Hand.
* Fäulnis: Staunässe oder Pilzbefall können zu Fäulnis führen. Sorge für eine gute Drainage und lüfte die Pflanzen regelmäßig.
* Schädlinge: Blattläuse, Schnecken oder andere Schädlinge können die Pflanzen befallen. Setze biologische Schädlingsbekämpfungsmittel ein.
Ich hoffe, dieser Leitfaden hat euch Mut gemacht, eure eigenen Honigmelonen anzubauen. Es ist ein lohnendes Hobby, das euch mit köstlichen Früchten belohnt. Viel Erfolg und viel Spaß beim Gärtnern! Und denkt daran: Geduld und Liebe sind die wichtigsten Zutaten für eine reiche Ernte!
Conclusion
So, there you have it! Mastering the art of growing sweet honeydew melon at home is not just a possibility; it’s an achievable reality with a little know-how and dedication. We’ve walked through the essential steps, from selecting the perfect seeds to nurturing your vines for optimal sweetness. But why is this DIY trick a must-try?
Firstly, the taste. Forget the bland, often disappointing honeydew you find at the grocery store. Homegrown honeydew, ripened on the vine under the warm sun, boasts an unparalleled sweetness and flavor that will redefine your perception of this melon. It’s a taste of summer captured in every juicy bite.
Secondly, control. When you grow your own honeydew, you have complete control over the growing process. You can choose organic methods, avoid harmful pesticides, and ensure your melon is free from unwanted chemicals. This is especially important for those concerned about their health and the environment.
Thirdly, the satisfaction. There’s an undeniable sense of accomplishment that comes with nurturing a plant from seed to harvest. Watching your honeydew vines flourish and produce those beautiful, golden melons is a rewarding experience that connects you to nature and provides a sense of pride.
But the journey doesn’t end here! Feel free to experiment with different varieties of honeydew. Consider trying ‘Honey Globe’ for its classic sweetness or ‘Temptation’ for its early maturity. You can also explore companion planting to enhance the growth and flavor of your honeydew. Marigolds, for example, can deter pests, while basil can improve the overall health of your plants.
Another variation to consider is vertical gardening. If you have limited space, training your honeydew vines to grow up a trellis or fence can be a game-changer. This not only saves space but also improves air circulation, reducing the risk of fungal diseases.
Don’t be afraid to get creative with your growing techniques. Try different soil amendments, experiment with watering schedules, and observe how your plants respond. The more you learn, the better you’ll become at growing sweet honeydew melon.
We strongly encourage you to embark on this exciting gardening adventure. The rewards are well worth the effort. Imagine serving your family and friends slices of your own homegrown, incredibly sweet honeydew melon. It’s a conversation starter, a source of pride, and a delicious treat all rolled into one.
So, grab your seeds, prepare your garden, and get ready to experience the joy of growing your own sweet honeydew melon. And most importantly, don’t forget to share your experiences with us! We’d love to hear about your successes, your challenges, and any tips or tricks you discover along the way. Share your photos, your stories, and your insights in the comments section below. Let’s build a community of honeydew enthusiasts and help each other grow the sweetest, most delicious melons imaginable! Happy gardening!
Frequently Asked Questions (FAQ)
What is the best time of year to plant honeydew melon?
The ideal time to plant honeydew melon is in late spring or early summer, after the last frost has passed and the soil has warmed up to at least 65°F (18°C). Honeydew melons require a long growing season, typically 80-100 days, so starting them early is crucial for a successful harvest. If you live in a region with a shorter growing season, consider starting your seeds indoors 4-6 weeks before the last expected frost. This will give your plants a head start and ensure they have enough time to mature and produce sweet, juicy melons.
How much sunlight does honeydew melon need?
Honeydew melons thrive in full sun, requiring at least 6-8 hours of direct sunlight per day. Sunlight is essential for photosynthesis, the process by which plants convert light energy into chemical energy for growth and fruit production. Insufficient sunlight can result in smaller, less sweet melons. Choose a planting location that receives ample sunlight throughout the day. If you’re growing honeydew melons in containers, make sure to place them in a sunny spot or use grow lights to supplement natural sunlight.
What type of soil is best for growing honeydew melon?
Honeydew melons prefer well-drained, fertile soil with a pH between 6.0 and 6.8. Amend your soil with compost or well-rotted manure to improve its fertility and drainage. Avoid heavy clay soils, as they can retain too much moisture and lead to root rot. If you have clay soil, consider adding sand or other organic matter to improve its drainage. Raised beds are also an excellent option for growing honeydew melons, as they provide good drainage and allow the soil to warm up quickly in the spring.
How often should I water honeydew melon plants?
Honeydew melon plants need consistent watering, especially during hot, dry weather. Water deeply and regularly, aiming to keep the soil consistently moist but not waterlogged. Avoid overhead watering, as it can promote fungal diseases. Instead, water at the base of the plants or use a soaker hose or drip irrigation system. During fruit development, increase watering slightly to ensure the melons receive adequate moisture. However, be careful not to overwater, as this can cause the melons to split or develop a bland taste.
How do I know when a honeydew melon is ripe?
Determining when a honeydew melon is ripe can be tricky, but there are a few key indicators to look for. First, check the color of the melon. A ripe honeydew melon will have a creamy yellow or golden hue. The blossom end (the end opposite the stem) should also be slightly soft to the touch. Another sign of ripeness is a sweet, fragrant aroma emanating from the melon. Finally, the stem should easily slip from the vine when the melon is gently tugged. If the stem is still firmly attached, the melon is not yet ripe.
Are there any common pests or diseases that affect honeydew melon?
Yes, honeydew melons are susceptible to several pests and diseases, including aphids, squash bugs, cucumber beetles, powdery mildew, and fusarium wilt. Regularly inspect your plants for signs of infestation or disease. Use organic pest control methods, such as insecticidal soap or neem oil, to control pests. To prevent fungal diseases, ensure good air circulation around your plants and avoid overhead watering. Choose disease-resistant varieties of honeydew melon to minimize the risk of infection. Crop rotation can also help prevent soilborne diseases.
Can I grow honeydew melon in containers?
Yes, you can grow honeydew melon in containers, but you’ll need a large container with good drainage. Choose a container that is at least 24 inches in diameter and 12 inches deep. Use a high-quality potting mix and amend it with compost or other organic matter. Provide a trellis or other support for the vines to climb. Water regularly and fertilize every 2-3 weeks with a balanced fertilizer. Place the container in a sunny location that receives at least 6-8 hours of direct sunlight per day. Container-grown honeydew melons may require more frequent watering and fertilization than those grown in the ground.
How can I improve the sweetness of my honeydew melon?
Several factors can influence the sweetness of honeydew melon. First, ensure your plants receive adequate sunlight, as sunlight is essential for sugar production. Second, provide consistent watering, but avoid overwatering, especially during the final weeks before harvest. Third, fertilize your plants with a fertilizer that is high in potassium, as potassium promotes sugar development. Finally, allow the melons to ripen fully on the vine before harvesting. Harvesting too early can result in a less sweet melon.
What are some good companion plants for honeydew melon?
Companion planting can benefit honeydew melon by attracting beneficial insects, repelling pests, and improving soil health. Some good companion plants for honeydew melon include marigolds, which deter pests; basil, which improves overall plant health; nasturtiums, which attract aphids away from the melon plants; and radishes, which help break up the soil and improve drainage. Avoid planting honeydew melon near potatoes, as they can compete for nutrients.
How do I save seeds from my honeydew melon for next year?
To save seeds from your honeydew melon, allow the melon to fully ripen on the vine. Once the melon is ripe, cut it open and scoop out the seeds. Rinse the seeds thoroughly to remove any pulp. Spread the seeds out on a paper towel and allow them to dry completely for several days. Once the seeds are dry, store them in an airtight container in a cool, dark, and dry place. Properly stored honeydew melon seeds can remain viable for several years. Remember that hybrid varieties may not produce true-to-type seeds, so you may want to save seeds from heirloom or open-pollinated varieties.
Leave a Comment