
Sweet Potato Planting Tips: Ever dreamt of harvesting a bounty of vibrant, earthy sweet potatoes right from your own backyard? I know I have! There’s something incredibly satisfying about growing your own food, and sweet potatoes are surprisingly easy and rewarding to cultivate, even for beginner gardeners. Forget those bland, store-bought spuds – imagine the rich, sweet flavor of homegrown sweet potatoes gracing your dinner table!
Sweet potatoes have a rich history, dating back thousands of years in South America. They were a staple food for many ancient civilizations and have since spread across the globe, becoming a beloved ingredient in countless cuisines. Beyond their delicious taste, sweet potatoes are packed with nutrients, making them a healthy and wholesome addition to your diet.
But let’s be honest, sometimes gardening can feel a little daunting. That’s where these sweet potato planting tips come in! I’m going to share some simple, DIY tricks and hacks that will help you successfully grow your own sweet potatoes, regardless of your experience level. Whether you have a sprawling garden or just a small patio, these tips will empower you to enjoy the fruits (or rather, the roots!) of your labor. So, grab your gardening gloves, and let’s get started on this sweet potato adventure together!
Grow Your Own Sweet Potatoes: A Beginner’s Guide
Hey there, fellow gardening enthusiasts! I’m so excited to share my tried-and-true method for growing sweet potatoes right in your backyard. It’s easier than you might think, and the reward of harvesting your own delicious, homegrown sweet potatoes is absolutely worth the effort. Let’s dive in!
Getting Started: Choosing Your Sweet Potato and Sprouting Slips
Before we get our hands dirty, we need to prepare our sweet potato “seed” and sprout some slips. Slips are basically the baby sweet potato plants that will eventually become our bountiful harvest.
* Choosing the Right Sweet Potato: Opt for an organic sweet potato. Non-organic ones are often treated to prevent sprouting, which is exactly what we want to happen! Look for one that’s firm, free from blemishes, and preferably has a few “eyes” (those little spots where sprouts will emerge).
* The Water Method: This is my preferred method because it’s so simple.
1. Prepare Your Sweet Potato: Gently wash your sweet potato to remove any dirt.
2. Support System: Find a glass jar or container that’s wide enough to hold the sweet potato. You’ll need to suspend the sweet potato so that only the bottom half is submerged in water. You can use toothpicks inserted around the middle of the sweet potato to rest on the rim of the jar.
3. Add Water: Fill the jar with water, making sure the bottom half of the sweet potato is submerged.
4. Location, Location, Location: Place the jar in a warm, sunny location. A windowsill is perfect!
5. Water Changes: Change the water every few days to keep it fresh and prevent mold growth.
6. Patience is Key: Within a few weeks, you should start to see sprouts emerging from the top of the sweet potato. These are your slips!
* The Soil Method: This method is a bit messier, but some gardeners swear by it.
1. Prepare a Container: Choose a container with drainage holes. Fill it with a well-draining potting mix.
2. Bury the Sweet Potato: Partially bury the sweet potato horizontally in the soil, leaving the top third exposed.
3. Water Gently: Water the soil gently, keeping it consistently moist but not soggy.
4. Warm and Sunny Spot: Place the container in a warm, sunny location.
5. Wait for Sprouts: Similar to the water method, you’ll need to wait a few weeks for sprouts to emerge.
Planting Your Sweet Potato Slips
Once your slips are about 6-8 inches tall and have a good set of roots (if you used the water method), it’s time to plant them in the garden!
* Timing is Everything: Sweet potatoes are warm-weather lovers, so wait until after the last frost and the soil has warmed up to at least 60°F (15°C). I usually aim for late spring or early summer.
* Soil Preparation: Sweet potatoes thrive in well-drained, sandy loam soil. If your soil is heavy clay, amend it with plenty of compost and sand to improve drainage.
1. Choose a Sunny Spot: Sweet potatoes need at least 6-8 hours of sunlight per day.
2. Prepare the Beds: Create raised beds or mounds about 12 inches high and 3 feet apart. This will help with drainage and provide plenty of room for the sweet potatoes to develop.
3. Amend the Soil: Mix in plenty of compost into the raised beds. Sweet potatoes are not heavy feeders, so avoid adding too much nitrogen fertilizer, as this can lead to excessive vine growth and fewer potatoes.
4. Water the Beds: Water the beds thoroughly before planting.
* Planting the Slips:
1. Gently Remove the Slips: Carefully detach the slips from the sweet potato. If you used the water method, they should easily pull away. If you used the soil method, you might need to gently dig them out.
2. Prepare the Planting Holes: Dig holes about 4-6 inches deep and 12 inches apart along the top of the raised beds.
3. Plant the Slips: Place each slip in a hole, burying the stem up to the first set of leaves.
4. Water Thoroughly: Water the newly planted slips thoroughly to help them establish.
5. Mulch (Optional): Add a layer of mulch around the plants to help retain moisture and suppress weeds. Straw or shredded leaves work well.
Caring for Your Sweet Potato Plants
Now that your sweet potato slips are planted, it’s time to provide them with the care they need to thrive.
* Watering: Water regularly, especially during dry spells. Sweet potatoes need consistent moisture, but avoid overwatering, which can lead to root rot. Aim for about 1 inch of water per week.
* Weeding: Keep the area around your sweet potato plants free of weeds. Weeds compete for nutrients and water, which can stunt the growth of your sweet potatoes.
* Fertilizing (Optional): If your soil is particularly poor, you can side-dress your sweet potato plants with a balanced fertilizer a few weeks after planting. However, be careful not to over-fertilize, as this can lead to excessive vine growth.
* Vine Management: Sweet potato vines can grow quite long and spread out. To prevent them from taking over your garden, you can prune them back as needed. You can also lift the vines occasionally to prevent them from rooting at the nodes, which can divert energy away from the developing potatoes.
* Pest and Disease Control: Sweet potatoes are generally resistant to pests and diseases, but keep an eye out for common garden pests like aphids and flea beetles. If you notice any problems, treat them with an appropriate organic insecticide or fungicide.
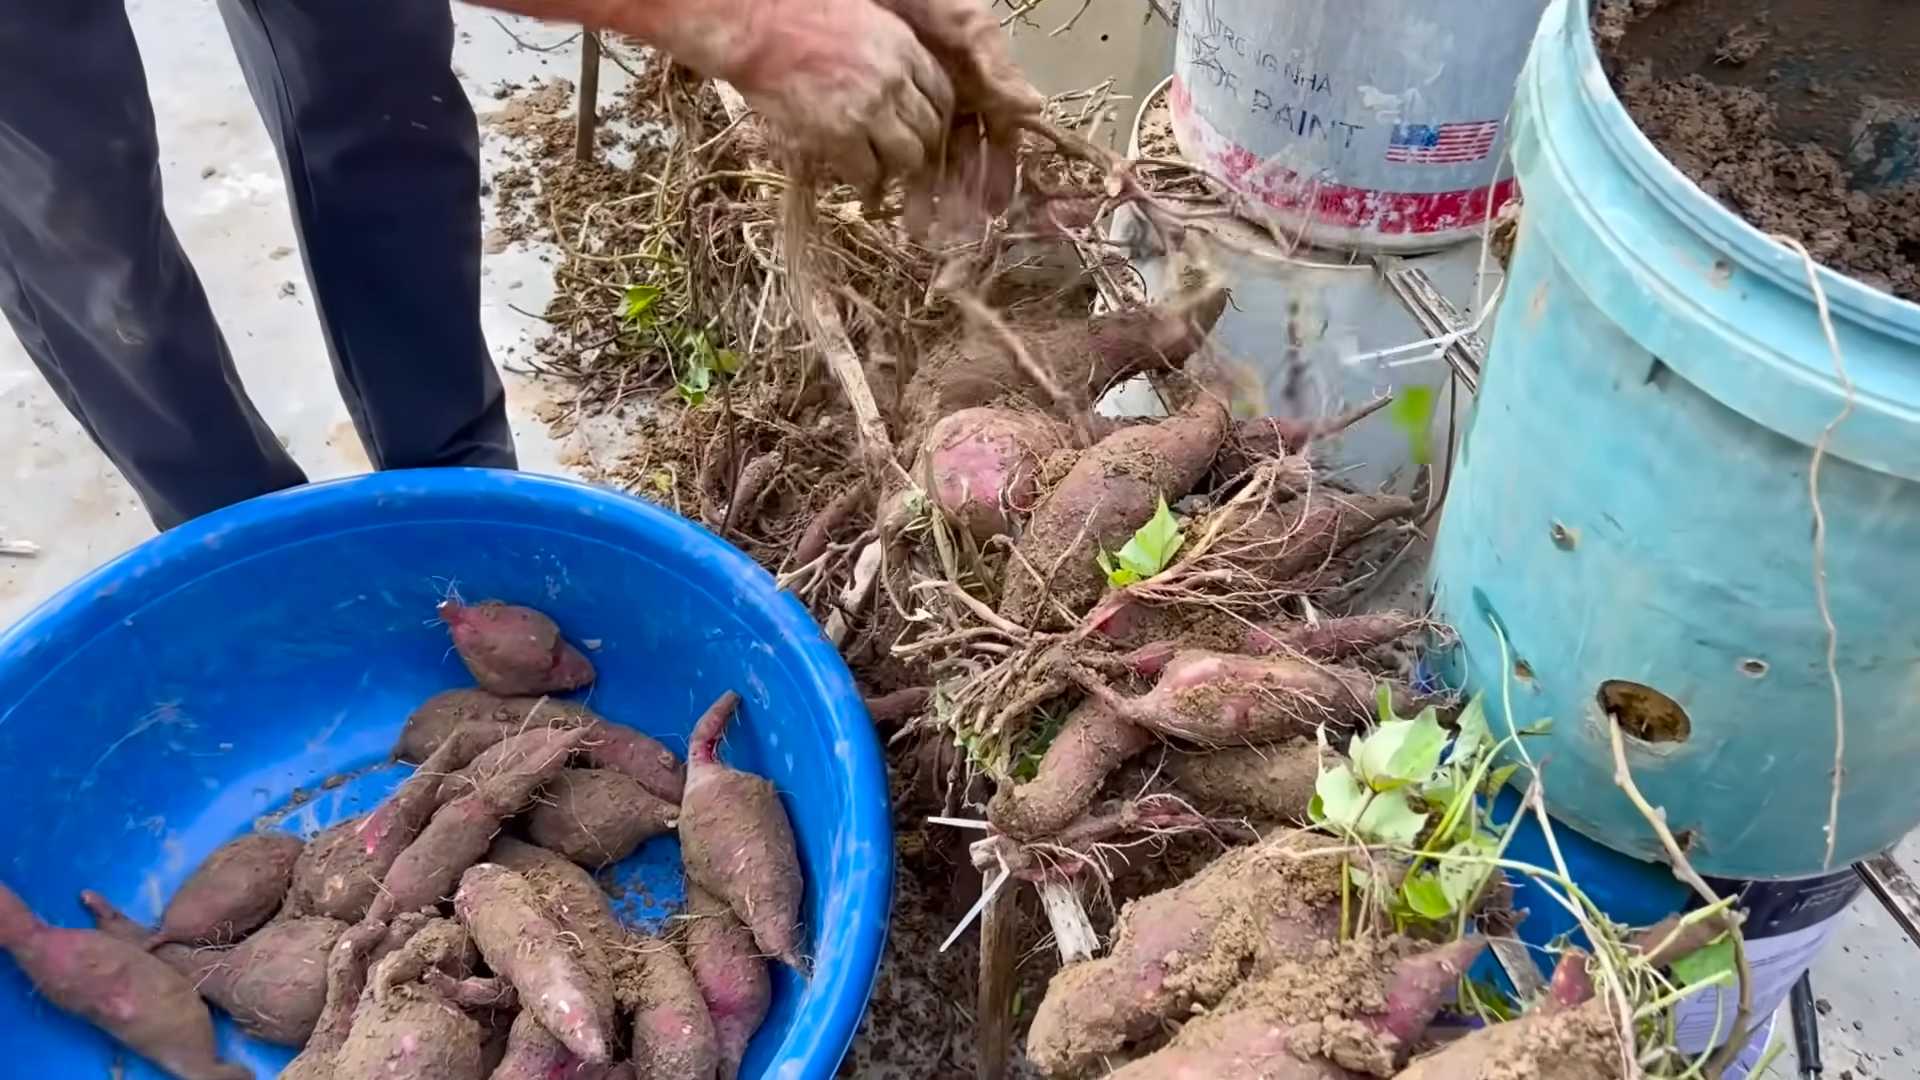
Harvesting Your Sweet Potatoes
The moment we’ve all been waiting for! Harvesting your own sweet potatoes is a truly rewarding experience.
* Timing is Key: Sweet potatoes are typically ready to harvest about 90-120 days after planting. A good indicator is when the leaves start to turn yellow and the vines begin to die back.
* Choose a Dry Day: Harvest your sweet potatoes on a dry day to prevent them from rotting during curing.
* Dig Carefully: Use a garden fork or shovel to carefully dig around the plants, being careful not to damage the sweet potatoes. Start digging a foot or so away from the base of the plant to avoid accidentally spearing the potatoes.
* Gently Lift the Potatoes: Once you’ve loosened the soil, gently lift the sweet potatoes out of the ground.
* Handle with Care: Sweet potatoes are delicate and can bruise easily, so handle them with care.
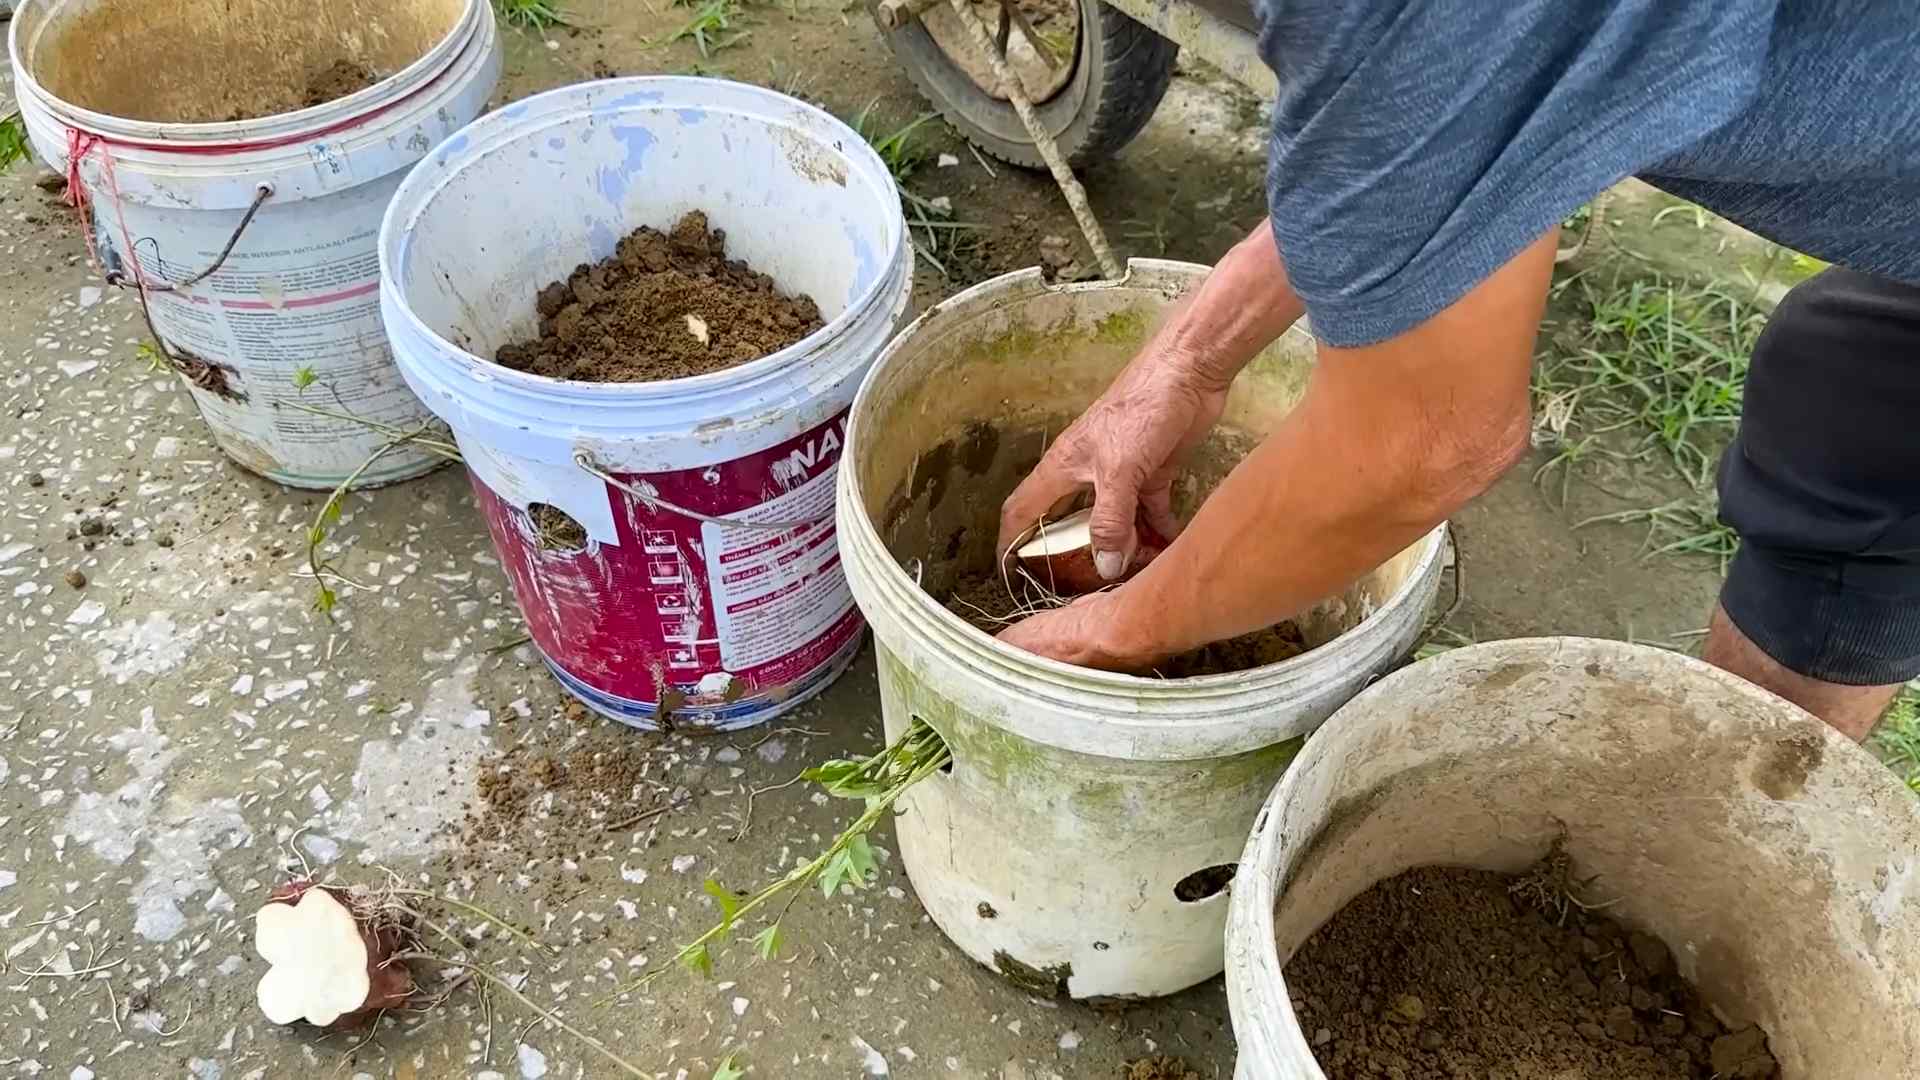
Curing Your Sweet Potatoes
Curing is an essential step in the sweet potato growing process. It allows the skins to harden and the starches to convert to sugars, resulting in a sweeter, more flavorful potato.
* Don’t Wash Them: Brush off any excess dirt, but don’t wash the sweet potatoes.
* Curing Conditions: Place the sweet potatoes in a warm, humid location with good ventilation. The ideal temperature is around 80-85°F (27-29°C) and the humidity should be around 85-90%.
* Curing Time: Cure the sweet potatoes for about 7-10 days.
* Storage: After curing, store the sweet potatoes in a cool, dry, and dark place. The ideal storage temperature is around 55-60°F (13-16°C). Properly cured and stored sweet potatoes can last for several months.
Troubleshooting
Even with the best planning, sometimes things don’t go exactly as expected. Here are a few common problems you might encounter and how to address them:
* Slips Not Sprouting: If your sweet potato isn’t sprouting, make sure it’s getting enough warmth and sunlight. Also, check the water regularly and change it if it becomes cloudy.
* Yellowing Leaves: Yellowing leaves can be a sign of nutrient deficiency or overwatering. Check the soil moisture and consider adding a balanced fertilizer.
* Pest Problems: If you notice pests on your sweet potato plants, treat them with an appropriate organic insecticide.
* Root Rot: Root rot is caused by overwatering. Make sure your soil is well-draining and avoid watering too frequently.
Enjoying Your Harvest
Congratulations! You’ve successfully grown your own sweet potatoes. Now it’s time to enjoy the fruits (or rather, vegetables) of your labor. Sweet potatoes are incredibly versatile and can be used in a variety of dishes, from sweet potato fries and casseroles to soups and st
Conclusion
So, there you have it! Mastering these sweet potato planting tips isn’t just about growing vegetables; it’s about cultivating a rewarding experience, connecting with nature, and enjoying the unparalleled flavor of homegrown goodness. We’ve walked you through the process, from selecting the perfect slips to nurturing them into thriving plants, and now it’s your turn to get your hands dirty.
Why is this DIY approach a must-try? Because store-bought sweet potatoes simply can’t compare to the vibrant taste and nutritional value of those you’ve grown yourself. You control the entire process, ensuring organic practices and avoiding harmful chemicals. Plus, there’s an undeniable satisfaction in harvesting something you’ve nurtured from start to finish. It’s a tangible connection to the earth and a delicious reward for your efforts.
But don’t stop there! Feel free to experiment with different varieties of sweet potatoes. Beauregard, with its classic orange flesh, is a reliable choice, but why not try a Japanese sweet potato with its creamy white interior or a purple sweet potato for a visually stunning and antioxidant-rich treat? You can also explore different planting methods. While we focused on traditional in-ground planting, consider raised beds or even large containers if you have limited space. Raised beds can improve drainage and soil warmth, leading to earlier harvests. Container gardening allows you to move your sweet potatoes to optimal sun exposure throughout the day.
Another variation to consider is companion planting. Marigolds can deter nematodes, while beans can help fix nitrogen in the soil, benefiting your sweet potato plants. Experiment with different combinations to see what works best in your garden.
Remember, gardening is a journey of learning and discovery. Don’t be afraid to make mistakes – they’re valuable lessons in disguise. The most important thing is to get started and enjoy the process.
We are confident that with these sweet potato planting tips, you’ll be well on your way to a bountiful harvest. But we also want to hear from you! Share your experiences, successes, and challenges in the comments below. What varieties did you try? What planting methods did you find most effective? What unexpected hurdles did you overcome? Your insights can help other gardeners learn and grow, creating a vibrant community of sweet potato enthusiasts.
So, grab your gardening gloves, prepare your soil, and get ready to embark on a sweet potato adventure. We can’t wait to hear about your delicious results! Happy planting!
Frequently Asked Questions (FAQ)
What are sweet potato slips and where can I get them?
Sweet potato slips are sprouts that grow from a mature sweet potato. They are essentially baby sweet potato plants ready to be transplanted into your garden. You can either grow your own slips from a sweet potato purchased at the grocery store (make sure it’s organic and hasn’t been treated to prevent sprouting) or purchase them from a reputable nursery or online seed supplier. Growing your own slips is a fun and cost-effective way to start your sweet potato crop. To do this, suspend the sweet potato in a jar of water, with the bottom half submerged, using toothpicks. Place the jar in a warm, sunny location, and wait for the slips to sprout. Once the slips are 6-8 inches long, gently twist them off the sweet potato and root them in water before planting.
When is the best time to plant sweet potatoes?
The ideal time to plant sweet potatoes is after all danger of frost has passed and the soil has warmed to at least 65 degrees Fahrenheit. This typically occurs in late spring or early summer, depending on your climate. Sweet potatoes are heat-loving plants and will not thrive in cold soil. Planting too early can stunt their growth and reduce your yield. Check your local weather forecast and soil temperature before planting to ensure optimal conditions. A soil thermometer is a valuable tool for determining soil temperature.
How much sun do sweet potatoes need?
Sweet potatoes require at least 6-8 hours of direct sunlight per day to thrive. Choose a planting location that receives ample sunlight throughout the day. Insufficient sunlight can result in smaller tubers and reduced yields. If you live in a particularly hot climate, some afternoon shade may be beneficial to prevent the plants from scorching.
What type of soil is best for growing sweet potatoes?
Sweet potatoes prefer well-drained, sandy loam soil. Heavy clay soil can restrict root growth and lead to misshapen tubers. Amend heavy clay soil with compost, sand, and other organic matter to improve drainage and aeration. The ideal soil pH for sweet potatoes is between 6.0 and 6.5. Conduct a soil test to determine your soil’s pH and nutrient levels and amend accordingly.
How often should I water sweet potatoes?
Water sweet potatoes regularly, especially during dry periods. Keep the soil consistently moist, but avoid overwatering, which can lead to root rot. Water deeply and less frequently, rather than shallowly and more often. Mulching around the plants can help retain moisture in the soil and reduce the need for frequent watering.
Do sweet potatoes need fertilizer?
Sweet potatoes benefit from a balanced fertilizer, but avoid over-fertilizing with nitrogen, which can promote excessive vine growth at the expense of tuber development. A fertilizer with a higher phosphorus and potassium content is ideal. Apply fertilizer according to the package directions, and avoid getting fertilizer on the foliage.
How do I control pests and diseases in sweet potatoes?
Sweet potatoes are generally resistant to pests and diseases, but some common problems include sweet potato weevils, nematodes, and fungal diseases. Practice crop rotation to prevent the buildup of soilborne pests and diseases. Use row covers to protect plants from insect pests. Choose disease-resistant varieties whenever possible. If you encounter pest or disease problems, consult with your local agricultural extension office for recommendations on appropriate control measures.
When and how do I harvest sweet potatoes?
Sweet potatoes are typically ready to harvest about 90-120 days after planting, depending on the variety and growing conditions. The leaves will begin to yellow and the vines will start to die back when the tubers are mature. Harvest on a dry day to prevent the tubers from rotting. Carefully dig around the plants with a garden fork, being careful not to damage the tubers. Gently lift the tubers from the soil and brush off any excess dirt.
How do I cure sweet potatoes after harvesting?
Curing sweet potatoes is essential for improving their flavor and storage life. Cure the tubers in a warm, humid place (80-85 degrees Fahrenheit and 85-90% humidity) for 7-10 days. This allows the skins to harden and any minor cuts or bruises to heal. After curing, store the sweet potatoes in a cool, dry, and well-ventilated place (55-60 degrees Fahrenheit). Avoid storing them in the refrigerator, as this can cause them to develop a hard core.
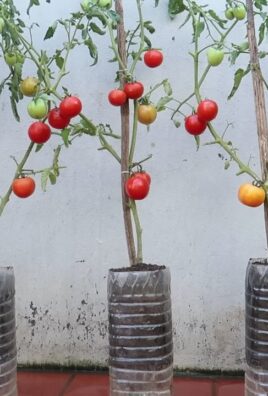
Can I grow sweet potatoes in containers?
Yes, you can grow sweet potatoes in containers, but you’ll need a large container (at least 20 gallons) with good drainage. Choose a bush-type variety of sweet potato that is better suited for container growing. Fill the container with a well-draining potting mix and provide ample sunlight and water. Container-grown sweet potatoes may not produce as many tubers as those grown in the ground, but they can still provide a satisfying harvest.
What are some common mistakes to avoid when growing sweet potatoes?
Some common mistakes to avoid when growing sweet potatoes include planting too early, overwatering, over-fertilizing with nitrogen, and neglecting to cure the tubers after harvesting. Pay attention to the specific needs of sweet potatoes and provide them with the proper care to ensure a successful harvest.
Are sweet potato leaves edible?
Yes, sweet potato leaves are edible and nutritious! They can be cooked and eaten like spinach or other leafy greens. Harvest young, tender leaves for the best flavor. Sweet potato leaves are a good source of vitamins A and C, as well as fiber and antioxidants.
Leave a Comment