
Growing Garlic in Bottles might sound a little unconventional, but trust me, it’s a game-changer for any home gardener, especially if you’re short on space! Have you ever dreamt of having a constant supply of fresh, pungent garlic right at your fingertips, without dedicating a huge chunk of your garden? Well, this DIY trick is your answer!
Garlic, with its rich history dating back thousands of years, has been cultivated not only for its culinary uses but also for its medicinal properties. From ancient Egypt, where it fueled the pyramid builders, to its prominent role in various cultures worldwide, garlic has always been a staple. But let’s face it, traditional gardening can be time-consuming and requires a lot of space. That’s where this clever hack comes in.
I know what you’re thinking: “Why bottles?” Well, growing garlic in bottles is an ingenious way to maximize your yield, minimize space, and even add a touch of quirky charm to your balcony or patio. It’s perfect for apartment dwellers, urban gardeners, or anyone who wants to experiment with a fun and rewarding project. Plus, it’s incredibly satisfying to watch those green shoots emerge from something you’ve created yourself. So, let’s dive into this simple yet effective method of growing garlic in bottles and unlock a world of fresh, homegrown flavor!
Growing Garlic in Bottles: An Urban Gardener’s Dream
Hey there, fellow plant enthusiasts! Ever dreamed of having fresh garlic readily available, even if you don’t have a sprawling garden? Well, I’m here to tell you that it’s totally possible, and surprisingly easy, to grow garlic right in your own home using recycled bottles! This method is perfect for apartment dwellers, balcony gardeners, or anyone who just wants a fun and unique way to cultivate their own food. Let’s dive in!
What You’ll Need
Before we get our hands dirty, let’s gather all the necessary supplies. Trust me, having everything ready beforehand will make the whole process much smoother.
* Garlic Cloves: Choose organic garlic from a local farmer’s market or grocery store. Avoid garlic from China, as it may be treated to prevent sprouting. Look for plump, healthy cloves with no signs of mold or damage. One head of garlic should be enough for a few bottles.
* Plastic Bottles: I prefer using 2-liter soda bottles or larger water bottles. The bigger the bottle, the more room your garlic will have to grow. Make sure they’re clean and dry before we start.
* Potting Soil: Use a high-quality potting mix that drains well. Avoid using garden soil, as it can become compacted in containers and hinder root growth.
* Scissors or a Utility Knife: For cutting the bottles. Be careful!
* Drill or Nail and Hammer: To create drainage holes.
* Watering Can or Spray Bottle: For watering your garlic.
* Optional: Pebbles or Gravel: To improve drainage at the bottom of the bottle.
* Optional: Plant Labels: To keep track of different garlic varieties (if you’re feeling fancy!).
Preparing the Bottles
This is where we transform those discarded bottles into mini-gardens. It’s a simple process, but take your time and be careful when using sharp tools.
1. Clean the Bottles: Wash the bottles thoroughly with soap and water to remove any residue. Rinse them well and let them dry completely.
2. Cut the Bottles: There are a couple of ways you can cut the bottles, depending on the look you’re going for.
* Option 1: Vertical Planting (My Favorite!): Cut the bottle in half horizontally. You’ll be using the bottom half as your planter. The top half can be discarded or used as a mini-greenhouse cover later on.
* Option 2: Horizontal Planting: Cut a rectangular opening along the side of the bottle, leaving the top and bottom intact. This creates a trough-like planter.
3. Create Drainage Holes: This is crucial for preventing waterlogging, which can rot your garlic. If you’re using a drill, carefully drill several holes in the bottom of the bottle. If you don’t have a drill, you can use a nail and hammer to create the holes. Just be careful not to crack the plastic.
4. Add Drainage Layer (Optional): Place a layer of pebbles or gravel at the bottom of the bottle to further improve drainage. This isn’t strictly necessary, but it can be helpful, especially if you tend to overwater.
Planting the Garlic
Now for the fun part – getting those garlic cloves into their new homes!
1. Fill the Bottle with Potting Soil: Fill the prepared bottle with potting soil, leaving about an inch of space at the top. Gently pat down the soil to remove any air pockets.
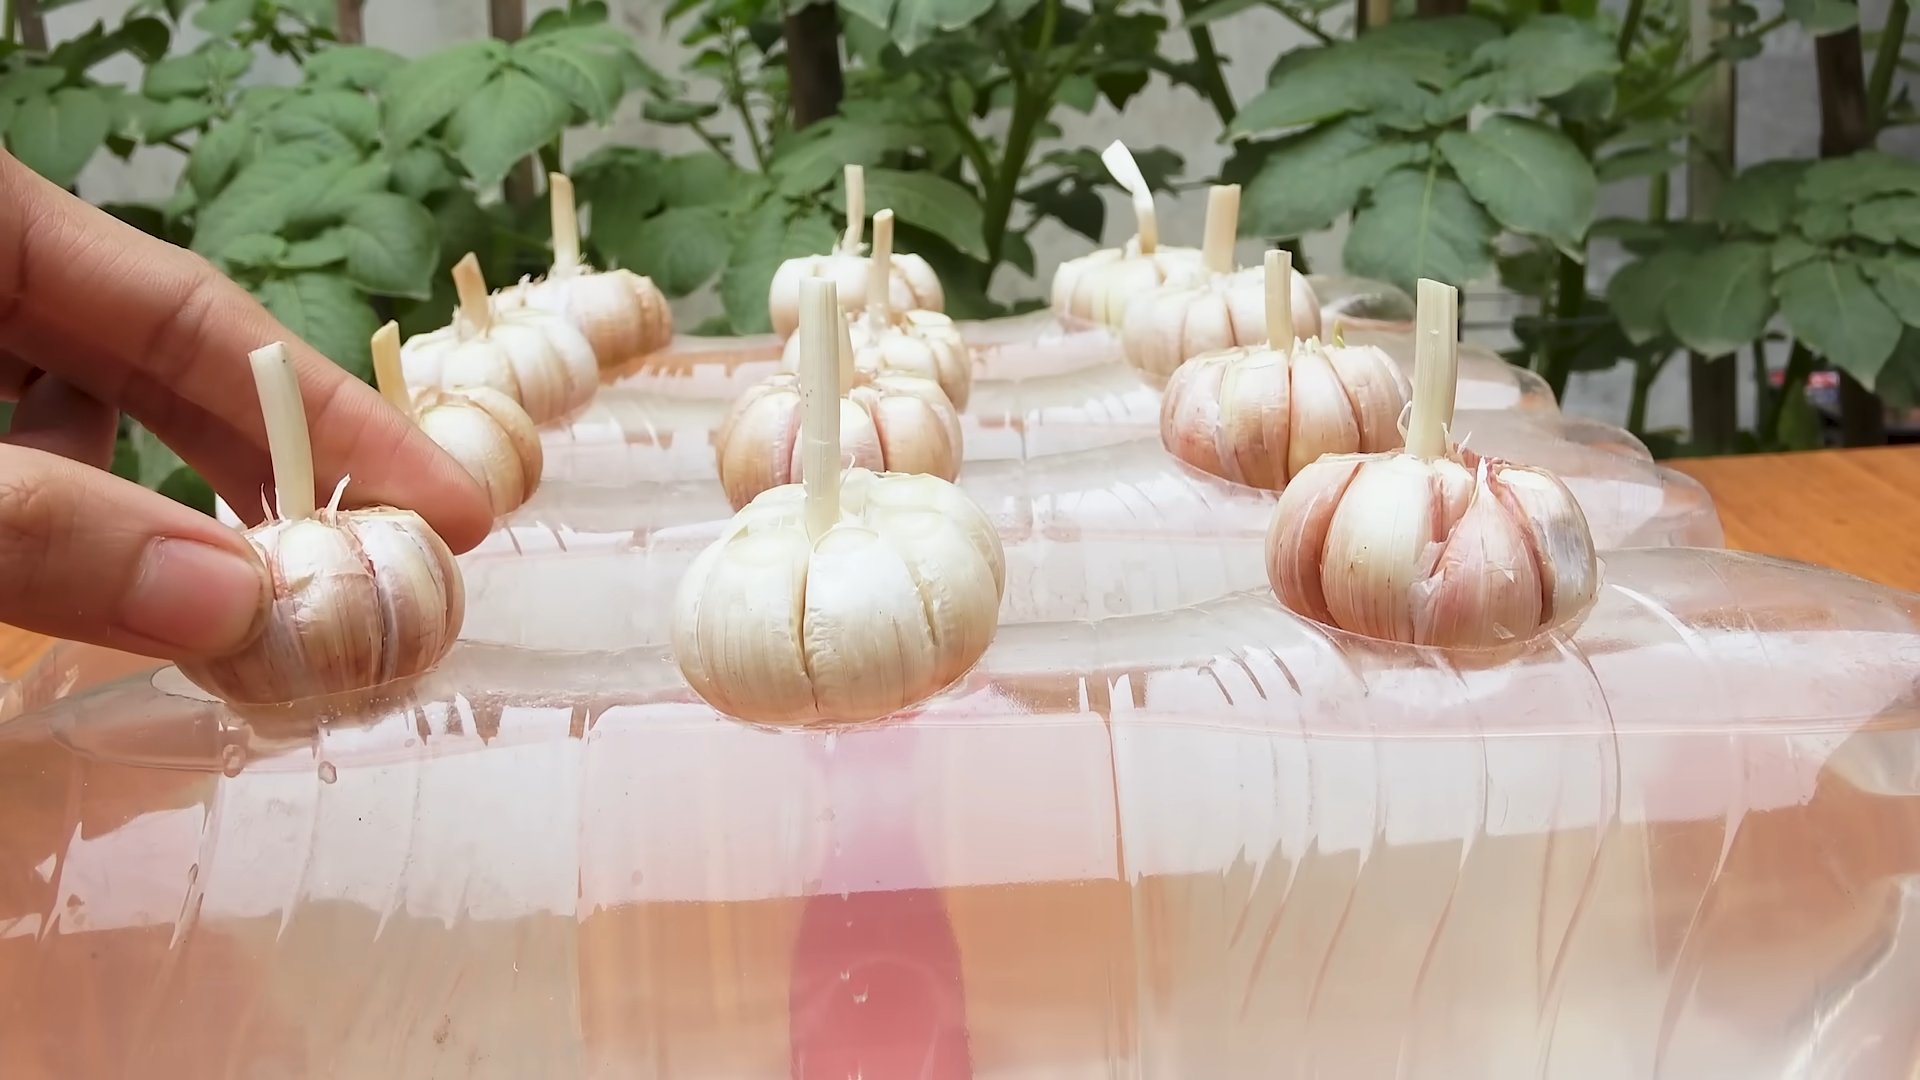
2. Separate the Garlic Cloves: Carefully separate the cloves from the garlic head, being careful not to damage them. Leave the papery skin on the cloves.
3. Plant the Cloves: Plant the cloves pointy-end up, about 2-3 inches deep and 4-6 inches apart. If you’re using a larger bottle, you can plant more cloves.
4. Water Gently: Water the soil gently until it’s evenly moist but not soggy. Avoid overwatering, as this can lead to rot.
Caring for Your Garlic
Growing garlic in bottles is relatively low-maintenance, but there are a few things you’ll need to keep in mind to ensure a successful harvest.
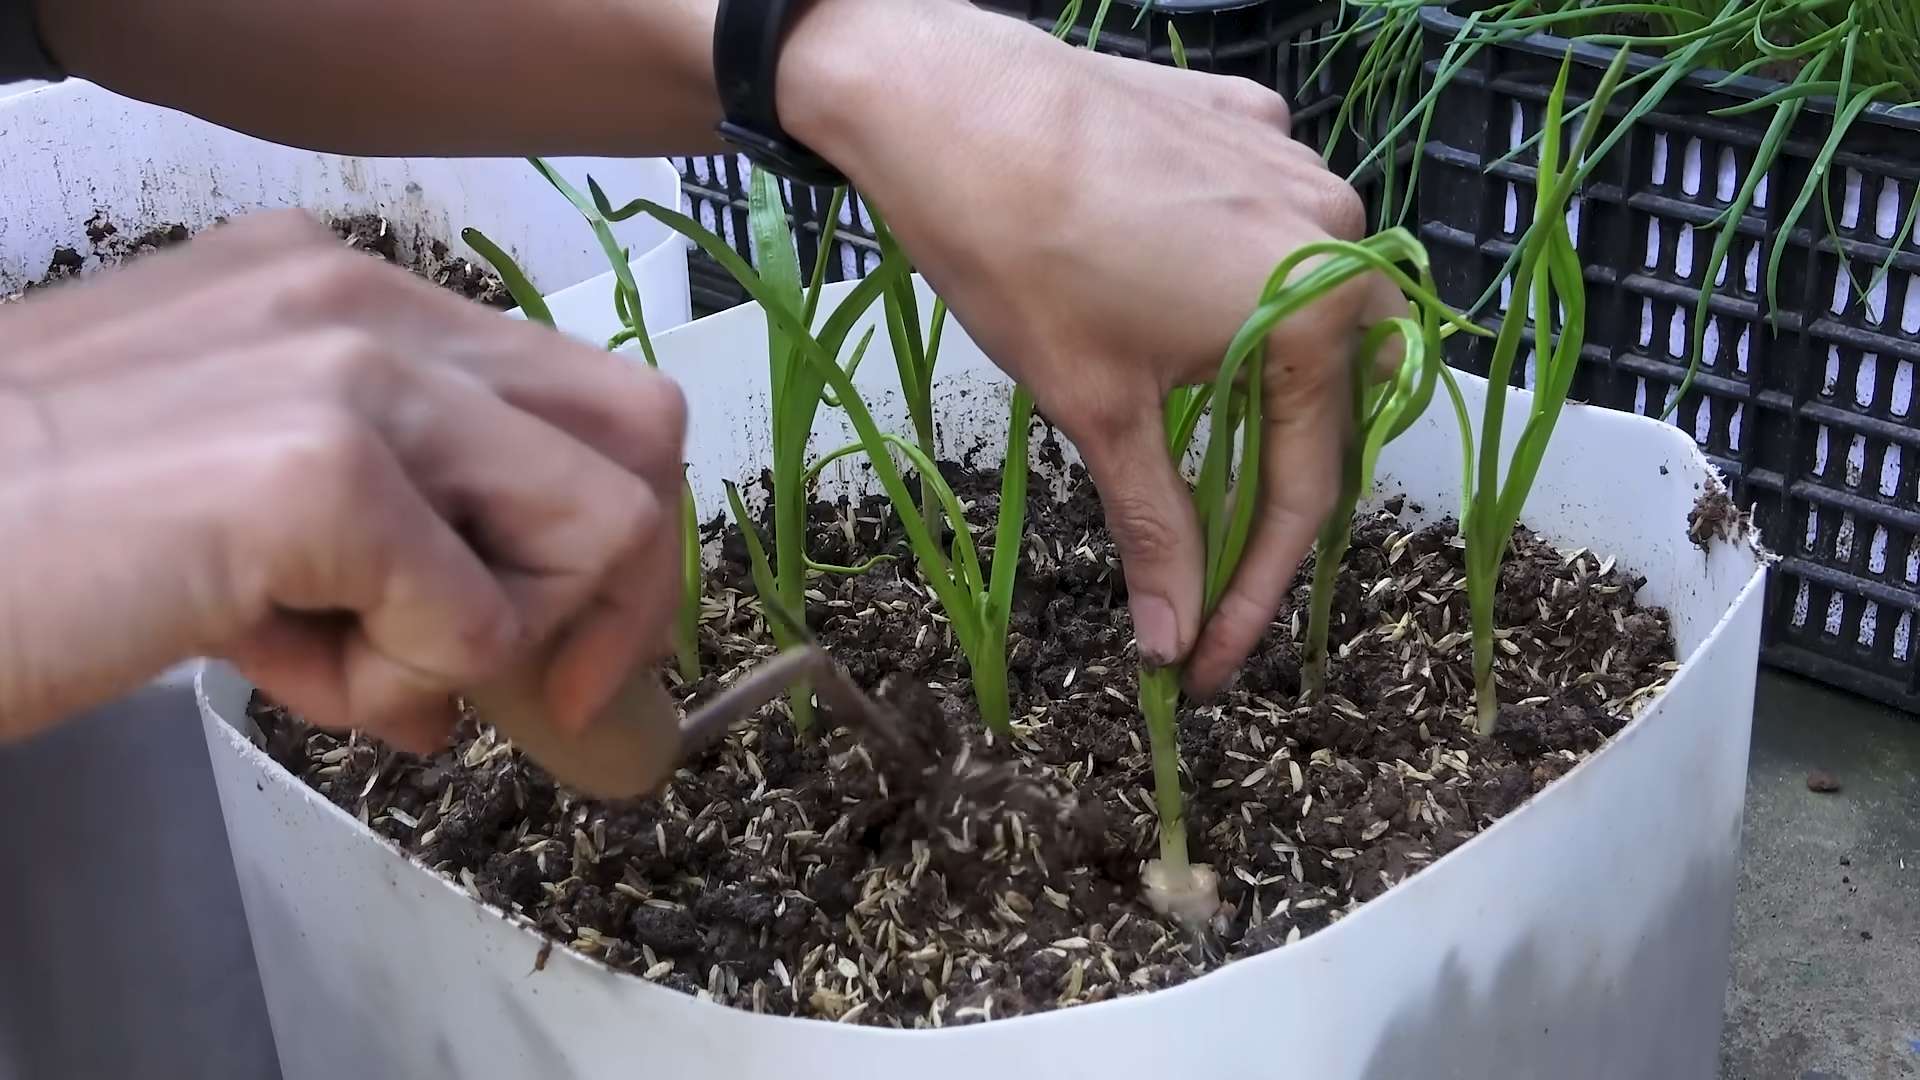
1. Sunlight: Garlic needs at least 6 hours of sunlight per day. Place your bottles in a sunny location, such as a windowsill, balcony, or patio. If you don’t have enough natural light, you can supplement with a grow light.
2. Watering: Water your garlic regularly, but avoid overwatering. The soil should be moist but not soggy. Check the soil moisture by sticking your finger into the soil. If it feels dry, it’s time to water.
3. Fertilizing: Garlic is a heavy feeder, so it benefits from regular fertilization. Use a balanced liquid fertilizer every 2-3 weeks. Follow the instructions on the fertilizer label.
4. Temperature: Garlic prefers cool temperatures, ideally between 50-70°F (10-21°C). Avoid exposing your garlic to extreme temperatures.
5. Pest Control: Garlic is generally pest-resistant, but it can occasionally be affected by aphids or other pests. If you notice any pests, you can spray them with insecticidal soap or neem oil.
6. Mulching (Optional): Adding a layer of mulch, such as straw or wood chips, can help to retain moisture, suppress weeds, and regulate soil temperature.
Harvesting Your Garlic
The moment we’ve all been waiting for! Harvesting your homegrown garlic is incredibly rewarding.
1. When to Harvest: Garlic is typically ready to harvest in late spring or early summer, about 8-9 months after planting. Look for signs that the leaves are starting to turn yellow or brown and fall over.
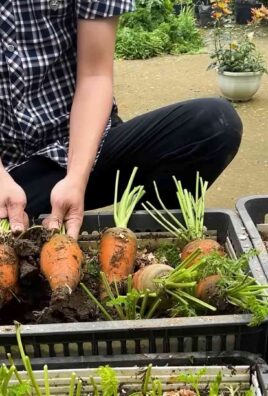
2. How to Harvest: Gently loosen the soil around the garlic bulb with a trowel or fork. Carefully pull the bulb out of the soil, being careful not to damage it.
3. Curing the Garlic: After harvesting, you’ll need to cure the garlic to improve its flavor and storage life.
* Cleaning: Gently brush off any excess soil from the bulbs. Don’t wash them!
* Drying: Tie the garlic plants together in bundles and hang them in a cool, dry, well-ventilated place for 2-3 weeks. You can also spread the bulbs out on a screen or rack.
* Trimming: Once the garlic is cured, trim the roots and stems. You can leave a few inches of stem on the bulbs for braiding.
4. Storing the Garlic: Store your cured garlic in a cool, dry, well-ventilated place. Braided garlic can be hung in the kitchen for easy access. Individual bulbs can be stored in a mesh bag or basket. Properly cured and stored garlic can last for several months.
Troubleshooting
Even with the best intentions, things don’t always go according to plan. Here are a few common problems you might encounter when growing garlic in bottles and how to fix them.
* Yellowing Leaves: This could be a sign of overwatering, underwatering, or nutrient deficiency. Check the soil moisture and adjust your watering schedule accordingly. Fertilize your garlic with a balanced fertilizer.
* Rotting Bulbs: This is usually caused by overwatering or poor drainage. Make sure your bottles have adequate drainage holes and avoid overwatering.
* Small Bulbs: This could be due to insufficient sunlight, poor soil, or lack of fertilization. Make sure your garlic is getting enough sunlight and fertilize it regularly.
* Pests: If you notice any pests, such as aphids or spider mites, spray them with insecticidal soap or neem oil.
Tips and Tricks for Success
Here are a few extra tips and tricks to help you grow the best garlic possible in bottles:
* Choose the Right Variety: Some garlic varieties are better suited for container growing than others. Softneck garlic varieties, such as Artichoke and Silverskin, tend to be more productive in containers.
* Rotate Your Crops: Avoid planting garlic in the same bottles year after year, as this can deplete the soil of nutrients. Rotate your crops with other vegetables or herbs.
* Use a Soil Thermometer: A soil thermometer can help you monitor the soil temperature and ensure that it’s within the optimal range for garlic growth.
* Experiment with Different Bottle Sizes: Try growing garlic in different sized bottles to see which ones work best for you.
* Have Fun! Growing garlic in bottles is a fun and rewarding experience. Don’t be afraid to experiment and try new things.
So there you have it! Growing garlic in bottles is a simple, sustainable, and rewarding way to enjoy fresh, homegrown garlic, even if you don’t have a traditional garden. I hope this guide has inspired you to give it a try. Happy gardening!
Conclusion
So, there you have it! Growing garlic in bottles is not just a quirky gardening experiment; it’s a game-changer for urban dwellers, space-conscious gardeners, and anyone who wants fresh, flavorful garlic readily available. This method transforms ordinary plastic bottles into miniature garlic farms, offering a sustainable and incredibly rewarding experience.
Why is this DIY trick a must-try? Firstly, it’s incredibly space-efficient. Forget sprawling garden beds; a sunny windowsill or balcony corner is all you need. Secondly, it’s a fantastic way to recycle plastic bottles, turning waste into a productive resource. Thirdly, you gain complete control over the growing environment, minimizing pests and diseases that often plague traditional garlic crops. Finally, and perhaps most importantly, the taste of homegrown garlic is simply unparalleled – a vibrant, pungent flavor that elevates any dish.
But the beauty of this method lies in its adaptability. Feel free to experiment with different varieties of garlic. Softneck varieties, known for their braiding capabilities and milder flavor, often thrive in container environments. Hardneck varieties, with their bolder taste and impressive scapes, can also be grown, but may require slightly larger bottles. Consider adding companion plants like basil or thyme to your bottles. These herbs not only deter pests but also enhance the overall aroma and aesthetic appeal of your miniature garlic garden. You can also experiment with different soil mixes. While a standard potting mix works well, adding compost or worm castings can significantly boost nutrient levels and improve drainage.
Don’t be afraid to get creative with your bottle design. Paint them, decorate them, or even create a vertical garden by stacking multiple bottles. The possibilities are endless!
We wholeheartedly encourage you to try this DIY garlic growing method. It’s a simple, sustainable, and incredibly satisfying way to enjoy fresh, homegrown garlic. Once you’ve harvested your first crop, you’ll be amazed at the difference in flavor and quality compared to store-bought garlic.
More than just a gardening project, growing garlic in bottles is a step towards self-sufficiency and a deeper connection with the food we eat. It’s a reminder that even in the smallest of spaces, we can cultivate abundance and enjoy the simple pleasures of nature.
So, grab some bottles, some soil, and some garlic cloves, and embark on this exciting gardening adventure. We’re confident that you’ll be thrilled with the results. And most importantly, we want to hear about your experience! Share your photos, tips, and stories with us in the comments below. Let’s build a community of bottle-grown garlic enthusiasts and inspire others to embrace this innovative and rewarding gardening technique. Let us know what challenges you faced and what worked best for you. Your insights will help others succeed and further refine this fantastic DIY method. Happy growing!
Frequently Asked Questions (FAQ)
What type of garlic grows best in bottles?
While you can grow almost any type of garlic in bottles, softneck varieties generally perform better due to their adaptability to container environments. Softneck garlic tends to be more tolerant of varying moisture levels and doesn’t require as much cold stratification as some hardneck varieties. However, hardneck varieties can also be successfully grown, especially if you provide adequate drainage and ensure they experience a period of cold temperatures before planting. Experimenting with different varieties is part of the fun!
How many garlic cloves can I plant in one bottle?
This depends on the size of your bottle. For a standard 2-liter bottle, planting one to three cloves is generally recommended. Overcrowding can lead to smaller bulbs and increased competition for nutrients. Ensure each clove has enough space to develop properly. If you’re using smaller bottles, stick to planting just one clove per bottle.
What kind of soil should I use for growing garlic in bottles?
A well-draining potting mix is ideal. You can also amend the potting mix with compost or worm castings to provide additional nutrients. Avoid using garden soil, as it can be too heavy and may not drain well, leading to root rot. A good mix would be equal parts potting mix, compost, and perlite or vermiculite for added drainage.
How often should I water my bottle-grown garlic?
Water regularly, keeping the soil consistently moist but not waterlogged. Check the soil moisture by sticking your finger about an inch into the soil. If it feels dry, it’s time to water. During warmer months, you may need to water more frequently. Ensure the bottles have drainage holes to prevent water from accumulating at the bottom.
How much sunlight does bottle-grown garlic need?
Garlic needs at least 6-8 hours of direct sunlight per day to thrive. Place your bottles in a sunny location, such as a south-facing windowsill or balcony. If you don’t have enough natural sunlight, you can supplement with grow lights.
When is the best time to plant garlic in bottles?
The best time to plant garlic is in the fall, about 4-6 weeks before the first expected frost. This allows the cloves to develop roots before winter sets in. However, you can also plant garlic in early spring, although the bulbs may not be as large. If planting in spring, consider chilling the cloves in the refrigerator for a few weeks before planting to mimic the cold stratification process.
How long does it take to grow garlic in bottles?
Garlic typically takes about 8-9 months to mature. You’ll know it’s ready to harvest when the lower leaves start to turn yellow and brown.
How do I harvest garlic from bottles?
Carefully remove the soil and gently pull the garlic bulbs from the bottle. Be careful not to damage the bulbs. Once harvested, cure the garlic by hanging it in a cool, dry, and well-ventilated place for a few weeks. This allows the outer layers to dry and helps to preserve the garlic.
Can I reuse the soil from my garlic bottles?
It’s generally not recommended to reuse the soil for growing garlic, as it may contain pathogens or depleted nutrients. However, you can amend the soil with compost and other organic matter and use it for other plants that are not susceptible to the same diseases as garlic.
What are some common problems when growing garlic in bottles, and how can I prevent them?
Common problems include root rot (caused by overwatering), pests (such as aphids or mites), and fungal diseases. To prevent root rot, ensure the bottles have good drainage and avoid overwatering. To control pests, inspect your plants regularly and treat them with organic insecticides if necessary. To prevent fungal diseases, provide good air circulation and avoid overhead watering.
Can I grow garlic scapes in bottles?
Yes, you can grow garlic scapes in bottles, especially if you’re growing hardneck varieties. Garlic scapes are the flower stalks that emerge from hardneck garlic plants. They are delicious and can be used in a variety of dishes. Simply harvest the scapes when they curl and become tender.
Is growing garlic in bottles organic?
Yes, growing garlic in bottles can be organic if you use organic potting mix, compost, and pest control methods. Avoid using synthetic fertilizers or pesticides.
How do I store my harvested garlic?
Store your cured garlic in a cool, dry, and well-ventilated place. You can braid the garlic or store the bulbs individually in a mesh bag or basket. Properly stored garlic can last for several months.
Can I grow other plants with garlic in the same bottle?
Yes, you can grow companion plants with garlic in the same bottle. Good companion plants for garlic include basil, thyme, rosemary, and chamomile. These herbs can help to deter pests and improve the overall health of your garlic plants.
What if I don’t have a sunny windowsill or balcony?
If you don’t have a sunny windowsill or balcony, you can use grow lights to provide the necessary light for your garlic plants. Place the grow lights a few inches above the plants and keep them on for 12-16 hours per day.
Leave a Comment