
Terrace gardening beetroot – sounds like a delicious adventure, doesn’t it? Imagine stepping onto your terrace and harvesting your own vibrant, earthy beetroot, ready to be transformed into a refreshing salad or a hearty roasted dish. But let’s be honest, the thought of growing anything, especially root vegetables, in a limited space can feel a bit daunting.
For centuries, rooftop and terrace gardens have been a symbol of resourcefulness and connection to nature, especially in urban environments. From the Hanging Gardens of Babylon to the modern-day urban farming movement, the desire to cultivate our own food in limited spaces is deeply ingrained in our history. But why should you bother with terrace gardening beetroot? Well, beyond the sheer joy of nurturing life, growing your own beetroot on your terrace offers a fantastic way to access fresh, organic produce, reduce your carbon footprint, and add a touch of green to your concrete jungle.
Let’s face it, store-bought vegetables often lack the flavor and nutrients of homegrown ones. Plus, knowing exactly where your food comes from and how it was grown gives you peace of mind. In this DIY guide, I’m going to share some simple yet effective tricks and hacks to help you successfully cultivate beetroot in your terrace garden, even if you’re a complete beginner. Get ready to get your hands dirty and enjoy the sweet rewards of your labor!
Terrasse Gartenarbeit: Wie du deine eigenen Rüben anbaust!
Hallo Gartenfreunde! Ich freue mich riesig, euch heute zu zeigen, wie ihr eure eigenen, köstlichen Rüben direkt auf eurer Terrasse anbauen könnt. Es ist einfacher als ihr denkt und das Ergebnis ist einfach unschlagbar – frische, knackige Rüben, die ihr direkt vom Beet auf den Teller bringen könnt. Lasst uns loslegen!
Was du für deinen Rüben-Terrassengarten brauchst:
* Rüben-Saatgut: Wähle deine Lieblingssorte! Es gibt rote, gelbe, gestreifte – die Auswahl ist riesig.
* Pflanzgefäße: Töpfe, Kübel, Balkonkästen – alles ist möglich, solange sie tief genug sind (mindestens 20-25 cm).
* Hochwertige Blumenerde: Rüben lieben lockere, nährstoffreiche Erde.
* Kompost oder organischer Dünger: Für einen extra Nährstoff-Boost.
* Gießkanne oder Gartenschlauch: Zum regelmäßigen Gießen.
* Handschuhe: Um deine Hände sauber zu halten.
* Eine kleine Schaufel oder Pflanzkelle: Zum Befüllen der Töpfe und Pflanzen.
* Ein sonniger Standort: Rüben brauchen mindestens 6 Stunden Sonne pro Tag.
* Optional: Mulch (z.B. Stroh oder Holzhackschnitzel) zur Feuchtigkeitsspeicherung.
Die Vorbereitung: Der Schlüssel zum Erfolg
Bevor wir mit dem Pflanzen beginnen, ist eine gute Vorbereitung das A und O. Das ist wie beim Kochen – die besten Zutaten und die richtige Vorbereitung machen den Unterschied!
1. Wähle die richtigen Pflanzgefäße: Rüben brauchen Platz, um sich zu entwickeln. Wähle Töpfe oder Kübel mit einem Durchmesser von mindestens 20 cm und einer Tiefe von 20-25 cm. Balkonkästen sind auch eine gute Option, aber achte darauf, dass sie ausreichend tief sind. Ich persönlich mag Terrakotta-Töpfe, weil sie gut aussehen und die Erde atmen lassen.
2. Bereite die Erde vor: Rüben lieben lockere, gut durchlässige Erde. Fülle deine Pflanzgefäße mit hochwertiger Blumenerde. Ich mische gerne noch etwas Kompost oder organischen Dünger unter, um den Rüben einen extra Nährstoff-Boost zu geben. Das sorgt für kräftiges Wachstum und leckere Rüben.
3. Der richtige Standort: Rüben sind Sonnenanbeter! Stelle deine Pflanzgefäße an einen sonnigen Standort, an dem sie mindestens 6 Stunden Sonne pro Tag bekommen. Ein Südbalkon oder eine Terrasse mit viel Sonne sind ideal.
Die Aussaat: So bringst du die Rüben zum Sprießen
Jetzt kommt der spannende Teil: Die Aussaat! Es ist fast wie ein kleines Wunder, wenn aus winzigen Samen prächtige Pflanzen entstehen.
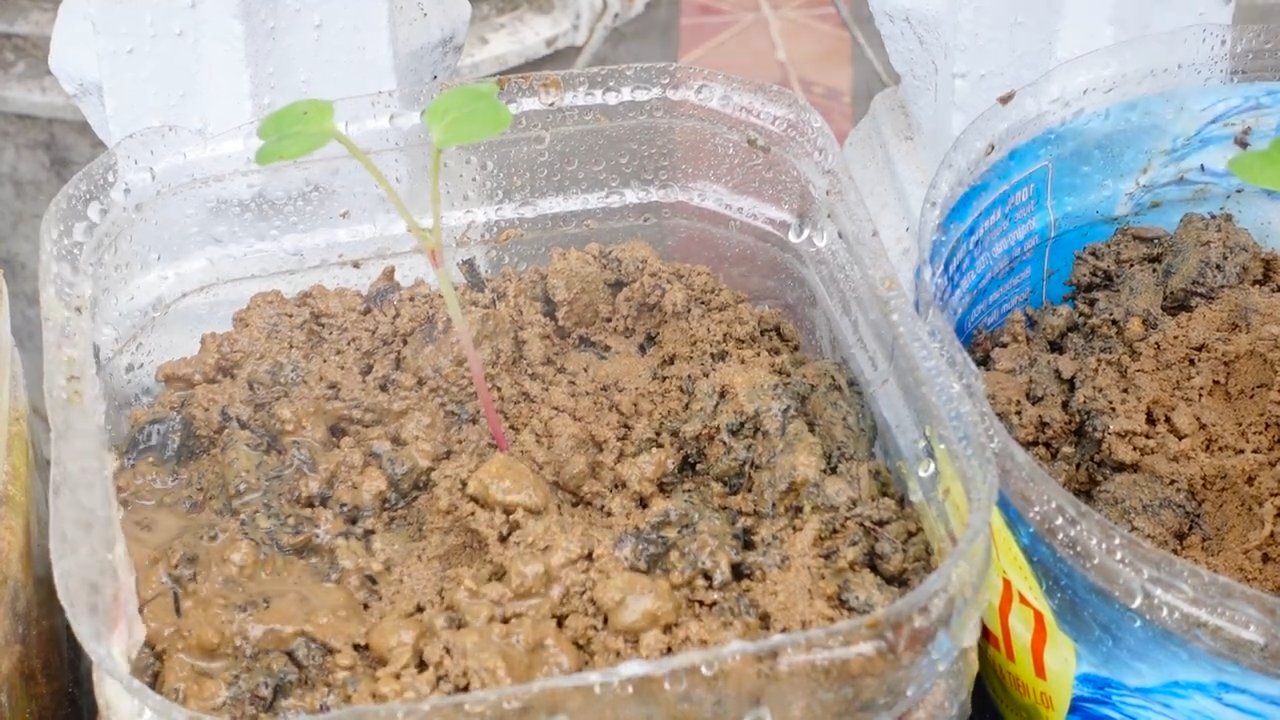
1. Säen: Mach mit dem Finger oder einem kleinen Stäbchen kleine Löcher in die Erde (ca. 1-2 cm tief). Lege in jedes Loch 2-3 Samen. Das erhöht die Wahrscheinlichkeit, dass mindestens ein Samen keimt.
2. Abdecken: Bedecke die Samen vorsichtig mit Erde und drücke sie leicht an.
3. Gießen: Gieße die Erde vorsichtig an, sodass sie gut durchfeuchtet ist. Vermeide es, die Samen wegzuschwemmen.
4. Geduld haben: Jetzt heißt es warten! Die Keimung dauert in der Regel 7-14 Tage. Halte die Erde während dieser Zeit feucht, aber nicht nass.
Die Pflege: Damit deine Rüben prächtig gedeihen
Die Pflege ist entscheidend, damit deine Rüben gesund und kräftig wachsen. Es ist wie bei einem Haustier – regelmäßige Aufmerksamkeit und Pflege sind wichtig!
1. Gießen: Rüben brauchen regelmäßige Bewässerung, besonders während trockener Perioden. Achte darauf, dass die Erde immer leicht feucht ist, aber vermeide Staunässe. Ich gieße meine Rüben am liebsten am frühen Morgen oder späten Abend, wenn die Sonne nicht so stark scheint.
2. Düngen: Rüben sind hungrig! Dünge sie alle 2-3 Wochen mit einem organischen Dünger oder Komposttee. Das sorgt für kräftiges Wachstum und leckere Rüben.
3. Ausdünnen: Wenn die Sämlinge ein paar Zentimeter groß sind, solltest du sie ausdünnen. Das bedeutet, dass du die schwächsten Pflanzen entfernst, sodass die verbleibenden Pflanzen genügend Platz zum Wachsen haben. Lasse zwischen den Pflanzen etwa 5-7 cm Platz.
4. Unkraut jäten: Halte deine Rübenbeete sauber von Unkraut. Unkraut konkurriert mit den Rüben um Nährstoffe und Wasser.
5. Mulchen: Eine Schicht Mulch (z.B. Stroh oder Holzhackschnitzel) hilft, die Feuchtigkeit im Boden zu halten und Unkraut zu unterdrücken.
Schutz vor Schädlingen und Krankheiten
Auch auf der Terrasse können Schädlinge und Krankheiten auftreten. Aber keine Sorge, mit ein paar einfachen Maßnahmen kannst du deine Rüben schützen.
1. Blattläuse: Blattläuse sind kleine, saugende Insekten, die sich gerne an den Blättern von Rüben ansiedeln. Du kannst sie mit einem Wasserstrahl abspritzen oder mit einer Lösung aus Wasser und Schmierseife bekämpfen.
2. Erdflöhe: Erdflöhe sind kleine, springende Käfer, die Löcher in die Blätter fressen. Du kannst sie mit einem Gemisch aus Wasser und Neemöl bekämpfen.
3. Pilzkrankheiten: Bei feuchtem Wetter können Pilzkrankheiten auftreten. Achte auf eine gute Belüftung und vermeide Staunässe. Bei Bedarf kannst du ein Fungizid verwenden.
Die Ernte: Der Lohn deiner Mühe
Nach etwa 8-10 Wochen ist es endlich soweit: Die Ernte! Das ist der Moment, auf den du hingearbeitet hast.
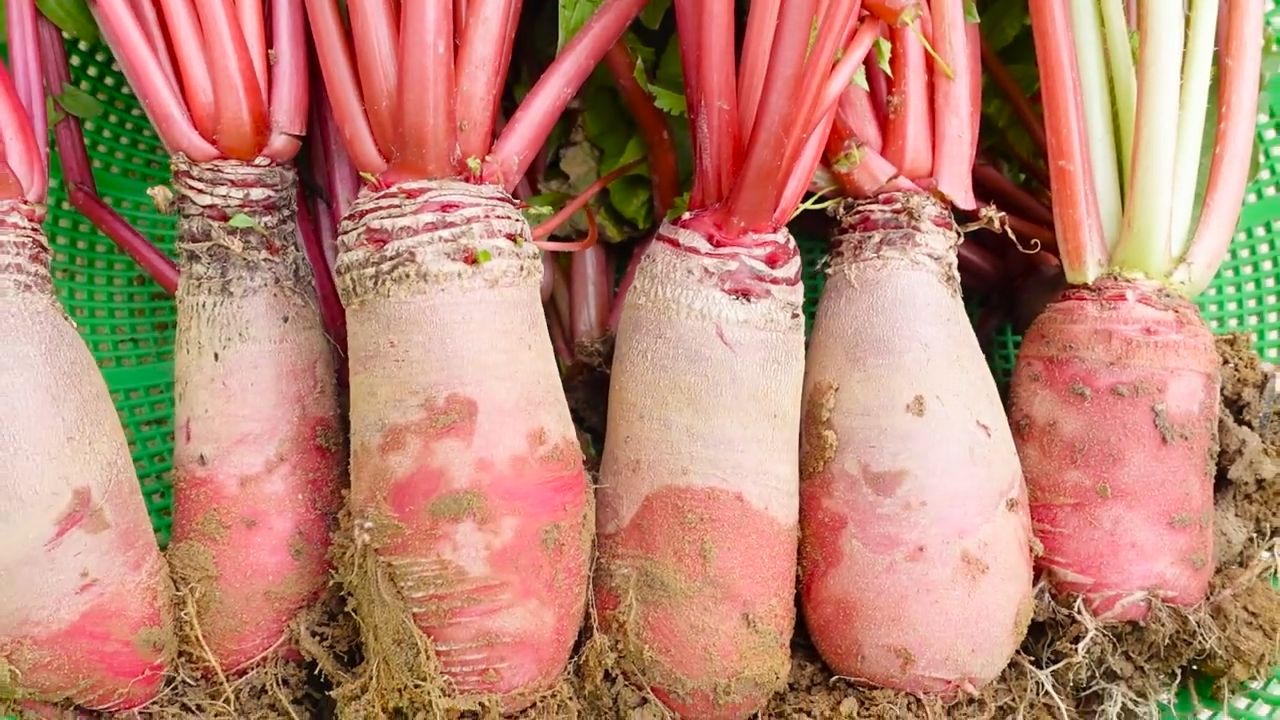
1. Erntezeitpunkt: Rüben sind erntereif, wenn die Knollen etwa die Größe eines Golfballs haben. Du kannst sie aber auch größer werden lassen, je nachdem, wie du sie am liebsten magst.
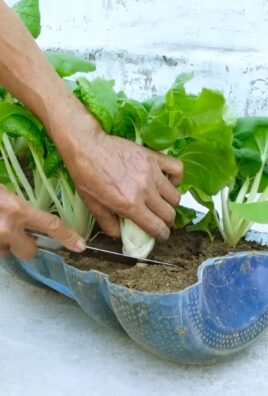
2. Ernten: Ziehe die Rüben vorsichtig aus der Erde. Wenn sie sich nicht leicht lösen, kannst du die Erde um die Knollen etwas lockern.
3. Reinigen: Entferne die Erde von den Rüben und schneide das Grün ab (lasse etwa 2-3 cm stehen). Das Grün kannst du übrigens auch essen! Es schmeckt lecker in Salaten oder als Beilage.
4. Lagern: Rüben lassen sich im Kühlschrank etwa 1-2 Wochen lagern. Wickle sie am besten in ein feuchtes Tuch, damit sie nicht austrocknen.
Verwendung der Rüben: Köstliche Rezepte
Jetzt, wo du deine eigenen Rüben geerntet hast, stellt sich die Frage: Was mache ich damit? Hier sind ein paar Ideen:
* Rübensalat: Ein Klassiker! Geraspelte Rüben mit Apfel, Zwiebeln und einem Dressing aus Essig, Öl und Honig.
* Rübensuppe: Eine wärmende Suppe mit Rüben, Kartoffeln, Karotten und Gewürzen.
* Gebratene Rüben: In Scheiben geschnittene Rüben mit Olivenöl, Knoblauch und Kräutern im Ofen gebacken.
* Eingelegte Rüben: Rüben in Essig, Zucker und Gewürzen eingelegt.
* Rübenblätter: Die Blätter können wie Spinat zubereitet werden.
Zusätzliche Tipps für den Rübenanbau auf der Terrasse:
* Sortenwahl: Wähle Sorten, die für den Anbau in Töpfen geeignet sind. Es gibt spezielle Züchtungen, die kompakter wachsen.
* Fruchtfolge: Wechsle die Pflanzen in deinen Töpfen regelmäßig ab, um Krankheiten und Schädlingen vorzubeugen.
* Beetbegleiter: Pflanze Ringelblumen oder Kapuzinerkresse neben deine Rüben. Sie halten Schädlinge fern.
* Gießzeiten: Gieße deine Rüben am besten am frühen Morgen oder späten Abend, wenn die Sonne nicht so stark scheint.
Conclusion
So, there you have it! Transforming your terrace into a vibrant, beetroot-producing haven is not only achievable but also incredibly rewarding. We’ve walked you through the simple steps to cultivate these ruby-red gems right outside your door, proving that you don’t need acres of land to enjoy fresh, homegrown produce. The beauty of this DIY approach lies in its accessibility and adaptability. Whether you’re a seasoned gardener or a complete novice, growing beetroot on your terrace is a project that promises satisfaction and delicious results.
Why is this a must-try? Beyond the sheer joy of nurturing life and connecting with nature, growing your own beetroot offers a multitude of benefits. You’ll have access to incredibly fresh, nutrient-rich vegetables, free from the pesticides and herbicides often found in commercially grown produce. Imagine the vibrant salads, hearty soups, and delicious roasted beetroot dishes you can create with your own harvest! Plus, the deep green leaves are edible too, offering a spinach-like alternative packed with vitamins.
But the advantages don’t stop there. Terrace gardening, in general, is a fantastic way to reduce your carbon footprint, promote biodiversity in urban environments, and create a calming, green space for relaxation. Growing beetroot specifically is a relatively low-maintenance endeavor, making it perfect for busy individuals who still crave the satisfaction of homegrown food.
Ready to take your terrace garden to the next level? Consider these variations and suggestions to personalize your beetroot-growing experience:
* Experiment with different varieties: From the classic Detroit Dark Red to the golden-hued Golden Beet and the candy-striped Chioggia, there’s a beetroot variety to suit every taste and preference. Try planting a mix for a colorful and diverse harvest.
* Companion planting: Enhance your beetroot’s growth and deter pests by planting companion plants like onions, garlic, lettuce, or chamomile. These beneficial pairings can create a thriving ecosystem in your terrace garden.
* Succession planting: Extend your beetroot harvest by planting seeds every few weeks. This ensures a continuous supply of fresh beetroot throughout the growing season.
* Container gardening: If you’re short on space, beetroot thrives in containers. Choose pots that are at least 12 inches deep and wide to accommodate the root’s growth.
* Vertical gardening: Get creative with vertical gardening techniques to maximize space and add visual interest to your terrace. Consider using hanging baskets or wall-mounted planters for your beetroot.
We’re confident that you’ll find growing beetroot on your terrace to be a fulfilling and delicious experience. Don’t be afraid to experiment, adapt the techniques to your specific environment, and most importantly, have fun!
We encourage you to embark on this gardening adventure and share your experiences with us. Post photos of your beetroot plants, share your tips and tricks, and let us know what delicious dishes you create with your homegrown harvest. Together, we can inspire others to embrace the joys of terrace gardening and enjoy the bounty of nature, one beetroot at a time. So, grab your seeds, prepare your soil, and get ready to experience the satisfaction of growing your own delicious and nutritious beetroot!
FAQ
What is the best time of year to plant beetroot on my terrace?
The ideal time to plant beetroot depends on your local climate. Generally, beetroot thrives in cooler temperatures. For most regions, the best time to plant is in early spring (as soon as the soil can be worked) or late summer for a fall harvest. In warmer climates, you can plant beetroot throughout the fall and winter. Check your local frost dates and plan accordingly. Aim to plant about 4-6 weeks before the last expected frost in spring or 6-8 weeks before the first expected frost in fall.
How much sunlight does beetroot need when grown on a terrace?
Beetroot requires at least 6 hours of direct sunlight per day to thrive. Choose a sunny spot on your terrace for your beetroot plants. If your terrace doesn’t receive enough direct sunlight, you can supplement with grow lights. Insufficient sunlight can result in leggy plants and smaller root development.
What type of soil is best for growing beetroot in containers on a terrace?
Beetroot prefers well-draining, fertile soil with a pH between 6.0 and 7.0. A good potting mix for containers should consist of a combination of compost, peat moss (or coconut coir), and perlite or vermiculite. This mixture provides adequate drainage, aeration, and nutrients for healthy beetroot growth. Avoid using heavy clay soil, as it can hinder root development.
How often should I water my beetroot plants on the terrace?
Water your beetroot plants regularly, especially during dry periods. Keep the soil consistently moist but not waterlogged. Overwatering can lead to root rot, while underwatering can stress the plants and reduce yield. Check the soil moisture level regularly by sticking your finger about an inch into the soil. If it feels dry, it’s time to water. Water deeply and thoroughly, ensuring that the water reaches the roots.
How do I fertilize my beetroot plants on the terrace?
Beetroot benefits from regular fertilization. Before planting, amend the soil with compost or well-rotted manure. During the growing season, fertilize every 2-3 weeks with a balanced liquid fertilizer or a fertilizer specifically formulated for root vegetables. Avoid using fertilizers that are high in nitrogen, as this can promote leafy growth at the expense of root development.
What are some common pests and diseases that affect beetroot, and how can I prevent them?
Common pests that affect beetroot include aphids, flea beetles, and leaf miners. Diseases include leaf spot and root rot. To prevent these problems, practice good garden hygiene, such as removing weeds and debris regularly. Use insecticidal soap or neem oil to control pests. Ensure good drainage to prevent root rot. Crop rotation can also help to prevent soilborne diseases.
When is the right time to harvest my beetroot?
Beetroot can be harvested at any size, depending on your preference. For tender, young beetroot, harvest when the roots are about 1-2 inches in diameter. For larger, more mature beetroot, harvest when the roots are 2-3 inches in diameter. To harvest, gently loosen the soil around the beetroot and pull it up by the leaves.
Can I eat the leaves of my beetroot plants?
Yes, beetroot leaves are edible and nutritious. They can be used in salads, stir-fries, or cooked like spinach. Harvest the leaves when they are young and tender. Avoid harvesting too many leaves at once, as this can weaken the plant.
How can I store my harvested beetroot?
To store beetroot, remove the leaves, leaving about an inch of stem attached. Gently brush off any excess soil. Store the beetroot in a cool, dark, and humid place, such as a refrigerator or root cellar. Beetroot can be stored for several weeks under these conditions.
What are some creative ways to use my homegrown beetroot?
Beyond the classic roasted beetroot and beetroot salads, there are many creative ways to use your homegrown beetroot. Try making beetroot juice, beetroot soup (borscht), beetroot hummus, or even beetroot cake. The possibilities are endless! Don’t forget to experiment and discover your own favorite beetroot recipes.

Leave a Comment