
Toilet cleaning tricks – let’s face it, nobody *loves* cleaning the toilet. It’s one of those chores we all dread, right? But what if I told you there are simple, effective, and even *fun* ways to tackle this task? Forget those harsh chemicals and hours of scrubbing! This article is packed with DIY toilet cleaning hacks that will leave your bathroom sparkling and smelling fresh, all while saving you time and money.
Historically, maintaining hygiene in our homes, including the toilet, has been a sign of prosperity and good health. While our ancestors may not have had the same cleaning products we do today, they relied on natural remedies and clever techniques to keep things sanitary. Think about it – even ancient civilizations understood the importance of a clean and healthy living space!
Why do you need these toilet cleaning tricks? Because life is too short to spend hours battling stubborn stains and unpleasant odors! We all want a clean and inviting bathroom, but the thought of the effort involved can be overwhelming. These DIY solutions are designed to be quick, easy, and use ingredients you probably already have in your home. Plus, you’ll be reducing your reliance on harsh chemicals, which is better for your health and the environment. So, let’s dive in and discover some amazing toilet cleaning hacks that will transform your cleaning routine!
DIY Toilet Cleaning Power-Ups: From Grime to Gleam!
Okay, let’s face it: cleaning the toilet isn’t exactly anyone’s favorite pastime. But a sparkling clean toilet bowl is a must for a fresh and hygienic bathroom. So, I’m going to share some of my go-to DIY toilet cleaning hacks that are not only effective but also use ingredients you probably already have in your pantry! Get ready to ditch those harsh chemicals and embrace a cleaner, greener (and cheaper!) way to keep your throne sparkling.
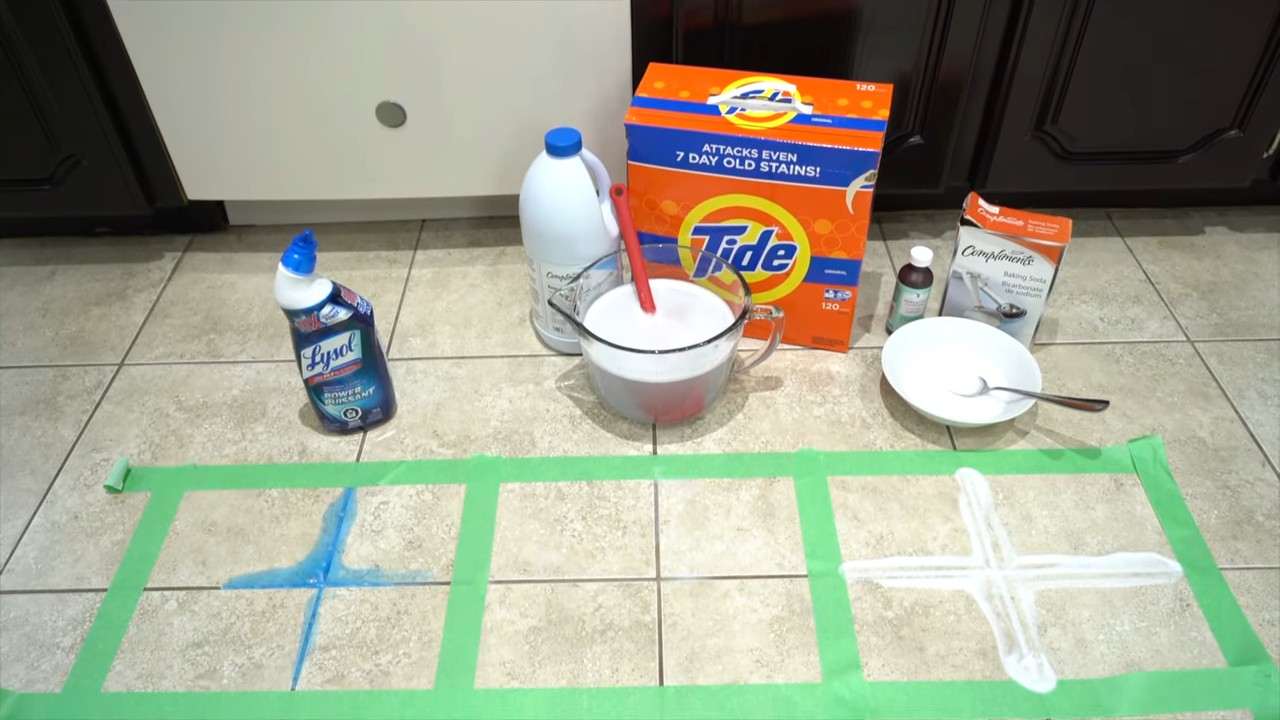
The Baking Soda & Vinegar Fizzing Frenzy
This is a classic for a reason! The combination of baking soda and vinegar creates a fizzing action that helps loosen grime and stains. It’s like a mini science experiment that cleans your toilet!
- What you’ll need: Baking soda, white vinegar, a toilet brush, and a little patience.
- Why it works: Baking soda is a mild abrasive and deodorizer, while vinegar is a natural disinfectant and helps dissolve mineral deposits. The fizzing action helps lift away stubborn stains.
Step-by-Step Instructions:
- Prepare the Bowl: First, flush the toilet to wet the bowl. This helps the baking soda stick better.
- Baking Soda Blast: Pour about one cup of baking soda directly into the toilet bowl. Try to distribute it evenly around the bowl.
- Vinegar Volcano: Slowly pour about two cups of white vinegar into the bowl. Get ready for the fizz!
- Let it Fizz: Let the mixture fizz and bubble for at least 30 minutes. For really tough stains, you can let it sit for a few hours or even overnight. The longer it sits, the better it works!
- Scrub-a-dub-dub: After the fizzing action has subsided, use your toilet brush to scrub the bowl thoroughly, paying extra attention to any stained areas.
- Flush it Away: Flush the toilet to rinse away the baking soda and vinegar. Admire your sparkling clean toilet!
The Power of Borax: A Stain-Fighting Champion
Borax, also known as sodium borate, is a natural mineral that’s a fantastic cleaner and disinfectant. It’s especially effective against hard water stains and mildew.
- What you’ll need: Borax powder, white vinegar (optional), a toilet brush, and gloves (recommended).
- Why it works: Borax is a natural disinfectant and cleaner that helps to remove stains and odors. It’s also a mild abrasive, which helps to scrub away grime.
Step-by-Step Instructions:
- Prepare the Bowl: Flush the toilet to wet the bowl.
- Borax Blitz: Pour about half a cup of borax powder directly into the toilet bowl.
- Optional Vinegar Boost: For extra cleaning power, you can add about one cup of white vinegar along with the borax. This will create a fizzing action similar to the baking soda and vinegar method.
- Let it Sit: Let the borax (and vinegar, if using) sit in the bowl for at least an hour, or preferably overnight.
- Scrub-a-dub-dub (Again!): Use your toilet brush to scrub the bowl thoroughly, focusing on any stains or problem areas.
- Flush and Admire: Flush the toilet to rinse away the borax. Enjoy your newly cleaned toilet!
The Lemon Juice Brightener: A Fresh and Natural Clean
Lemon juice isn’t just for lemonade! Its acidity makes it a great natural cleaner and deodorizer. Plus, it leaves your bathroom smelling fresh and citrusy.
- What you’ll need: Lemon juice (freshly squeezed or bottled), a spray bottle (optional), a toilet brush.
- Why it works: The citric acid in lemon juice helps to break down stains and disinfect the toilet bowl. It also has a pleasant, natural scent.
Step-by-Step Instructions:
- Lemon Juice Application: You have two options here. You can either pour about one cup of lemon juice directly into the toilet bowl, or you can pour the lemon juice into a spray bottle and spray it around the inside of the bowl.
- Soak Time: Let the lemon juice sit in the bowl for at least 30 minutes, or longer for tougher stains. Overnight is ideal for maximum cleaning power.
- Scrub and Flush: Use your toilet brush to scrub the bowl, paying attention to any stained areas. Then, flush the toilet to rinse away the lemon juice.
- Bonus Tip: For extra cleaning power, you can combine lemon juice with baking soda. Just sprinkle some baking soda into the bowl before adding the lemon juice.
The Coca-Cola Conundrum: A Surprisingly Effective Cleaner
Yes, you read that right! Coca-Cola can actually be used to clean your toilet. The phosphoric acid in Coke helps to break down stains and mineral deposits.
- What you’ll need: A can or bottle of Coca-Cola (or any cola), a toilet brush.
- Why it works: The phosphoric acid in Coca-Cola helps to dissolve rust and mineral deposits.
Step-by-Step Instructions:
- Pour the Coke: Pour the entire can or bottle of Coca-Cola into the toilet bowl, making sure to coat the entire surface.
- Let it Sit: Let the Coke sit in the bowl for at least an hour, or preferably overnight. This gives the phosphoric acid time to work its magic.
- Scrub and Flush: Use your toilet brush to scrub the bowl thoroughly. Then, flush the toilet to rinse away the Coke.
- Important Note: While Coke can be effective for removing stains, it’s not a disinfectant. You may want to follow up with another cleaning method, such as baking soda and vinegar, to disinfect the bowl.
The Denture Tablet Trick: Effervescent Cleaning Power
Denture tablets aren’t just for dentures! They contain cleaning agents that can help to remove stains and freshen up your toilet bowl.
- What you’ll need: 2-3 denture cleaning tablets.
- Why it works: Denture tablets contain ingredients that help to break down stains and kill bacteria.
Step-by-Step Instructions:
- Drop the Tablets: Drop 2-3 denture cleaning tablets into the toilet bowl.
- Let them Fizz: Let the tablets fizz and dissolve completely. This usually takes about 20-30 minutes.
- Scrub and Flush: Use your toilet brush to scrub the bowl, paying attention to any stained areas. Then, flush the toilet to rinse away the residue.
- Repeat if Necessary: For stubborn stains, you may need to repeat the process.
Preventative Measures: Keeping Your Toilet Sparkling Longer
Okay, so cleaning is great, but preventing stains in the first place is even better! Here are a few tips to help keep your toilet bowl cleaner for longer:
- Flush Regularly: Flush the toilet after each use to prevent stains from setting in.
- Clean Regularly: Give your toilet a quick scrub at least once a week to prevent buildup.
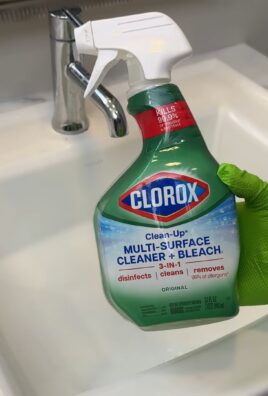
- Use a Toilet Bowl Cleaner: Consider using a commercial toilet bowl cleaner regularly to help prevent stains and keep your toilet fresh. There are many eco-friendly options available.
- Soft Water is Your Friend: Hard water can contribute to mineral deposits and stains. If you have hard water, consider installing a water softener.
A Few Extra Tips and Tricks:
* Gloves are Your Best Friend: Always wear gloves when cleaning your toilet to protect your hands from germs and harsh chemicals (even natural ones!).
* Ventilation is Key: Make sure your bathroom is well-ventilated when cleaning. Open a window or turn on the exhaust fan.
* Don’t Mix Chemicals: Never mix different cleaning products, especially bleach and ammonia, as this can create dangerous fumes.
* Test in an Inconspicuous Area: Before using any new cleaning product, test it in an inconspicuous area of the toilet bowl to make sure it doesn’t damage the surface.
* Pumice Power: For really stubborn hard water stains, a pumice stone can be surprisingly effective. Just wet the pumice stone and gently rub it on the stain. Be careful not to scratch the porcelain.
So there you have it! My arsenal of DIY toilet cleaning hacks. With a little elbow grease and these simple ingredients, you can keep your toilet bowl sparkling clean without resorting to
Conclusion
So, there you have it! This simple yet incredibly effective DIY toilet cleaning trick is more than just a way to save money; it’s a game-changer for maintaining a sparkling clean and fresh-smelling bathroom. We’ve walked you through the steps, highlighting the ease and accessibility of using readily available ingredients. Forget harsh chemicals and expensive store-bought cleaners – this method harnesses the power of natural ingredients to tackle grime, eliminate odors, and leave your toilet bowl gleaming.
Why is this a must-try? Because it’s economical, eco-friendly, and genuinely works! You’re not just cleaning; you’re contributing to a healthier home environment by reducing your exposure to potentially harmful chemicals. Plus, the satisfaction of creating your own effective cleaning solution is surprisingly rewarding.
But the beauty of this DIY toilet cleaning trick lies in its adaptability. Feel free to experiment with variations to suit your preferences and needs. For instance, if you’re a fan of essential oils, add a few drops of your favorite scent, like lavender or tea tree oil, for an extra boost of fragrance and antibacterial properties. A splash of white vinegar can further enhance the cleaning power, especially for tackling stubborn stains. If you have hard water, consider adding a bit more citric acid to combat mineral buildup. Remember to always test any new additions in a small, inconspicuous area first to ensure they don’t damage your toilet bowl.
Don’t be afraid to get creative! You can even pre-make batches of your DIY toilet cleaner and store them in an airtight container for future use. This way, you’ll always have a readily available solution for quick and easy toilet cleaning.
We are confident that once you try this DIY toilet cleaning trick, you’ll be amazed by the results. It’s a simple, effective, and sustainable way to keep your toilet clean and fresh. So, ditch the expensive, chemical-laden cleaners and embrace the power of DIY!
Now, we want to hear from you! Give this DIY toilet cleaning trick a try and share your experience in the comments below. Let us know what variations you experimented with and what results you achieved. Your feedback will not only help us improve this guide but also inspire other readers to embrace the world of DIY cleaning. Let’s create a community of clean, green, and happy homes! We are excited to see how this simple trick transforms your toilet cleaning routine.
Frequently Asked Questions (FAQs)
Is this DIY toilet cleaning trick safe for all types of toilets?
Generally, yes, this DIY toilet cleaning trick is safe for most types of toilets, including porcelain and ceramic bowls. However, it’s always a good idea to exercise caution, especially if you have a toilet with a unique or delicate finish. Before applying the solution to the entire bowl, test it in a small, inconspicuous area to ensure it doesn’t cause any discoloration or damage. Avoid using abrasive scrub brushes or harsh scouring pads, as these can scratch the surface of your toilet bowl. If you have any concerns about the compatibility of the ingredients with your specific toilet type, consult the manufacturer’s instructions or contact a plumbing professional.
How often should I use this DIY toilet cleaning trick?
The frequency of use depends on your household’s needs and the level of toilet usage. For regular maintenance and to prevent buildup, we recommend using this DIY toilet cleaning trick at least once a week. If you have a busy household or notice stains and odors developing more quickly, you may want to increase the frequency to two or three times a week. Remember, consistency is key to maintaining a clean and fresh-smelling toilet. You can also use this method as a spot treatment for tackling stubborn stains as they appear.
Can I use this DIY toilet cleaning trick in my toilet tank?
While the ingredients in this DIY toilet cleaning trick are generally safe, we don’t recommend using it directly in your toilet tank. The tank contains sensitive components, such as the flapper and fill valve, which could be affected by prolonged exposure to certain ingredients. Instead, focus on cleaning the toilet bowl, where the majority of stains and odors accumulate. If you’re concerned about the cleanliness of your toilet tank, consider using a commercially available toilet tank cleaner specifically designed for that purpose, or consult a plumbing professional for advice.
What if I don’t have all the ingredients listed? Can I substitute them?
While we recommend using all the ingredients listed for optimal results, you can make some substitutions if necessary. For example, if you don’t have baking soda, you can use washing soda instead. If you don’t have citric acid, you can use a slightly larger amount of white vinegar. However, keep in mind that substitutions may affect the effectiveness of the cleaning solution. Experiment with different combinations to find what works best for you, but always prioritize safety and avoid using harsh chemicals that could damage your toilet or harm your health.
How do I store the leftover DIY toilet cleaner?
If you have leftover DIY toilet cleaner, you can store it in an airtight container in a cool, dry place. Be sure to label the container clearly to avoid any confusion. The shelf life of the cleaner will depend on the ingredients used, but it should generally last for several weeks. If you notice any changes in color, odor, or consistency, discard the cleaner and make a fresh batch. Avoid storing the cleaner in direct sunlight or near heat sources, as this could degrade the ingredients and reduce its effectiveness.
Is this DIY toilet cleaning trick septic-safe?
Yes, this DIY toilet cleaning trick is generally considered septic-safe. The ingredients used, such as baking soda, citric acid, and essential oils, are biodegradable and won’t harm the beneficial bacteria in your septic system. However, it’s important to use the cleaner in moderation and avoid flushing large quantities of it down the toilet at once. Overuse of any cleaning product, even natural ones, can disrupt the balance of your septic system. If you have any concerns about the compatibility of this DIY toilet cleaning trick with your septic system, consult a septic system professional.
Can I use this DIY toilet cleaning trick to remove hard water stains?
Yes, this DIY toilet cleaning trick can be effective in removing hard water stains, especially if you include citric acid or white vinegar in the solution. These ingredients help to dissolve mineral deposits and break down stubborn stains. For particularly tough stains, you may need to let the solution sit in the toilet bowl for a longer period of time before scrubbing. You can also try using a pumice stone or toilet brush specifically designed for removing hard water stains. Remember to always test any cleaning method in a small, inconspicuous area first to avoid damaging your toilet bowl.
What essential oils are best to use in this DIY toilet cleaning trick?
The best essential oils to use in this DIY toilet cleaning trick are those with antibacterial, antifungal, and deodorizing properties. Some popular choices include:
* Tea tree oil: Known for its powerful antibacterial and antifungal properties.
* Lavender oil: Provides a pleasant fragrance and has calming properties.
* Lemon oil: Has a refreshing scent and is a natural degreaser.
* Eucalyptus oil: Has a strong, invigorating scent and can help to disinfect.
* Peppermint oil: Provides a cooling sensation and has antibacterial properties.
Experiment with different essential oils to find your favorite scent and combination. Remember to use essential oils sparingly, as they are highly concentrated. A few drops are usually sufficient to add fragrance and enhance the cleaning power of the solution.
Leave a Comment